How to program House ID for Honeywell 2GIG GC3?
Honeywell devices such as the 5828, 5828V, 5800WAVE, and 5800RL are bi-directional. This means they receive status from the panel, and send information to the panel, wirelessly, using a House ID protocol. The GC3 doesn’t support the use of this protocol, so these devices are not compatible.
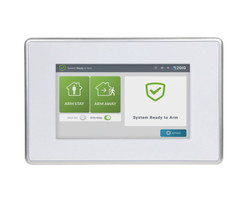
Though 2GIG panels support nearly all Honeywell wireless products, they are not actually made by Honeywell. Instead of the 5828 or 5828V, the 2GIG GC3 supports the use of the 2GIG-SP2-GC3. This is a 7 inch, full color, HD (1024 x 60 pixel) keypad, which requires that the GC3 be at version 3.0.2 or higher. If necessary, you can upgrade your GC3 via USB, and download the files to do so here. The GC3 also supports Over the Air (OTA) updates through Alarm.com for monitored customers. For this, they charge a nominal fee. Pricing for this is handled differently by different alarm dealers. At Alarm Grid, we pass this charge to our customers as is, with no mark-up.
The SP2 comes with a 200mA 5VDC transformer, and the wiring with which to connect it. This keypad will allow you to arm/disarm, see status, and hear chime sounds for zones with chime enabled. It will not allow you to enter the Installer Toolbox, or control Z-Wave devices. The 2GIG-SP1-GC3 supports this more advanced functionality.
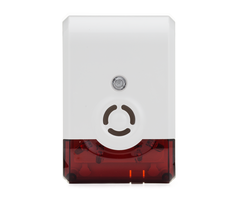
Unlike Honeywell panels, the 2GIG GC3 can support the use of a Z-Wave siren. The 5800WAVE and the 5800RL are most commonly used to add siren capability to a wireless system, so the ability to use a Z-Wave siren negates the need for either of these on the GC3. Compatibility is always changing with new Z-Wave devices, and panel firmware updates, but currently, the WA105DBZ-1 is listed as compatible with the GC3 version 3.0.1 or higher. There may be other Z-Wave sirens that are compatible, but it would require further testing to be certain. To enable the Z-Wave siren:
Include the WA105DBZ-1:
- Enter the Installer Toolbox by pressing the 2GIG Logo in the upper right, then entering the Installer Code (Default = 1561)
- Go to System Configuration then Panel Programming.
- Scroll down to Q43 and make sure it is set as you wish, for the Z-Wave siren to sound for Burg, Fire, and CO zone, or for Burglary only.
- Back out to System Configuration again, and Save.
- Follow Step 1 above to re-enter the Installer Toolbox.
- Press "Smart Home Settings"
- Press "Add Devices" the GC3 will display "Listening for Devices to Add"
- With the WA105DBZ-1 within 3 feet of the GC3, connect the siren's power adapter to a standard outlet.
- If the Siren doesn't learn in automatically, you can depress the tamper switch for 1 second, then release, the WA105DBZ-1's led will begin to flash.
- Once included, the siren will show up in the GC3 as "Siren" with the option for you to change this to whatever name you wish. The LED will stop blinking.
- If the siren fails to include properly, hit the Left Arrow to go back to the "Smart Home Settings" menu, and select "Remove Devices."
- You'll see the message "Listening for Devices to Remove".
- Follow Steps 4 and 5 above to first Exclude the WA105DBZ-1, then follow steps 3 - 6 above to Include.
- Once inclulded, follow the instructions for permanently mounting the siren.
Did you find this answer useful?
We offer alarm monitoring as low as $10 / month
Click Here to Learn MoreRelated Products


Related Categories
- Wireless Alarm Systems
- Wireless Alarm Control Panels
- DIY Wireless Security Systems
- Wireless Alarm Keypads
- Wireless Alarm Sirens
- Answered
- Answered By
- Julia Ross


