Adding a Z-Wave Device to the Qolsys IQ Panel 2
Related Products

Related Categories
- Small Business Security Systems
- Monitored Home Security Systems
- Home Security Systems
- DIY Wireless Security Systems
- Business Security Systems
- Apartment Security Systems
Description
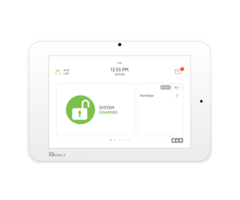
In this video, Jarret demonstrates the process for pairing a new Z-Wave device to the IQ Panel 2 System. The IQ Panel 2 has a built-in Z-Wave card for accepting these devices. All sorts of Z-Wave devices are compatible, including lights, door locks and thermostats. Learning the devices is very easy.
Before pairing any new Z-Wave device, you should clear it from the network first. Even if the device is brand-new and fresh out of the box, it may have been paired with a Z-Wave network for factory testing purposes. Clearing the device from the network will ensure that it can be paired successfully. It will also show you that the device is communicating properly. The IQ Panel 2 has a menu option for clearing Z-Wave devices. From there, you will have no trouble adding it to the system.
The IQ Panel 2 allows you to quickly activate Z-Wave devices directly from its main menu. This is great for conveniently dimming the lights, adjusting the thermostat or even just opening and closing the garage door. All you need is the appropriate Z-Wave device included in your Z-Wave network. Once you are at the IQ Panel 2, simply swipe left or right until you find the Z-Wave device you want to control. Then you can activate it with the press of a button!
But perhaps most exciting about using Z-Wave devices with the IQ Panel 2 is the ability to operate these devices remotely from Alarm.com. This service can be accessed from the Alarm.com website or by using the Alarm.com Mobile App on an Android or iOS device. All you need to do is open the app and login to your Alarm.com account. You can then control your paired Z-Wave devices and activate Scenes from anywhere in the world. Alarm.com will send a signal to your IQ Panel 2, and the system will forward the command to the Z-Wave devices.
http://alrm.gd/get-monitored
Transcript
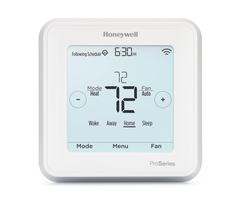
Hey, DIYers. This is Jarrett with Alarm Grid here. Today we're going to be discussing how you would include or add a Z-Wave device into the Qolsys IQ Panel 2. Now, the reason why you would add a Z-Wave device to the Qolsys IQ Panel 2 is so that you can either control Z-Wave lights, Z-Wave thermostats, or certain Z-Wave locks so you can have a type of home automation for your home. So if you were a user, and you did want to add a Z-Wave device to the Qolsys IQ Panel 2, you're going to follow a couple of different steps. The first step is by clearing the device or clearing the Z-Wave device from the network. You always want to clear the Z-Wave device from the network before you add it to your alarm system so that you can ensure that it is going to work properly and not have any type of issues. Now, when you are adding the Z-Wave device to the Qolsys IQ Panel 2, we do recommend that you try to bring the Z-Wave device as close as possible to the system to ensure that it is getting a good connection. So the first step in clearing the Z-Wave device from the network, you're going to go to the little gray bar on top of the screen. And then you're going to hit Settings. And then from here you're going to press Advanced Settings. Enter user code. And you're going to use your installer code. The default installer code for the system is 1111. So once you've done that, then you're going to press Installation. And then you're going to tap Devices. And you should see Z-Wave Devices. So you're going to tap on that. And you're going to have all these options in here. But to clear the device, you're going to press Clear Device. And this has put the system into its exclusion process. So right now I'm actually going to cancel it real quick. Your operation cancelled. So right now, when we put this to the Qolsys IQ Panel 2 in its inclusion process, the way to clear the device or clear that Z-Wave device from the network is by putting the Z-Wave device into it its inclusion process while the Qolsys this is excluding. So once it does that, then it will successfully remove a Z-Wave device from the network. So we're here now. This is the Honeywell T6 Pro Z-Wave thermostat. So we're going to be using this with the Qolsys IQ Panel 2. So as of right now, the Qolsys is in its inclusion mode or exclusion mode. So to put this system or a Z-Wave device into an inclusion mode, you're going to tap the screen. And then you're going to press Menu on the bottom. And then you're going to hit the right arrow until you see Z-Wave Setup and then press Select. And then you should see Set Control. And now it's in inclusion process. So as you can see, the Qolsys IQ Panel 2 has successfully cleared the Z-Wave device from the network. So you will get this message that it has successfully cleared from the network. You're just going to press OK. Now the next step is to add the Z-Wave device to the Qolsys IQ Panel 2. So what you're going to tap is Add Device. And then you're going to press Include on the bottom. And it's going to put the Qolsys IQ Panel 2 in its inclusion process. So to add the Z-Wave device to the Qolsys IQ Panel 2, you're going to press Menu. You're going to go until you see Z-Wave Setup. And you're going to press Select. And then you're going to see Set Control. And you're going to press Select again. So as of right now, it is including with the Qolsys IQ Panel 2. And as you can see, it has successfully included. So as you can see, the Honeywell T6 Pro thermostat has been successfully added to the Qolsys IQ Panel 2. So as you can see, you have the ID, which is 8. And then for the type, it's obviously going to be a thermostat. And then if you want to change the name for the thermostat so you could distinguish which one it is, you just hit the down arrow. And you'll see Custom Name to be able to put in your own name for it. You have downstairs , thermostat, hallway thermostat, and upstairs thermostat. So you choose whichever one you want to go with. But for right now, we're just going to keep it as thermostat. And then once you have confirmed all the information, you're going to press Add. Thermostat is added to network successfully. So it has successfully added to the Qolsys IQ Panel 2. So basically, at this point, you could just press the House button to go all the way back to the home screen. So in order to control the Z-Wave thermostat, you're going to be on the home screen, and you're basically going to slide until you see the thermostat. So to configure the thermostat or change the temperature or what not, you're basically just going to tap this until you can change the temperature, if you want it higher or lower. Right now we're going to keep it as 72 because it is pretty nice and chilly at 72. And you can change the fan settings, if you want to that as automatic, continuously on, or auto. You can change the heat, cool, or turn off the thermostat, if you want to. And that is how you add a Z-Wave device to Qolsys IQ Panel 2. If you have any questions about the Qolsys IQ Panel 2 or alarm systems in general, please contact us at support@alarmgrid.com or go to our website, alarmgrid.com. If you found this video helpful, please like, subscribe. And if you want future notifications on any future videos, please click the Bell icon. This is Jarrett with Alarm Grid. You have yourself a great day.
- Uploaded
