PROA7 or PROA7PLUS: Factory Resetting
Related Products

Description
In this video Darrell from Alarm Grid shows you how to set a PROA7 or PROA7PLUS, PROA7C, or PROA7PLUSC back to factory ...
Transcript
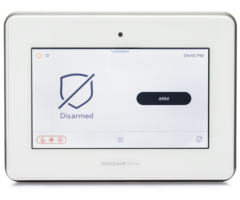
Hi, DIYers. This is Darrell with Alarm Grid. Today we're going to talk about factory defaulting the PROA7 and PROA7 plus panel. The only time you should really have to do this if something catastrophically has gone wrong and you have to remove everything and start over. We're going to enter programming by hitting the three-line menu. We're going to swipe up and go to Tools. Enter the default installer code 4112. We're going to swipe up to default options. We're going to select factory default. It's going to give us a pop up window asking us if we want to default the panel, are you sure? This is the last time you're going to get a chance to say no or cancel it because if you hit default, this is going to erase the system back to the original factory defaults. We're going to default the panel. The panel is going to default, it's going to say please stand by, and it should-- and we'll reset shortly. OK. So what we're seeing is the original boot up. If you were setting it up prior to activation, we would go to setup up the Wi-Fi, we go to Wi-Fi networks, reconfigure your wireless network. You can check out our video on how to set up the Wi-Fi for the PROA7 and PROA7 plus. And that will take you through the next set of steps to set up the network. Or we can go back add it manually through the WPS enrollment. We're going to skip this and go to local alarm mode, which is the basic setup of the panel before activation. It'll ask you if you want to continue for enabling a local alarm mode. We're going to continue and it'll take us back to the home screen. Just a reminder, DIYers, when you default the PROA7 and PROA7 plus, you will erase everything in the panel. It will default the installer code back to 4112, it will default the master code back to 1234, it will erase all Z-Wave devices that are paired to the panel, which will have to be excluded and then re-included in another device or back into this panel if you choose. If you have any six or PROSIX devices, they will also be deleted and they're looking for the reset command, which will cause the LEDs to flash green fast on the devices, that's the pairing command to let them know that they've been removed from the system. All right, DIYers. That's how we factory default the PROA7 and PROA7 plus panels. If you have any questions, you can email us at support@alarmgrid.com or go to our website alarmgrid.com. If you found the video helpful like, subscribe. Hit the bell notification icon to get notifications when we produce new content. My name is Darrell with Alarm Grid. Everybody have a great day.
- Uploaded


