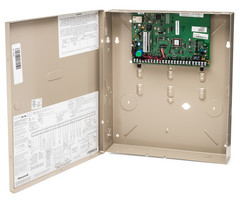
Troubleshooting a Low Battery Condition on a Vista Panel
Related Products


Related Categories
Description
http://alrm.gd/get-monitored.
Transcript
Hi, DIY-ers. Joe from AlarmGrid. And today, we're talking about how to troubleshoot a low-battery condition on your vested panel. There's a bunch of different things that can give you a low battery condition on the panel but there's two main culprits to this problem. One is that the battery could be getting old, and it's not holding a charge, and that you just simply need to replace it. That's an easy fix. The other issue that could happen is that the panel itself may be going bad and it's not sufficiently charging the battery. And in that case, you would actually have to replace the whole panel itself. It's kind of a pain but it is what it is.
Let's go through the different troubleshooting steps that you'll need to go through though to figure out whether it's the panelists giving you the issue or if it's the battery that's giving you the issue. The first thing you need to know before you jump into this is some of these symbols on your multimeter. We take a look at our multimeter, we have two different Vs on this. One of the Vs has a straight line on top and a dotted line underneath. That tells us that that is to check DC voltage. The other V has a wavy line next to it, that tells us that that's to check AC voltage.
So if we're having an AC or a low battery condition on the panel, really the first thing you want to do in your troubleshooting steps is check and confirm that the AC power going to the panel is good. So to do this, to start, we're going to set our multimeter to AC voltage 20. And then we're going to take our probes and we're going to connect them to the AC terminals on the panel. Now, AC doesn't have polarity so it doesn't matter which probe you attach to which terminal. So if we go and connect these, you'll see that we're getting 17.1819 volts AC at our AC panel connection, which is great.
If we found that this was lower or if it was 16.5 or lower, next we'd want to check the wire integrity. And then we want to check the transformer that's making this connection to the AC terminals. If we were to do this, I don't have alligator clips on my probes, but to check the wire integrity, we would power the panel down 100%. So we'd undo the battery, and now we need to unplug the AC leads from the terminals and then connect our probes to those wires with them unplugged. Our voltage should be relatively close to what we read when it was on the panel. If it's not, that tells us that there is an issue on the wire or on the transformer itself.
So let's say that we found that the voltage drops when we've removed this wire from the-- or that the voltage is still low and we've remove the wire from the panel. We want to then check to see if our transformer is good or not. So to do that, I'm going to unplug the transformer from our power and I'm going to remove the wires from the transformer. I'm going to reconnect the transformer back to power, and then with my multimeter still on 20 volts AC, I'm going to connect my probes to the terminals on the back of the transformer. And we're getting 17.6 volts. So that's telling us that this transformer is good, and that if there was an issue, it would be on the wire if we found that before.
If you're finding that the voltage coming from the transformer is no good, the next step would be to check if the outlet, the transformer where it's plugged into is providing sufficient voltage to the transformer. If it is, and the transformer is still getting a bad reading, that tells you that the transformer itself is no good. So to check the outlet, what you're going to have to do is set your voltage to 200 for AC voltage checking. Because all of the outlets in your house, they're going to be 110 to 120 AC for these transformers and just about everything else. It's very unlikely that you're going to bump into a 240-volt circuit, but if you see anything like that around, leave it alone and don't touch it. The transformer, again, it wouldn't even be able to be up-- the transformer, again, it wouldn't even be able to be plugged into a 240-volt circuit, and that's as far as we're going to go with that.
So we have our multimeter set to 200 volts for the check AC. And if I take my probes and I stick them in the outlet that my transformer is plugged into, I'm getting 117.7 volts which tells me that this is a good outlet. So with that all confirmed, we know that our transformer is good, our wire is good, and the connection is intact. So I'm going to reattach the wires back to my transformer, and the panel's powering up.
The next step, if we're still getting a low battery condition after this, would be to check to see if any of the other wires in the panel are causing issues for the panel's charging ability. If one of these wires has a staple through it or if there's some integrity problems, it could potentially drain the AC and it could interfere with the battery charging. The way to check this would be to take your probes, set it to voltage AC for 20 volts. You want to connect them to these two terminals right here. Now, you'll probably need a second person and do this because one person's going to have to stand and hold these probes on the terminals, while the other person goes ahead and removes each wire from each terminal. Now, what you're going to look for is to see if your voltage jumps up when you remove one of the wires. If it does jump up, that tells you that that connection is causing an issue with the power on the panel.
From there, you want to go and check to see if the wire integrity is good. So you really have to trace it out, see if there's a stable going through it. Maybe it's crimped somewhere, maybe it's going through a box, an electrical box of some sort that's having an issue. That's pretty much what that's going to tell you. If this is all good, then the next step would be to check the charging circuit for the battery. So to do that, because our battery charging circuit is 12 volts DC, we're going to have to switch the multimeter to DC voltage checking. So from here, as I said before, our DC is the V with the straight line and a dotted line. I'm going to set this up to 20 because that will cover 12, obviously. And then I'm going to take my probes and stick them in to the battery charging leads. So I'm going to take red and put it in red, I'm going to take black and put it in black. And as you can see, we're getting 13.64 volts. This tells us that this charging circuit is good and that the panel is sufficiently charging the battery. One of my connections may be a little loose which is why we're getting this flickering.
The next thing that you'd want to do if you confirm that there's still an issue after going through all these troubleshooting steps with the battery charging is remove the panel 100% from the box and hang it or put it on a piece of cardboard or anything that isn't going to conduct electricity. The panel, the board itself is very sensitive, and as you can see, all the circuitry is open. So if you put this on something that's metal, you could short the panel out and you'll just have to get a new panel after that because it'll be damaged.
But just to show you the way to remove the panel. First, you want to completely power it off so there is no power going to it. Luckily, we have one of these LTE cables which has a barrel connector and I can just unplug this and it completely powers the panel down. The next thing that I'm going to want to do is to remove all the wires from the panel.
We don't have any connection on our cable right now. There is no power going to it so we know that our panel is 100% powered down. This panel actually has a vested GSM4G cell card which we will need to just simply unplug before we remove it, which has a little connection right there. Now these panels, they have two screws on the bottom which you'll need to undo.
The panels now loose. If I just lift it up and remove it, it comes right out of the board. Now whenever you handle one of these panels, you always want to touch the edges of the panel so you don't short anything out with static electricity. And from here, you can hang it or you can place it on a safe surface. And with nothing else connected to the panel and it removed from the box itself, you can again check that circuit for the AC power to make sure that it's getting the right reading. And you can again check your battery leads to make sure that they're actually outputting the proper voltage. If you find that there's an issue in either place, likely the panel is bad and you just simply need to replace it.
If you do have any questions though about testing your panel, the power connections, or anything with the multimeter, feel free to reach out to us, 888-818-7728. Head to our website www.alarmgrid.com, or send us an email to support@alarmgrid.com. If you did enjoy the video, feel free to subscribe. And if you want to be notified when we post future videos, hit the notification button below and we'll send you an update when we do so. Thanks for watching and have a great day.
- Uploaded


