How Do I Add a Z-Wave Light to My IQ Panel 2?
You can add a Z-Wave light to your IQ Panel 2 by first excluding the light from the Z-Wave network, and then pairing the device with the system. You must configure the device settings during the enrollment process. You can control the light through Alarm.com if the system is monitored.
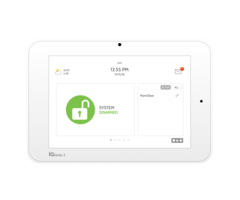
The Qolsys IQ Panel 2 contains a built-in Z-Wave Plus controller for adding Z-Wave devices. Any Z-Wave device you add can be controlled directly from the panel. Just swipe from the main screen until you find the corresponding automation menu. And if the panel is monitored, then you can control any added Z-Wave device from the Alarm.com platform. Any Qolsys IQ Panel 2 System can be monitored by Alarm Grid with a Gold Plan or higher. Check our monitoring page for more information.
The steps outlined below apply to any Qolsys IQ Panel 2 or Qolsys IQ Panel 2 Plus System. Complete the following steps to add a Z-Wave light to a Qolsys IQ Panel 2:
1. Enter exclusion mode. Begin from the main screen of your Qolsys IQ Panel 2. Click the small grey bar at the top. Choose Settings > Advanced Settings > enter Installer Code (default 1111) > Installation > Devices > Z-Wave devices > Clear Device. The IQ Panel 2 will enter a mode for excluding Z-Wave devices.
2. Clear the device. It is important to always clear a Z-Wave device from the network before attempting to pair it. With the system in its exclusion mode, activate the inclusion/exclusion function on the light. This process will vary depending on the light you are using. There may be a simple button for pairing. Check the instruction manual for the light for more information. Note that the light will need to be powered on when doing this. If performed successfully, the IQ Panel 2 should recognize the light and state that a device was cleared from the network. You can press OK on the IQ Panel 2 to continue.
3. Include the device. Click on the Add Device button on the IQ Panel 2. Then activate the inclusion/exclusion function on the light, just like you did in Step 2. The IQ Panel 2 should recognize the light and allow you to configure its settings.
4. Configure light settings. You will now need to configure the settings for the light. The ID refers to the Z-Wave Node ID for the light. You can leave it set to whatever it's at. The Device Type should be Light. You should choose a Name that will help you easily identify the light. You can click on the Automation button to set an automated schedule for the light, though this is optional. Click the Add button at the bottom to finish adding the light. You can then press the picture of the house at the bottom of the screen to return to the main menu.
Did you find this answer useful?
We offer alarm monitoring as low as $10 / month
Click Here to Learn MoreRelated Products

Related Categories
- Answered
