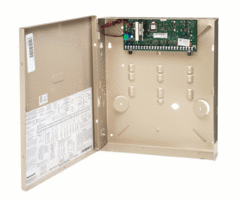
How Do I Change the Date and Time on My Honeywell VISTA System?
You can change the date and time on your Honeywell VISTA System by accessing the date and time setting and then adjusting the date and time. You will need to know either the Master Code (default 1234) or the Installer Code (default 4112) for the panel in order to change this setting.

Setting the proper date and time is usually one of the final things you will do when setting up a new Resideo VISTA Alarm System. You might also need to change the date and time for Daylight Savings Time. Fortunately, the process is very easy, but you need to know what you are doing. You must have either the system's Master Code or its Installer Code to do this. If you don't know either of these codes, you can use the backdoor method to get into programming and set the Installer Code. It is strongly recommended that you keep the IC at its 4112 default code. It is also recommended that you use an Alpha Display keypad, such as the 6160 when setting the date and time.
Once you know one of these codes, you can complete the following steps to change the date and time on your Honeywell VISTA System:
1. Access the setting. To access the date and time setting, enter the following command on your keypad:
[Master Code or Installer Code] + [#] + [63]
The current date and time will be displayed after entering this command. An example can be seen in the following picture:

2. Adjust the setting. To start changing the date and time, first press the [*] key. A cursor will appear under the first digit of the set hour. This means that you are now able to start adjusting the date and time. As you enter digits, the cursor will automatically move to the right. You can press [*] to move to the next selection (right), and you can press [#] to move to the previous selection (left). The date and time consists of the following components:
- Two digits for the hour (00-12)
- Two digits for the minute (00-59)
- AM or PM (Press [1] for AM or [2] for PM)
- Two digits for the year (20XX, with only XX being adjustable, 00-99)
- Two digits for the month (01-12)
- Two digits for the day (00-31, depending on month)
- The day of the week is set automatically based on the entered information.
3. Save your changes. Once the correct date and time is displayed, you can keep pressing the [*] to save your changes and return to the main screen. You will be taken back to the main screen after you press [*] with the cursor on the 2nd digit for the day setting.
Please remember that on Honeywell VISTA P Series panels, any time the system is powered completely down, it will lose the date and time setting. For this reason, you want to set the date and time once you've completed installing the system, and are sure that you won't be powering down any more. Another thing to remember is that you can only set the clock if all partitions are disarmed.
Did you find this answer useful?
We offer alarm monitoring as low as $10 / month
Click Here to Learn MoreRelated Products
Related Videos
Related Categories
- Answered


