How Do I Disable the Internal IP Communicator on a VISTA-21iP?
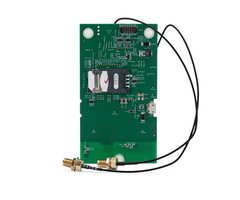
You can disable the internal IP communicator on a VISTA-21iP by powering down the panel and moving the IP/GSM Jumper to its "OFF" position. This will disable the panel's IP communicator and allow the panel to use an external module, such as a Honeywell LTEM-XA, LTEM-XV, LTE-IA, or LTE-IV.

The most common reason to disable the panel's IP communicator and add an external communicator is that you want to upgrade your VISTA-21iP System to LTE cellular monitoring. The only way to do this on a VISTA-21iP is to first disable the system's internal IP communicator. You can then add a compatible LTE cellular communicator or LTE dual-path communicator to use with the system. If you only want to use IP monitoring with the VISTA-21iP, then you should just keep its internal IP communicator enabled and not bother adding an external communicator. Remember that any Alarm Grid customer wanting cellular or dual-path (IP & cellular) will need a Gold or Platinum Level Plan (Self or Full) or a Cell Monitoring Plan.
It is also very important to note that some earlier VISTA-21iP Systems will require a PROM Chip upgrade in order to be used with Total Connect 2.0. These early VISTA-21iP systems can still connect with the AlarmNet360 Servers for general alarm monitoring service, but the end user will not be able to take advantage of the interactive monitoring and automation benefits of Total Connect 2.0. Any VISTA-21iP that is running a PROM Chip lower than 2.10.15 will need a PROM Chip upgrade to use TC2. Alarm Grid has a very useful FAQ that explains the PROM Chip requirements for a VISTA-21iP that you can check out here. You may also want to review this FAQ on how to replace a PROM Chip.
We also want to mention that VISTA-21iPLTE users will not need to disable the system's internal IP communicator to go cellular or dual-path. This is because the VISTA-21iPLTE supports a plug-in communicator that provides LTE cellular connectivity for the system, without needing to disable the internal IP communicator. By adding this plug-in cellular communicator, you will effectively make your VISTA-21iPLTE System dual-path. This means that it will offer both IP and cellular capabilities.
The only compatible plug-in cellular communicator for the VISTA-21iPLTE is the Honeywell LTE-21V with service from the Verizon LTE Network. This only applies to the new VISTA-21iPLTE, as the original VISTA-21iP cannot support any LTE communicators that don't require disabling the system's internal IP communicator.
This FAQ assumes that you have a VISTA-21iP System that does not require a PROM Chip upgrade. If you have an original Honeywell VISTA-21iP, and you want to disable the system's internal IP communicator so that an external communicator can be used, complete the following steps.
1. Power down the panel. Powering down the panel is required whenever you make hardware changes. Disconnect the system's backup battery, and unplug its transformer. Make sure the system is completely powered down before continuing. There should be no LED lights lit on the panel's circuit board.
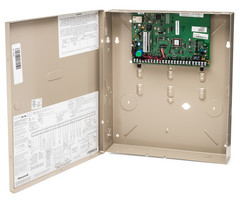
2. Adjust the IP/GSM Jumper. Turn your attention to the main system board. This is likely housed inside a metal enclosure, also called a can. Locate the internal IP/GSM Jumper on the main system board. This jumper can be found above the spot where the battery connects, and just below the RJ45 connector where an ethernet cable would connect. If you have the system board mounted correctly, this should be in the upper-left area of the green circuit board. You need to take that jumper, remove it, and then re-position it so that it connects the bottom and middle pins, instead of the top and middle pins.

Below is a picture of the actual jumper. Note that it is currently in the ON position. In this case, you would need to power down the system, pull out the white jumper, and re-position it to the OFF position.

3. Add a new communicator. If you need to install a new communicator, now is a great time. We advise reviewing this FAQ on installing an LTE-IA. Other external AlarmNet communicators will follow the same process.
4. Power on the panel. Now that you are finished making hardware changes, you can power the system back on. Plug in the system transformer, and then reconnect the system battery. Any keypads used with the system should emit a long beep while powering back up.
Did you find this answer useful?
We offer alarm monitoring as low as $10 / month
Click Here to Learn MoreRelated Products


- Answered
- Answered By
- Julia Ross


