How Do I Enroll a Kwikset 910 on a Qolsys IQ Panel 2?
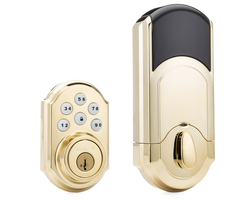
You can enroll a Kwikset 910 on a Qolsys IQ Panel 2 by putting the system into its Z-Wave inclusion mode and then activating the inclusion function on the lock. You should clear the lock from the network before attempting to do this. The Z-Wave lock can then be installed and tested.
 Complete the following steps to enroll a Kwikset 910 Z-Wave lock on a Qolsys IQ Panel 2:
1. Exclude the lock. Whenever you include or exclude a Z-Wave device with a system, you should first bring the Z-Wave device close to the system. This will allow the signal to be received properly. All Z-Wave devices should be cleared from the network in case they were previously included with a network as part of factory testing.
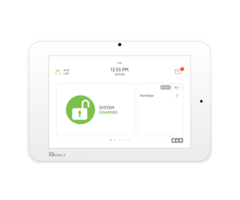
To exclude the lock, start from the home screen of the IQ Panel 2 System. Click on the small grey bar at the top of the screen. Choose Settings and then Advanced Settings. Then enter in either the Installer Code or the Dealer Code. The default Installer Code is 1111, and the default Dealer Code is 2222. Next, choose Installation, then Devices, then Z-Wave Devices, and finally Clear Device. This will put the system into Z-Wave exclusion mode.
With the Z-Wave lock close to the system, activate its inclusion function. The inclusion button on the Kwikset 910 is found on the back of the device, and it is labeled "A". Press this button to activate the lock's inclusion function. The system should recognize the lock and state a message saying that a device has been cleared. Then press the "OK" button to continue.

2. Include the lock. From the IQ Panel 2 System, press "Add Device". Then click on "Pair". This will put the panel into its Z-Wave inclusion mode. With the lock close to the panel, press the inclusion button on the back. This is the same button that was used in step 1. The IQ Panel 2 should recognize the device and include it into the Z-Wave network. You can then provide a name for the lock so that it can be easily identified. Press "Add" to save the changes. You can then press the picture of the house at the bottom of the screen to return to the main menu.
3. Install the lock. Refer to the lock's instruction manual to install it into the door. Make sure that you can manually lock and unlock the device.
4. Test the lock. With the lock installed, you should make sure that it can be controlled remotely. From the home screen of the IQ Panel 2, verify that the lock is displayed on the right side of the screen. Swipe right until you reach the locks menu. Press the large green key to lock the door. Make sure that the door is successfully locked. You will also be able to lock and unlock the door from Alarm.com using a web browser or the Alarm.com Mobile App.
Did you find this answer useful?
We offer alarm monitoring as low as $10 / month
Click Here to Learn MoreRelated Products

Related Categories
- Home Security Systems
- Apartment Security Systems
- Locks
- Small Business Security Systems
- DIY Wireless Security Systems
- Answered
