How Do I Enroll and Use My Z-Wave Thermostat With the New Tuxedo and TC2?
You can enroll and use your Z-Wave thermostat with the new Tuxedo and TC2 by including the thermostat with the Z-Wave network for the Tuxedo and then performing a Panel Sync on the TC2 platform. A Z-Wave thermostat will follow a standard exclusion-inclusion process to pair with the Tuxedo.
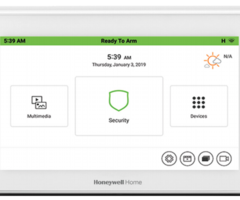
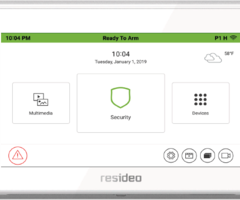
The Tuxedo is a wired touchscreen keypad and Z-Wave Plus automation controller for a Honeywell VISTA Security System. After you pair a Z-Wave device, such as a Z-Wave thermostat, with the Tuxedo, you will then be able to control that device locally through the touchscreen. This will also allow you to build local Tuxedo Smart Scenes that have the device respond automatically based upon a set schedule and/or with various predetermined system events. Please note that a maximum of twenty (20) Z-Wave thermostats can be paired with the Tuxedo.
If the Tuxedo is connected with a VISTA Panel that is monitored with access to Total Connect 2.0 for automation service, then you will also be able to control the Tuxedo remotely through the TC2 platform. You can access TC2 through a web browser on your computer or by using a mobile app on your smartphone. It is also possible to create TC2 smart scenes, much like how you can build smart scenes locally at the Tuxedo Keypad. It is usually necessary to perform a Panel Sync on TC2 after enrolling the thermostat in the Tuxedo to get it to show up on the automation platform. Just like the Tuxedo itself, a single TC2 account can support up to twenty (20) Z-Wave thermostat devices.
Complete the following steps to enroll a Z-Wave thermostat with a Honeywell Home Tuxedo or Resideo Tuxedo, and then use use it from both the Tuxedo and Total Connect 2.0:
1. Pair thermostat with Tuxedo. The first thing you will need to do is access Z-Wave programming on the Tuxedo. From the main Tuxedo screen, choose Devices. Then choose the Z-Wave Setup icon at the bottom of the screen. From there, you will complete a traditional exclusion-inclusion process to pair the Z-Wave thermostat. It is advised that you exclude the thermostat before attempting to pair, as doing so will clear out any residual Z-Wave data from the device. Even a brand-new Z-Wave device might have residual data due to factory testing, so doing this first is always a good idea. The following picture shows the Z-Wave Setup icon, as well as various other Tuxedo Z-Wave menu options.

Make sure the thermostat is within range of the Tuxedo before beginning. Press the Remove Device button at the bottom of the Tuxedo screen. Then activate the exclusion function on the Z-Wave device. Refer to the manual for your Z-Wave thermostat on how to do this. You should then get a message on the Tuxedo stating that a device was removed. Then press the Add Device button at the bottom of the Tuxedo screen. From there, activate the inclusion function on the Z-Wave thermostat. Again, refer to the manual for the device to learn how to do this. Some Z-Wave thermostats will follow the same process for inclusion as they do for exclusion. You should get a message on the Tuxedo stating that the device was added.

2. Name the thermostat. The name that you set for the thermostat will also be the name that appears on Total Connect 2.0 later on. To set the name, click on the thermostat to highlight it blue. Then click Device Setup at the bottom of the screen. This will take you to a menu where you can adjust various settings for the thermostat.

Click on the Device Name field, and then erase the existing name. Enter the name you want for the thermostat. After entering the name, press the green circle icon with the checkmark inside it. You can also choose a device icon for the thermostat, but this will not appear in TC2. Press the checkmark in the bottom-right corner to save the change. You can then press the picture of the house in the upper-right corner to return to the main screen once you have finished.

3. Control thermostat from Tuxedo. When you want to control the Z-Wave thermostat from the Tuxedo, click the Devices button on the main screen. Then locate the thermostat device you want to control, and begin adjusting it as needed. You can set its mode, enable/disable an energy saving feature, and adjust the set temperature. The User Interface and available options may vary, depending on the thermostat used.


4. Control thermostat from TC2. If you want to control the Z-Wave thermostat from Total Connect 2.0, start by accessing the platform using the website or mobile app, and then login to your account. If this is your first time controlling the Z-Wave thermostat from TC2, then you will typically need to perform a Panel Sync to get it to appear. Go to the Locations tab in TC2, and choose the Sync Panel option. It may take a few minutes for this to complete. You can go to the Activity screen to see when the Sync Panel procedure has completed successfully.

When you want to control the Z-Wave thermostat from TC2, navigate to the Devices tab, and then locate the thermostat on the screen. You can increase and decrease the set temperature as well as view advanced settings. Note how our thermostat is named "Hall Thermostat". This is because that is the name we chose for the thermostat back in Step 2.

Did you find this answer useful?
We offer alarm monitoring as low as $10 / month
Click Here to Learn MoreRelated Products

Related Categories
- Answered


