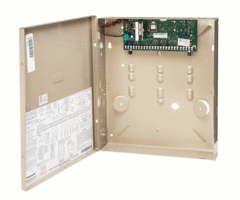
How Do I Factory Default a Honeywell VISTA P-Series System?
You can factory default a Honeywell VISTA P-Series System by activating the *97 command within system programming. A factory default will reset the Master Code to 1234, reset the Installer Code to 4112, delete any other user codes, clear all programmed zones, and restore default settings.

A factory reset is normally only performed if a user is taking over an existing VISTA System from someone else. It may also be performed as a final troubleshooting step if the panel is experiencing severe issues. The reset process is actually very easy to perform.
We have heard of users performing this process by accident. If you are already an Alarm Grid monitored customer, we can push down your old programming information to the panel in this situation. We can only do this if you were already a monitored customer with an activated system at the time the panel was factory defaulted.
Please note that the defaulting process involves using the *97 programming command. This command should not be confused with the *98 programming command. The *98 programming command can lock you out of keypad programming and require you to use the backdoor method to get back in. It is possible for users to become locked out of programming permanently when entering *98. If this happens, it may require a panel replacement. Never use the *98 command on your VISTA System. Be extremely careful not to do this when defaulting your VISTA System.
Also note that the process outlined in this FAQ only applies to VISTA P-Series Systems like the VISTA 15P, 20P and 21iP. The VISTA Polling Loop Panels like the VISTA 128BPT and the VISTA 250BPT follow a slightly different process. Only use the instructions outlined in this FAQ to factory reset a VISTA P-Series Panel.
Complete the following steps to factory default your Honeywell VISTA P-Series System:
1. Enter programming. Go to your VISTA Keypad. You can use an Alphanumeric Keypad like a Honeywell 6160 or a Fixed English Keypad like a Honeywell 6150 to complete this process. Defaulting a VISTA P-Series System does not involve any deep-level programming, so either keypad type is fine for this job. You can also use Console Mode on a Honeywell Tuxedo Touch Keypad.
Once you are at the keypad, enter the command [Installer Code] + 800. The default Installer Code is 4112. The screen should display "Installer Code 20" or just "20". This indicates that you have entered programming. If you are unable to enter programming this way, use the backdoor method linked above. If the backdoor method is required, you will not be able to enter using a Tuxedo Touch or similar keypad.
2. Perform the default. Enter the command [*97]. The keypad will beep three (3) times. This indicates that the system has been defaulted. Be very careful not to enter the [*98] command by mistake.
3. Default the account. Enter the command [*96]. Doing this defaults the panel account and CSID (Computer Station ID). This is important for your alarm monitoring company to be able to access your system's programming settings remotely. The keypad will beep three (3) times to confirm. Note: Never enter the [*96] command on a VISTA Polling Loop System.
4. Confirm the default. Press [*99] to exit programming. Do not use the [*98] command to exit programming. Check and make sure that the panel has been properly defaulted. All zones should be cleared, all added user codes should be deleted, and both the Master Code and Installer Code should be reset to their respective defaults. If necessary, you should contact your monitoring company to push down programming information.
Did you find this answer useful?
We offer alarm monitoring as low as $10 / month
Click Here to Learn MoreRelated Products
Related Videos
Related Categories
- Answered


