How Do I Install PROWIFI / PROWIFIZW To PROA7 / PROA7C?
To install a PROWIFI or PROWIFIZW start with the system powered down and unmounted. At the back of the panel, remove the left side cover. Insert the module into the slot at the top left, making sure it seats fully. Secure with the provided screw then replace the cover and power back up

The Honeywell Home PROA7 and the Resideo PROA7C are functionally identical, but with different branding on the front, and a few changes in the user interface. Neither panel comes from the factory with a communicator or a Z-Wave controller installed. This gives you the freedom to install only those features you're interested in using, saving you money. However, it also means that from the factory, the system has no way to communicate. For that, you need to install an add-on module.
The Honeywell Home PROA7PLUS and the Resideo PROA7PLUSC panels come with a PROWIFIZW module installed from the factory. There are also other features that these panels support that are not available on the PROA7 and PROA7C. Some of these are Bluetooth support for automatic disarming, and a front-facing camera for disarm photos. You can read all about the differences between these panel types in this comparison.
In a separate FAQ we showed you how to install an LTE cellular module in the PRO Series panels. Here, we'll show you how to install either the PROWIFI or the PROWIFIZW to the PROA7 or PROA7C. The PROWIFI offers WIFI-only, while the PROWIFIZW offers both WIFI and Z-Wave Plus capabilities to the panel. Having a WIFI connection is important because panel firmware updates are available through WIFI only, not via cellular communicators. WIFI is also necessary if you want to use a PROWLTOUCH or PROWLTOUCHC keypad. A panel can be set up and fully monitored using either of these WIFI modules. However, at Alarm Grid we always recommend dual-path monitoring whenever possible.
It is important to note that both of these modules support 2.4 GHz WIFI only. In some mesh networks, this can pose a problem as the network equipment may try to steer the panel toward 5 GHz, which it can neither detect, nor support but the router or access point won't know that. WIFI in the 2.4 GHz band offers better range, due to its ability to penetrate walls and other surfaces better than 5 GHz signals. This is why Resideo chose to offer only the 2.4 GHz band option.
To install the PROWIFI or PROWIFIZW into a PROA7 or PROA7C, follow these steps:
Important Note: If your system is already being monitored by a central station using an LTE cellular communicator, then be sure to contact them and put the system on test. Alarm Grid customers in the United States who are monitored through CMS can use the MyAlarms.com feature. To set that up, check out this post. For our Canadian customers who are monitored through Rapid Response, you can contact them by calling 1-800-932-3822. Once they verify your name, address, and password, ask them to put your system on test.
-
Dismount and power down. If the panel is already mounted, it will need to be removed from the mount. If wall mounted, remove the set screw in the bottom edge of the panel, then carefully remove it from the wall mounting plate. This will remove primary power, assuming the panel was powered on using the two (2) terminal block inside the wall mount. If the barrel connector was used turn the panel over and unplug it. Also, disconnect the backup battery. The panel should power completely down.
If you are using a desk mount you'll need to remove the back plate that came with the desk mount kit. Unscrew the set screw in the bottom edge and remove the panel from the mounting plate. Unplug the barrel connector and the battery to power the panel down. -
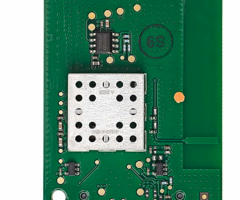
Remove the side cover. Expose the rear of the panel by laying it on a flat, preferably soft surface. The PROWIFI or PROWIFIZW will install on the left side as the panel faces away from you. Remove the left side cover.
The image below is from the PROWIFI/PROWIFIZW Install Guide:
-
Install the module With the left side cover removed, slide the PROWIFI or PROWIFIZW into the slot in the upper left side of the panel. There is a female connector on one side of the module (see below). It slides in and seats with a male connector on the inside of the panel. As you press the PROWIFI or PROWIFIZW into place, you'll feel resistance as it makes this connection. Press it in as far as you can without forcing it. When the module is pressed in properly you'll be able to install the provided screw to hold it in place


-
Remount and power up. Once the module has been secured you can replace the left side cover. Plug in the panel battery. The system will not power on. This is normal. If your system is wall mounted, carefully place the panel back on the wall mount, making sure the pins on the back of the panel line up properly with the two (2) terminal block. If you're using the barrel connector instead of the terminal block, then plug the barrel connector into the panel, then mount the panel to the wall plate. Install the set screw in the bottom edge and tighten it.
If your panel is desk mounted, reattach the back plate that came with the desk mount. Plug the barrel connector into the back of the panel. When primary power is applied, the panel will begin to boot up. Allow it to complete this process. - Connect to WIFI. Once the panel boots up, follow these instructions to connect the system to your WIFI network.
- Test the communicator. From the main panel screen tap the Menu icon (≡). Scroll down and press Tools. Enter the Installer or Master Code (4112 or 1234 respectively, by default) then go to System Tests > Test Communicator > Test WIFI.


Did you find this answer useful?
We offer alarm monitoring as low as $10 / month
Click Here to Learn MoreRelated Products


Related Videos

- Answered
- Answered By
- Julia Ross