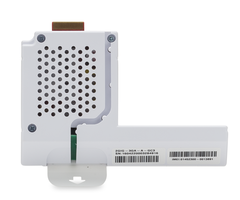
How Do I install The 2GIG 3GA-A-GC3 Into A 2GIG GC3?
The 2GIG 3GA-A-GC3 is the compatible AT&T cellular communicator for the2GIG GC3 control panel.
To install the 2GIG 3GA-A-GC3, make sure the 2GIG GC3 control panel is completely powered down by disconnecting the battery and making sure the transformer is not plugged into an outlet.
2GIG has simplified the installation by adding a hinged door to the side of the GC3 panel. Open the side hinged door and insert the 2GIG 3GA-A-GC3 until it snaps in place > close the hinged door.
Power up the GC3 by connecting the battery and plugging the transformer into the outlet. After powering up, the system should recognize the cell communicator, this may take about 40 seconds.
The 2GIG 3GA-A-GC3 has a built in antenna and usually no exterior antenna is required.
Users will need to run a test to make sure the cell communicator is communicating. To run a test press the 2GIG logo > Installer Toolbox > Enter the 4 digit installer code (the default 2GIG installer code is 1561) > System Configuration > Radio Test > Press Radio Test. If the cell is communicating Success will display on your screen. Once success is displayed press Done.
Since there are no phone lines to cut, installing a cell communicator is the most secure path of communication. The 2GIG 3GA-AGC3 will send signals to a central monitoring station and enable the GC3 panel to receive panel updates.
Installing a 2GIG 3GA-A-GC3 also allows users to connect to Alarm.com. Alarm.com provides users with the ability to control the alarm system, home automation and video surveillance remotely from any computer, smartphone or ios device. Users will receive notifications via email and or text message on any alarm signal or event.
Did you find this answer useful?
We offer alarm monitoring as low as $10 / month
Click Here to Learn MoreRelated Products


Related Categories
- Answered
- Answered By
- Connie Michael
