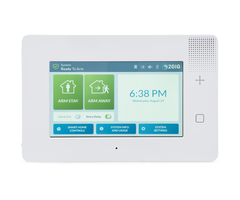
How Do I Properly Replace a Bad Sensor On My GC3 or GC3e?
You can properly replace a bad sensor on your GC3 or GC3e by deleting the wireless zone and then re-programming the zone from scratch. If you simply delete the old Serial Number and then enter the Serial Number for the new sensor, then you may encounter a "bypassed at device" error.
 If you need to delete a zone from a 2GIG GC3 or GC3e, then you should clear the zone and re-program the zone from scratch. Many users try to save time by simply deleting the Serial Number and then entering the new one. This can result in a "bypassed at device" error. When this occurs, the sensor is ignored by the system, and no action will be taken when the sensor is faulted. This can present a major security risk for your system. This may not be the only strange behavior exhibited by a zone replaced improperly. There could be other abnormal zone status messages or zone responses.

Fortunately, the issue can be corrected by clearing the wireless zone in programming and then re-programming the zone with the new sensor. This will take a little bit longer than simply swapping the respective Serial Numbers for the sensors. But it will ensure that the zones on your GC3 or GC3e operate properly. We've also found that changing the partition assignment for a zone requires that the zone be deleted and re-programmed from scratch. Make sure to test the new sensor after enrollment.
Complete the following steps to properly replace a bad sensor on your 2GIG GC3 or 2GIG GC3e:
1. Delete the existing zone. Start from the main screen of your system. Click on the 2GIG logo in the upper-right corner. Enter the system's Installer Code (default 1561). Choose System Configuration, followed by Wireless Zones. Locate the zone you want to delete on the left side of the screen. Then click the trash can icon next to the zone. Click the red Reset button to clear the zone. Then click Return To System Configuration in the upper-right corner. Click the back arrow on the left side of the screen. Click the green Save button. The existing zone will be deleted, and you will be returned to the main screen.
2. Enroll the new sensor. You must now enroll the new zone to the GC3 or GC3e. This FAQ will show you the process. Although the linked FAQ was written for the GC3e, the same steps will apply to the GC3. Make sure to use the proper Equipment Code, especially if you are enrolling a 2GIG Encrypted Sensor with a 2GIG GC3e. Using the incorrect Equipment Code has been known to cause problems.
3. Test the new sensor. Remember to test your new sensor after it has been programmed. You will need to put your system on test mode with the central station if you plan to trigger an alarm. Make sure that the sensor faults and restores properly. If the device is a security sensor, then make sure that it can be bypassed. If you want to try bypassing a sensor, click the System Settings option in the bottom-right corner of the main screen. Enter the Master Code (default 1111). Then choose the option Bypass Sensors. The new sensor should appear in the list with the toggle for bypassing.
Did you find this answer useful?
We offer alarm monitoring as low as $10 / month
Click Here to Learn MoreRelated Products
Related Videos
- Answered


