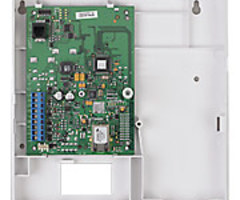
How do I install a 7847i on a VISTA-20P system?
A Honeywell VISTA-20P only supports phone line alarm communications out of the box. However, with the additional of an AlarmNet alarm monitoring communicator, you can upgrade the VISTA-20P with internet and/or cellular alarm communications. The Honeywell 7847i is the internet communicator for the VISTA-20P. After completing the simple installation steps, your 7847i will be ready to provide internet communications for your VISTA-20P and you will be ready to activate one of our no-contract Total Connect monitoring plans.
First, open the 7847i enclosure by pressing in the two tabs on the bottom of the device. Mount the unit to the wall using the included screws and wall anchors. Connect an Ethernet cable from your router to the Ethernet port on the 7847i. Next, use a four conductor wire to connect the 7847i to your VISTA-20P alarm control panel. You should power down your VISTA-20P security system before making these connections. Unplug your system's AC transformer and disconnect one of the leads to the backup battery. You will need to connect one wire from terminal 3 on the communicator to terminal 5 on the control panel. Then connect a wire from terminal 4 on the communicator to terminal 4 on the panel. Make a connection from terminal 5 on the 7847i to terminal 7 on the VISTA-20P and finally make the final connection from terminal 6 on the internet communicator to terminal 6 on the alarm panel.
Once you have the connections secure, put the cover back on the 7847i and power up your VISTA-20P. Your 7847i installation is complete so now all you have to do is choose the right monitoring plan for your situation.
Did you find this answer useful?
We offer alarm monitoring as low as $10 / month
Click Here to Learn MoreRelated Products
Related Categories
- Answered
- Answered By
- Sterling Donnelly


