What Are The Programming Options For a Honeywell 6150RF?
The programming options on a 6150RF include setting the keypad and receiver addresses, the House ID for bi-directional devices, and enabling or disabling the receiver and transmitter. Also, programming key fobs, configuring high-security settings and restoring all settings to factory default.
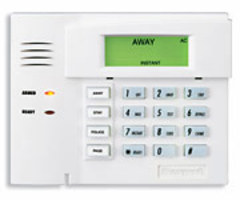
The 6150RF is a fixed-english keypad for Honeywell VISTA Alarms. Honeywell has integrated a medium transceiver for their 5800 wireless sensors into this keypad. Honeywell 5800 series wireless devices operate at a 345 MHz frequency. A transceiver allows the keypad to both receive signals from wireless sensors and to transmit status information from the alarm panel to bi-directional sensors. Medium indicates it will support a maximum of 16 wireless zones programmed into the VISTA panel. In addition to that, it can also support up to 8 key fobs, programmed locally, that will not use wireless zones. We talk more about medium receivers here.
The 6150RF, because of its versatility, contains a built-in menu for programming these various configurations. Its fixed display does limit it though, so trying to decipher all the options can feel like reading code. In an effort to make this understandable, we will run through all the programming options on the 6150RF and explain what they mean. Even seasoned alarm installers find the menu to be challenging. For this reason, we always recommend having a copy of the Honeywell 6150RF Installation Instructions in hand.
To enter the programming menu, you must power down the keypad, then power it back up, and immediately (within the 30-second limit) hold the [1] + [3] buttons at the same time. Your display will then read oo/-- and your keypad will beep (3) times.

From here you have many menu options. Please see the chart below for details.
6150RF MENU
This table goes over all 6150RF menu options. After programming an option, you must hit [*] to continue. When you hit [*], you will be returned to the prior menu option, usually the oo/-- display for the main level of programming.
| ADDRESS | DISPLAY | OPTIONS | DESCRIPTION | HOW WE USE IT |
|---|---|---|---|---|
| 1 | cA | 01-31 (default = 31) | Console Address: This is the keypad address that will allow the keypad to operate on your vista. | All panels require the connected keypads to have a proper address. Older VISTA-10, and VISTA-20 panels use address 31. VISTA-10P, VISTA-15P, and VISTA-20P, VISTA-21iPLTE panels use an address from 16 - 23. |
| 2 | rA | 00-30 (default = 00) | Receiver Address: This is the address the receiver gets assigned. | Panels require a certain address for receivers. The Residential panels like the 15p/20p/21ip all use "0" as the wireless receiver address. For Commercial panels, like the TURBO panels, the receiver address is set in the panel and you must set the same address on the receiver. |
| 3 | hI | 01-31 (default = 10) | House ID: Bi-directional devices use this ID number to communicate with the built-in transmitter. This allows them to receive status information from the panel. | Products like a 5800WAVE, 5804BD, and 5828 are bi-directional devices that not only send signals to the panel, via the receiver but also get status from the panel via the built-in transmitter. The 6150RF will send the status of the partition the keypad address is assigned to in the panel. This field is only used when House ID Source is set to Local. Set this to match the House ID set on the wireless device. |
| 4 | hS | 0 = System, 1 = Local (default = 1) | House ID Source: Which House ID will be used? The one programmed into the alarm panel, or the one programmed into this keypad. | Transmitters that communicate over House ID are often limited to 50' (15.2m) so this keypad may be closer to the bi-directional device. 6150RFs can be programmed in a partition other than 1. The House ID source must be set as local to get the status of the other partition. This guide explains further. |
| 5 | d- | 1-8 | Local key fob edit menu, Enter Device Number: This is the key fob number that is already programmed locally into the keypad | You can delete existing key fobs after entering the device number. To do this hit [*] [9] [*] or to exit without deleting, press the [#] key. You can also edit existing fobs, for such things as editing the 4-digit code associated with the key fob. The programming options, once you choose the device number, are the same as the sub-options for programming location 8 below. |
| 6 | rE | 0 = Off, 1 = On (default = 1) | Receiver Enable: Turns the receiver off or on. | If there are more receivers connected than the panel supports, then additional receivers must either be turned off or disconnected. Residential Panel = Max 1. Commercial Panel = Max 2. |
| 7 | tE | 0 = Off, 1 = On (default = 1) | Transmitter Enable: Turns the transmitter module OFF or ON. | This feature must be enabled in order for the 6150RF to send status to bi-directional devices. When enabled, it can use the Local House ID, or the System House ID, but not both |
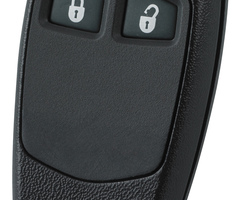
| 8 | d -- | 1-8 | 6150RF will automatically display the first available fob number (1-8) that is not already programmed. | Hold any button on the Key Fob you want to program to learn in its Serial Number. The Serial Number will scroll across the screen. Press [*] once you confirm it is correct. The display will show d # (where # is a number 1 - 8) -. Press [2] to go to the next prompt. |
| 2 | U4 | 0-9 | Enter the 4-digit user code to be assigned to this Key Fob | You must now enter a 4 digit user code that will be associated with the Key Fob. If the code is not already in the panel, the fob will not work until you program the user code into the panel. Press [*] then press [4] to go to the next prompt. |
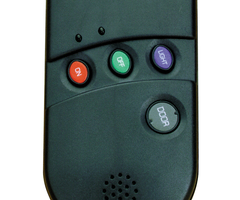
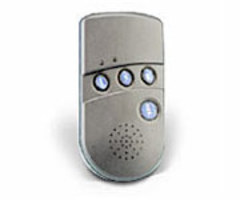
| 4 | Ln | 1- 4 | Enter a Loop Number to view or change the function of that loop. Select the desired function. See Image #1 below for loop orientation. | Defaults are: LOOP 1 = 2 Second close of built-in Relay LOOP 2 = Disarming LOOP 3 = Arming Away LOOP 4 = Arming Stay Please See "WIRELESS KEY FUNCTION CHART" below Once all loops are properly programmed, Press [*] you will return to d # - display. Press 5, if desired. If not, continue pressing [*] until you exit keypad programming or return to the Main Menu to program the next non-fob-related option. |
| 5 | o- | 1- 4 | Enter Loop Number you Want to Operate the On-board Relay then select the Relay Action | Not commonly used anymore. Choices for action: 0 = No action 1 = Relay Off 2 = Relay On 3 = Relay Toggles On and Off 4 = Relay Closes for 2 Seconds By default, Loop 1 is programmed with a 4. If you want to disable this programming, at o- enter [4], then [0] then press [*] to return to d # -. Press [*] again if you need to program another key fob. If not, press [*] again to return to the Main Menu. |
| 9 | EE | 1 = Restore (any other option will not restore) | Restore Keypad Defaults | Always make this step #1 on a new setup or perform when things are not operating as desired. |
| 0 | En | 0 = Disable, 1 = Enable (default = 0) | High-Security Mode: For key fobs that use high-security option | For key fobs that have high security. This must match how the key fob is set up. When High Security Mode is on, any key fob not enabled for High-Security Mode will not work with this receiver. |

IMAGE #1
WIRELESS KEY FUNCTION CHART***
This chart corresponds with 6150RF Menu option 5 (when editing an existing key fob) or 8 (when programming in a new key fob) sub-option 4.
| Function | Entry |
|---|---|
| Disarming | 1 |
| Arming Away | 2 |
| Arming Stay | 3 |
| Arming Maximum | 4 |
| Arming Instant | 7 |
| Panic Alarm (Same as [*] + [#] at keypad) | #99 |
| Start a Relay | #7 (VISTA-10SE, VIA-30PSE) #7 + Device Number in Panel (VISTA-10P/15P/20P/21IP/20SE(HW)) |
| Stop a Relay | #8 (VISTA-10SE, VIA-30PSE) #8 + Device Number in Panel (VISTA-10P/15P/20P/21IP/20SE(HW)) |
| Activate Panel Programming of Relay | #71 (VISTA-40/50P/128B) |
| Activate Panel Programming of Relay | #72 (VISTA-40/50P/128B) |
| Activate Access Control Relay for Partition | 0 (VISTA-40/50P/128B) |
***Chart taken from the Honeywell 6150RF Installation Instructions
These options can appear overwhelming but just remember, not everything needs to be changed. The 6150RF has menu options to cover the wide range of panels they caan operate with. Once you have entered programming, always default the keypad before starting any programming. This gives a clean slate to configure the keypad as you need to.
Follow these steps for the options that must be programmed for basic operation:
1. Default the Keypad. This is important for every setup, whether the keypad is brand new or not. Once in programming mode select [9]. The keypad will display EE, Press [1]. The keypad will beep three (3) times, then return to flashing oo / --. This will default the keypad and you are now ready to configure.
2. Address the Keypad. Every panel uses a certain keypad address or possibly a group of addresses that are enabled as keypads. The keypad address you program here must match what is enabled in the panel. In addition, on panels that require unique addresses for keypads, no two (2) keypads can be connected using the same address at the same time. Some older panels would actually use (31) as a valid keypad address. This was known as the "unaddressable address". This terminology was used because for those panels, ALL keypads used the same address, so each keypad did not receive a unique identifier. Modern panels are addressable and require addressing the keypad to something other than 31.
3. Address the receiver. This is only required with the commercial panels, as the default address is set to a residential panel's proper receiver address of (00). On commercial panels a user must enable an address which is set up as a wireless receiver and then match that address in the 6150RF Receiver Address field, located in Programming Location 2.
Those few options allow the 6150RF keypad, receiver, and transmitter to now function. Since the receiver and the transmitter are enabled by default. See our step-by-step for key fobs programmed locally into the 6150RF, linked above. For any other programming, carefully follow the chart and the sequence of steps to set up your 6150RF as desired. Comment below on what specific programming, if any in a 6150RF you are struggling with.
Did you find this answer useful?
We offer alarm monitoring as low as $10 / month
Click Here to Learn MoreRelated Products


Related Categories
- Answered
- Answered By
- Freddie Daniels


