How Do I Add a Zigbee Sensor to a Qolsys IQ Panel 4?
Verify the Zigbee card is working in the IQ Panel 4. Navigate to the Auto-Learn portion of security device programming. When the panel is in auto-learn mode pull the battery tab or insert the battery. The panel will ask you to confirm enrollment. Press "OK" then configure the settings.

A Zigbee daughter card can be installed in the IQ Panel 4 to add support for Zigbee sensors and Zigbee automation devices. Be sure to consult the list of supported Zigbee devices to be sure the device you plan to use is compatible. It is possible that devices not listed will work, but the list shows devices that have been tested by Qolsys, so you can be sure that listed devices will work as expected.
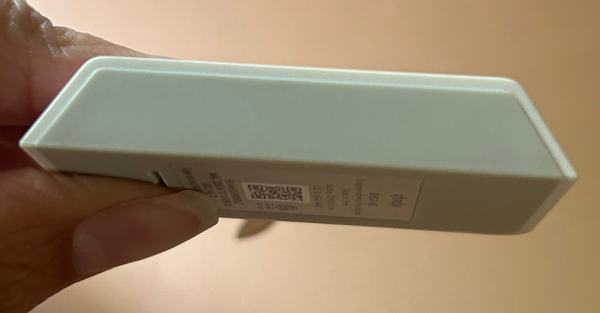
Zigbee sensors are used by some other manufacturer's systems, like Xfinity. By adding the Zigbee daughter card (QC000E-840) you may be able to replace a proprietary panel without having to replace all of the sensors. The sensor we're using for the purposes of this article is an Xfinity XHS2-UE. It is not listed on the compatibility document. From what we can find online, it is manufactured by Visonic and corresponds to their MCT-350.
We purchased our sensor new. However, if you have a sensor that is already learned into an Xfinity panel, you will need to either delete that sensor from the existing panel, or perform a default on the sensor before learning it into the IQ Panel 4.
Default the Zigbee Sensor:
These steps will be necessary if your sensor has been in use with another panel and you can't enter programming on that panel to delete it. You'll need to perform these steps before you can program the sensor with the IQ Panel 4. These instructions are specific to the Visonic (Tyco) MCT-350 SMA, but they worked with our Xfinity XHS2-UE as well.
- Remove the cover. Holding the sensor with the back facing up, use your thumbs to slide the cover off.
-
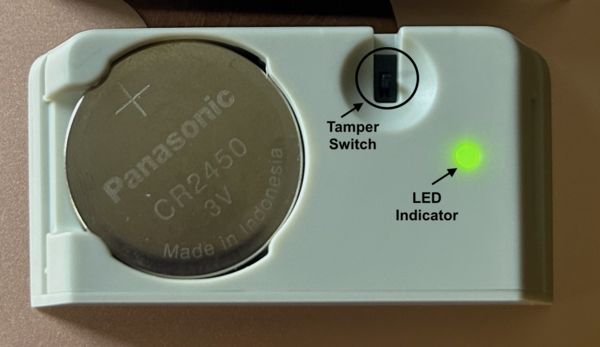
Remove the battery. You'll need to press the battery toward the middle of the sensor, then pull up on the edge of the battery to remove it.

-
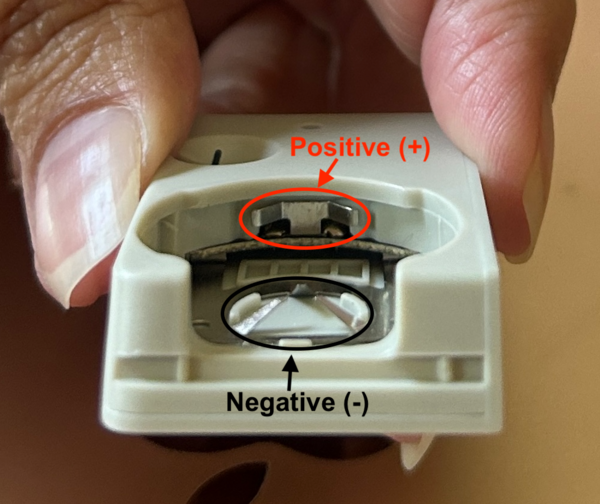
Discharge capacitance. This step is optional (unless the default process doesn't work). But, since it may prove necessary, we recommend you do this from the outset. Using a short piece of insulated wire, touch one end of the wire to the positive contact point and the other end of the wire to the negative contact point in the sensor. Hold for at least ten (10) seconds. If there is any capacitance built up in the sensor, this will discharge it. This makes sure that the sensor is completely powered down. Be sure you do this on the sensor only, not on the battery!
-
Perform the default. While holding down the tamper switch, reinsert the battery. Release the tamper switch within four (4) seconds. The LED on the sensor should begin to blink three (3) times every five (5) seconds to indicate that it has been defaulted. This will appear as three (3) blinks, pause, three (3) blinks, pause, etc.
- Remove the battery again. Remove the battery again. You will reinsert the battery when you're ready to enroll the sensor.
Program a Zigbee security sensor into the Qolsys IQ Panel 4:
- Add Zigbee card and test. Follow the steps in this FAQ to add and then test the Zigbee card.
- Navigate to Auto-Learn. From the panel's home screen, tap the gray bar at the top, just above the date and time. Then tap Settings > Advanced Settings > Enter Installer or Dealer Code (1111 or 2222 respectively, by default) > Installation > Devices > Security Devices > Auto Learn Sensor.
- Enroll the sensor. Once the panel is in auto learn mode place the battery back into the sensor. Be sure to observe proper polarity, with the Plus (+) symbol facing up and visible when the battery is inserted. The panel should pick up the sensor and prompt you with the option to enroll.
-
Configure the sensor. The options available for configuration will vary by sensor type:

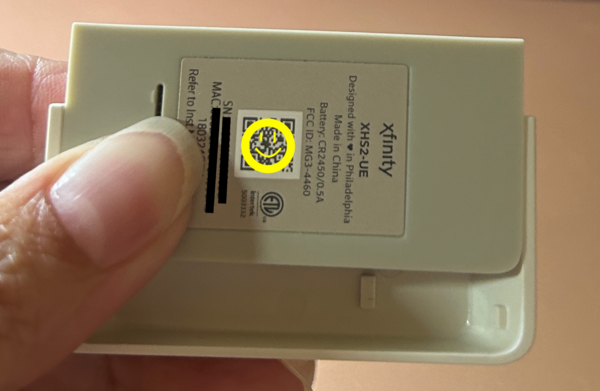
- Sensor DL ID: In the case of a Zigbee sensor this is the 16-Character MAC listed on the back of the sensor. There may be a QR code as well, but we didn't have any luck attempting to enroll the sensor using the QR Code. Auto Learn is the only method of programming that worked for us. If you are attempting to Auto Learn and the process is not working, go through the steps listed above to default the sensor, then try again.
- Sensor Type: This will be filled in automatically by the panel, based on the Sensor DL ID learned. In our case, our sensor is a door/window sensor. Unfortunately, if you're attempting to use this in a way that requires a sensor group other than those associated with door/window sensors, there is no way to change this setting. At least not in our experience.
- Sensor Group: Sensor Group is how you tell the IQ Panel 4 how a particular zone is supposed to behave, and be treated by the system. Does a sensor provide a delay, or is it instant? Is the zone armed while in Stay, Away, Both? The sensor group determines that. In this guide, we go through all of the available sensor groups and give an explanation of each. Our guide provides a bit more info that what's available in the Install Guide (starting on page 65).
- Sensor Name: Some common descriptions are provided, or you can choose to create a custom zone name. After choosing Custom Name from the drop down, type in the name you want to use. Regardless what you name the zone, the system has text to speech capabilities, so it will speak the description you enter when voice prompts are enabled. In our example, we named the sensor Zigbee Door. The system was able to speak this descriptor with no problem.
- Chime Type: You can choose no chime, or you can choose a unique chime sound for the zone. There are currently 11 different chime sounds to choose from. When you choose a chime from the drop down, you'll hear a sample of what that chime sounds like. Once you decide which chime sound, if any, you will use, move on to the next prompt.
- Chime Function: This is a new option, added in firmware 4.5.0. This option allows you to have the zone chime on opening, chime on closing, or chime on both opening and closing.
- Voice Prompts: The options here are either On or Off. When set to On, the panel will speak the zone description in various situations, such as when the zone is opened, has a trouble condition, or is in alarm.
- Source: You can't actually see that this is the field for the sensor RF source, but that's what it is. Possibly, by adding the new option for Chime Function the sensor programming page has gotten a little crowded. The source is filled in automatically when the sensor is auto learned, and it can't be changed. If you hit the drop down arrow, there are no other options available.
- SAVE: Once you complete programming don't forget to hit SAVE. Otherwise, your work is lost. After saving the final zone you're here to program press the House icon at the bottom of the screen to return to the main panel screen.

-
Test sensors: Once you finish all programming, be sure to test each sensor to verify that each is working. If you decide to the arm the system and put any zones into alarm, be sure to put your system on test first, if you have a full monitoring plan.
You can also tap the gray bar above the panel date and time. Then tap Settings > Advanced Settings > Enter Installer or Dealer code (1111 or 2222 by default) > System Tests > Zigbee Test. This will show you each of your Zigbee sensors with a battery level and signal strength. You can tap "More" to the right of each sensor to get more in-depth information about that sensor.
Did you find this answer useful?
We offer alarm monitoring as low as $10 / month
Click Here to Learn MoreRelated Products
Related Videos
- Answered
- Answered By
- Julia Ross


