How Do I Add an IQ Motion to a Qolsys IQ Panel 2?
You can add an IQ Motion to a Qolsys IQ Panel 2 by putting the system into its learn mode and then activating the IQ Motion device. The sensor will need to be powered on when doing this. You must know the Installer Code or the Dealer Code for the IQ Panel 2 in order to enroll the sensor.
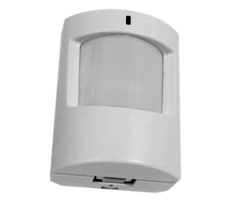
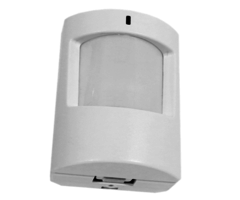
 The IQ Motion is a wireless, passive infrared (PIR) motion detecting sensor. It is an un-encrypted, unidirectional sensor that is compatible with the IQ Panel, the IQ Panel 2 and the Interlogix Simon Alarm Systems. The sensor features a detection range of 30 by 40 feet, and it can operate at up to 600 feet from the panel in open air. If you are looking for the fully encrypted S-Line version of this sensor that is compatible with the IQ Panel 2 System, check out the IQ Motion-S.
Complete the following steps to add an IQ Motion to a Qolsys IQ Panel 2:
1. Access learn mode. Start from the main screen of the IQ Panel 2. Press the small grey button at the top of the screen. Choose Settings. Then Advanced Settings. Then enter in the Installer Code. This code is 1111 by default. You can also use the Dealer Code, which is 2222 by default. Then press Installation, followed by Devices. Then choose Security Sensors. Then select Auto Learn Sensor. The panel will enter into its learn mode.


2. Activate the sensor. Activate the IQ Motion to learn it in with the system. You can do this by waving your hand directly in front of the lens. The IQ Motion must be powered on when doing this. This involves removing the battery tab underneath the device's back cover. The red LED light on the IQ Motion will light up when the device detects motion after it has been initially powered on. It may take a few moments for the device to learn in with the system. The system will display a message when the device has been learned in. Press "OK" to continue with enrollment.
3. Configure the settings. Adjust the settings for the motion sensor as needed. This includes settings its Sensor Type to Motion Detector and providing a name for the sensor. Then press "Add New" at the bottom of the screen to save the changes. You can press the picture of the house at the bottom of the screen to return to the home screen when programming is completed.
4. Test the sensor. After installing the sensor in its final location, perform a walk test to make sure that it can properly detect motion.You can activate walk test mode by removing the device's back cover to activate the tamper switch. In walk test mode, the LED light on the sensor will light up whenever motion is detected. The sensor will remain in its walk test mode until it experiences a full minute of inactivity.
Did you find this answer useful?
We offer alarm monitoring as low as $10 / month
Click Here to Learn MoreRelated Products

Related Videos
Related Categories
- Answered

