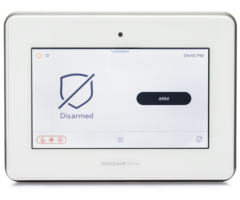
How Do I Delete a Zone From My Honeywell Home PROA7PLUS?
You can delete a zone from your Honeywell Home PROA7PLUS by accessing Tools using the system's Installer Code, then entering Programming, followed by the Peripherals sub-menu. From there, find any zone you want to delete. Select the zone(s), press Delete in the top-right, and then confirm.
Whether you are using a Honeywell Home PROA7PLUS or a Resideo PROA7PLUSC, the zone deletion process is the same. By deleting a zone, you are freeing it up so that it can be used with a different sensor. There are 250 total zones on a PROA7PLUS or PROA7PLUSC. Of these zones, 127 are for encrypted sensors from the Honeywell SiX Series and PROSIX Series, and the other 123 are for legacy sensors. The legacy zones are only usable if you have added a PROTAKEOVER Module to the system. One very common reason to delete a zone is simply to make room for another sensor. Or you might just want to delete a zone because you no longer want to use a sensor with the system. Regardless of the reason, there is a very easy process you can follow to delete the zone. Keep in mind that any sensor can be assigned any Zone Number, regardless of whether it is an encrypted PROSIX or Six Series Sensor or a legacy sensor added using the PROTAKEOVER Module. You just cannot exceed 127 encrypted zones or 123 legacy zones. Sensors are assigned Zone Number in the order in which they are enrolled.
However, there is one very important thing to consider before you try and delete a system zone by yourself. The only way that you can delete a zone from your PROA7PLUS or PROA7PLUSC on your own is if you have access to local end-user programming. Initially, these panels were released without an end-user programming option. In fact, the feature is still in beta development as of May 2021, and at the time of this writing, the feature has yet to be made available to the general public. Without local end-user programming, the only way to delete a zone from one of these panels is to have your alarm monitoring company complete the process for you. But for this FAQ, we will be covering the zone deletion process as though you have end-user programming and can complete the process all by yourself.
Complete the following steps to delete a zone from a PROA7PLUS or PROA7PLUSC:
1. Access Programming. Start from the main system screen. Click on the three horizontal bars menu button at the bottom-center. Select Tools. Provide the system's Installer Code. This code is 4112 by default. Select Programming. You will enter into the panel's local programming menu.
2. Delete the zone. After you have accessed Programming, click on Peripherals. This will have the system display all programmed zones. You will be able to scroll through the list and see every zone that is programmed on the system. You need to find the zone or zones that you want to delete. Once you have found the zone(s), press the checkbox to the right-hand side of that zone to select it. Additionally, if you want to delete multiple zones all at once, then you can select every zone that you want to delete.

Upon selecting at least one (1) zone, you will notice that a black Delete button appears in the top-right corner of the screen. This button will appear in the spot where the Refresh, Add (+) and Filter buttons are located when no zones are selected. Only after at least one (1) zone is selected will these buttons be replaced by the Delete button. Press the Delete button once you have selected every zone that you want to clear from the system. The screen will display a message to confirm that you want to delete the selected zone(s). Press the black Delete button on the right-hand side to confirm that you want to delete the selected zone(s). The deletion process should only last a few seconds. Any zone that you selected will be deleted from the system.
3. Go back home. After deleting the zone(s), you should return the system to the home menu. First, press the return arrow (<) in the top-left corner twice. After two (2) presses, you will be taken out of programming. You can then press the security status icon in the bottom-right corner to return to the home menu screen.
![]()
Did you find this answer useful?
We offer alarm monitoring as low as $10 / month
Click Here to Learn MoreRelated Products

Related Videos
Related Categories
- Answered


