How Do I Factory Reset My PROA7 or PROA7PLUS Alarm System?
Factory reset a PROA7 or PROA7PLUS by entering the Tools menu with the Installer Code. Then, select the "Factory Default" option. Proper troubleshooting should occur before a system default, as this will erase all settings. Defaulting the alarm is considered a last resort.
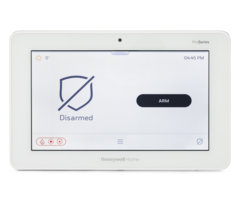
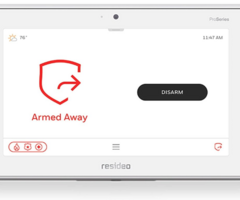
In this article we mention the Honeywell Home PROA7, and Honeywell Home PROA7PLUS. This article also pertains to the Resideo PROA7C and Resideo PROA7PLUSC, as these are identical products except for the branding on the front of the panel.
To make sure there are no misunderstandings, factory reset and factory default both refer to the same operation. Defaulting an alarm system is a major step and should be a last resort when all other troubleshooting has been exhausted with no positive results. An alarm panel may require a factory default when there are no wrong settings to explain an undesired behavior, yet the behavior persists. Before completely wiping all settings, perform a complete comb-through of all the current programming. Preferably, speak with your alarm dealer for assistance with this, and don't perform a default unless they instruct you to do so.
Performing a default will completely remove all programming in the panel, including security sensors, remote keypads, Z-Wave devices and scenes, and all user codes. All values will be set back to their default values (Installer Code = 4112, Master Code = 1234). Defaulting the panel will cause it to send an unpair command to all Honeywell SIX or Resideo PROSIX sensors that have power and are within range.
If for some reason these encrypted devices do not receive the unpair command, then you risk the chance of these sensors becoming unusable. For example, if a PROSIX sensor has been paired with the panel, but at the time of the default that device doesn't have battery power, it will not be able to receive the unpair command. You will then be unable to pair it with the panel again after the default. This is because the PROSIX device will still think it's paired with the panel from before.
In order to perform a factory default, you must have the panel's 4-digit Installer Code (default is 4112). This code is required to access the Tools menu that allows a panel default to occur. We recommend that our customers keep the Installer Code at its default value. There is little to no risk in doing so, because you cannot disarm with the installer code unless it was used to arm. If your system is actively monitored, and your Installer Code has been changed by an installer and/or you do not know the code, you will need to reach out to the installing company to either gain access to the Installer Code, or have it set back to the default value. Otherwise, you won't be able to log into the Tools menu.
It is important to note that the factory default option is not available when accessing programming from a remote touchscreen keypad (PROWLTOUCH or PROWLTOUCHC). To complete a factory default on a PROA7 or PROA7PLUS, follow these steps:
1. Select the 3-lined icon on the home screen. This is a menu icon and is many times referred to as a hamburger menu. Tap this icon at the bottom of the home screen to proceed. It is a good idea to be sure that all SiX and PROSIX sensors that have been paired with the panel have good battery power and are within transmitting range of the system.

2. Select "Tools." Next, you will select the "Tools" option. You'll have to scroll down toward the bottom of the menu screen to find it.
3. Enter the 4-Digit installer code. Type in your 4-digit installer code (default is 4112) when prompted.
4. Select "Default Options." Tap "Default Options" to continue.
5. Select "Factory Default." Next tap "Factory Default" to perform the default.
6. Verify the panel reboots. At this point, the panel should power down and then power back up.
7. Verify all SIX and PROSIX devices have a fast blinking LED. The process of defaulting should cause the panel to send an unpair command to all SIX and PROSIX sensors. Since these devices can only pair with one panel at a time, it is important that they are aware they have been released by the panel. A fast blinking green LED indicates that each sensor has been unpaired. This can usually be seen through the cover. You can open the cover of the sensor, and the green LED is on the circuit board if you're having trouble seeing through the cover.
If you have an active monitoring account with an alarm dealer, then your dealer should have a backup program on the AlarmNet360 server. In this instance, once defaulted, the panel will reboot and immediately try to connect to those servers in an effort to restore all previous settings. If you do not have an active monitoring account, then you will need to reprogram everything by hand.
As mentioned earlier, if your panel has SIX and/or PROSIX sensors enrolled, a default will unpair all those sensors. Prior to the default, please make sure all SIX and PROSIX devices are working and within transmitting range so that they can receive the unpair command. If the panel programming is then restored based on a backup from your dealer and AlarmNet360, the encrypted sensors will show in programming but with a "Not Paired" status.
To complete the pairing process, you will need to go through the learn mode and trip each sensor individually to pair them back with the PROA7 or PROA7PLUS. WIFI Keypads will also show as unpaired after restoring the program. You must rejoin the WIFI Keypad back to the local WIFI network, then you will be able to pair it back with the panel.
Most customers will never need to perform a factory default, but in the event that you do, this comprehensive guide should show you the way.
Did you find this answer useful?
We offer alarm monitoring as low as $10 / month
Click Here to Learn MoreRelated Products


Related Videos
Related Categories
- Wireless Alarm Control Panels
- Wireless Alarm Control Panels
- Home Automation Controllers
- Monitored Home Security Systems
- DIY Wireless Security Systems
- Small Business Security Systems
- Answered
- Answered By
- Freddie Daniels


