How Do I Install an LTE Unit To a PROA7 or PROA7PLUS?
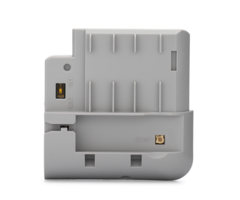
To install the PROLTE-A or PROLTE-V first make sure the panel is powered completely down. If the panel is mounted, remove it from the wall or desk mount. Flip the panel over so you can see the back. Remove the left side cover. Insert the LTE module, then replace the cover.


Probably the single most important upgrade for a PROA7 or PROA7PLUS system is the addition of an LTE module. The Honeywell Home PROA7 and Resideo PROA7C come with no communicator, and the Honeywell Home PROA7PLUS and Resideo PROA7PLUSC come with a WIFI communicator only. It is always a good idea to opt for dual-path communication when setting up an alarm system. WIFI communicators offer the fastest signal delivery, but LTE cellular is by far the most reliable path.
WIFI communication is also important and for the PROA7 or PROA7C you'll need to install a WIFI module. WIFI is necessary to download firmware updates for the panel. These updates won't be downloaded using cellular data. In addition, WIFI is required if you want to use either of the touchscreen keypads available for the PROSeries panels. These are the Honeywell Home PROWLTOUCH and the Resideo PROWLTOUCHC.
Whether you plan to self-monitor or invest in full central station monitoring, reliability in your alarm system's communication is the key to getting the most from it. Let's face it, without a communicator, it's just a really noisy piece of art. This makes LTE cellular alarm monitoring a very attractive, some would even say necessary, feature. In this article, we'll show you how to install an LTE cellular communicator in a Honeywell Home or Resideo PROSeries alarm panel.
The LTE cellular communicator for the PROA7 and PROA7PLUS is available in either an AT&T version or a Verizon version. Choose the carrier that will have the best signal in your home. It doesn't matter what carrier your cell phone may use. The cellular charges will be included in your monitoring service payments. This guide walks you through the full installation process for the system. Be sure to choose a mounting location that provides good cellular coverage.
To install the PROLTE-A or PROLTE-V in a PROA7 or PROA7PLUS (or equivalent) follow these steps:
- Put your system on test. If your system is already being monitored by a central station using a WIFI communicator, then be sure to contact them and put the system on test. Alarm Grid customers in the United States who are monitored through CMS can use the MyAlarms.com feature. To set that up, check out this post. For our Canadian customers who are monitored through Rapid Response, you can contact them by calling 1-800-932-3822. Once they verify your name, address, and password, ask them to put your system on test.
- Unplug the panel. If the panel has already been powered up, then you you will need to power it down before installing the LTE cellular module. If your system is wall mounted, with the power wires connected using the terminal block, then removing the panel from the wall plate (covered in Step 3) will remove it from power, so unplugging the transformer is not necessary. Only if the barrel connector is used is unplugging necessary, and in that case, you can unplug DC power from either the wall, or by unplugging the barrel connector at the panel.
- Dismount the panel. It is easiest to perform this installation before the panel has been mounted to either the wall or a desk mount. If the panel has been mounted, remove the set screw in the bottom edge of the panel, then pull the panel from the wall or desk mount. Lay the panel facedown on a clean, flat surface and unplug the battery. Be sure the surface you lay the panel on is soft and smooth, so as not to scratch or damage the screen.
-
Remove the side cover. The LTE cellular module installs on the left side of the panel when it is laying on it's face. Slide the left side cover off.

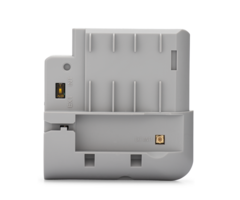
- Install the LTE module. Align the LTE cellular module with the opening in the back of the panel that you exposed when you remove the side cover. Insert the module into the indicated slot and push it all the way in. Install the provided machine screw. This will help prevent tampering or loosening of the module.
- Replace the side cover. Slide the side cover back into place over the LTE cellular module. At this time, you can go ahead and reconnect the panel battery. The panel will NOT power up at this point. This is normal.
- Remount the panel. Replace the panel on either the wall plate or the desk mount. If you're using the wall plate with power wired to the terminals, then when you mount the panel it will begin to power up (assuming you didn't unplug the DC power adapter). If you are using a desk mount, plug in the barrel connector or plug in the power adapter. The panel should begin to boot up.
- Test the communicator. Once the panel boots up completely, you can test the cellular communicator. Tap the Menu icon (≡) on the main screen. Scroll down and press Tools. Enter the Installer or Master Code (4112 or 1234 respectively, by default) then go to System Tests > Test Communicator > Test Cellular. If for some reason you don't see the option for testing the cellular communicator it means the system is not seeing the communicator for some reason. Power down, and go through these steps again, reseating the module and then powering back up.
Did you find this answer useful?
We offer alarm monitoring as low as $10 / month
Click Here to Learn MoreRelated Products


- Answered
- Answered By
- Julia Ross


