How Do I Quickly Configure a Honeywell Home PROSIXC2W?
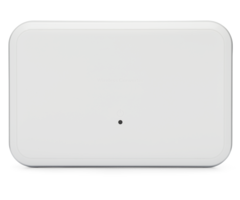
To quickly wire and configure a Honeywell Home PROSIXC2W, connect existing zone wires to zone inputs on the module. Power up and then calibrate the PROSIXC2W. Enter zone programming on the ProSeries panel, then tamper the module. Complete zone programming for all inputs, then exit and test.
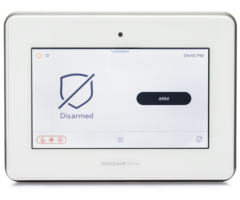
The Honeywell Home PROSIXC2W is compatible with the Honeywell Home PROA7, Honeywell Home PROA7PLUS, Resideo PROA7C, and Resideo PROA7PLUSC. These panels are collectively known as the ProSeries. The difference between the Honeywell Home version and the Resideo version of the almost identical name is purely cosmetic. In terms of features and compatibility, the PROA7 and PROA7C are identical, and the PROA7PLUS and PROA7PLUSC are identical. You can read more about the branding decision for these panels here.
The steps for quickly configuring the Honeywell Home PROSIXC2W shown here assume a couple of things. They assume that you have already mapped which zone wire pairs from the old alarm panel represent which zone numbers and their descriptors. Meaning, you know that the wires connected to terminals 10 and 11 (just as an example) of the old panel are for zone number 2, and that this zone number represents the Front Door.
This mapping is important to make sure that you have every zone from the old panel connected to the new one, and that no zones are left out. It is also necessary to be sure that when you open the front door, after making the switch to the PROSIXC2W, that the panel actually shows it as the Front Door and not something else, like Dining Room Window. If this happens, it represents a problem with the way the module and panel were wired and programmed, not a problem with the equipment itself.
If you have not done this zone mapping yet, it is best to have someone help you. One person can stay at the old panel's keypad while the other person goes around to each zone and faults then restores it. The zone number, and possibly an alphanumeric descriptor, should pop up on the keypad, and the person monitoring the keypad can then make a note as to the zone number, and the description. If the keypad only displays a zone number, the person who is going around to each zone can then provide a description of what that zone is. Then, using the schematic for the old panel, you can determine which wires at the panel go to which zones and you can mark the wires accordingly.
IMPORTANT NOTE: Each zone to be used on the PROSIXC2W must have a resistor properly connected, either in Series for Normally Closed zones or in Parallel for Normally Open ones. The resistor value must be between 1k and 10k in order to be properly calibrated. If the zones on the system being replaced were wired with no End-of-Line Resistors (EOLR) then you will need to add one of the 2.2k resistors that came with the PROSIXC2W to each zone before calibrating.
Once the proper zone wire mapping has been completed, perform these steps to quickly configure a Honeywell Home PROSIXC2W to a ProSeries panel:
-
Power down everything: Be sure that both the existing alarm panel and the PROSIXC2W are completely powered down before you begin wiring. This means you need to unplug both the transformer and the backup battery on each device. If you are unable to find the transformer for the existing panel, you can power down using the circuit breaker instead. Do not disconnect the power wires at the panel, as this can be dangerous.
Below a common transformer for VISTA alarm panels is shown. The transformer may be Tan, or White:
-
Connect the wires: Take each pair of zone wires, which you have hopefully marked, from the existing panel and connect each pair to an input on the PROSIXC2W.
In the wiring diagram below you can see on Z1, GND, and Z2 the typical wiring for burglary zones. These zones are Normally Closed (NC) and the resistor for them is wired in Series. All of the Zone GND terminals on the PROSIXC2W are common to one another, so you can connect the Lo or Negative side of any zone from the old panel to any of these GND terminals. Each Zone Hi or Positive from the old panel can connect to only one of the numbered zone inputs. So for example, the two (2) wires that comprise the first zone input being transferred from the old panel will connect to Z1 and GND on the PROSIXC2W. The two (2) wires for the second zone input will connect to Z2 and GND.
For sensors that require power, such as motions, and glass breaks, a total of two (2) of these sensors can be connected to the 12VDC AUX OUT terminals. This output provides 12VDC @ 100mA. If you need to power more than two (2) devices, you will need to provide power to them from another source, such as a power supply. Any power supply used will need its own transformer and backup battery. Move all wired zone inputs from the old panel to the PROSIXC2W. Each module can support up to eight (8) zones. Multiple modules can be used to accommodate all zones from the old alarm panel.
- Calibrate the module: Once all wiring for a module has been completed, including adding EOLRs if necessary, the module needs to be calibrated. In order to properly calibrate each zone, all zones need to be in their normal, non-faulted condition at the time the Calibration Button is pressed. If a zone is not in the normal state, then the panel won't see it, and will assume that the zone input is not being used. Once all wiring is complete and all zones are secured, press and release the Calibration Button. LED 2 will flash Red for 1/2 second then LED 3 will light steady Green. At this point, the unit is calibrated. If all power is lost to the PROSIXC2W, calibration information is retained.
-
Enter Zone Programming: From the main screen of the panel, or of a Honeywell Home PROWLTOUCH or a Resideo PROWLTOUCHC Touchscreen Keypad, press Menu (≡) > Tools > Installer Code (Default 4112) > Programming > Peripherals > + Key. This puts the panel into Programming, then Zone Programming, and then Learning Mode.
With the panel in Learning Mode, press and release the Tamper Switch on the PROSIXC2W. Wait for the panel to beep twice to indicate it has received the Serial Number/MAC. You should now see the Sensor Edit Page with the Sensor Type as SIX-C2W, and the MAC of the module itself. You will automatically be put into the Edit screen of the first available panel zone and will be programming the first calibrated PROSIXC2W Input.
Zone Descriptor 1, and Zone Descriptor 2: The Zone Descriptor is what the panel will display when it has information about the zone, and also what it will speak, if Voice is enabled. As you click in each of these spaces, begin typing the description you want the zone to have, and the available words that match what you type, as you type it, will appear on the screen. Select the word of your choice and then click "Save".
Device Type: Device Types include Door, Window, Garage Door, Glassbreak, Flood, Motion Sensor, Temperature or Other. Bear in mind when creating the Zone Descriptors that every Device Type above, with the exception of Other, will be spoken and displayed as part of the full Zone Descriptor. This means if you program Zone Descriptor 1 as Front, and Zone Descriptor 2 as Door, and Device Type as Door, the panel will actually speak and display "Front Door Door" each time the zone provides any type of fault or alarm indication for that zone.
Response Type: This entry tells the alarm panel how to treat the zone being programmed. The options you see available in Response Type will depend on the Device Type selected. For example, when Device Type Door is selected, the Response Types you can choose from are Entry Exit 1, Entry Exit 2, Perimeter, or Silent Burglary. Whereas a Device Type of Motion Sensor provides the Response Types of Perimeter, Interior Follower, Day/Night, Interior Delay, and Silent Burglary. For full details on Response Types and how the panel treats each, checkout the Installation and Setup Guide, starting on Page 22.
Supervision: This option is enabled by default and it is recommended that it stay enabled. This tells the panel to let you know if a sensor fails to check in with the panel within a preset amount of time. For the PROSIXC2W, the preset time period is 12 hours.
Alarm Report: If you want the panel to report to a central monitoring station any time this zone causes an alarm, then Alarm Report should be enabled. If not, it should be disabled.
Version: This information is provided to the panel by the PROSIXC2W, and can't be edited.
Chime: Chime will be enabled by default for Entry/Exit and Perimeter zones and can be enabled for some other zone types. In addition, there are ten (10) different chime sounds you can choose from. The Chime Sound will accompany any Chime event. When the panel is disarmed, if a zone has a Chime sound enabled, and the Chime mode is toggled on, a fault on the zone will cause the panel to emit a Chime sound based on your choice here. In addition to this Chime sound, it can also speak the Zone Descriptors and Device Type for the zone when Voice is enabled.
Supervision: The supervision time is set at 720 Minutes (12 Hours) and can't be changed on the PROSIXC2W zones. What this means is, when supervision is enabled, and the panel doesn't hear from this sensor for 12 hours straight, it will indicate a trouble condition for the zone on the panel, and report it to the monitoring station and to the event log, if enabled.
After programming the first calibrated input from the PROSIXC2W, if you have additional inputs from the same module to program, go to the line on the panel programming screen that says "Service" and press "Add" (see screenshot above). This allows you to add an additional input from the same PROSIXC2W Module. You'll see that you are now programming the next available panel zone, with information from the next available calibrated module input. Continue in this way until all inputs from the PROSIXC2W have been programmed. If you have additional hardwired to wireless modules to add, perform these same steps for each module until you have them all configured. - Exit programming: Once all PROSIXC2W modules have been programmed, exit programming by pressing the Left Arrow (<) arrow at the top left of the screen until you automatically exit programming. Be sure to test all converted zones to be sure that they are working properly once configuration has been completed.

Did you find this answer useful?
We offer alarm monitoring as low as $10 / month
Click Here to Learn MoreRelated Products


Related Categories
- Apartment Security Systems
- Home Automation Controllers
- Wireless Touchscreen Alarm Panels
- Small Business Security Systems
- DIY Wireless Security Systems
- Monitored Home Security Systems
- Answered
- Answered By
- Julia Ross


