How do I Set up a Honeywell 6160RF?
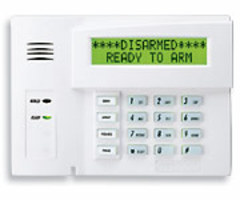
The 6160RF is set up by accessing the circuit board and making the appropriate connections. The 6160RF connects via 4 wires to the keypad bus of Vista panels and uses 2 addresses. One address is used as a 2-line alpha display keypad, and the other address is used as a High capacity 5800 series receiver. In order to connect a 6160RF to a Vista panel, perform the following steps:
- Power down the Vista Panel.
-
Access the 6160RF circuit board. Using a flat blade screw driver, loosen the tabs at the bottom of the keypad. About halfway up on each side will be another locking tab, which will require prying apart. Separate the front and back portions of the keypad.

- Mount the keypad. Determine where you want to mount the keypad. Mount the back plate to the wall, making sure it's level. Drill a hole in the wall through which the keypad wires will pass.
-
Connect wires to the appropriate terminals. Find the terminals on the 6160RF's printed circuit board. Connect one wire to each terminal, following the color code provided.

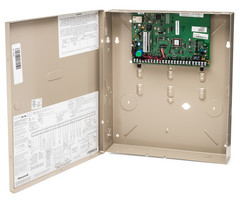
- Connect these wires to the keypad bus. On Vista-15P, 20P, 21iP panels Black goes to terminal 4, Red goes to terminal 5, Green goes to terminal 6, and Yellow goes to terminal 7. On the Vista-128BPT/250BPT, Black goes to terminal 7, Red goes to terminal 6, Green goes to terminal 8, and Yellow goes to terminal 9.
- Reattach the keypad. When reattaching the front and back of the keypad, start by lining it up properly at the top, then press together firmly at the bottom until it snaps into place.
- Address the device. Once connected to the panel, the 6160RF will need to be addressed.
Did you find this answer useful?
We offer alarm monitoring as low as $10 / month
Click Here to Learn MoreRelated Products

Honeywell 6160RF
Alphanumeric Alarm Keypad with Integrated Transceiver
List Price:
$338.00
Our Price:
$236.99

Honeywell VISTA-21iP
Internet Alarm Control Panel

Honeywell VISTA-21iPSIA
Internet Alarm Control Panel
Related Categories
- Answered
- Answered By
- Julia Ross


