How Do You Address a Honeywell Alarm Keypad?
You can address a Honeywell Alarm Keypad through system programming on your Honeywell VISTA System. Before using a Honeywell Alarm Keypad to control a hardwired system, you must set the keypad to a device address that is available and enabled within your Honeywell Security System.

The alarm keypad will come preset with a default address of (31), and it may not show anything on the LCD screen when you wire it to your Honeywell Security System. That does not mean you have a defective alarm keypad. You simply need to address it to a security system device address that supports keypads. Since the Honeywell VISTA-15P, VISTA-20P and VISTA-21iP Security Systems come with device address (16) enabled by default, we recommend that you set your first alarm keypad to address (16).
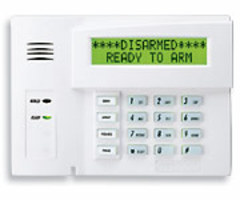
A brand new Honeywell keypad that has never communicated with a control panel before can be addressed at any time by simply holding down the [1] and [3] keys. When the existing address pops up, which by default will be (31), press [0] [0]. You will see the address change to (00). Then enter the intended address. For example, [16]. You will see the address change to (16). Then press the [*] key to confirm the address.
When changing the address for a keypad that has been used before, you must simultaneously press the [1] and [3] keys for (3) seconds within (60) seconds of powering up the keypad. Again, the existing address will appear. Press [00]. Then enter your desired address. If you wait longer than (60) seconds after power up to enter address mode programming, pressing [1] and [3] will simply display the current address without allowing you to change it. You will have to power the alarm keypad down and start the process again.
If you allow (10) seconds to elapse without pressing a new key during device address programming, the alarm keypad will exit address mode. You will then need to start over. Once the address is set and you press the [*] key, your keypad's LCD screen should then show the normal disarmed screen with current panel status.
You can view your programmed keypad address at anytime by pressing [1] and [3] at the same time for (3) seconds. The alarm keypad will display the currently programmed address, but it will not allow you to change it unless you power the keypad down. If you press any key or allow (10) seconds to go by, the keypad address display will go away, and the default screen will be displayed again.
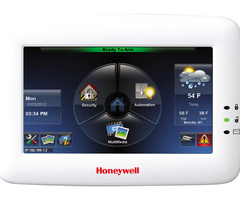
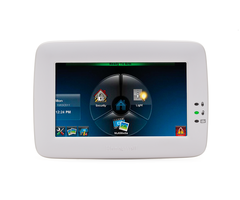
If you are addressing a touchscreen keypad, such as a Honeywell Tuxedo Touch WIFI or a Honeywell 6280 Keypad, then it must be addressed as an AUI (advanced user interface) device. On a Honeywell VISTA-20P or VISTA-21iP, there are four address slots available for AUI devices. These are addresses 1, 2, 5 and 6. By default, addresses 1 and 2 are already enabled. If addresses 5 and 6 are being used, they must be enabled through programming field [*189].
The touchscreen AUI keypad must be assigned to the proper address. This is based on which partition it is meant to control by default. You can set the device's physical address by following the below steps from the Home screen:
Press Setup > System Setup
> CS Setup
> enter your Installer Code (default 4140 or 4112) > ECP Address
> Select the ECP Address using the up and down arrows.
Please note that a working AUI will use the same Installer Code as the panel, with the default being 4112. An AUI showing ECP Error will use the default Installer Code of 4140, which is the default Installer code for a Tuxedo Touch or 6280 Keypad.
Valid addresses for the AUI keypad on the Vista-20P and Vista-21iP are 1, 2, 5 or 6. Once you have set the correct address, save your changes. Then press the Home Icon to return to the home screen.
Please note that the Total Connect 2.0 service must be enabled as one of the four available AUI devices. By default, it is set to address 2. But it can be changed if necessary. For this reason, any Vista-20P or Vista-21iP System using Total Connect 2.0 can support no more than three actual AUI keypads. Keep that in mind when planning your system. Also note that a VISTA-15P only has two available AUI addresses (1 and 2), and both are enabled by default. On these panels, when Total Connect 2.0 is enabled, only one actual AUI keypad can be supported by the system.
When configuring the AUI device addresses on the panel, you will set all four in a sequence. After entering into the [*189] menu, you will set the four options simultaneously. First you will set the option for address 1, then address 2, then address 5, and lastly address 6. Once you enter your option, you will be taken to the next option automatically. Entering 0 will disable the current AUI device address. Entering 1 will enable the current AUI device address slot for partition 1. Entering 2 will enable the current AUI device address slot for partition 2. Entering 5 will enable the AUI device address slot for use with Total Connect 2.0 (assigned to partition 1 with auto-stay arming disabled).
For example, if you wanted address 1 for a Tuxedo Touch on partition 1, address 2 for TC2, address 5 for a Tuxedo Touch on partition 2 and address 6 disabled entirely, you would enter in the following command:
[Installer Code] + [8] + [00] + [*] + [189] + [1] + [5] + [2] + [0] + [*] + [99].
In that case the 1 is enabling address 1 on partition 1, the 5 is enabling address 2 for TC2 on partition 1, the 2 is enabling address 5 on partition 2, and the 0 is disabling address 6. Please note that the default Installer Code for a Honeywell VISTA is 4112.
NOTE: The reason Honeywell keypads default to address (31) is that older residential Honeywell security systems were "non-addressable", and all keypads on those systems used address (31) to operate properly. For those systems, a new keypad out of the box worked when hooked up, with no addressing required. If you have an older Honeywell System such as the 4110XM, Vista-20SE, Vista-10SE, or Vista-15, it will actually use address (31) for all keypads. The default address in a new keypad would not need to be changed.
Did you find this answer useful?
We offer alarm monitoring as low as $10 / month
Click Here to Learn MoreRelated Products

Related Videos
Related Categories
- Answered


