How Do I Enroll My PowerG Wireless Sensor?
You can enroll your PowerG Wireless Sensor by putting your panel into its wireless enrollment mode and then activating the enrollment function on the PowerG Sensor. Your panel should recognize the transmission and allow you to enroll the device. You must then configure the zone settings.
Most PowerG Sensors have an enrollment function that is activated in one of two ways. Many PowerG Sensors will auto-enroll by simply inserting fresh batteries to power them on. If the sensor is brand-new, it will likely have a removable battery tab for this purpose. Other PowerG Sensors have an enrollment button that must be pressed and held until the LED light is a solid color. Either way, the panel should recognize the transmission so that you can auto-enroll the sensor. The last step will be to adjust the zone settings. Remember that you will need to put your panel into its auto-enrollment mode for this to work.
Really, enrolling a PowerG Wireless Sensor can be broken down into the following three (3) steps:
1. Enter panel enrollment mode. Put your panel into its auto-enrollment mode for learning in new wireless devices. This process will vary depending on the panel you are using. Check the installation manual for your panel for more information. Note that if you have a Qolsys IQ Panel 2 Plus, you can do this by clicking the small grey bar at the top of the screen, and choosing Setitngs > Advanced Settings > enter Installer Code (default 1111) > Installation > Devices > Security Devices > Auto-Learn Sensor.
2. Activate sensor enrollment function. Activate the enrollment function on your PowerG Sensor. This is usually done in one of two ways. Some PowerG Sensors auto-enroll by inserting fresh batteries or removing the battery tab if the sensor is brand-new. Other sensors auto-enroll by pressing and holding a device enrollment button while the sensor is powered on. The panel should recognize the transmission and allow you to proceed with auto-enrollment.
3. Configure the zone settings. Adjust the zone settings so that the system responds the way you want it to when the sensor is activated. You can then save your changes and return to the main system menu.
The process for activating the enrollment function for a PowerG Sensor will vary between different devices. Below we have outlined the process for most PowerG Sensors. Keep in mind that this represents Step 2 in the process above. You must activate the enrollment function while the panel is in its enrollment mode in order for the device to auto-enroll. Only then can you configure the zone settings.
DSC PG9303 Door/Window Contact 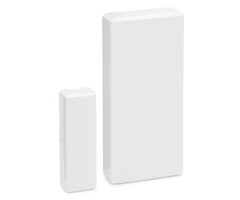
Device will enter its auto-enrollment mode upon powering on by inserting fresh batteries or by removing battery tab.
Device will enter its auto-enrollment mode upon powering on by inserting fresh batteries or by removing battery tab.
DSC PG9312 Outdoor Door/Window Contact 
Device will enter its auto-enrollment mode upon powering on by inserting fresh batteries or by removing battery tab.
DSC PG9862 Ceiling-Mount Motion Sensor 
Device will enter its auto-enrollment mode upon powering on by inserting fresh batteries or by removing battery tab.
Open up device. With fresh batteries inserted, press and hold its enrollment button until the LED light remains steady. Release the enrollment button to auto-enroll.

DSC PG9904P Pet Friendly Motion Sensor 
Open up device. With fresh batteries inserted, press and hold its enrollment button until the LED light remains steady. Release the enrollment button to auto-enroll.
Note: Enrollment button is inside device on main board.
DSC PG9905 Temperature Detector 
Open up device. With fresh batteries inserted, press and hold its enrollment button until the LED light remains steady. Release the enrollment button to auto-enroll.

Open up device. With fresh batteries inserted, press and hold its enrollment button until the LED light remains steady. Release the enrollment button to auto-enroll.

DSC PG9913 Carbon Monoxide Detector 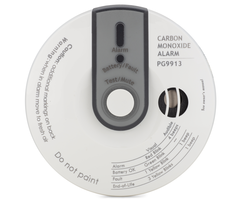
Device will enter its auto-enrollment mode upon powering on by inserting fresh batteries or by removing battery tab.
Open up device. With fresh batteries inserted, press and hold its enrollment button until the orange LED light remains steady. Release the enrollment button to auto-enroll. 
DSC PG9916 Smoke & Heat Detector 
Open up device. With fresh batteries inserted, press and hold its recessed enrollment button until the LED light remains steady. Release the enrollment button to auto-enroll.
DSC PG9920 PowerG Wireless Repeater 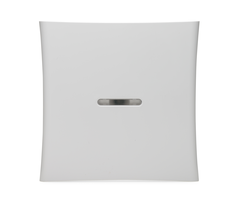
Open up device. With fresh batteries inserted, press and hold its enrollment button until the red and green LED lights remain steady. Release the enrollment button to auto-enroll.

DSC PG9922 Glass Break Detector 
Open up device. With fresh batteries inserted, press and hold its enrollment button until the LED light remains steady. Release the enrollment button to auto-enroll.

DSC PG9924 Curtain Motion Detector 
Open up device. With fresh batteries inserted, press and hold its enrollment button until the LED light remains steady. Release the enrollment button to auto-enroll.

DSC PG9926 Wireless Smoke Detector 
Open up device. With fresh batteries inserted, press and hold its enrollment button until the LED light remains steady. Release the enrollment button to auto-enroll.

DSC PG9929 Slimline 4-Button Key Fob 
With fresh batteries inserted, press and hold the [*] button on the key fob until the LED light remains steady. Release the [*] button to auto-enroll.
DSC PG9933 Carbon Monoxide Detector 
Device will enter its auto-enrollment mode upon powering on by inserting fresh batteries or by removing battery tab.
DSC PG9934P PIR Motion Detector w/ Camera 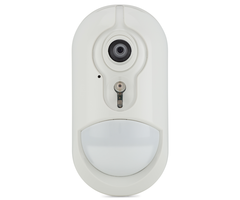
Open up device. With fresh batteries inserted, press and hold its enrollment button until the LED light remains steady. Release the enrollment button to auto-enroll.

Open up device. With fresh batteries inserted, press and hold its enrollment button until the LED light remains steady. Release the enrollment button to auto-enroll.

DSC PG9936 Smoke & Heat Detector 
Device will enter its auto-enrollment mode upon powering on by inserting fresh batteries or by removing battery tab.
With fresh batteries inserted, press and hold the main button on the device until the LED light remains steady. Release the button to auto-enroll.
DSC PG9939 Wireless 4-Button Key Fob 
With fresh batteries inserted, press and hold the [*] button on the key fob until the LED light remain steady. Release the [*] button to auto-enroll.
DSC PG9944 Outdoor PIR Motion Detector w/ Camera 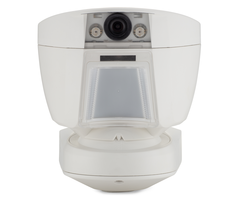
Open up device. With fresh batteries inserted, press and hold its enrollment button until the LED light remains steady. Release the enrollment button to auto-enroll.
DSC PG9945 Door/Window Contact 
Open up device. With fresh batteries inserted, press and hold its enrollment button until the LED light remains steady. Release the enrollment button to auto-enroll.

DSC PG9949 Wireless 2-Button Key Fob 
With fresh batteries inserted, press and hold the disarm (unlock) button until the LED remains steady. Release the disarm (unlock) button to auto-enroll.
DSC PG9974P Mirror Pet Friendly Motion Detector 
Open up the device. With fresh batteries inserted, press and hold its enrollment button until the LED light remains steady. Release the enrollment button to auto-enroll.

DSC PG9975 Vanishing Door/Window Contact 
Open up device. With fresh batteries inserted, press and hold its enrollment button until the LED light remains steady. Release the enrollment button to auto-enroll.

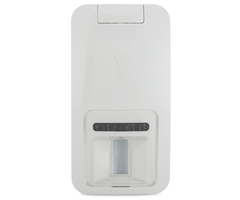 DSC PG9984P Dual Tech Motion Detector w/ Pet Immunity
Open up device. With fresh batteries inserted, press and hold its enrollment button until the LED light remains steady. Release the enrollment button to auto-enroll.

Open up device. With fresh batteries inserted, press and hold its enrollment button until the LED light remains steady. Release the enrollment button to auto-enroll.

DSC PG9994 Outdoor Motion Detector 
Open up device. With fresh batteries inserted, press and hold its enrollment button until the LED light remains steady. Release the enrollment button to auto-enroll.
Did you find this answer useful?
We offer alarm monitoring as low as $10 / month
Click Here to Learn MoreRelated Products


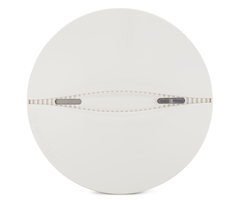
Related Videos
Related Categories
- PowerG Control Panels
- PowerG Glassbreak Detectors
- PowerG Repeaters
- PowerG Products
- PowerG Prox Tags
- PowerG Outdoor Motion Sensors
- PowerG Flood Sensors
- PowerG Door & Window Security Sensors
- PowerG Door Alarm Sensor
- PowerG Motion Sensors
- PowerG Curtain Motion Sensors
- PowerG Smoke Detectors
- PowerG Heat Detectors
- PowerG Carbon Monoxide Detectors
- PowerG Environmental Sensors
- PowerG Pet Friendly Motion Sensors
- PowerG PIR Motion Sensors
- PowerG Image Sensors
- PowerG Sirens
- PowerG Shock Sensors
- PowerG Key Fobs
- PowerG Panic Buttons
- PowerG Medical Alert Buttons
- PowerG Under the Desk Panic Buttons
- PowerG Temperature Sensors
- Answered


