Adding a Qolsys IQ Panel 2 to My Local WIFI
Related Products


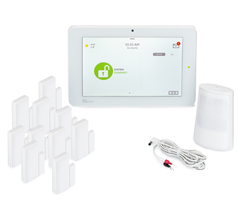
Description
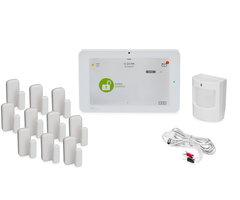
In this video, Jorge from Alarm Grid teaches you how to pair a Qolsys IQ Panel 2 System to a local WIFI network. This is important if you want your IQ Panel 2 Alarm System to connect with Alarm.com through a WIFI network. Keep in mind that that you must still activate the panel for cellular service.
The Qolsys IQ Panel 2 System is dual-path ready right out of the box. This is because the system has both a built-in WIFI card and a cellular communicator (AT&T LTE or Verizon LTE). In order to use the system with Alarm.com, you must activate the cellular communicator for monitoring service. This will require signing up for a monitoring plan that includes cellular communication. Activating the WIFI portion of the system is actually optional. However, you may as well do it, since most monitoring plans that include cellular will also include IP connectivity at no extra charge. Alarm Grid customers will need a Gold or Platinum Level Monitoring Plan to activate for cellular service.
When an IQ Panel 2 System is connected across both WIFI and cellular, it will send out signals across both paths. Whichever signal reaches the intended destination first will go through, while the other will be automatically discarded. Normally, WIFI will reach the intended location first. This is because WIFI service is normally a little bit faster than cellular. But cellular is more reliable, and it is very good to have in situations where the internet is down or unavailable. Still, the best case scenario is to always have both cellular and IP available. There may be some rare situations where the internet connection is the only available communication path. And it never hurts to have the extra speed of WIFI connectivity. As long as you have WIFI set up in your home or business, you should have no problem getting your IQ Panel 2 System connected to a local IP network.
https://www.alarmgrid.com/faq/how-do-i-add-a-qolsys-iq-panel-2-to-my-local-wifi
http://alrm.gd/get-monitored
Transcript
[ZING] [THUD] [CLICK] Hi, DIYers. I'm Jorge from Alarm Grid. Today I'm going to be showing you guys how to add your IQ 2, or in my case the IQ 2+, to your local Wi-Fi. Now a lot of you may be wondering, wait, but what if I have the IQ 2 and not the IQ 2+ or vice versa? Well, they're exactly the same panel, so what you're going to see me do here today on this panel is going to be the exact same process, whether or not you have one panel or the other. It is exactly the same panel. The only difference is that the IQ 2+ has the PowerG [INAUDIBLE] built into it and the IQ 2 does not. All right? Now first thing I want to go ahead and touch base on is that the IQ 2's or the IQ 2+'s do come with Wi-Fi built in, and they come with either an AT&T or Verizon cellular card built in. It depends what flavor you get. Now the one thing that's very important is when you guys go to activate your alarm system, if this is something that you guys are interested in doing, you cannot activate the system on a Wi-Fi-only plan. Alarm.com only allows you to activate your alarm system on cellular, all right? Now what this means for you people out there, if you guys are looking at a company that offers Wi-Fi only-based plans, you'll see that the pricing is a lot less because cellular is extra. And the monitoring companies or the alarm companies like ourselves, we have to pay for those cellular fees. So if you guys have an IQ 2 or an IQ 2+, it uses Alarm,com service. And because it uses Alarm.com service, we cannot activate on a Wi-Fi only. Cellular has to be enabled on the plan, which means your monitoring prices are always going to be a little bit higher than those who use Wi-Fi-only systems such as the Honeywell System or [INAUDIBLE] systems. Now one thing that I will go in and start getting into is you see here my IQ 2+ actually says, your IQ panel is disconnected from Wi-Fi. Please check your Wi-Fi/Network Configuration. Now this may or may not be coming up on your screen. If it is, just go ahead and tap on it. Now adding the IQ 2 or the IQ 2+ to your Wi-Fi is actually very easily done. You basically add it just like you do any other device, your cell phone, gaming consoles, laptops, tablets, whatever you guys have ever hooked up to your Wi-Fi. You're familiar with the process where you have to search for the network, click the network, enter in your password, click the Connect button, and then it'll let you know whether or not you entered in the password correctly or not and if it's successfully joined. So to do that, we do need to go into the Advanced Settings menu on the IQ 2+. So if you have a new IQ 2 or an IQ 2+, you're just going to need your dealer code or your installer code. The installer code is usually 1111, and the dealer code is usually 2222. If you have either one of these, then you're in perfectly good shape. You can connect it to your Wi-Fi. Keep in mind some companies do change the codes on you, so you want to make sure that you know your codes, all right? So to go into Advanced Settings, I'm going to hit the little gray bar at the very top. You can either slide down or just press it. After you press it, you're going to hit Settings on the far left. You'll notice here it says, no Wi-Fi access. Please check your Wi-Fi or router connection. I'm just going to hit OK. I am aware that my panel is not connected to the Wi-Fi, and I'm actually showing you guys how to connect it right now. So after you're in this main menu here, you're going to go to Advanced Settings, bottom right-hand corner. Enter User Code. It's going to ask you to enter in the user code. You need to enter in your installer or dealer code. Remember my panel's defaulted. So I have the default codes. I'm going to use one 1111, but you could also use 2222 if your panel is defaulted. If your codes have been changed, you need to use the correct codes. Once you enter in your code, whether it's the dealer or installer code, you're going to see a couple of different options come up on the screen here. It's very simple. You're pairing to Wi-Fi, so the button you want to go ahead and click on will be the Wi-Fi button. Yes? Qolsys makes it very easy for you guys to connect your panel and to do stuff-- program, connect, add Z-Wave devices. They make it very easy, very straightforward. And as you can see here, my Wi-Fi is enabled. Sorry. Let me go to hit that. Now if you are not seeing anything in the list, first of all, make sure that where it says, activate Wi-Fi right here up at the very top, if you look to the far right, there's a little box. Mine is checked. If I uncheck that box, you will see no Wi-Fi networks available. And it'll actually let you know. To see available networks, turn the Wi-Fi on. So if you uncheck that box or if your box is not checked, then that means that the Wi-Fi is currently disabled. You need it go ahead make sure is a checkmark in this far-right box. It'll say, turning Wi-Fi on. It will say, searching for networks. And then I have a whole bunch of networks available. You can go ahead and scroll up or down. Now the IQ 2+, some panels out there, if you've ever had an alarm system and you recently moved or anything like that, you'll notice that the IQ 2+, depending on your router, will actually pick up on your 5.0 gigahertz and 2.4 gigahertz Wi-Fi frequency, all right? You can use whichever one. Normally, if your system is far away from the router, you want to use 2.4 gigahertz frequency, as that's better for longer-range Wi-Fi connection. And then if your panel is literally right next to your router, you should use the 5.0 gigahertz connection, because that's better whenever you're closer to the router, all right? So right now I'm going to connect to my Wi-Fi network. So I'm going to click Alarm Grid. And then it's going to ask you to enter in your password. So I'm going to go ahead and enter in my password. Now for the password, if you're not sure if you made a mistake or not, you can hit Show password and it will actually show you everything you've typed. Now I'm not going to hit Show password. I don't want you guys to see my Wi-Fi password. But in the event that you guys think you may have made a typo, you can always go ahead and hit Show password and you'll be able to see whether or not you typed in your password correctly. Now after you typed in your password, all you'll have to do is hit Connect. And if you entered in the password correctly, it'll say Connected underneath the Wi-Fi network. Once you have connected to the Wi-Fi network, you can just hit the Home button. Now one little option I also want to show you guys, you can also pair it using the WPS button. So if you guys have a WPS button on your router, you guys can just hit that WPS Push button, press it then on your router, and it pairs automatically like that. They'll handshake. They'll connect. So there's different ways that you can connect to the Wi-Fi. This was just the simplest way here. And like I said, once you finish connecting to your Wi-Fi, just hit the House button and it'll bring you out to the main screen. All right? So if you guys have any questions at all about connecting your IQ 2 or your IQ 2+ to a Wi-Fi network, please feel free to contact us at support@alarmgrid.com. If you found the video hopeful, make sure you hit Like underneath, subscribe to the YouTube channel, and hit the little bell icon so whenever we upload new content, you guys get notified. Thank you and I'll see you guys next time.
- Uploaded

