Alarm Grid Video Recap: June 25th - July 2nd
Posted By Michael GorisWelcome back from 4th of July! We have had a busy past couple of weeks at Alarm Grid since our last video recap. This time, we have seven (7) new videos to show you, including five (5) with Jorge and two with myself. We cover the PROA7PLUS, 2GIG Edge Cameras, and 2GIG GC2 Firmware Updates!
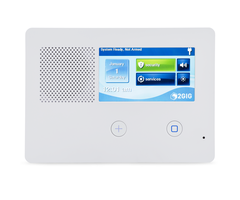
2GIG Edge: Alarm.com Cameras that Support Live Streaming
Jorge explains which Alarm.com Security Cameras can be streamed directly to a 2GIG Edge Alarm Panel. Most of the newer Alarm.com Cameras can be used in this way. In order for this to work, a camera must be paired with the same Alarm.com account used with the 2GIG Edge, and it must be enabled for panel streaming from the Alarm.com website or mobile app. Cameras can be streamed from the Smart Home Menu on the 2GIG Edge.
2GIG Edge: Alarm.com Cameras that Support 2-Way Audio via Live-Streaming
Jorge teaches users about two-way audio playback when live-streaming security cameras on the 2GIG Edge. While nearly all Alarm.com Cameras can be used for video streaming on the 2GIG Edge, only a smaller selection of cameras can be used for live audio streaming. Really, it's mostly the indoor residential cameras that do audio streaming. Most of the Alarm.com Commercial Cameras that support Power over Ethernet (PoE) and all Alarm.com Outdoor Cameras do not support two-way audio, as they typically do not have built-in microphones.
2GIG Easy Updater Tool: Updating
Jorge explains how to update the 2GIG UPDV Easy Updater Tool that is used to update the firmware on a 2GIG Go!Control GC2 Security System. The Easy Updater Tool contains the firmware update for the GC2 System. If the firmware on the Updater Tool is outdated, then you must update the Updater Tool by following the process outlined in this video. The current downloaded firmware on the Updater Tool will be displayed across the device screen when power is applied. This will let you know if you need to updater the Updater Tool.
2GIG GC2: Updating Using the Easy Updater Tool
Jorge teaches you how to use the 2GIG UPDV Easy Updater Tool to update the firmware on a 2GIG Go!Control GC2 Alarm Panel. After you have updated the firmware on the Updater Tool itself, you can then use the device to update the firmware on the GC2 Panel. Updating to the latest firmware version will ensure that you can use all of the released features for the system and that all of the latest hardware is supported. The LTE communicators for activating with Alarm.com and alarm monitoring will require a certain firmware version.
Honeywell Home PROA7PLUS: Delete a Zone
Jorge shows you how to delete a zone on a Honeywell Home PROA7PLUS or other ProSeries Alarm System. When you delete a zone, the associated sensor will no longer be programmed with the system. You would need to re-enroll it in order to continue using it. For the encrypted PROSIX Sensors and SiX Sensors, after deleting the sensor, you will then be able to enroll it with a new ProSeries Panel, provided that the sensor received the deletion signal from the panel. When deleting PROSIX and SiX Sensors, be sure the sensor is powered on and within range of the ProSeries Panel at the time of deletion.
Honeywell Home PROA7PLUS: Add a User Code
I show you how to add a new user code to a Honeywell Home PROA7PLUS Alarm System or other ProSeries Panel. All of the ProSeries Systems support up to (96) total user codes, so you should have no trouble giving everyone in your household or office their very own code to use when controlling the system. After you have added a user code, you can then go back into user settings to configure automatic Bluetooth disarming and Z-Wave lock functionality for the user.
Honeywell Home PROA7PLUS: Clear a Tamper Error
I show you how to clear a tamper error on a Honeywell Home PROA7PLUS or other ProSeries Security Controller. A tamper error occurs when the red tamper button on the back of the ProSeries Controller isn't held down properly. This is usually because the system has been taken off its backplate, or it isn't mounted on its backplate properly. Once you get the panel back on the backplate, you can then acknowledge the tamper condition by entering the system's Master Code when prompted.

