June 2022 Archives

Posted By

The Resideo LTEM-PA and LTEM-PV are dual-path capable communicators that use the LTE Cat-M1 network. During the global chip shortage, these radios have come to prominence because of their availability in the absence of other LTE communicators. They provide nearly the same speed as LTE comms.

Another feature that differentiates the LTEM-PA and LTEM-PV from other communicators is their modular design. These radios are considered a part of the ProSeries lineup, which includes the Honeywell Home PROA7 and PROA7PLUS and the Resideo PROA7C and PROA7PLUSC. The reason for this is that many of the add-on modules that can be used with the ProSeries panels can also be used with the LTEM-P communicators. Including the PROWIFI or PROWIFIZW, the PROLTE-A or PROLTE-V, and the PRODCM.

The LTEM-P Series communicators support an ethernet connection, but if you find yourself in a situation where a wired connection is not possible, then you can install the PROWIFI or PROWFIZW, which will give you WIFI, or WIFI and Z-Wave Plus capabilities. The ability to add a modular cellular unit is exciting as it allows you to install a separate LTE communicator to use instead of the built-in LTE Cat-M1 communicator. This will come in handy if you purchase an AT&T LTEM-PA, but find out later that Verizon would provide a better signal in this particular installation. Also, far in the future, when LTE is eventually phased out, whatever takes its place can easily be installed in the unit, rather than having to replace the entire communicator.

The PRODCM is a dialer-capture module. It allows the LTEM-P Series communicator to work with an alarm panel that has a built-in dialer and can report using Contact ID Format. The PRODCM installs inside a slot in the LTEM-P Series communicator, then two wires are connected between it and the Tip and Ring terminals on the alarm panel. The panel believe's it is dialing out over a phone line, but the module captures the signal, and transmits it via IP, or Cellular. Many of these add-on modules are also compatible with the ProSeries panels, which is why the LTEM-P Series are considered a part of the ProSeries lineup.

Tip 1: Power Wiring

The LTEM-PA and LTEM-PV come with a 9VDC power supply. Depending on the communicator you may be replacing there could be an existing AC Transformer in place. Do not make the mistake of trying to use the existing transformer. You have two (2) options when it comes to powering the LTEM-PA or LTEM-PV. You can use the included power supply, making sure to observe proper polarity with the power wires, or you can wire it so that the communicator receives all its power from the alarm panel. If you choose the latter option, be sure to calculate the current draw for the communicator correctly, and if you decide to leave the battery out of the LTEM-P Series device, turn off the radio's Low Battery Reporting.

Tip 2: Installing A WIFI Module

If you want to add support for WIFI to your LTEM-P module, you can add the PROWIFI module. When the PROWIFI module is installed, the ethernet connection becomes unavailable, so you can only use one or the other of these, but not both. If you want to add both WIFI and Z-Wave Plus capabilities to your system, then you can choose to install the PROWIFIZW.

Using the PROWIFIZW can add Z-Wave support in a situation where it would otherwise be unavailable, such as when using the LTEM-P with a non-VISTA panel. The PROWIFIZW cannot be used as a secondary controller, so it can't be used to extend the range of another controller such as the Tuxedo or VAM. Using the PROWIFIZW also doesn't give you an option to create scenes through Total Connect 2.0, only manual control of Z-Wave devices is available.

Tip 3: Always Default the Communicator

We've found, through painful experience, that it is a good idea to always default the LTEM-PA or LTEM-PV once all the wiring is completed, prior to account creation and activation. To default, hold down the red button on the upper right side of the main communicator board for at least 20 Seconds. The LEDs on the communicator should begin going through their initial power-on sequence. This is how you can tell the default has completed.

Once the communicator has booted completely up, then do one last power cycle. Do this by unplugging the transformer and disconnecting the red battery lead. If the communicator is being powered completely by the panel, simply power the panel down and back up by unplugging its transformer and backup battery. If the communicator battery is still connected though, be sure to disconnect this battery as well to completely power the communicator off. Wait about 30 seconds, then power back on as you normally would. For VISTA panels, plug in the transformer, then the battery. If the communicator has its own DC Power Supply, plug in the communicator battery, then plug in the power supply. Now you can proceed with programming and activation.

Tags: , , , , , , , , , , , , , , , , , , , , , , , ,

Comments


Posted By

Resideo has reported that Verizon cellular communicators may experience issues connecting to Total Connect 2.0, issues with commands taking longer than usual to process, or failing completely. This is due to an SMS issue with the carrier which began at 11:00 pm Monday night.

As of this writing, the issue is ongoing and could last for some time. Only Verizon cellular communicators are affected, AT&T communicators and dual-path communicators where the IP path is present are not affected. This issue does not affect the Verizon cellular communicator's ability to send alarm signals!

If you have a Verizon communicator and are experiencing issues with Total Connect 2.0, please be patient. Verizon is aware of the issue, and they are working to correct it. At this time, only Resideo has reported an issue with Verizon communicators. If that changes, we will let you know.

Tags: , , , , ,

Comments


Posted By

Resideo and Honeywell Home, formerly Honeywell, released an announcement last week that they will change their date code format from a YDDD (Year, Day of the year) format, to use YYWW (Year, Week of the year). This is being done, ostensibly, to simplify the decoding of date codes for users.

Product date codes are important for determining whether a product is still under warranty, as well as whether it may be affected by a particular anomaly that may have occurred because of an issue in the manufacturing process. For Carbon Monoxide detectors, which always have a finite useful life, the manufacturing date code is important to help determine when a CO detector needs to be replaced, particularly if the detector doesn't include a feature to warn a user when its useful life is coming to an end. For all these reasons, it's important to be able to decode a date code.

Going all the way back to the Ademco days, Resideo products have used a date code where a letter signified the Year of manufacture, and a 3-digit number signified the day of manufacture. For example, 2022 has been signified by the letter F, so a date code of F159 would indicate a product was manufactured on the 159th day of 2022, or June 8. Calendars can be downloaded from the internet with all the days of the year enumerated.

Of course, this date code scheme has advantages and disadvantages. The letter used to signify each year can seem somewhat arbitrary, and at some point, letters must begin to be repeated. So, with a very long-lived product line, there could be some confusion as to whether a particular letter indicates the older or newer iteration of that letter for that product. The advantage of this format is that you know exactly which day a product was manufactured, and exactly which day it was packaged (packaging has its own date code, which follows the same format). This information can be helpful when determining a manufacturing issue.

Starting this month, June 2022, Resideo will standardize on a new Date Code format. In this format, containing four (4) digits, the first two (2) digits will indicate the year of manufacture, and the last two (2) digits will indicate the week of that year (YYWW). This will simplify things, as no one will have to look up or figure out which year goes with which letter, but it also doesn't supply quite as detailed an accounting of when a product was manufactured or packaged as the old format did. Packaging date codes will also be making the switch.

Below are some examples of the new Date Code, in these examples, the Date Codes are all 2223, indicating they were manufactured the 23rd week of 2022:


Tags: , , , , , , ,

Comments


Posted By

Effective in August of 2022, Alarm.com is ending sales of Alarm.Com Image Sensors (ADC-IS-220-GC and ADC-IS-300-LP). Alarm Grid has already discontinued these sensors due to the fact that they are in short supply, and no more of them will be produced. Only the Honeywell Home PROINDMV remains.

The 2GIG IMAGE3:


There was some overlap between the Alarm.com Image Sensor models, and the 2GIG and Qolsys Image Sensor models. I have confirmed with Alarm.com that the 2GIG and Qolsys models are also discontinued as of August, 2022. Currently, the only Image Sensors being offered by Alarm Grid are the DSC PowerG and Honeywell Home PROINDMV models which are discussed in more detail below.

Image sensors were a great idea that never really took off. The original image sensors, first offered by 2GIG and Alarm.com, did not have particularly good resolution or picture quality, which is probably one reason they weren't widely adopted by the DIY crowd. By the time the 2nd generation of these sensors came around, people were prepared to simply go with full-on video monitoring or to avoid capturing images altogether.

Both the second and third-generation image sensors that were offered by 2GIG, Qolsys, and Alarm.com had very good image quality. Combine that with Alarm Grid's policy of offering monitoring for image sensors without an additional price markup, and the image sensor was a viable alternative to the use of video cameras. An Alarm.com user could log into their account and perform a "peek-in", meaning they could request that a particular image sensor grab a picture of whatever it was able to see at that moment, and the image (actually two (2) images) would then be uploaded to the customer's alarm.com account for viewing. The sensor could also take images upon sensing motion after a particular period of inactivity, or upon an alarm. For full details on image sensor features and operation, check out this prior post.

DSC offers a couple of PowerG PIR Cameras that will work with the Qolsys IQ Panel 2 and IQ Panel 4 in addition to the DSC PowerSeries Neo panels with a PowerG Transceiver added. These are the DSC PG9934P, Indoor PIR Camera, and the DSC PG9944, Outdoor PIR Camera. These sensors work like any other PowerG Sensor with the Qolsys Panels. They can only capture images when the system is armed and the image sensor is active (not bypassed). They send their images to the panel, and then the first image is uploaded to Alarm.com. A total of ten (10) images are taken, and these images are stitched together by the panel into a sort of stop-motion video where each image can also be viewed individually. This is done via the panel screen itself. When used with the PowerSeries Neo panels, the DSC PIR Cameras can be used for Visual Verification only, they do NOT work like a regular image sensor with Alarm.com.

DSC PG9934P, Indoor Image Sensor:

DSC PG9944, Outdoor Image Sensor:


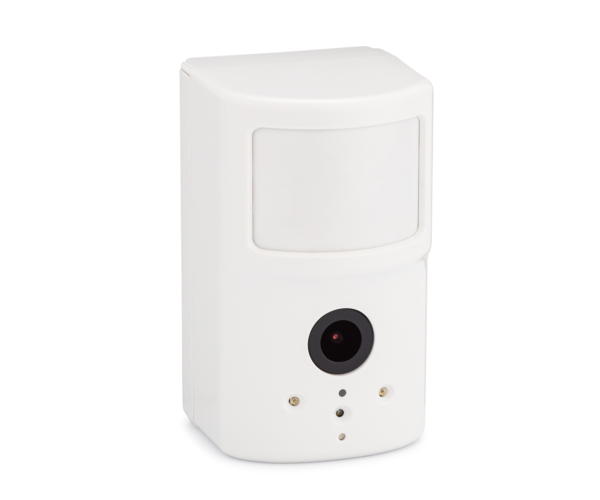
The Honeywell Home PROINDMV is a wireless PIR motion sensor with a camera built-in, just like the 2GIG, Qolsys, and Alarm.com image sensors were. The PROINDMV is currently only supported on the Resideo PROA7PLUSC, and Honeywell Home PROA7PLUS panels. There is no "peek-in" option for these image sensors. They can only capture images when they sense motion while the system is armed in Away mode. Images or videos are captured and uploaded to Total Connect 2.0 for viewing. The user can choose to receive either a still image or a 10-second video clip. You can read their full details of operation in our previous post.

Honeywell Home PROINDMV:


It seems like the era of the image sensor may be coming to a close, at least for now. Who knows, once we're through the global chip shortage, and the availability of components is back to normal, perhaps the humble image sensor will experience a revival. If so, DIYers may want to consider giving these sensors a try. They really are an excellent idea. They can be used for alarm verification in this age of increasing police resistance to alarm response, and they are cheaper, both initially and on an ongoing month-to-month basis, than video cameras.


Tags: , , , , , , , , , , , , , , , , , , , , , ,

Comments


Posted By

Corporate surveillance is on the rise. Including in the home security industry. Whereas the industry used to be dominated by local ma' and pa' shops who couldn't care less about what you're doing and why, the introduction of megacorps into the industry have changed the landscape entirely. We know that Google and Amazon in particular, but many others as well, are deeply interested in everything you do. They want as much of your social graph as possible so that they can feed you relevant ads or sell your data to brokers who can monetize it in other ways. In fact, most of the companies we interact with on a daily basis are not particularly good at keeping your information out of the hands of people who want to buy it. It makes sense when you realize that sharing your data is essentially a consequence free (to the sellers), cash-making enterprise. But for you, the consequences can be incredibly invasive, frustrating, and even a bit scary.

Enter the rise of OPSEC. OPSEC is shorthand for Operational Security. For the OPSEC-curious, you'll know that the field is deep and wide, and, for the most part, it adds large inconveniences to the lives of those who practice it. For the uninitiated, let me define it. OPSEC is, more or less, the practice of being as private as possible. The goal of OPSEC is to be less leaky data-wise. This can encompass a whole set of complicated digital practices from installing privacy operating systems on your phones to using browsers you've never heard of, to configuring your computer's display settings, to literally running your own search engine. And, depending on the depth of your practice, it can leak into the real world. It is absurdly complicated to live a normal life that looks off-the-grid to corporations but on-the-grid to your friends.

As a Bitcoin enthusiast myself, I have taken a strong interest in OPSEC. And the inspiration for this article is a combination of things. Timing-wise, I'm writing it now, because I came across an article on page 9 of the 1st edition of "Unredacted" Magazine entitled, "I Installed Your Alarm System."

The article is a scary diary entry of a rogue installer that logs into an account and watches his customers video cameras. He obliquely explains how he does it. The reality is, traditional monitoring is rife with security problems, which can be a problem if you don't trust your company. Even if you trust them, the information leak is considerable. So I thought, I might write a guide that will allow you to leak as little data as possible.

1) Sign Up for Alarm Grid monitoring Using SimpleLogin

This service allows you to maintain some privacy with regard to your email. It disambiguates your email from your person, allowing you to pick a single email address for each service you sign up for. Or, you can use it in any other way you'd like. I, personally, use it so that no one can create a personal profile of me based on my email address. I recommend you sign up with Alarm Grid because, well, this is Alarm Grid. I also know the practices of my company. We have no interest in monetizing your data. How can you know that to be true? You can't. But take the hint here. I'm telling you how to buy an account anonymously. Trust me on this. We don't care about your data.

2) Pay for the monitoring service using Privacy.com

Privacy.com is a wonderful service that will disambiguate your identity from the card you use. You can pick any name, address, zip code, expiration date, etc, and sign up for monitoring. If you're in Alaska, but you want to tell us you're in Oklahoma, Privacy.com prevents us from finding out.

3) Sign up for any of our accounts

If you follow these practices, you can actually sign up for monitoring of any type and be anonymous. Yes, this includes, monitored accounts. When you are working with us to set up the central station, you can decide how you want each zone to behave. If you want us to call a guard service, or a police station, or no one at all, that is an option. The guard service is a particularly interesting piece of the puzzle. They are not police, and they will not publish the incident in the local newspaper. Rather, if you can find one in your location, they are a service that can receive alarm calls and will send someone out to an address to verify if a break-in is happening. If it is happening, then, and only then, would they initiate a call to the police (unless you ask them not to).

That said, the self-monitoring option puts everything in your hands. You will have an app on your phone that receives messages, text, and/or email alerts telling you what your system is doing. Again, in this app, you can give simplelogin.io emails, you can use a Jabber number if you so choose, or you can use a proton mail account if you'd like. The options are endless, and you can use the service without leaking any data.

4) Don't use cameras with an online service component

I'm not saying that no one should use cameras. Rather, if you're security-minded, and OPSEC is your priority, cameras that shoot out over the internet aren't for you. You'll want a local server, if you want cameras at all, to host your files. You can tunnel into your server from outside if you need to. This is a very typical setup.

Using these methods, you can properly obfuscate nearly everything about yourself. With Alarm Grid, no one has to come to your home. In fact, if you need security products, you could use some kind of freight forwarder to ship the items to yourself. This with privacy.com would allow you to not leak your actual address.

This is the perfect service for the security minded, celebrities, Bitcoin whales, or anyone else who simply doesn't want anything about them known to even the company monitoring their alarm. The Unredacted article paints a bleak picture about something that is completely avoidable. If you don't want your data leaked, you don't have to leak it. Following these practices, you don't even need to trust your security company, so long as they actually attach the system to the interactive service (Alarm.com or Total Connect). It just takes a bit of planning, work, and the right company.

Comments


Posted By

The ever-evolving WIFI industry can sometimes present challenges to alarm equipment. The steps manufacturers take to protect privacy, and streamline connections, can sometimes interfere with an alarm system's ability to get connected. Here, we'll discuss ways to keep your WIFI system online.

Resideo and Honeywell Home have not embraced the 5 GHz WIFI band as some of the other alarm manufacturers have. Both 2GIG and Qolsys have panels that can connect to either 2.4 GHz or 5 GHz WIFI. While 5 GHz WIFI offers slightly greater speed, it also offers a shorter range. Its main advantage is that it offers more channels and less congestion than its 2.4 GHz counterpart. The 2.4 GHz band is slightly slower, mostly because it's more crowded, but with a greater range and better solid object penetration.

Many customers may be afraid to purchase Resideo or Honeywell Home equipment because they believe that soon WIFI routers may stop supporting the 2.4 GHz frequency. However, most IoT (Internet of Things) devices that use WIFI currently only support the 2.4 GHz band, so you can expect network equipment manufacturers to continue producing equipment that supports 2.4 GHz for some time. Also, many older devices, such as older smartphones or tablets, don't support 5 GHz WIFI.

Users with dual-band routers that support both 2.4 GHz and 5 GHz WIFI, and who also have Resideo or Honeywell Home WIFI products, may have experienced issues with their security device losing its WIFI connection. If that is the case, disabling a feature in the router called Band Steering may help the system to stay connected. Routers that support dual-band WIFI often use Band Steering in an effort to make switching from one band to the other seamless.

In theory, with Band Steering enabled, and the SSID, Password, and encryption settings for both 2.4 GHz and 5 GHz bands set to the exact same parameters, any device capable of using both bands can switch between them on the fly as the device moves through the location. Consider using a tablet or a smartphone as you walk through your home. When you're close to the router, 5GHz is likely the best band for the device to use. But as you walk away from the router, the 2.4 GHz band may become a better option. Band Steering will take care of switching from one to the other with no further input from the user and without the user even knowing that the switch has occurred.

If Band Steering worked as well in practice as it does in theory this would be an excellent solution. However, for some routers that support this feature, in certain cases, if a client WIFI device can only support 2.4 GHz, and the router supports both bands with both having matching SSIDs and Passwords and Band Steering is enabled, often the client device can't connect to the network because it is blocked by the router.

The router does this because it believes the client device is capable of connecting using the 5 GHz band, and in most cases, the router is trying to steer as many devices as it can to 5GHz. By disabling Band Steering, the Resideo or Honeywell Home WIFI capable panel will be able to see and connect to the 2.4 GHz network. In fact, it's the only network that it will be able to see. All other devices that support both bands will still be able to connect to whichever SSID the user chooses.

You can disable Band Steering on your dual-band router without having to change either SSID or password. The drawback to doing this is that you won't immediately be able to tell which WIFI band a device that supports both the 2.4 GHz and 5 GHz bands is connected to. If you need to be able to determine this, then you will want to disable Band Steering and then change the SSID and Password for one or the other WIFI Band so that you can easily determine which WIFI band a device is using. This will assist you, particularly on mobile devices, where you may need to manually switch between bands to achieve the best WIFI outcome.

Tags: , , , , , , , , , , , , , , , , , , , ,

Comments