October 2019 Archives

Posted

Hi DIYers! Today, we plan to talk about some of the specifications of Z-Wave Plus and how the protocol has been improved over classic Z-Wave communication. Setting up some Z-Wave Plus devices with your system is a great way to get started in the exciting world of home automation!


You probably see us talking about Z-Wave Plus all of the time, but you might not know why we get so excited about it. If you didn't know, Z-Wave Plus is a wireless communication protocol that is frequently used with smart home devices. This includes peripherals like smart lights, door locks, programmable thermostats, and more. Many of the systems we sell and support include built-in Z-Wave controllers so you can start pairing these convenient devices. Today, a collective group called the Z-Wave Alliance is working to further improve upon this robust and convenient form of local wireless communication.

By nature, Z-Wave offers many important advantages. Wireless communication makes installation and set up super easy, which is great for DIYers who don't want to hire a professional installer. And by using them with your monitored security system, you can operate these devices remotely through an automation platform like Total Connect 2.0 or Alarm.com. Both platforms offer their own mobile app so that you can control these devices from virtually anywhere! And you can even establish smart scenes so that your Z-Wave devices operate automatically based on a schedule or with certain events on your system. How cool!

But not all Z-Wave devices are created equal. More recently, we have seen the rise of "Z-Wave Plus" devices, also known as 500-Series devices. This is as opposed to what we sometimes refer to as "classic Z-Wave" devices, or 300-Series devices. When given the option, you will definitely want to go with the newer and more advanced Z-Wave Plus 500-Series devices. This will provide you with the best possible end user experience.

2gig pd300emz5 1 z wave plug in 300w dimmer module

Before we get into Z-Wave Plus specifications, we want to quickly mention what you will need to achieve a Z-Wave Plus setup. To unlock the full potential of Z-Wave Plus, you will need a Z-Wave Plus controller and certified Z-Wave Plus devices. You can use classic Z-Wave devices with a Z-Wave Plus controller, but you will only get the functionality of classic Z-Wave.

Likewise, you can use Z-Wave Plus devices with a classic Z-Wave controller, but again, you will only have the same 300-series functionality. If you want true Z-Wave Plus, you must have a Z-Wave Plus controller and certified Z-Wave Plus devices. Check for the label shown at the top of this post to determine if a device is Z-Wave Plus. That label should be found somewhere on the product box.

Now that we have that out of the way, you might be wondering what's the big deal about Z-Wave Plus. After all, you can technically do anything with classic Z-Wave that you can do with Z-Wave Plus. The thing is though, Z-Wave Plus can do it better. This comes down to a few different considerations. Namely, Z-Wave Plus offers further range, extended battery life, and better reliability overall.

Kwikset 910 z wave push button deadbolt lock polished brass

When it comes to Z-Wave range, signal hopping is key. Z-Wave signals actually have the ability to "hop" through other Z-Wave devices. Each time a "hop" occurs, the signal is repeated to extend the range. A Z-Wave signal can make up to four (4) of these hops on its way to the intended destination. By adding more Z-Wave devices, you are establishing a stronger mesh network.

Z-Wave Plus devices allow for about 50 to 60 feet between hops. So you can expect a roughly 200 foot range for a Z-Wave Plus device if you have a strong mesh network for signal hopping. Conversely, a classic Z-Wave device will only offer a range of about 30 to 40 feet between hops. That's only a range of about 120 feet with a strong mesh network. By using exclusively Z-Wave Plus devices, you are getting a roughly 66% increase in range!

Battery life is also something to consider for Z-Wave devices that do not plug in or connect with electrical wiring. This is common for most Z-Wave locks and even some thermostats like the Honeywell T6 Pro Z-Wave. The Z-Wave Alliance designed Z-Wave Plus devices to consume less power, which has improved their expected battery life by about 50%. This will save you money with fewer required battery changes!

Lastly, you should consider the fact that Z-Wave Plus offers better reliability than classic Z-Wave. This is important for ensuring that any Z-Wave commands and signals ultimately reach their intended destinations. Certified Z-Wave Plus devices are also required to support Security S2, which includes complete Diffe-Hellman Symmetric Encryption for enhanced security. And perhaps most importantly, Z-Wave Plus devices can receive firmware updates over-the-air (OTA), allowing developers to streamline any needed improvements.


The future certainly looks bright for Z-Wave, as the Z-Wave Alliance is currently working on 700-Series Z-Wave Communication. This represents the future over the current Z-Wave Plus 500-Series. We do not have the details on 700-Series, including when it will be made widely available, but it is expected to communicate up to 150% further, while using even less power for improved battery life! These devices will also offer enhanced processing for signal transmissions that are up to 18% faster.

At this time, no security systems support 700-Series technology. But there are still fantastic systems like the Qolsys IQ Panel 2 Plus which support Z-Wave Plus 500-Series communication. With Z-Wave on your side, you can truly make your alarm system stronger than ever and achieve a more convenient life! If you have any questions about Z-Wave technology, you are welcome to email us at support@alarmgrid.com. Remember that our support hours are from 9am to 8pm ET M-F. We look forward to hearing from you!

Tags: , , , , , , ,

Comments


Posted By

Hi DIYers! Today, we're giving a quick lesson on Response Types, also known as Sensor Groups. Every sensor used with your security system will have one. It is important that you get these settings correct so that your alarm system responds appropriately when a sensor is activated!

Honeywell sixct wireless door slash window contact for lyric con


Starting with the basics, the Response Type is the setting that tells the system how to respond when the sensor is activated or faulted. Most Honeywell and 2GIG Systems refer to this as a Response Type. Other systems like the Qolsys IQ Panel 2 Plus refer to this setting as the Sensor Group. For the purpose of this post, we will generally use the terms interchangeably. Just know that when we are talking about Response Types, we also mean Sensor Groups.

When it comes to sensors for alarm systems, there are many types. Some common examples include door and window contacts, motion sensors, glass break sensors, shock sensors, smoke detectors, carbon monoxide sensors, panic buttons, medical alert buttons, temperature sensors, and flood sensors, just to name a few. As a result, there are many Response Types as well. What you use for one sensor type is likely very different from what you would use for another, though there is some overlap from time to time.

Now, we're not going to cover each and every Response Type and Sensor Group here today. But what we will do is cover some general rules for Response Types so that you know a little bit more about them. If you do want some more extensive knowledge on Response Types or Sensor Groups, check the programming manual for your panel. We also have the following FAQs that you may want to check out:

With that out of the way, let's take a look at some of the most basic and general Response Types you will encounter.

Entry/Exit: An Entry/Exit Zone is used for coming and going. This is almost always going to be a door that you use to enter and/or exit your home or business. When this zone is faulted while the system is Armed Away or Armed Stay, you will need to Disarm your system within a preset Entry Delay period, or else an alarm will occur. Additionally, if your system has Auto-Stay Arming enabled, then you will need to fault an Entry/Exit Zone during the Exit Delay countdown when Arming Away, or else the system will revert to Armed Stay instead.

  • Common Sensor Types: Door and Window Sensors for Entering/Exiting the Building

Interior: An Interior Zone refers to a sensor that can trigger an alarm while the system is Armed Away, but not while the system is Armed Stay. The idea here is that when your system is Armed Away, there should be nobody inside the building, and faulting an Interior Zone would mean there is a security breach. But when the system is Armed Stay, there is still someone inside the building, and you want them to be able to move around freely. A very common sub-type of an Interior Zone is an Interior Follower Zone. The "follower" portion of the name refers to the fact that the zone will not cause an alarm if the sensor is after (e.g. it follows) an Entry/Exit Zone. The reasoning is that you may need to fault an Interior Zone to get to your system and Disarm after faulting an Entry/Exit Zone.

  • Common Sensor Types: Interior Motion Sensors, Interior Door and Window Sensors

Perimeter: A Perimeter Zone is a very secure sensor. If a Perimeter Zone is faulted while the system is Armed Away or Armed Stay, then an alarm will occur immediately. You should only assign a Perimeter Zone to a sensor that should absolutely never be faulted while the system is Armed. Perimeter Zones are commonly used for Window Sensors (unless you like to climb in through the window!), as well as Glass Break Sensors and Shock Sensors that indicate forced entry into the building. Some panels also have a similar Response Type called Day/Night. This Response Type is the same as Perimeter, except that a Day/Night Zone will also trigger a Trouble condition if the sensor is faulted while the system is Disarmed.

  • Common Sensor Types: Window Sensors, Glass Break Sensors, Shock Sensors

24-Hour: A 24-Hour Zone is the most secure Zone Type available. This is a sensor that should never be activated, unless there is an emergency or something seriously wrong. There are many sub-categories of 24-Hour Zones, including 24-Hour Burglary, 24-Hour Fire, 24-Hour Carbon Monoxide, and 24-Hour Auxiliary. Since these are very secure zones, you will likely want to provide special instructions regarding these zones for the central monitoring station. This way, the operator will know how to respond when they see the alarm come through. For example, if you give your Flood Sensor a 24-Hour Auxiliary Response Type, you will want the operator to know that it isn't an emergency medical alarm! The 24-Hour Auxiliary Response Type is often used for both environmental sensors and medical sensors, so you will want to provide specification.

  • Common Sensor Types: Smoke & Heat Detectors, Carbon Monoxide Sensors, Panic Buttons, Medical Alert Buttons, Flood Sensors, Temperature Sensors

Of course, this is just a small list of the available Response Types and Sensor Groups. But you will usually find Zone Types just like these no matter which panel you use. If you want to learn more about Response Types, you are welcome to send us an email at support@alarmgrid.com. We will check your email when we have an opportunity and reply back as soon as possible. Remember that our support hours are from 9am to 8pm ET M-F. We look forward to hearing from you!

Tags: , , , , , ,

Comments


Posted By

Resideo is currently in the process of pushing automatic OTA firmware updates to all active AT&T LTE Communicators. The updating process is ongoing, and we are not sure how long it will last. You should not notice any changes to your monitoring service or your Total Connect 2.0 account.

Honeywell lyric lte a at and t lte cellular communicator for the

If you recall a few months ago, we announced that Resideo was pushing down automatic over-the-air (OTA) firmware updates to LTE communicators. Resideo started with the Verizon LTE Communicators, and now they are updating the AT&T LTE Communicators. This is a very similar update with no major differences.

Just like before, Resideo is expected to perform this update cycle in batches. Units that were registered first will have the update performed first. This will continue in sequential order until all active Resideo AT&T LTE Communicators have been updated. Any new AT&T LTE Communicator activated during this time will be placed at the end of the queue. If an update fails, that communicator will be pushed to the next batch to try again.

Remember, the communicator must be active and connected with the AlarmNet360 Servers in order for the update to go through. Any communicator that is not active will not be able to receive the update. This includes any communicator installed inside a panel that is currently powered off. Try and keep your panel powered on at all times to ensure that the update can go through successfully.

The following Resideo Communicators are affected by this update:

It is possible that your panel may reboot as part of the updating process. However, you should not notice any other changes. Additionally, the following Contact ID messages may be generated during the process:

Contact ID
Description
E365 Cell Software Update Start
R365 Cell Software Update Finish
E966 Cell Software Update Failed
E903 Code Update Start
R903 Code Update Finished
E904 Code Update Failed
E339 Power On Reset

If you have any questions regarding this update, please do not hesitate to email us at support@alarmgrid.com. Remember that our support hours are from 9am to 8pm ET M-F. We look forward to hearing from you and answering your questions!

Tags: , , , , , , , , , ,

Comments


Posted By

We have heard some recent buzz in the industry that other alarm monitoring companies may begin stopping all support for older 3G, 4G and CDMA Cellular Communicators. While the push to get everyone onto LTE is important, Alarm Grid plans to support these existing modules as long as possible.

Honeywell lyric lte a at and t lte cellular communicator for the

If you have been keeping up with the latest events in the security industry, then you will know that both Total Connect 2.0 and Alarm.com will no longer allow activations for older cellular modules. The CDMA activation sunset occurred last year in 2018. Then this year in late June, Total Connect 2.0 stopped allowing AT&T 3G & 4G activations. From there, Alarm.com followed suit and also announced they would no longer allow new activations for 3G & 4G Communicators.

It is important to understand that these "sunset" events only affect new activations. If you have an existing 3G, 4G, or CDMA Communicator that is currently activated for use with Total Connect 2.0 or Alarm.com, then you can continue to use it, at least for now. As long as you keep it activated and your monitoring company continues to support it, then there will be no problem until the associated cellular network is permanently shut down.

For the record, the AT&T 3G Network is going to be shut down in February of 2022. We do not have an official date for the shutdown of the Verizon CDMA Network, but it is also expected to occur around this time. In preparation for this event, both Total Connect 2.0 and Alarm.com will only allow for new activations of LTE cellular communicators. In other words, if you want cellular alarm monitoring for your system, you should definitely go LTE.

Recently, we have heard that some other alarm monitoring companies are dropping support for these communicators sooner. Some will drop support as early as the end of 2019. This means that if you have monitoring service with that company and you have an older communicator, your monitoring service will be automatically terminated unless you upgrade to LTE before their self-imposed cut-off date.

Alarm Grid would like to state publicly that we plan to support existing 3G, 4G, and CDMA Communicators for as long as possible. We understand that not everyone can feasibly make the upgrade right away. We are doing everything we can to let our customers make the transition at their own pace. If you are still using a 3G, 4G, or CDMA Communicator with Alarm Grid, then rest assured that your communicator will still work for the next couple of years.

Now, just because we are still supporting these modules does not mean you shouldn't upgrade. LTE communication is faster, more reliable, and it will provide you with a better end user experience overall. Additionally, installing an LTE communicator will essentially "future-proof" your system against further advances in cellular technology. Cellular service providers have stated repeatedly that LTE networks will remain supported and in-service well into the very distant future.

Also remember that if you currently use a 3G, 4G, or CDMA Communicator, and you deactivate the module for ANY reason, you will NOT be able to reactivate it. This can be particularly important if you are trying to bring an older cellular module to Alarm Grid. If your communicator is still active with a different monitoring company, and you keep it active in your transition to Alarm Grid, we can help you reprogram it for use with our monitoring service.

At Alarm Grid, we are working to make sure all of our customers who use cellular monitoring will make a smooth and seamless transition over to LTE. We know that everyone moves at a different pace, and we are not going to rush you into doing something that you may not be ready for. While we certainly encourage you to make the jump to LTE as soon as possible, we will continue to work with you as long as we can.

If you have any questions about the 3G and CDMA sunset, or if you are trying to determine your best option for getting your panel on LTE, then by all mean, please reach out to us as soon as you can. Our team will be happy to work with you and assist you in any way possible. The best way to contact us is to email support@alarmgrid.com. Remember that our support hours are 9am to 8pm ET M-F. We look forward to hearing from you!

Tags: , , , , , , , ,

Comments


Posted By

Hi DIYers! We're here for our video recap. We only have three (3) new videos this week, but they all follow a theme. They all feature Joe discussing the PowerG Smoke Detectors. You can use them with any PowerG compatible panel, and they offer one-go-all-go technology! They are nice devices!

Dsc pg9916 powerg 915mhz wireless smoke and heat detector

Additionally, if you haven't seen our blog about the new DSC PG9936 Smoke and Heat Detector, make sure you take a look. Now, onto the videos!

Properly Testing a PowerG Smoke Detector

Joe shows you how to test a PowerG Smoke Detector. This is something you should do regularly, and you may have to perform this test to get a certificate of alarm (CoA). The PowerG Smoke Detectors have a test button so you can easily test transmissions with the panel. If you want to test the device for smoke detection, then you will need canned smoke. Make sure to put your system on test mode before testing!


Enrolling a PowerG Smoke Detector In a Qolsys IQ Panel 2 Plus

Joe shows you how to enroll a PowerG Smoke Detector with a Qolsys IQ Panel 2 Plus System. All versions of the Qolsys IQ Panel 2 Plus include a PowerG daughtercard for supporting PowerG Sensors. PowerG Smoke Detectors can be auto-enrolled with an IQ Panel 2 Plus System by putting the panel into its auto-enrollment mode and then holding down the device's enrollment button until the LED light remains steady. However, the new PG9936 can be auto-enrolled by powering the device on while the panel is in enrollment mode.


Factory Defaulting a PowerG Sensor

Joe shows you how to factory default a PowerG Smoke Detector. These same steps apply to almost any PowerG Sensor. The PowerG devices use 128-bit AES encryption in all their wireless communication. This requires linking the PowerG Sensor with a compatible panel. When you delete the sensor from the panel, the sensor will still think that it is enrolled with the panel. You need to perform a factory default on the PowerG Sensor so that it knows that it is no longer enrolled.

Tags: , , , , , , ,

Comments


Posted By

Hi DIYers! Today, we're taking a quick look at the new DSC PG9936 PowerG Smoke & Heat Detector. This device is great for anyone looking for a reliable fire-safety sensor for use with a PowerG-compatible System. The new sensor offers some impressive features, and it is super easy to use!


The DSC PG9936 replaces the older DSC PG9916. The new model features an updated designed and enhanced detection for improved functionality. However, most of the specs from the PG9916 return to the PG9936. If you have an existing PG9916, then it will continue to work just fine. But it's great to see a new smoke and heat detector available!

For smoke detection, the PG9936 uses photoelectric technology. This is arguably the most consistent and more reliable smoke detection method available, and it will help ensure that any fire is detected as quickly as possible. The sensor also features a built-in 135°F fixed temperature heat sensor for redundancy. This will give you peace of mind in knowing that any fire will be properly detected.

Any system that supports PowerG can use the DSC PG9936 Sensor. This includes any Qolsys IQ Panel 2 Plus and any DSC PowerSeries NEO with added PowerG Receiver. It can be easily auto-enrolled by putting the panel into its enrollment mode and then powering on the PG9936 by inserting its batteries. You are welcome to check out the PG9936 Install Guide for more information.

Also returning to the DSC PG9936 is one-go-all-go support. This means that if the sensor is activated, all other PowerG Smoke Detectors paired with the panel will also activate. This is very important for ensuring that everyone in the building is properly alerted to the fire. Remember that each PowerG Smoke Detector has an 85 dB sounder for alerting building occupants.

Each PG9936 uses three (3) AAA batteries for power (included), and has a three (3) battery life on average. The sensor features a tri-colored LED status light for assisting with enrollment and troubleshooting. It measures five (5) inches across and is 2.5 inches deep. There is a test button on the device for easy testing when needed. Remember to place your system on test mode first!

You can get the PG9936 from the Alarm Grid website right now! If you have any questions about the DSC PG9936 Smoke & Heat Detector or any of our other products, please email us at support@alarmgrid.com. Our support team checks emails between 9am and 8pm ET M-F. We look forward to hearing from you!

Tags: , , , , , , , ,

Comments


Posted By

We recently discussed the end of Interlogix and how the company will soon be ceasing business in North America. We know that many users will be looking for a replacement for Interlogix Panels. Today, we will discuss how you can easily replace an Interlogix Panel with a Qolsys IQ Panel 2 Plus.

Qolsys iq panel 2 plus verizon lte with powerg s line and legacy

Interlogix Systems have been widely used in the security industry for many years. We want to start by saying that existing Interlogix Panels will continue to be supported by Alarm.com. As long as your Interlogix System has a compatible LTE cellular communicator, you can continue using the system well into the very distant future. And that is a perfectly acceptable option if you are looking for a cheap and effective solution for alarm monitoring.

But if you want to take home or business security to the next level, then now is a great time to upgrade to a Qolsys IQ Panel 2 Plus. This state-of-the-art security system offers fantastic features like automatic Bluetooth disarming, partitioning, live-streaming for compatible Alarm.com Cameras, built-in Z-Wave Plus functionality, support for up to 128 wireless zones, and so much more. And it is all controlled using a beautiful 7" touchscreen display.

Qolsys offers three (3) versions of the IQ Panel 2 Plus. If you are replacing an Interlogix Panel, then you will want to get the 319.5 MHz version. This is the version with the gold and white box shown above. The 319.5 MHz will be able to support all of your existing Interlogix 319.5 MHz Sensors. This means that you can upgrade to a brand-new high-tech security system, while still being able to maintain your existing sensors that work perfectly well. How cool is that?

If you do want to upgrade to newer wireless sensors, then you can also use PowerG Sensors with the system. PowerG Sensors offer an incredible wireless range of up to 2,000 feet away from the IQ Panel 2 Plus in an open air environment. They also utilize military-grade 128-bit AES encryption to prevent any wireless hacking or takeover attempts. This also protects the sensors from any RF jamming techniques that could disable legacy sensors.

Qolsys also offers their own 319.5 MHz sensors if you need to get some new wireless devices for the system. These sensors can be easily enrolled with the panel just any existing Interlogix Wireless Sensor. Qolsys even offers their own "S-Line" Encrypted Sensors for added wireless protection. These sensors use a rolling code encryption for added protection. These devices will make for a great addition to any 319.5 MHz IQ Panel 2 Plus!

We also understand that some users may be upgrading from hardwired Interlogix Panels, such as an Interlogix Concord 4 or an Interlogix NetworX Series Panel. Qolsys considered this, and they have a solution. The Qolsys IQ Hardwire 16-F is a wired to wireless converter that will allow you to use existing wired sensors with your new IQ Panel 2 Plus System. Just mount the IQ Hardwire 16-F in-place of the old panel, and enroll your existing sensors!

Whether you have a wireless Interlogix Panel like an Interlogix Simon XT, an Interlogix Simon XTi, or an Interlogix Simon XTi-5, or you have a hardwired Interlogix Panel like a Concord 4 or NetworX Series System, Qolsys has the solution for you. And if you choose to keep your existing Interlogix Panel, that's fine too. We have compatible communicators available on our website, and we can help you get the system running with our monitoring services.

If you would like to learn more about your options, or if you would like to discuss our monitoring plans, we invite you to email us at support@alarmgrid.com. Just tell us what you have (or what you would like to have!), and we will be happy to help you as soon as possible. Remember that our support hours are 9am to 8pm ET M-F, so keep that in mind when you email us. We look forward to hearing from you and helping you find the perfect security solution!

In the video below, Qolsys shows us how quickly and easily an Interlogix Simon XT panel can be replaced by a Qolsys IQ Panel 2 Plus 319.5 MHz version:


Tags: , , , , , , ,

Comments


Posted By

Hi DIYers! We know that many of you out there have pets. Many of us at Alarm Grid do as well! We know that trying to use a security system with a pet can present certain challenges and difficulties. Today, we're going to show you that using an alarm system with a pet is actually quite easy!

Qolsys iq panel 2 verizon 3 1 kit wireless alarm system 3 door s

For the most part, you can use your alarm system and sensors with pets exactly the same as you would if you did not have pets. There are really only a few things you need to consider and perhaps do differently. By taking these few precautions, you are sure to improve your experience of using an alarm system with a pet!

Pet-Immune Motion Sensors

Honeywell 5800pir res wireless pet immune motion detector close up

Most sensors can be used around pets without any issue. The only real exception is for motion sensors. Pets give off the same infrared (IR) energy that humans do. As a result, they can easily set off a motion sensor if they get within its field of view (FOV). But you probably don't want your system going off just because your pet has walked in front of your motion sensor.

Luckily, alarm manufacturers have considered this problem. That is why they created pet-immune motion sensors. A pet-immune motion sensor works by only "looking" in the areas where a human would be walking upright. The areas closer to the ground where a pet would walk are not "seen" by the motion sensor. In practice, this works pretty well, just as long as everything is set up correctly.

It is very important to understand that pets can still activate pet-immune motion sensors. If the pet manages to get within the sensor's FOV, then it will be the same as if a human intruder walked past. The key is to position your pet-immune motion sensors so that your pets cannot get in their FOV. For example, you don't want your motion sensor to be facing furniture that your pet could climb upon to activate the sensor!

You must check and make sure that the motion sensor you are planning to use is "pet-friendly" or "pet-immune". Not every motion sensor offers this feature. Motion sensors that do will list a weight limit for how small of pets can safely avoid setting off the sensor. Make sure that your pet is within that limit! Also, you will want to use any pet-immune motion sensor on the lowest possible sensitivity setting.

Dealing With Loud Sounds

Qolsys iq siren z wave siren for qolsys iq and iq panel 2 qz2300

Many pet owners are concerned about the loud sounds associated with security systems, especially sirens. These users are afraid that activating their system will upset or scare their pets. It is true that many security systems have the power to be some of the loudest devices in your homes. But fortunately, there are a few things you can do to avoid scaring your dog or cat.

One loud sound that systems will make is during entry and exit delays. Most panels will continuously beep after Arming Away to let you know that you need to leave the building immediately. And then they will do the same during the entry delay to let you know that you need to Disarm before the countdown expires. These noises can be bothersome or troubling to a small animal.

But there are ways around these issues. Many panels like the Honeywell Lyric Controller offer a "Silent Exit" option so that no annoying beeps are made during the exit delay countdown. And as for the entry delay, you can overcome that by just using the Alarm.com Mobile App or the Total Connect 2.0 Mobile App to Disarm from your phone before you enter the building. A key fob would work as well.

Some pets may be disturbed by Chimes and Voice Annunciations that occur when zones are faulted. This is an easy solution, as most panels will allow you to turn off or disable Chime and Voice. Another option is to turn down the system volume so that your pet is not bothered when a sensor is activated. Do whatever works for your dog or cat.

And of course there are sirens. If you don't want a siren to activate during an intrusion alarm, then you can set them to silent on your panel. Any alerts and notifications will still be sent out like normal, but your pet won't have to hear the siren. Of course, if someone has broken into your home, then your pet will likely know about it anyway! And remember, life-safety alarms (fires and CO) must be kept audible.

Please note that Alarm Grid always recommends using audible intrusion alarms, as they are important for scaring off intruders. But that can be difficult if you have a pet in the household. Sometimes the best thing to do is to set the siren (bell) timeout to be as short as possible so that the siren shuts off quickly. You might also install a small "doggy door" so that your pet can escape the loud noise if this happens.

However, you will still need to test your sirens from time to time. This is a very important part of testing your system. For these situations, it may be best just to take your pet away during the testing process. You could have your spouse or kids take them on a walk or car ride while you complete the test. Remember to put your system on test mode with the central station before you do this! And keep in mind that you will still need your pet when walk testing your motions!

Updating the CMS Document

Honeywell 5800mini interior wireless door and window sensor

An often overlooked aspect of using a security system with pets is to make sure the central monitoring station document is updated. This applies to any pet owner whose alarm monitoring plan includes central station service. You will want to make sure the notes for your location mention any pets that will likely be on the premises.

When an operator at a central station contacts any emergency rescuers, they will relay whatever information is on the document. You should make sure that all family members (including your pets!) are listed on this document. This way, they will know to check and make sure that everyone got out of the building in case of an emergency. This is a particularly good idea for systems with fire and carbon monoxide sensors!

Updating your central station document is easy. Just contact your alarm monitoring company and have them make the changes. You can also contact the central station directly and have them review any documents or information that they have on file. Remember, you will need to provide your false alarm password to do this. For Alarm Grid customers, changes to the dispatch instructions will need to be directed to us at our support email or via telephone, rather than directly to the central station operator.

We're Here to Help!

Alarm grid inside security stickers

If you have monitoring service from Alarm Grid, then we are happy to help you make sure that your security system is ready for your pets. We would love to talk with you and help you with everything you need. Alarm Grid customers can email us at support@alarmgrid.com or call us at (888) 818-7728. Remember that our office hours are 9am to 8pm ET M-F. And if you aren't monitored, please reach out to us so we can help you explore your options. We look forward to hearing from you!

Tags: , , ,

Comments


Posted By

Hi DIYers! Today, we are happy to unveil the Honeywell Home VISTA-21iPLTE. This is the newest hardwired system from the VISTA Series by Resideo, and it is essentially replacing the existing VISTA-21iP System. The big addition is its ability to support special plug-in LTE communicators.


The Honeywell Home VISTA-21iPLTE is actually the same as a VISTA-21iP System, except that the 21iPLTE board has been upgraded to support new plug-in LTE communicators. This includes the Honeywell Home LTE-21V with Verizon LTE (available now).

This new plug-in module is just like the older Honeywell VISTA-GSM4G Communicator, which is conveniently plugged into the VISTA-21iP board. The only difference is that the LTE-21V supports LTE connectivity. This is important for anyone looking to use cellular communication with a security system.

The reason you want to use an LTE communicator with your alarm system is that it offers superior speed and reliability when compared with older 3G and CDMA networks. Also, these older networks are in the process of being shut down. By going with LTE, you are providing a long-term solution for your panel.

Just like the existing VISTA-21iP, the new VISTA-21iPLTE has a built-in IP communicator, which is basically the equivalent of a Honeywell 7847i Communicator. Even if you don't add a cell module to the VISTA-21iPLTE, you will still be able to connect it with AlarmNet for IP monitoring and access to Total Connect 2.0.

Honeywell vista gsm4g alarmnet vista 21ip cellular alarm monitor

But, adding a cellular communicator is very important for dealing with internet outages. If the internet goes out and you don't have a cellular backup, then your 21iPLTE will lose connectivity with the AlarmNet360 Servers. Maintaining this connection is necessary for properly utilizing any monitoring service. This makes cellular backup crucial!

By connecting your VISTA-21iPLTE Panel with AlarmNet360, you will also be able to control your system through Total Connect 2.0. This is an interactive monitoring and automation platform that you can access from nearly anywhere using your phone. Make sure you choose a monitoring plan with TC2 service!

If you plan to use cellular communication with your VISTA-21iPLTE and Alarm Grid, then you will need a Gold or Platinum Level Plan (Self or Full). This is needed to activate the cellular radio and connect it with AlarmNet360. You can find more information about all our monitoring plans on our monitoring page.

Once you have access to Total Connect 2.0, you will be able to control your 21iPLTE System from any location with network access. You can use Total Connect 2.0 to arm and disarm, check current system status, control Z-Wave devices (controller required), view IP cameras (video monitoring required), and so much more!

Honeywell vista 21ip internet alarm control panel open

As far as functionality is concerned, the VISTA-21iPLTE is just like like a VISTA-21iP. Other than the added support for the LTE-21V, they are the same panel. As a result, almost any specification that applies to the VISTA-21iP also applies to the VISTA-21iPLTE.

The VISTA-21iPLTE is capable of supporting up to 64 total zones. However, you can only use eight (8) hardwired zones out of the box. To use additional wired zones, you will need to add Honeywell 4219 Expansion Modules. To use wireless sensors, you will need a wireless receiver, such as the 6160RF Keypad.

By adding up to five (5) 4219 Expansion Modules, you can use up to 48 hardwired zones on the VISTA-21iPLTE. Keep in mind that Zones 2 through 8 support zone doubling. Zone 1 is a special zone for use with 2-wire smokes. That is why it does not support zone doubling, although it can be used as a burglary or environmental zone if 2-wire smokes are not needed. You can have up to 16 2-wire smokes on the zone.

Adding a compatible wireless receiver will let you use wireless 345 MHz sensors from the Honeywell 5800 Series. A standard wireless receiver will only support uni-directional (one-way) devices. But a wireless transceiver like the 6160RF will also let you use bi-directional devices. Up to 56 wireless zones can be used. The number of available wireless zones depends on the number of wired expansion zones being used.

It is important to keep in mind that the total number of zones (wired and wireless) can never exceed 64. Additionally, zones 49 through 64 on a VISTA-21iPLTE are designated as key fob zones. But you can use these zones with any wireless sensor, as long as you have a wireless receiver added.

Honeywell 6160rf alphanumeric alarm keypad with integrated transceiver

There are also some other accessories you can add to a VISTA-21iPLTE System. First and foremost, you will want a keypad for controlling the system. As stated earlier, the Honeywell 6160RF is a great option. If you don't plan to use wireless sensors, then the standard Honeywell 6160 will work just as well.

You might also consider getting a touchscreen keypad for the system. These can be easier to use than push-button keypads. But just remember that only push-button keypads can backdoor into programming. The new Honeywell 6290W is a great option. Or you could go with the Tuxedo Touch which will also add Z-Wave functionality.

There are limits to the number of keypads you can use with the system. Up to eight (8) push-button keypads can be added. Touchscreen keypads count as AUI devices, and the VISTA-21iPLTE will only support a max of four (4) of these. Keep in mind that the Total Connect 2.0 service also counts as an AUI device!

Speaking of Z-Wave, a Z-Wave controller is needed if you want to use Z-Wave devices with the system. Adding a Tuxedo Touch is a great way to add Z-Wave capabilities. If you already have a keypad, then the standalone Honeywell VAM was an option, but it has recently been discontinued. Remember, you can control all Z-Wave devices through TC2.

Ultratech 1240 alarm control panel battery backup 12v 4 dot 5ah

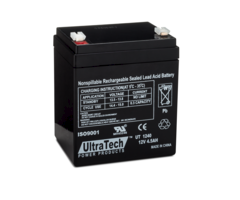
Lastly, the system comes with its own transformer for supplying power. You will still need to supply a backup battery like the UltraTech IM-1250F1. Power cabling is not included with the VISTA-21iPLTE system, so you must add your own. We recommend using 18-gauge wiring, or even better, a Honeywell LT-Cable.

We would also like to mention that the VISTA-21iPLTE supports two (2) partitions, along with a third common partition. It also supports other miscellaneous features like Quick Arming, Scheduling, up to 48 unique user codes, 100-event event log, two (2) low-current trigger outputs, chime functionality, and more.

The VISTA-21iPLTE System and the LTE-21V LTE Communicator are both available for purchase now from the Alarm Grid website. This system is great for anyone looking for a simple, yet effective hardwired panel. It will certainly serve as a long-lasting addition to your home or business and help keep you safe.

If you have any questions about the system, please email us at support@alarmgrid.com. We will check your email at our earliest convenience and reply as soon as possible. You may also call us at (888) 818-7728. Remember that our support hours are 9 am to 8 pm EST M-F. We look forward to hearing from you!

Tags: , , , , , , , , ,

Comments