We Are Excited to Offer New PowerG Everywhere Products!
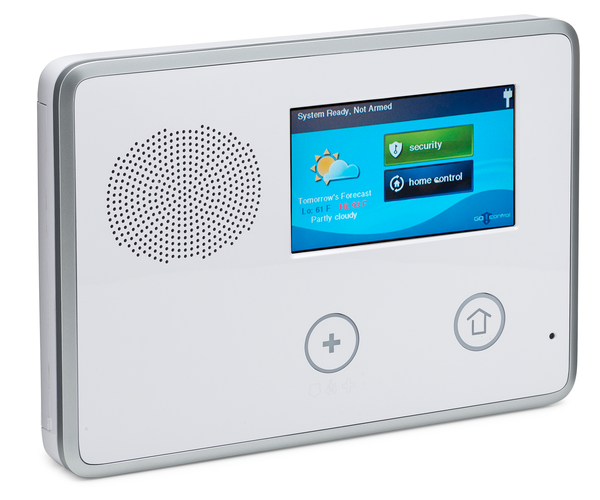
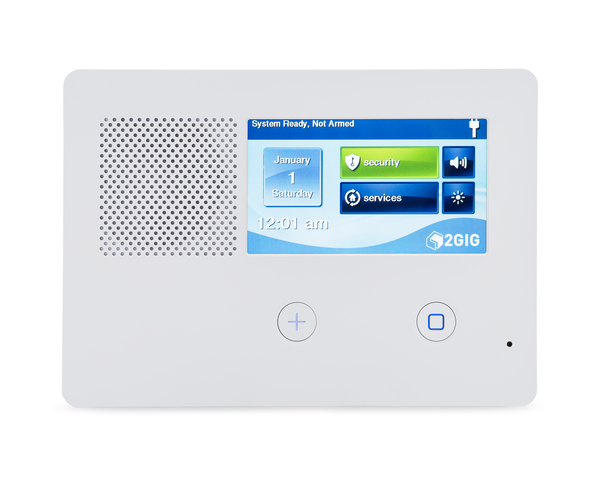
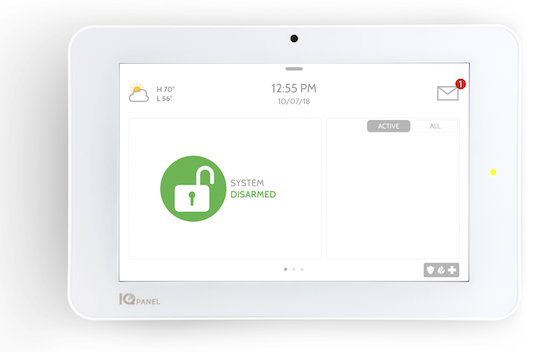
Posted By Julia RossQolsys, which is owned by Johnson Controls, Inc., the same company that owns DSC, is introducing a new lineup of PowerG automation devices. Currently, they offer a door lock along with a range of wired and plug-in switches. These devices will be supported by the IQ4 panels and the IQ Pro.
I say "will be supported" instead of "are supported" because the firmware required to support these new PowerG automation devices hasn't been released yet. For the IQ Panel 4, IQ4 Hub (PowerG Version), and IQ4 NS (PowerG Version) this is firmware version 4.4.0. For the Qolsys IQ Pro, firmware 4.3.0n is required. These firmware updates should be available later this month for the IQ4 Series panels, and soon thereafter for the IQ Pro.
We've talked before about the benefits of PowerG sensors. The big story with this and all PowerG devices is the transmitting range. Depending on the PowerG transceiver being used you can expect hundreds, and up to thousands, of feet in transmitting range. The PowerG repeaters will also work with these devices, so in the unlikely event you need one, a repeater is available.
Compare that to a Z-Wave Plus device, where you can expect a transmitting range of a couple hundred feet at most. Z-Wave is a mesh network, though, so if you plan to install a large number of devices, you can build out an impressive network using that technology. The problem is if you have a single area you want to automate, and it's not near the rest of your Z-Wave network, you might be out of luck with Z-Wave, but not with PowerG!
The encryption used with PowerG security sensors is also used here, so you get 128-bit AES encryption with FHSS (Frequency Hopping Spread Spectrum) which you can read more about here.
IQ Lock-PG:
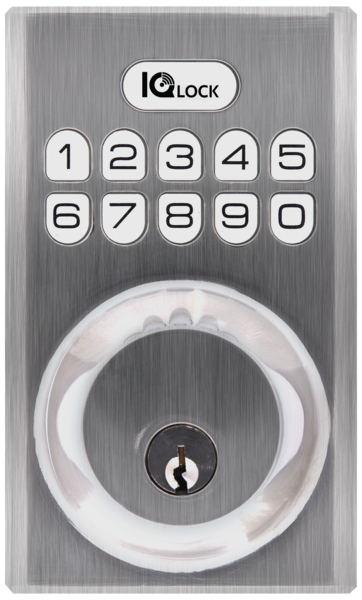
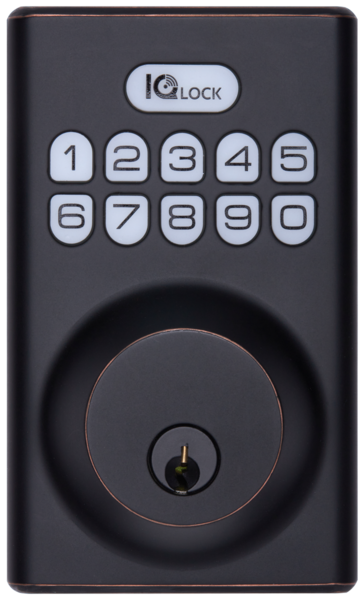
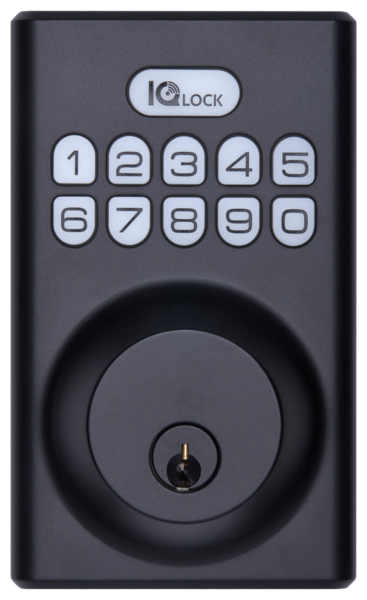
The IQ Lock-PG (SKU: IQDLK-PGK) is available in three (3) finishes. Shown above from left to right in Satin Nickel, Matte Black, and Oil-rubbed Bronze. This lock is powered by four (4) AA batteries (not included) and with typical use, the battery life expectancy is one (1) year. This estimate is based on six (6) user code unlocking events and ten (10) locking/unlocking events per day. The IQ Lock-PG offers self-handing capability, and the lock motor is noticeably quieter than previous automated locks we've heard.
Unlike some automated locks, the IQ Lock-PG does offer the option to use a key, and two (2) keys are included with it. It has a KW1 keyway cylinder. The IQ Lock logo lights up green when the door is unlocked, and red when it is locked. This provides a nice visual indication of the lock status when the user is returning home or to their business.
Specifications:
- Operating Temperature: Exterior: -31°F to 150°F (-35°C to 66°C), Interior: 32°F to 140°F (0°C to 60°C)
- Material: ANSI Grade 2 Certified
- Compatibility: Compatible with the Qolsys IQ4 NS (No Screen) (PowerG Version), IQ4 Hub (PowerG Version), IQ Panel 4, and IQ Pro panels
- Technology: PowerG
- Key Cylinder: Yes (KW1 keyway)
- Self-Handing: Yes
- Bolt Type: Motorized/ Standard Deadbolt
- User Codes: Up to 250 unique users
- Code Length: 4-10 Digits
- Batteries: Four (4) AA batteries (not included)
- Low Battery Alarm: Yes
- Backset: 2 3/8”/ 2 3/4” Adjustable (60/70mm)
- Door Prep: 1 1/2” / 2 1/8” (38/54mm)
- Door Thickness: 1 3/8” ~ 2 1/4” (35-58mm) automatic adjustment
- Lockout Mode: Keypad lockout for 3 minutes after 10 entries of invalid user code
- Certifications: FCC, IC, ANSI BHMA A156.36 Grade 2, UL10C (20min Fire Rating)
- IP Rating: Exterior assembly: IP54
- Operating Humidity: Exterior: 100% condensing Interior: 20% – 95% non-condensing
IQ Switch-PG:
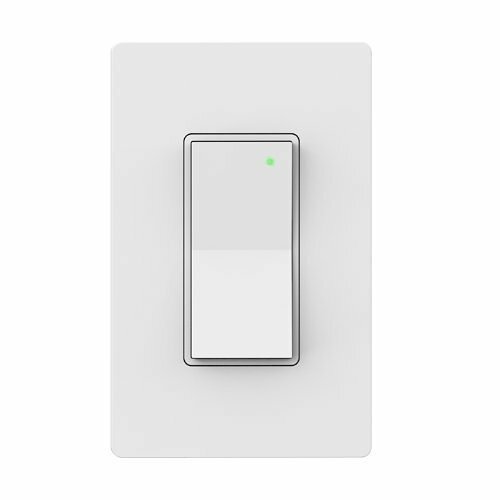
Next up is the Qolsys IQ Switch-PG (SKU: IQSWH-PG). This is an in-wall on/off switch without dimming. It can replace any standard in-wall switch to add automation capabilities to the circuit. With PowerG technology built-in, you will be able to automate devices in areas you may have thought impossible before. Have an outbuilding that you thought was too far away for automation? With PowerG, that goal may be well within reach depending on how far the building is located from the compatible panel.
Before removing the old switch and replacing it with the IQ Switch-PG, be sure the breaker is turned off. Failure to do so may cause damage to the switch and to you! This is a hardwired switch, which will be connected to 120V, so we do recommend that you have a qualified electrician perform the wiring.
Specifications:
- Technology: PowerG
- Power: 120V at 60Hz
- Maximum Load: Incandescent 600W, CFL/LED 300W
- Current: 5A Max
- Standby Power Consumption: <1W
- Wiring: 16 AWG (direct wire connection)
- Noise: 24dB at 20cm Max
- Operating Temperature: 32°F to 104°F (0°C to 40°C)
- Storage Temperature: -4°F to 140°F (-20°C to 60°C)
- Weight: 4.09 oz (116g)
- Operating Humidity: 0% – 85% non-condensing
IQ Dimmer-PG

The Qolsys IQ Dimmer-PG (SKU: IQDMR-PG) is also an in-wall switch, with dimming capabilities included. As with the IQ Switch-PG, this device can replace any existing 120VAC switch that fits within its specifications to add remote control and automation capabilities.
Another attractive feature for this and all of the new hardwired PowerG switches and sockets is that they come with a screwless faceplate. This provides a clean, modern look. Currently, they are only available in white. If you prefer a more traditional look, the screwless faceplate can be removed and there are screw holes for a traditional faceplate. This may also come in handy if you have multiple switches in a line and require a double-gang or triple-gang setup.
Some Important Specifications:
- Compatibility: Compatible with the Qolsys IQ4 NS (PowerG Version), IQ4 Hub (PowerG Version), IQ Panel 4, and IQ Pro panels
- Technology: PowerG
- Power: 120V at 60Hz
- Maximum Load: Incandescent 200W, CFL/LED 100W
- Current: 1.67A Max
- Standby Power Consumption: <1W
- Wiring: 16-10 AWG (terminal block connection)
- Operating Temperature: 32°F to 104°F (0°C to 40°C)
- Storage Temperature: -4°F to 140°F (-20°C to 60°C)
- Weight: 4.83 oz (137g)
- Operating Humidity: 0% – 85% non-condensing
IQ Smart Socket-PG:
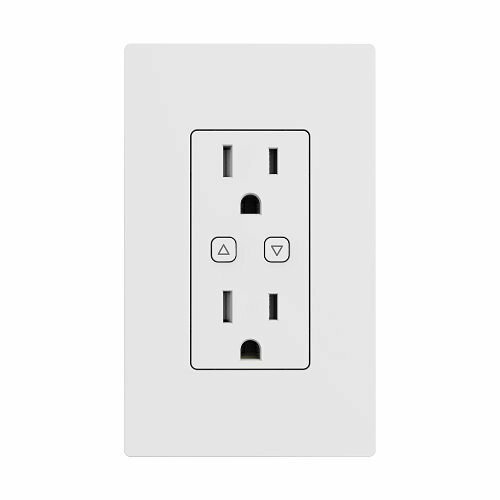
The Qolsys IQ Smart Socket-PG (SKU: IQSKT-PG) is an in-wall socket with two (2) sockets that can be controlled individually. By replacing a standard in-wall socket with the IQ Smart Socket-PG you gain the ability to individually control the devices plugged into each outlet from the panel's touchscreen, or from the Alarm.com app or webpage.
Using rules and scenes, you can create automation scenarios to turn devices on or off based on other events that occur on the system, or based on a schedule. With the Smart Rules Builder, available on Alarm.com, you can easily create automation rules to suit your every need.
Specifications:
- Color: White
- Tamper Resistant?: Yes
- Technology: PowerG
- Input Power: 120VAC at 60Hz
- Output Load: 120VAC at 60Hz, 15A Total Max Load for both outlets
- Maximum Load: Total 1800W@120V (Resistive Load)
- Standby Power Consumption: <1W
- Dimensions: 14.5 x 2.75 x 1.7 Inches (115 x 70 x 44 mm)
- Operating Temperature: 32°F to 104°F (0°C to 40°C)
- Storage Temperature: -4°F to 131°F (-20°C to 55°C)
- Weight: 5.57 oz (157.8g)
- Operating Humidity: 0% – 90% non-condensing
IQ Smart Plug-PG:

The Qolsys IQ Smart Plug-PG (SKU: IQIDP-PG) is an indoor plug-in module. Often referred to as appliance modules, these devices allow you to quickly turn any existing wall outlet into a smart outlet with no electrician required. With its low-profile form factor, you will be able to make one outlet smart without blocking the other outlet in a traditional two-outlet wall plug.
To learn these devices into any of the IQ4 panel lineup, once you have the 4.4.0 firmware installed you'll press the grey bar at the top of the panel screen, go to Settings > Advanced Settings > Enter Installer or Dealer Code (1111 or 2222 by default) > Installation > Devices > Automation > Auto Learn Devices. From there, just power on the PowerG device and it will auto-learn into the system.
Prior to firmware version 4.4.0, the Automation menu option was missing from the Devices screen, so you won't be able to properly learn these devices on older firmware panels. If you attempt to learn any of them as a security sensor, they will likely learn in, but will not operate properly and will need to be removed from sensor programming prior to proper enrollment once the firmware has been updated.
Specifications:
- Color: White
- Technology: PowerG
- Power: 120VAC at 60Hz
- Output Power: 1800W@120V (Resistive Load)
- Standby Power Consumption: <1W
- Dimensions: 2.6 x 1.5 x 1.29 Inches (68 x 38 x 33 mm)
- Operating Temperature: 32°F to 104°F (0°C to 40°C)
- Storage Temperature: -4°F to 122°F (-20°C to 50°C)
- Weight: 2.29 oz (65g)
- Operating Humidity: 10% – 90% RH, non-condensing
IQ Outdoor Plug-PG:

The Qolsys IQ Outdoor Plug-PG (SKU: IQODP-PG) allows you to take one single outdoor outlet plug, and make two (2) smart outlets out of it. These two (2) outlets will be enrolled as separate automation devices and can be controlled individually.
Here's an example of how this plug can come in handy. Perhaps you used to have your patio string lights and a bug zapper connected to the two plugs of an outdoor outlet. You can now connect the IQ Outdoor Plug-PG to one of the existing available outlets, and plug the string lights and the bug zapper into it. You can automate the string lights to come on at dusk and turn off at a set time. Automate the bug zapper to turn on based on some other criteria, whether it's a schedule, or based on the opening of the patio door. And you still have one of your previously existing outlets available for another device.
Specifications:
- Color: Black
- Tamper Resistant?: Yes
- Compatibility: Compatible with the Qolsys IQ4 NS (No Screen), IQ4 Hub, IQ Panel 4, and IQ Pro panels
- Technology: PowerG
- Power: 120VAC at 60Hz
- Output Power: 1800W@120V (Resistive Load)
- Output Load: 120VAC at 60Hz, 15A Total Max Load for both outlets
- Standby Power Consumption: <1W
- Dimensions: 2.6 x 1.5 x 1.29 Inches (68 x 38 x 33 mm)
- Operating Temperature: 32°F to 104°F (0°C to 40°C)
- Storage Temperature: -4°F to 122°F (-20°C to 50°C)
- Weight: 2.29 oz (65g)
- Operating Humidity: 10% – 90% RH, non-condensing
At Alarm Grid, we're super excited about the launch of these new automation devices. I believe these will be game-changing, particularly in circumstances where transmitting distance has been a hindrance in the past. I expect we'll see additional PowerG automation devices in the near future.
Hopefully, a PowerG garage door controller, PowerG PGM device, and my personal hope, some PowerG motorized blinds or shades. Stay tuned and we'll let you know when the firmware to support these devices is released. Are you excited about the new PowerG automation products? Leave a comment below and let us know what you think. What other automation devices would you like to see in the PowerG lineup?