Apartment Security Systems Posts

Posted By

Update: All US versions of the Qolsys IQ Panel 4 are now available, and the links for each panel type, along with a description of each, are available below!

Qolsys announced several new products at ISC West in August. However, product availability, including for the IQ Panel 4, has been nil. We now have one iteration of the panel that has limited stock available. The Qolsys IQ Panel 4 with Verizon LTE and Interlogix/GE SRF support in White.

The Qolsys Roadmap for product releases got a little rocky this year. We expected the Qolsys IQ Hub in the late Spring, with the Qolsys IQ Panel 4 to be released in the late fall. That's understandable with all the things that have been going on. What with the COVID-19 Pandemic, and the recent global chip shortage, we consider ourselves fortunate to be seeing stock on existing products, let alone newly announced ones.

At this time, we have limited stock available on one specific version of the Qolsys IQ Panel 4. This is the panel with built-in WIFI, a Verizon LTE cellular communicator, and support for both PowerG and Interlogix/GE and Qolsys 319.5 MHz wireless devices with the panel in White. Eventually, there will also be another version with these exact same specifications, but with the panel in Black.

As the rollout continues, and the component availability and manufacturing bottleneck abates, we will eventually see several other variations of this panel become available. You can see a list of all of them below:

Qolsys IQ Panel 4 Variations

SKU Product Description Available Date
IQP4001 IQP4, Verizon-LTE, PowerG+319.5 MHz, White Available Now
IQP4001BLK IQP4, Verizon-LTE, PowerG+319.5 MHz, Black Available Now
IQP4004 IQP4, AT&T-LTE, PowerG+319.5 MHz, White Available Now
IQP4004BLK IQP4, AT&T-LTE, PowerG+319.5 MHz, Black Available Now
IQP4003 IQP4, Verizon-LTE, PowerG+345 MHz, White Available Now
IQP4003BLK IQP4, Verizon-LTE, PowerG+345 MHz, Black Available Now
IQP4006 IQP4, AT&T-LTE, PowerG+345 MHz, White Available Now
IQP4006BLK IQP4, AT&T-LTE, PowerG+345 MHz, Black Available Now
IQP4002 IQP4, Verizon-LTE, PowerG+433 MHz, White Available Now
IQP4002BLK IQP4, Verizon-LTE, PowerG+433 MHz, Black Available Now
IQP4005 IQP4, AT&T-LTE, PowerG+433 MHz, White Available Now
IQP4005BLK IQP4, AT&T-LTE, PowerG+433 MHz, Black Available Now

If you click on any of the links above for products that aren't yet available, they will show up as discontinued on our site. Once they become available, we will blog again, and those links will become live. This way, you can come back to this post at any time and check availability on whichever panel variation you happen to be interested in.

In addition to the options shown above, the Qolsys IQ Panel 4 currently uses the same User Interface (UI) as the Qolsys IQ Panel 2 Plus. Eventually, they will offer a new look, and users will be able to choose between the new or the existing look. The panel has an 8 MP camera, which can be adjusted for tilt, increased signal range for all wireless cards that are built into the panel, more advanced speakers, three microphones, and many more hardware upgrades.

For those who may not know, Qolsys sought to make it easy to replace an existing panel that uses wireless sensors, without having to replace all of the sensors as well. So if you currently have an older Qolsys panel, or an Interlogix or GE panel, all of which used 319.5 MHz wireless sensors, then you would want to choose the corresponding Qolsys IQ Panel 4 in the color, and with the cellular communicator that best suits your needs.

Honeywell 5800 Series and 2GIG wireless both use 345 MHz wireless sensors. 2GIG has a lineup of encrypted sensors that also operate at 345 MHz, and those sensors will NOT be compatible with the Qolsys IQ Panel 4 that supports this frequency, but most other uni-directional 345 MHz wireless devices that work with either of these two product lines should also work with the Qolsys IQ Panel 4.

Older DSC panels used wireless sensors in the 433 MHz range. As you can see from the chart, there will also be a version of the IQ Panel 4 that supports these devices. DSC is also the manufacturer of PowerG wireless devices. All of the IQ Panel 4 variations will support PowerG. The idea being, once you replace the older panel, and begin to utilize the older RF sensors with the new Qolsys IQ Panel 4, if you need to replace the older devices, you can choose to replace them with the same older model sensor, or you can replace them with a PowerG version, which supports 128-bit AES encryption, and will have a range up to 4,000 feet with the IQ Panel 4. You can read all about why we love PowerG so much in this earlier post.

Qolsys released an RF Compatibility Document for firmware version 2.6.0. Both the Qolsys IQ Panel 2 Plus, and the IQ Panel 4 will use this firmware. This is the base version for the IQP4, so any devices listed on this document as compatible have been tested by Qolsys engineering and are known to work. Uni-directional devices (those that only transmit to the panel, but don't receive any information from the panel) that are not on the compatibility list may or may not work. Bi-directional devices such as the Honeywell 5800RL, 5800WAVE, or 5828 will definitely NOT work.

Tags: , , , , , , , , , , , , , , , ,

Comments


Posted By

Resideo's Pro Series Products, including the PROA7PLUS with Amazon Alexa built in, the PROWIFIZW, PROLTE-A, PROLTE-V and all of its other peripherals have won CEPro's BEST Award for Best Integrated Security System/Module/Device/Surveillance Cameras system. This is a big win for Resideo.

Each year, CEPro Magazine announces the winners of their BEST Awards at the CEDIA Expo. CEDIA is the Custom Electronics Design and Installation Association. It represents professionals in the home automation/smart technology industry. This is the biggest trade show geared specifically toward smart home and automation integrators.

The CEDIA Expo, owned and operated by EmeraldX, LLC. was held in Indianapolis this year beginning on September 1. The 2021 show returned to an in-person format after the 2020 show was canceled due to concerns about COVID-19. Exhibitors and attendees alike were happy to meet in person once again.

The Integrated Security System/Module/Device/Surveillance Cameras award is given in the Control and Automation Category. Some other awards in this segment were for Lighting, Lighting Controls & Accessories, which was won by the Alisse Wall Control which is offered by Lutron Electronics, Motorized Shade Controls & Accessories, which was awarded to Somfy Systems for their PoE Touch Panel Room Controller. There were a number of other categories and winners.

Resideo's Honeywell Home Pro Series Products offer a comprehensive platform to support existing legacy RF sensors using the PROTAKEOVER module (available separately or in one of our kits). With the PROTAKEOVER, a customer can replace an older alarm system that used older wireless technology without having to also replace every single sensor.

This saves both time and money, allowing the customer to concentrate on adding more automation devices, or new sensors in areas that weren't protected before. For example, by not having to replace all of the existing burglary sensors, a homeowner may be able to add smoke detectors or other life safety sensors that are tied to the alarm system where they didn't have this type of protection on the older system. The PROTAKEOVER can support wireless devices from the Honeywell or 2GIG 345 MHz lineup (one or the other, but not both), sensors from the Qolsys or Interlogix/GE 319.5 MHz lineup, and 433 MHz Bosch, or 433 MHz DSC sensors.

The PROA7PLUS comes with the PROWIFIZW already installed. This module adds support for WIFI (802.11 b/g/n 2.4 GHz only) as well as Z-Wave (908 MHz North American frequency). One of the big differences between the PROA7PLUS and the PROA7 is that the PROA7 does not have a WIFI module installed from the factory. Support for WIFI can be added using the PROWIFIZW, or if Z-Wave is not going to be used, then the PROWIFI can be installed. This modular design means that you will only pay for what you intend to use.

The modular design also means that if a component should fail, only the component needs to be replaced, rather than the entire panel. In the future, when technology changes and either WIFI or cellular technology requires an update, only the modules will have to be replaced in order to keep the panel current. If you've ever had to replace a panel with numerous security sensors, or Z-Wave automation devices, you'll know that this alone makes the Pro Series panels worth considering.

With built-in Amazon Alexa for both the PROA7PLUS panel itself, and the PROWLTOUCH Pro Wireless Touchscreen Keypad you can control the system as well as automation devices using just your voice and the Total Connect 2.0 Skill for Alexa. Some of the Alexa features supported are flash briefings, weather, time, add to calendar, create shopping lists, answer general questions, and more. Some features that are not supported are the ability to read books aloud (Audible) and the ability to place calls or Drop-in to another Alexa device.

Tell us what you think of the Resideo and Honeywell Home Pro Series Panels. Do you think these new panels are worthy of accolades? Have you had an experience with one of these systems that you'd like to tell us about? Leave a comment below, we'd love to hear what you think.


Tags: , , , , , , , , , , , , , , , ,

Comments


Posted By

2GIG has announced the release of their first big firmware update for the 2GIG Edge. This update adds support for image sensors in the form of the 2GIG-IMAGE3. In order to support image sensors, the 2GIG XCVR3-GC3 must be installed. Image sensors can be used without losing any other features.

The 2GIG Edge is a great addition to the 2GIG panel lineup. It has built-in facial recognition, Z-Wave Plus V2 (700 Series) support, up to four (4) Smart Area partitions, Bluetooth disarming, and so much more. One of the disappointing aspects of the panel rollout, is that it didn't support image sensors at the time of its release. That problem is now rectified with the new 3.1.0.011 firmware.

If you have a 2GIG Edge, then there are a couple of ways that you can get your panel updated. Alarm.com is still in the testing phase with this firmware, so it can't be pushed remotely quite yet, but remote over-the-air (OTA) updates will be available soon. Once this form of upgrade is available, you'll need to request the update from your alarm dealer. If your panel has a WIFI connection, the update will be completely free. If your panel connects to Alarm.com via cellular only, then a small fee will be incurred when updating OTA.

If you're an Alarm Grid monitoring customer, you can request the upgrade by emailing support@alarmgrid.com. Once the update is available, we'll verify the cost, if any, and if you give the go ahead, we'll push the update to your panel, and pass the cost along to you on your next monthly monitoring bill, with no markup. Remember, there will only be a fee if your panel connects to Alarm.com via cellular only. The cost for this type of update varies, depending on the size of the file to be downloaded. It could be as little as fifty-cents, or as much as a few dollars.

The other way that your panel can be updated is via USB. There is a USB port on the top of the 2GIG Edge. You can download the firmware update files from Alarm Grid here. This is a free download. Use a standard USB drive with at least 1GB capacity, and not more than 16GB capacity. Be sure the drive is formatted using FAT32, and that it has only one (1) partition. The file you download should be saved to the root directory of the USB drive. Full instructions for downloading and upgrading can be found here.

Once the file has been downloaded to the USB drive, remove the drive and take it to the 2GIG Edge panel. The USB port is on top of the panel, covered by a rubber boot. Remove the boot, and insert the drive. A message should appear on the panel, letting you know that an update is available. Press "Update", enter either the Installer Code (default 1561) or Master Code (1111) and the update will then proceed. Be sure the panel has AC power, and that AC power is not interrupted during the update process. The panel will reboot and provide a message letting you know when the update is complete. Remove the USB drive and reinsert the rubber boot.

If you have a 2GIG Edge Remote Keypad, it will be updated by the 2GIG Edge panel, once the panel has completed updating. Be sure the keypad has AC power and that it is connected to WIFI and to the Edge panel. You can verify this by making sure the keypad shows the panel home screen, and the proper panel status. Once the panel has been updated, it should automatically update the keypad. Again, once the firmware has been installed, the keypad will reboot to complete the update process.

In addition to support for image sensors, this firmware also corrects a few known issues regarding WIFI connection problems, and both remote keypad and main panel touchscreen issues. You can read the full firmware Release Notes Here.

So, what do you think about this firmware update? Do you have a 2GIG Edge and want to share your experience with it? Have you been anxiously awaiting image sensor support? Leave a comment below and let us know your thoughts. We always look forward to hearing from you.

Tags: , , , , , , , , , , , , , , , , , , , , , , ,

Comments


Posted By

Qolsys has released the long-awaited Firmware Version 2.6.0. This will be the base version for the Qolsys IQ Hub and will allow users to configure the new IQ WIFI Mesh Router from the touchscreen of the IQ Panel 2. These are only a couple of the new features. This is truly an exciting update!

We've been talking about the Qolsys IQ Hub, well, forever, it seems. But honestly, it's been "coming soon" for over a year now. We are so glad that the wait is almost over. The Qolsys IQ Hub will truly be a DIY dream. Qolsys has taken a "see no green" approach to this panel, meaning there is no reason to open the panel fully, so you should never see the green printed circuit board (PCB). It won't even have screw terminals! The battery will be easily end-user replaceable with a minimum of "deconstruction" to the alarm panel itself. Some of the best features of the IQ Panel 2/2+ will be available in this new panel, such as Bluetooth disarming, and Alarm.com Camera Streaming at the panel.

A couple of things have been removed though. It will not have a built-in camera, nor will it offer 2-way voice capability. The IQ Hub is meant to be a slightly less expensive alternative to the IQ Panel 2 or 2 Plus, and to the Qolsys IQ Panel 4 that we should be seeing later this year. Initially, the IQ Hub will support PowerG Wireless Sensors, but later, there will be 319.5 MHz, 345 MHz, and 433 MHz options available. Each IQ Hub is intended to support only one (1) RF frequency.

You might be saying, "I thought this was a blog about Firmware Version 2.6.0?" Well, it is. But the fact that we have Firmware Version 2.6.0 available now means that the full release of the Qolsys IQ Hub won't be far behind. The Qolsys IQ Hub is scheduled for a Q2 2021 release. Aside from all the new features and improvements for the IQ Panel 2 Plus itself, another exciting capability that is added in this firmware release is the ability to control and configure the new Qolsys IQ Router through the IQ Panel 2 or 2 Plus Touchscreen.

The Qolsys IQ Router is also slated for release in Q2 of 2021. This is a mesh router system that will support up to eight (8) nodes, and both 2.4 GHz and 5 GHz networks. What's great about this product is that it allows a user to create a WIFI subnet inside their regular network. Any devices that use WIFI can be attached to the network, not just security devices, and multiple nodes (up to 8) can be added to strengthen the mesh network. If you change internet providers or even just internet equipment, you simply unplug the IQ Router from the existing router, plug it into the new router, and all of the WIFI devices will remain connected to the WIFI sub-network without having to reconfigure any of them. These are two upcoming products associated with the release of Firmware Version 2.6.0 that we're really looking forward to.

Below you'll find some of the additional new features supported on Firmware Version 2.6.0:

New Features:

  • Support for DSC hardwire keypads (HS2LCD, HS2ICN) via the CORBUS on the PowerG Hardwire to Wireless Translator (PG9WLSHW8) with Firmware V 1.1. Also added new PGM system triggers for Police, Fire, Aux & CO emergency.
  • Support for DSC NEO Wire-Free Keypads HS2LCDWFx, HS2LCDWFxENG.
  • Support for new V4 PowerG Daughter Card.
  • Panel now supports remote Z-Wave Smart Start integration from Alarm.com.
  • This update includes the critical firmware2 fix that resolves an issue where certain panels would automatically reboot with previous firmware applied.

Fixes & Improvements

  • Added a setting to allow the panel to send 1 or 10 images taken by PowerG Image Sensor Cameras (PG9934P, PG9944, NEXT CAM, PG2, NEXT CAM K9-85 PG2, BW-IRC, BW-IPC, TOWER CAM PG2, BW-ODC) during an alarm event to Alarm.com. Previously, ten (10) images were stored locally at the panel, but only the first image was sent to Alarm.com.
  • Added a setting allowing alarm dealers to select a specific time for Communication Tests to be sent to the monitoring station. If no selection is made, the time will be randomized.
  • Added a setting for detection direction on PG9902 Outdoor Curtain PIR. Users can choose left to right, right to left, or both.
  • Added the ability to disable PowerG activation LED on devices that have one in order to conserve battery.
  • Added Partition support for EN Grade 2 Panels.
  • Improved 700-Series Z-Wave performance on UK & EU Panels.
  • Bluetooth Disarm now available for UK & EU Panels.
  • Added language support for Spanish (Spain), French (France), Finnish, and Polish.
  • Added support for European date format: DD.MM.YYYY.
  • Improved cellular strength matching between Panel and Alarm.com for Latin America.
  • Silent and Audible Panics now report separate CID codes to central station.
  • Duress Alarm and Silent Police Panic can now be dismissed from Alarm.com.
  • Improvements to PowerG Wireless keypad functionality (WS9LCDWFx).
  • Keyfob arming now follows the Auto-Bypass setting on the panel.
  • Duress codes from KP-140 & KP-141 now transmit to Alarm.com.
  • Corrected an issue where a PG9905 Temperature Sensor would send double alarms for the same event.
  • Fixed an issue related to virtual device integration on the panel, which includes Liftmaster Garage Door control from the panel UI, and Solar Integration from Alarm.com. See TSB 201026 for additional details.

Into each life, a little rain must fall. It's not all good news, although, this is more of an inconvenience than actual bad news. Because Firmware Version 2.6.0 also contains the important firmware2 fix, it must be downloaded and installed from the Qolsys Server. The server has some logic built-in that allows it to tell if the panel being updated requires the firmware2 fix, or not. For this reason, much like Firmware version 2.5.5, Qolsys is not making this firmware file available for download. This means that Alarm Grid can't host it on our site.

What this means for the end-user is that in order to get 2.6.0, your panel must have a WIFI connection. Once it does, you have two ways in which you can get the firmware. You can request it from your alarm dealer, and they can push the update to your panel from Alarm.com. This will be a free update. As long as your panel has WIFI 24/7, this is a simple and no-fuss way to get your panel updated. Just remember, if for some reason your panel loses WIFI, the update won't go through. Alarm.com will not allow the panel to be updated via a cellular-only connection. You can also follow the instructions below to request the update via Patch Tag.

If your panel happens to be in an area where there is no WIFI, maybe it's a hunting or fishing cabin, or a second home where WIFI is not readily available, then you may be able to use your cell phone as a mobile hotspot and fool the panel into thinking it's connected to WIFI. The amount of data in this file is about 250 MB according to Qolsys. Alternatively, you may be able to move the panel to a spot that has WIFI available just long enough to perform the upgrade. In a situation like this, you need to be in control of when the update begins, so in this case, you would want to use the "Patch Tag" method of updating. To do so, once your panel has a WIFI connection, do the following:

Follow these instructions after making sure your panel is on version 2.0.1 or higher. If the panel is on 2.5.0 or 2.5.1, the user must first update to 2.5.3 before running the update for 2.6.0:

  • Touch the small gray bar in the center at the top of the Home screen on the panel.
  • Touch “Settings”
  • Touch “Advanced Settings”
  • Enter a valid Installer or Dealer Code (defaults are 1111 and 2222 respectively)
  • Touch “Upgrade Software”.
  • Touch “Patch Tag” and enter: iqpanel2.6.0 then touch “OK”.
  • Important: If you need to install 2.5.3 prior to this update, the Patch Tag for that version is: iqpanel2.5.3. Run that update before running the Patch Tag for 2.6.0.
  • Touch “Upgrade Using Network”. If the panel is connected to WIFI, the system will begin downloading the update, it will be installed when the download completes. Once the update begins Do Not Touch The Screen! The update will take about five (5) minutes, and the panel will reboot as a part of the process. When the panel returns to the home screen and the Green LED at the right lights, the process has completed.

What do you think about the new Qolsys firmware, and the new products they have in the pipeline? Share your thoughts in the comments below. Is there a security topic you'd like to see us discuss? If so, leave a comment and we'll be happy to cover any security-related topics of interest. As always, we look forward to hearing from you!

Tags: , , , , , , , , , , , , , , , , , , , , , , , , , , , , , , , , , , , , , , , , , , , , ,

Comments


Posted By

Are you moving into a new home? Alarm Grid will do its part to help make your relocation as easy as possible! You can usually bring your existing security system and activate it for monitoring service at your new house. We can help you every step of the way, from planning to testing!

2gig gc3e at and t lte 3 1 kit wireless encrypted alarm system 3

Before you cancel your existing service, you should remember that Alarm Grid charges you month to month. When you pay your monthly bill, you are essentially paying in advanced for your next month of monitoring service. If you plan to move then you should try and cancel your service before your next billing cycle. That way, you won't get charged an extra month. We are happy to cancel your plan at the last minute if it means preventing an extra bill. But we can't refund you once you have already been charged, so make sure to plan accordingly. Keep in mind that there are no fees to cancel service, or to start new service. You will not pay anything extra to bring your service from your old location to your new one. To us, this is the same as us cancelling an old account and opening a new one.

When making move, you are often left to decide whether you should bring your existing system or start fresh with a new one. And really, it depends. If you have a wired system that would be difficult to bring, or if you have an older wireless system, then it might worth getting a new system. This could also be a good time to get a new LTE cellular communicator if you have been using an older 3G or CDMA module. On the other hand if you have one of the newer wireless systems that we often talk about, like the Honeywell Lyric, the Qolsys IQ Panel 2 Plus, or the 2GIG GC3e, then you should totally bring it! You can also bring your wireless sensors and set them up around your new home.

Whether you brought your existing system or found a new one, you will follow the same general process for setting it up. If you don't want to mount the panel to the wall, then a desk mount might be a great option. And if you are using double-sided foam tape to mount your wireless sensors, then you will probably want to pick some up. Double-sided foam tape isn't too expensive, and you can find it in pretty much any major retail outlet or a hardware store. You can always drill some holes and hard-mount your panel and sensors if you prefer. It's completely up to you.

Once you have your system set up, you can go through the same easy activation process as one of our new customers. Remember that you or a designated individual will need to be on-site and able to work with the system at the time of activation. Check these tips for making your activation as easy as possible. You should visit our monitoring page or email us at support@alarmgrid.com to choose an activation slot. The activation is a great time to get an updated Certificate of Alarm for an insurance discount at your new home. Just make sure to have all of the applicable sensors powered on and enrolled with your system before the activation. And please feel free to email us beforehand if you have any questions. We have activation slots available from 9am to 8pm ET M-F. We look forward to helping you during your move

Tags: , , , , , , , , , , , , , ,

Comments


Posted By

Alarm.com has recently announced that they will soon be dropping support for the Internet Explorer 11 web browser. The new change is being made to improve the overall experience for Alarm.com end users. Alarm.com recommends using a supported web browser or the Alarm.com Mobile App.


Beginning on Tuesday, May 26, 2020, Alarm.com will display a pop-up message to anyone who logs in using Internet Explorer 11. The message will let them know to switch to a supported web browser. The user will then be able to use Alarm.com like normal. But a month later in late June, Alarm.com will stop supporting IE11 entirely. Anyone who tries to login using IE11 will be denied.

According to Alarm.com, the best web browsers to use with their platform are the latest versions of Google Chrome, Mozilla Firefox, Apple Safari, and Microsoft Edge. If you already use one of these web browsers, then you should have no problems using Alarm.com. Just make sure that you are running the latest version and make an upgrade if necessary.

If you have any questions about this change for Alarm.com, or if you are interested in starting monitoring service for use with Alarm.com, please email us at support@alarmgrid.com. Our team checks email from 9am to 8pm ET M-F. We look forward to hearing from you and helping you get the most out of Alarm.com.

Tags: , , , , , , , , , , , , , , , , ,

Comments


Posted By

A security system is either monitored or unmonitored. While you can use an unmonitored system, we're here to tell you why having your system monitored is so important. Alarm monitoring service is the best way to ensure that responders arrive as soon as possible during an emergency.

Honeywell lyricpk10 lte a new dual path security system w slash

When a monitored system goes into alarm, it will activate a siren to alert those on-site, and it will send alerts to a central monitoring station and/or the end user directly via text and/or email, depending on the user's monitoring plan. If a system is not monitored, then the siren will still activate, but no remote alerts or notifications will be sent out.

The only way an unmonitored system is useful is if you are always on-site with the system. Then you will hear the siren and know to take action regarding the alarm. But what if you are away from your home or business and a fire or break-in occurs? That is when you count on your security system alarm monitoring service to ensure that the appropriate party is notified.

Alarm grid inside security stickers

There are two (2) types of alarm monitoring service. Central station monitoring involves having your system send an emergency alert to a central monitoring station where a highly trained operator will take immediate action. They can see the type of alarm that occurred (e.g. security, fire, carbon monoxide gas, medical, etc.) and contact the authorities in your area for help.

Some users prefer self-monitoring service. This involves having an alert sent to you via text, email, and/or push notification. The alert will tell you what type of alarm has occurred and which sensor or zone on your system caused the alarm. This way, you can take your own action regarding the alarm event. Just know that in order for help to arrive, you must be able to reliably respond to the alert.

It is also possible to get a central station monitoring plan that includes self-monitoring service. This way, you can still have emergency help sent out automatically by a central station operator, while also receiving a personal alert so that you immediately know what's going on. This is a "best of both worlds" option, and it is what most new users ultimately select when setting up their monitoring service.

Whether you go with central station monitoring, self monitoring, or a hybrid of both, having your system monitored is the best way to ensure that your home or business is protected while you are away. Alarm Grid offers monitoring plans for all types of homes and businesses, and we have a wide selection of security systems available. Our team is happy to help you every step of the way.

If you want to learn more about choosing and installing your own DIY security system and saving hundreds by not hiring a professional installer, please email us at support@alarmgrid.com. Our system planners are available from 9am to 8pm ET to help you choose the best security system for your needs. You might also want to check out our monitoring page to learn more about what we offer. We look forward to helping you get started with your new security system!

Tags: , , , , , , , , , , , , , , , , ,

Comments


Posted By

Just like any residence, an apartment is at-risk for a burglary or break-in. An unlocked door or a shattered window offers an easy entrance for an intruder. With an apartment security system you can be ready if this occurs. But picking a system can be daunting with so many options available!

Alarm grid inside security stickers

Luckily, Alarm Grid is here to help you pick the best apartment alarm system for your needs. A good apartment security system usually features a wireless panel that can be installed using a desk or table stand. This will allow you to easily take the system with you when you move, and it will prevent you from having to drill holes in the wall. The wireless sensors can similarly be mounted using double-sided foam tape, and they can be easily removed if you relocate. You may also want the panel to include some cool smart home automation features to make your life more convenient.

It is strongly recommended that you select an apartment security system that is non-proprietary. This means that you will be able to take it to a new monitoring company if you cancel your current service. A great option is to go with a DIY no-contract alarm monitoring company like Alarm Grid. Our company does not charge you anything to start or stop monitoring service, which is really convenient if you ever need to take a month off of service while you are moving. We also offer systems that are super quick and easy to install without having to hire a professional installer!

With that in mind, we have our picks for the top 5 apartment security systems of 2019. All of these systems work great if you are looking to set up your own apartment alarm system that you can take with you if you decide to move later on. These systems are all very easy to use, and you can set them up in a matter of minutes. Let's check out the systems!

5. Interlogix Simon XTi-5i

Interlogix has long been known for their cost-effective systems. While they are ceasing operations at the end of the year, they are leaving us with a very good system. The Interlogix Simon XTi-5i is great if you need a no-frills alarm panel for basic operation. It has a 5-inch touchscreen display, support for up to 80 wireless zones, and some great communicators available, including some dual-path options. Adding a communicator will also make the system Z-Wave ready. You can even choose from an exclusive lineup of Interlogix Encrypted Sensors to add to the system. And for apartments, there is an excellent table stand you can buy for the system!

4. 2GIG GC2e

2gig gc2e wireless encrypted alarm panelThe 2GIG GC2e is the current entry-level option from 2GIG. It packs some great features into a small package, and it provides some nice upgrades over its 2GIG GC2 predecessor. With the GC2e, you will enjoy a larger 5-inch touchscreen, built-in Z-Wave Plus, and support for 2GIG eSeries Encrypted Sensors. Some other specs include support for up to 60 wireless zones and 64 different user codes. Remember to add a cellular communicator so that you can use with system for monitoring service through Alarm.com. And don't forget about the desk mount!
3. 2GIG GC3e

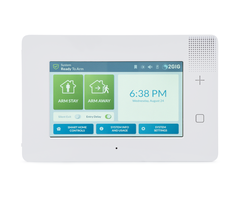
2gig gc3e wireless encrypted alarm panel2GIG offers an impressive high-end security system with their GC3e. It still retains a lot of similarities to the discontinued 2GIG GC3, while offering some new upgrades in its own right. Namely, the panel now supports the 2GIG eSeries Encrypted Sensors, and it offers a fresh redesign over its predecessor. Returning features to the GC3e include a 7-inch touchscreen, support for up to 100 wireless zones, 100 user codes, partitioning, integrated WIFI, and built-in Z-Wave Plus. Note that you will still need a cellular communicator to monitor the system and use it with Alarm.com. Interestingly, the system uses the same desk mount as the 2GIG GC2e.

2. Honeywell Lyric Controller

Honeywell lyric controller encrypted wireless security systemThere are many reasons why we can confidently say that the Honeywell Lyric Security System is one of the best panels on the market today. It is one of very few panels (and currently the only one on this list) that can support Apple HomeKit. The Lyric offers a very impressive 128 wireless zones, 64 user codes, built-in Z-Wave, and a 7-inch touchscreen. You will have no trouble filling up the zones with Honeywell SiX Series Sensors, which offer military-grade 128-bit encryption! Other features include a built-in 2MP camera for disarm photos and ten (10) different chime settings.

The panel also comes with built-in WIFI, and unlike the other systems on this list, it can be monitored across IP only. Not only does this mean you do not need to add a communicator, you can use the Lyric on a less expensive IP-only monitoring plan. This is perfect for users looking to cut-down on monitoring costs. But you can still add a Lyric Cellular Communicator if you want. The Honeywell LCP500-DK is the recommended desk mount.

1. Qolsys IQ Panel 2 Plus

Qolsys iq panel 2 plus verizon lte with powerg s line and legacy

There is so much to like about the Qolsys IQ Panel 2 Plus as an apartment security system. It is sleek and modern with its thin profile and beautiful 7-inch touchscreen. You will love its built-in glass break sensor, integrated 5MP camera, and support for up to four (4) partitions. This is also the only system on the list that is dual-path ready right out of the box, as it has both an LTE communicator (AT&T or Verizon) and a WIFI card. You can even live-stream compatible Alarm.com Cameras right from the panel once you have connected the system with Alarm.com.

Other features include built-in Z-Wave Plus technology for smart home integrations, as well as integrated Bluetooth for optional automatic disarming. If that weren't enough, the system offers support for PowerG Sensors, as well as one legacy frequency (319.5 MHz, 345 MHz, or 433 MHz). The PowerG support is particularly useful, as PowerG Sensors utilize military grade 128-bit AES encryption and a wireless range of up to 2,000 feet away from the panel. This is way further than you will likely need in an apartment, but it's still cool nonetheless! A standard desk mount comes included with the system, but you can also purchase the Qolsys IQ Stand if you want something a little more robust. The Qolsys IQ Panel 2 Plus is without a doubt the pinnacle of apartment security systems in 2019.

If you need help choosing a system, or if you want to learn more about the alarm monitoring plans offered from Alarm Grid, then please reach out to us! The best way to contact us is to email support@alarmgrid.com. You are also welcome to call us at (888) 818-7728. Just keep in mind that our regular business hours are from 9am to 8pm ET M-F. We look forward to hearing from you!

Tags: , , , , , , , , , , , , , , , , , , , ,

Comments


Posted By

Hi DIYers! Today, we're presenting our own guide for installing the Qolsys IQ Panel 2 Plus. This system is very easy to use, and it can be installed by virtually anyone using nothing more than a screwdriver! This is the perfect security system for your home, office, or apartment!

Qolsys iq panel 2 at and t wireless security system with at and Most of the information presented in this post can be found in the Qolsys IQ Panel 2 DIY Installation Manual. You are free to follow along with that manual, which can be found here. We also have three (3) videos that we will include along the way. Feel free to follow along with those as well. All of this information applies to both the original IQ Panel 2 and the newer IQ Panel 2 Plus. With that out of the way, let's get started!
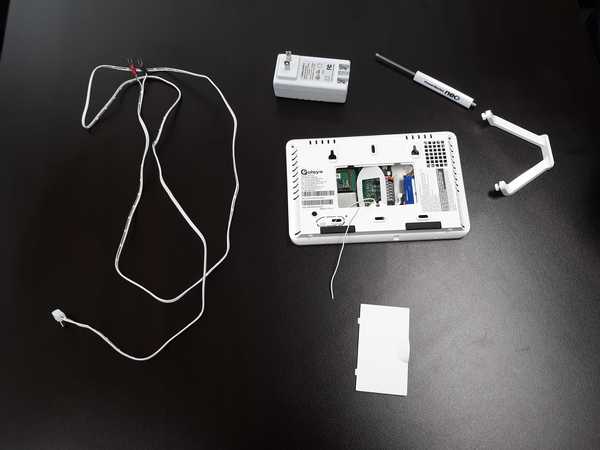
The first thing you will want to do is power on the system. The Qolsys IQ Panel 2 Plus comes with everything you need to get started. Once you have opened up the box, you should locate the panel, the power supply transformer, the power wire, the panel back cover, and the table stand. You will also want to have a screwdriver on hand.


Start by connecting the spade lugs of the power cable to the transformer. The IQ Panel 2 Plus uses DC power, so you must make sure to follow polarity. That means connecting the positive (+) wire and negative (-) wire accordingly. The positive and negative ends on the IQ Panel 2 power cable are marked for this purpose. The positive (+) wire has grey dashes and ends in a red spade connector. The negative (-) wire is solid white without grey dashes and ends in a black spade connector. Make sure that the wires are connected with the proper terminals on the transformer. You can see the positive (+) and negative (-) terminals marked on the transformer. The connection should be nice and snug, but not overly tight.

From there, you can connect the other end of the power cable to the IQ Panel 2 Plus System. There is a simple barrel connection for this purpose. The transformer can then be plugged into a wall outlet. When applying the panel back cover, make sure to run both the power cable and the thin RF receiver cable out from the indentation on the back cover. The back cover should snap nicely into place. The convenient table stand can be installed by putting it into the keyhole slots on the back of the panel and then sliding up. You can power on the system by pressing and holding the side power button until the system LED remains lit.


After the system powers on and boots up, you will be greeted by the Setup Wizard. It is recommended that you go through the Setup Wizard, as it will walk you through the entire setup process. Note that some steps of the Wizard will require you to activate the system for monitoring service. This involves registering the panel's built-in cellular communicator with Alarm.com. This is optional for initial set up. You can always register the cellular communicator with Alarm.com later.

Remember that activating the system is something you will definitely want to do before too long, as that is the only way for it to send out signals to you and/or a central station. Remember that you will need to provide the IMEI Number for the system in order for your monitoring company to activate the cellular communicator. This can be found on a sticker on the back of the panel. It will also be shown as you move through the Wizard.

You will do several things as you go through the Setup Wizard. You will connect the system to a WIFI network, run an initial check for the system, add sensors, perform an initial sensor test, set up the built-in panel glass break sensor, add Z-Wave home automation devices, pair your phone for automatic Bluetooth disarming, pair secondary IQ Remote Keypads, and add system users. Remember that you will want to have a good idea of Sensor Groups when enrolling sensors. You can learn all about the IQ Panel 2 Sensor Groups in this helpful FAQ.


The last thing you will want to do is install your sensors. We only focused on door and window contacts and motion sensors, but many of the same principles apply across any sensor type. What's great about wireless sensors that are used with the IQ Panel 2 Plus is that they can be mounted without drilling holes into the wall or using any power tools. You can safely mount and secure these sensors using double-sided foam tape. Most wireless sensors come with their own double-sided tape for this purpose, or you can buy some off our site!

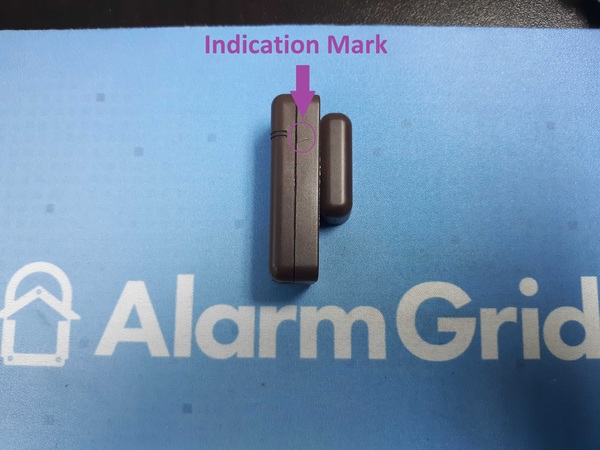
There are a few general tips when mounting these sensors. When mounting door and window contacts, you should have the magnet on the moving structure of the door or window, and the sensor itself on the door or window frame. Make sure the magnet is aligned with any indication marker shown on the sensor. Also remember to keep the magnet spacing gap in mind. Most Qolsys Door and Window Sensors allow for a magnet spacing gap of up to 0.75 inches.


As for motion sensors, you should have them mounted flat on a wall or corner-mounted. But keep in mind that only a flat-mount will allow you to install without drilling any holes. The motion sensor should be nice and level, and it should be installed at a height between 6 and 8 feet. Qolsys recommends 7.5 feet, which provides the best possible results. The motion sensor should not be facing any windows, vents, or air ducts. It should also not be facing any nearby furniture or stairwells if you have pets!

Most importantly, remember to test ALL your sensors after the final installation!


And that wraps up our Part 1 Guide for installing and using the Qolsys IQ Panel 2 Plus. Look forward to Part 2 coming soon! If you have any questions about the Qolsys IQ Panel 2 Plus or our monitoring service, please reach out to us by emailing support@alarmgrid.com. Remember that our support hours are from 9am to 8pm ET M-F. We look forward to hearing from you!

Tags: , , , , , , , , , , , , , , , , , , , , , , , , , , , , , ,

Comments


Posted By

Hi DIYers! Today, we wanted to let you know about some of the new security system kits that are available from the Alarm Grid website. We have new kits that feature the Resideo Lyric, the Qolsys IQ Panel 2 Plus (319.5 MHz, 345 MHz, and 433 MHz), the 2GIG GC3e and the 2GIG GC2e Systems.

Honeywell lyricpk10 lte enc encrypted at and t lte alarm system

Our system kits are perfect for anyone just getting started with alarm monitoring service. Each one includes a brand-new alarm panel, some door and window sensors, a motion sensor, an LTE cellular communicator, and a power cable. You can easily expand around any of these systems later on if needed. Just remember that you will need a monitoring plan to use one of these systems with Alarm Grid. A Gold Plan or higher is needed for cellular communication.

Now that you know a little bit about our kits, let's take a look at each new one individually:

Resideo Lyric w/ Verizon LTE Communicator Kits

Lyric Verizon-LTE 3-1 Kit


Lyric Verizon-LTE 10-1 Kit

  • Lyric System
  • LYRICLTE-V Verizon LTE Communicator
  • 10 Versa-2GIG Contacts
  • SiXPIR Motion
  • LT-Cable


Lyric Verizon-LTE 3-1 Encrypted Kit


Lyric Verizon-LTE 10-1 Encrypted Kit

  • Lyric System
  • LYRICLTE-V Verizon LTE Communicator
  • 10 SiXMINICT Contacts
  • SiXPIR Motion
  • LT-Cable


Qolsys IQ 319.5 MHz PowerG Kits

IQ Panel 2 319.5 MHz AT&T LTE 3-1 Kit


IQ Panel 2 319.5 MHz AT&T LTE 10-1 Kit
  • IQ Panel 2 Plus 319.5 MHz w/ AT&T LTE
  • 10 PG9303 PowerG Contacts
  • PG 9914 PowerG Motion


IQ Panel 2 319.5 MHz Verizon LTE 3-1 Kit


IQ Panel 2 319.5 MHz Verizon LTE 10-1 Kit
  • IQ Panel 2 Plus 319.5 MHz w/ Verizon LTE
  • 3 PG9303 PowerG Contacts
  • PG 9914 PowerG Motion


Qolsys IQ 345 MHz PowerG Kits

IQ Panel 2 345 MHz AT&T LTE 3-1 Kit


IQ Panel 2 345 MHz AT&T LTE 10-1 Kit

  • IQ Panel 2 Plus 345 MHz w/ AT&T LTE
  • 10 PG9303 PowerG Contacts
  • PG 9914 PowerG Motion


IQ Panel 2 345 MHz Verizon LTE 3-1 Kit


IQ Panel 2 345 MHz Verizon LTE 10-1 Kit

  • IQ Panel 2 Plus 345 MHz w/ Verizon LTE
  • 10 PG9303 PowerG Contacts
  • PG 9914 PowerG Motion


Qolsys IQ 433 MHz PowerG Kits

IQ Panel 2 433 MHz AT&T LTE 3-1 Kit


IQ Panel 2 433 MHz AT&T LTE 10-1 Kit

  • IQ Panel 2 Plus 433MHz w/ AT&T LTE
  • 10 PG9303 PowerG Contacts
  • PG 9914 PowerG Motion


IQ Panel 2 433 MHz Verizon LTE 3-1 Kit


IQ Panel 2 433 MHz Verizon LTE 10-1 Kit

  • IQ Panel 2 Plus 433 MHz w/ Verizon LTE
  • 10 PG9303 PowerG Contacts
  • PG 9914 PowerG Motion


2GIG GC3e Kits

2GIG GC3e Verizon-LTE 3-1 Kit


2GIG GC3e Verizon-LTE 10-1 Kit

  • 2GIG GC3e System
  • 2GIG LTEV-1-A-GC3 Verizon LTE Communicator
  • 10 2GIG DW10e Door and Window Sensors
  • 2GIG PIR1e Motion
  • LT Cable


2GIG GC2e Kits

2GIG GC3e Verizon-LTE 3-1 Kit


2GIG GC2e Verizon-LTE 10-1 Kit

  • 2GIG GC2e System
  • 2GIG LTEV1-A-GC2 Verizon LTE
  • Communicator
  • 10 2GIG DW10e Door and Window Sensors
  • 2GIG PIR1e Motion
  • LT Cable


All of these great kits are available from Alarm Grid right now. If you have any questions or need help choosing a system, please email us at support@alarmgrid.com. You may also call us during our regular business hours of 9am to 8pm EST M-F. We look forward to hearing from you!

Tags: , , , , , , , , , , , , , , , , , , , , , , , , , , , , , , , ,

Comments