Anyone who has a Honeywell Security System knows that using and managing codes is very important for getting the most out of the system. This handy guide will show you everything you need to know about Honeywell System Codes, including how they are are used and how they are created.
Basic Information about System Codes
Note that the default Installer and Master Codes for almost any Honeywell System are 4112 and 1234 respectively. Let's start by reviewing basic concepts and information about system codes.
What is a system code?
A system code on a Honeywell Panel is a numeric password that is used to gain access to certain menus of the system and to perform various functions. The main reason that alarm systems have codes is to make sure that the person who is using the system is supposed to have access. Only the end user and any other individuals they have authorized to use their security system should know any of the system codes.
Depending on the type of code, a master user can restrict access to only specific parts of the system for other users. This makes some system codes more powerful than others. For Honeywell Systems, most codes are four-digits in length and use the digits 0-9. This allows for up to 10,000 possible combinations for any given code!
How should I choose a system code?
Any code you use on a Honeywell System should be a code that is easy for the user to remember, but difficult for others to guess. Remember, the purpose of a code is to prevent access to unauthorized users. If an unauthorized user, like an intruder, is able to provide a valid system code, it could result in a serious security breach. Likewise, if an authorized user forgets a code, it can be inconvenient or even impossible to get back in.
Most Honeywell Systems operate using delay periods. In other words, upon entering the premises, a valid code must be provided within a very limited time period to disarm the system. If a valid code is not provided within this specified time, then an alarm will occur. This will give an end user who knows a valid code enough time to disarm the system. But it will not give an intruder nearly enough time to brute force their way into the system by guessing codes.
What types of codes are used on Honeywell Systems?
There are many types of codes used with Honeywell Panels. The most common are outlined below:
-
Master Code: Each system has one Master Code. This is the main code a user will normally use for arming and disarming. It can perform all security functions, add and delete users, change the current Master Code and perform many additional system functions. This code cannot be deleted from the system entirely. Only the main user and operator of the security system should know the Master Code.
-
User Codes: Most Honeywell Systems can have multiple user codes set up. These codes can arm and disarm the system just like the Master Code. However, they cannot perform other system functions. A user code should be provided to a user who needs regular access to the building, but should not be able to adjust important settings and configurations for the alarm system.
-
Installer Code: Each system has one Installer Code. This is the main code that is used for making programming changes to the system. It is needed for adding, deleting and configuring sensors, adjusting entry and exit delay periods and more. Basically any major system setting will require the use of the Installer Code. An important note is that the Installer Code can only disarm the system if it was used to arm the system in the first place. This means that keeping the Installer Code at its default is not a security risk, as long as the code isn't used to arm the system. This code cannot be deleted from the system.
-
Guest Code: Also called a "babysitter code", a guest code is a restricted-access code that can be established on most Honeywell Systems. The important thing to remember about this code is that it can only disarm the system if it was the code used to arm in the first place. This code is best provided to users who need temporary access to the system, such as a house guest, a babysitter or a maintenance person. The main user can arm their system with the guest code so that they can access the premises. But if nobody else should be using the system, then the Master Code or a regular user code can be used to arm so that the guest code cannot gain access.
-
Duress Code: The duress code is a special code that is used to send a secret signal to a central monitoring station, letting them know that help is needed immediately. When this code is entered, it will appear to disarm the system like normal. But in reality, a distress signal will be sent out to the central monitoring station to request immediate help. This code is very rarely used, as its only purpose it to protect the user in hostage situations. Otherwise, this code should never be used. However, it is still important to remember this code, as it can save lives when used properly.
-
Arm Only: On select panels only. This code can arm the system, but it cannot disarm.
-
Partition Master: Only for systems with multiple partitions. This code is the same as a Master Code, but its authority only applies to a specific partition. This type of code is optional on a system, but it can be useful if multiple partitions have been established.
What are default codes?
When a Honeywell System is used for the first time, its Master Code and its Installer Code will be set to default values. For most Honeywell Panels, the default Master Code is 1234, and the default Installer Code is 4112. It is normally recommended that you change the Master Code for security purposes. However, the Installer Code can be left at its default so that the user can get back into programming. Keeping the Installer Code at the default does not present any type of security risk.
Now that we have covered some basic information for system codes, let's look into some specific panels to learn how codes are used.

For the Lyric, codes are managed through the Users Menu. To access this menu, start from the main screen of the system. Choose Security > Tools > Master Code > Users. This menu will allow you to change any system code, with the exception of the Installer code.
Up to 48 unique codes can be added with the system. The code in slot 01 is the Installer Code. The code in slot 02 is the Master Code. The code in slot 47 is the Guest Code. The code in slot 48 is the duress code. All of the other 44 system codes are optional user codes.
Add New Codes
Press the "Add New" button. You can the provide a name for the code, enter in a valid four-digit code, and set whether or not the code can be used to control any Z-Wave door locks. The user number will be automatically assigned. Remember to press the "Save" button in the lower-right corner when you have finished.
Edit Existing Codes
Click on the code you want to edit to highlight it. Then press the Edit button in the lower-left corner of the screen. You can then edit the Name, the 4-digit numeric code and the Z-Wave lock settings for the code. Make sure to press "Save" when finished.
Delete Codes
Click on the code you want to delete to highlight it. Then press the Delete button in the lower-right corner of the screen. Press "Yes" when asked if you are sure. The code will be deleted.
Changing the Installer Code
The default Installer Code for the Honeywell Lyric Alarm System is 4112. We recommend keeping this code at the default to prevent the user from being locked out of programming. However, this code can be changed through programming if desired. You will need the current Installer Code to do this. You cannot do this using the Master Code.
Start from the main screen of the system. Choose Security > Tools > Installer Code (default is 4112) > Program > Installer Code. You can then change the Installer Code for the system. Press the "Done" button in the lower-right corner when finished.

Managing user codes for a Honeywell LYNX Touch System is very similar to the process for the Honeywell Lyric Controller. Most codes can be managed through the User Codes menu. To access this menu, start from the main screen, and choose Security > More > Tools > Master Code > Users. This menu will allow you to edit any system code, except for the Installer Code.
Please note that the number of user codes that can be added depends on the type of LYNX Touch Panel that is being used. On each system, the Installer Code will be user 01, the Master Code will be user 02, the Guest Code will be the second-to-last available code, and the Duress Code will be the last.
For reference, the L7000 will support up to 48 codes, the L5210 and L5200 will support up to 32, and the L5100 and L5000 will support up to 16.
Add New Codes
Click the "Add New" button at the bottom of the screen. The following menu will let you change the Name, the four-digit code and the Z-Wave lock settings for the code. The user number for the new code will be automatically assigned. Press "Save" in the lower-right corner to finish.
Edit Codes
Click on the code you want to edit to highlight it. Then press the Edit button in the lower-left corner. From there, you can change the name, the four-digit code, and the Z-Wave lock settings. Press "Save" in the lower-right corner when finished.
Delete Codes
Click on the code you want to delete to highlight it. Then press the Delete button in the lower-right corner. The panel will ask you if you are sure. Choose "Yes". The code will be deleted.
Changing the Installer Code
All of the LYNX Touch Panels use 4112 as their default Installer Code. This code is normally left at its default to prevent the user from being locked out of programming later. But it can be changed using the current Installer Code for the system if desired. Remember, keeping the Installer Code at the default does not present any type of security risk.
To change the code, start from the main screen of the system. Choose Security > More > Tools > Installer Code (default is 4112) > Program > Installer Code. You will then be able to change the Installer Code. Please note that when exiting programming, always choose "Yes" when asked you want to allow the installer to get back into programming. Choosing "No" will lock the user out of programming, and the user will need to use the backdoor method to get back in.
Backdoor Method for Accessing Programming
If you ever get locked out of programming, either due to choosing "No" when asked if you want to allow the Installer to get back into programming, or because you lost an Installer Code that wasn't set to the default of 4112, you can use the backdoor method to get back in.
First, reboot the panel by going to Security > More > Tools > Master Code > Test > Reboot. Alternatively, if you don't know the Master Code, you can power the system down by unplugging the transformer and disconnecting the backup battery. Then power it back on by plugging the transformer in. Once the white screen on the reboot appears, immediately press and hold the Home Button (the picture of the house) on the front of the panel. Release the button once the green bar with "Ready to Arm" appears across the top. Then choose Security, followed by Arm Stay. In the number pad that appears, press Clear, followed by 00. Choose "Program" to enter the Programming Menu.
Once you are inside, you can then set the Installer Code for the system to reenter programming later. You can also restore the system to factory default settings through "Default Config" to restore the system to its factory default settings. This will reset the Master Code to its default of 1234. Please note, this will also delete all programming settings for the system.

The VISTA P-Series Panels use hardwired keypads for virtually all system operations and overall access. This includes adding, editing and deleting codes. Since codes do not require deep level programming, alphanumeric keypads and fixed English keypads can be used for this purpose. The VISTA 21iP and VISTA 20P can support up to 48 system codes. The VISTA 15P can support up to 32 system codes. The VISTA 10P can support up to 16 system codes. Remember, two of these slots will go to the Installer Code (slot 01) and the Master Code (slot 02).
For these systems, each Code Type is associated with a particular Authority Level. This Authority Level is assigned when assigning attributes. Please note that since the Installer Code and Master Code are hardcoded to slots 01 and 02 respectively, they are not associated with any particular Authority Level. The table below outlines the the Authority Levels that can be assigned to system codes.
Code Type
|
Authority Level
|
Notes
|
| User
|
0
|
Can arm and disarm the system.
|
| Arm Only
|
1
|
Can only arm the system.
|
| Guest
|
2
|
Can disarm if it was the code used to arm.
|
| Duress
|
3
|
Sends secret distress signal to station.
|
| Partition Master
|
4
|
Partitioned systems only. One per partition.
|
Also note the various attributes for VISTA System codes:
Attribute
|
Attribute Number
|
Assigned Value and Notes
|
| Authority Level
|
1
|
See previous table.
|
| Access Group
|
2
|
0-8. An entry of [0] means no group.
|
| Active Partitions
|
3
|
Enter the partition numbers, then [#].
|
| RF Zone Number
|
4
|
2-digit key fob number.
|
| Open/Close Paging
|
5
|
0 for No. 1 for Yes.
|
Add New Codes
Enter the following command on the keypad:
[Master Code] + [8] + [2-digit User Number] + [desired 4-digit code]
The panel will beep to confirm the new code has been added. However, a long tone indicates that the process was unsuccessful, likely because the code was already taken.
Edit Codes
This is basically the same as adding a new code, only you will be working with a code that has already been programmed.
[Master Code] + [8] + [2-digit User Number] + [desired 4-digit code]
The panel will beep to confirm that the code has been changed. But if a long tone is produced, it indicates that the process was unsuccessful. This could be because the code was already taken.
Deleting Codes
Note that you cannot delete the Installer Code or the Master Code. Enter the following command:
[Master Code] + [8] + [2-digit User Number] + [#] + [0]
Assigning Attributes
Enter the following command:
[Master Code] + [8] + [2-digit User Number] + [#] + [Attribute Number] + [Attribute Value]
Backdoor Into Programming
If you don't have your Installer Code or if you have locked yourself out of programming., you can get back into programming using the backdoor method. To do this, power down the panel by unplugging the transformer and disconnecting the backup battery. Press and hold the the [*] and [#] buttons on the keypad simultaneously. With these buttons held down, power the system back on by plugging the transformer back in. The message "20" or "Installer Code 20" should appear on the keypad to indicate that programming has been accessed. Then press [*] + [20] + [4112] to set the Installer Code back to 4112. Then press [*] + [99] to exit programming. Never use [*] + [98] to exit programming, as this will lock you out!
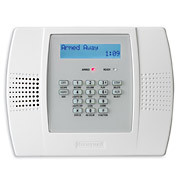 The Honeywell LYNX Plus L3000 is relatively outdated by today's standards, but it is still used in some cases. The panel can only support up to 8 different codes. Much like the other panels, slot 01 goes to the Installer Code, and slot 02 goes to the Master Code. These codes cannot be deleted from the panel. Also, slot 07 goes to the Guest Code, and slot 08 goes to the Duress Code. Only codes 03 thru 06 can be assigned to regular user codes.
Adding a Code
Enter the following command:
[Master Code] + [8] + [Code Number] + [Desired Code]
The panel will beep to confirm success. Remember that [03] thru [08] can be entered for the Code Number.
Deleting a Code
Only codes [03] thru [08] can be deleted. Codes 01 and 02 are for the Installer Code and the Master Code respectively, and they cannot be deleted from the system. Enter the following command:
[Master Code] + [8] + [Code Number]
The panel will beep to confirm that the code has been deleted.
Editing a Code
Codes cannot be truly edited. Instead, a code must be deleted, and then re-added with a new entry. Start by deleting the code:
[Master Code] + [8] + [Code Number]
Then add the new code:
[Master Code] + [8] + [Code Number] + [Desired Code]
The panel will beep to confirm the code has been added.
Change the Master Code
This process is the mostly same as adding a new code. Note that the Master Code is assigned slot 02. Enter the following command:
[Master Code] + [8] + [02] + [Desired Master Code] + [Desired Master Code Again]
The panel will beep three times after a Master Code change.
Conclusion
We hope that this guide has been informative for you in learning all about codes of Honeywell Systems. In future, we hope to expand this guide to include the commercial polling loop VISTA Systems as well. If you have any questions, please reach out to us at support@alarmgrid.com, or call us at (888) 818-7728 from 9am to 8pm EST M-F.


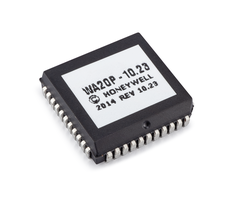 Before we discuss the issue itself, we will first cover some terminology to ensure that everyone is on the same page. Many Honeywell VISTA Alarm Panels come in both SIA and non-SIA variants. For example, there is the


 The Lyric is in competition with DSC’s Iotega, which works as a HomeKit controller. If you’re looking for HomeKit control, and your home is filled with DSC sensors, the Iotega might be a better choice for you. But if you’re starting from scratch, nothing is better than the Lyric controller. This system is compatible with a wide range of sensors, including America’s most sold sensor, the 5816. It looks great on a wall. It’s fairly priced, and it does everything you’d want from a good looking system, including a photo album feature.

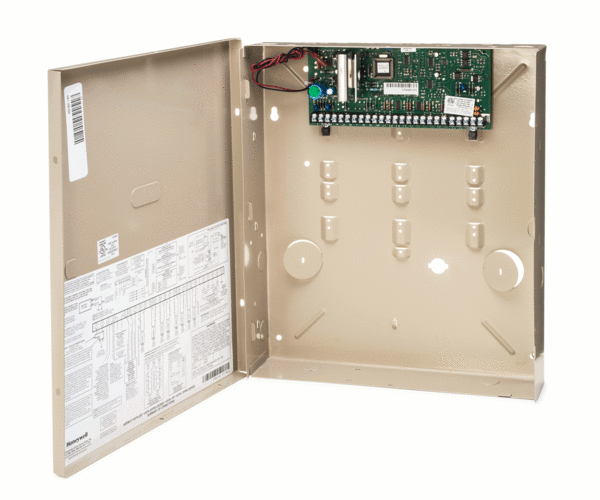 This is an oldie but a goodie. The VISTA 20P has been produced by Honeywell for many many years now. It's an excellent system with great, modern features. Honeywell produces update chips that they release every once in a while. These updates allow the system to take advantage of modern features like those available in the VAM or Tuxedo Touch. Home Automation? You can do it using the VISTA 20P. Manage both wired and wireless sensors? You can do that very easily with the VISTA 20P by adding a wireless receiver or a keypad with a wireless receiver built in. In all, this system has all the same great features of its all-in-one wireless contemporaries. 2 drawbacks to speak of, though: 1) it's big and bulky; 2) programming these systems sucks.


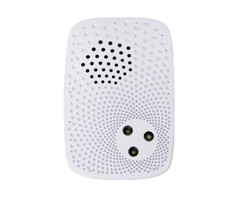




 The Honeywell LYNX Plus L3000 is relatively outdated by today's standards, but it is still used in some cases. The panel can only support up to 8 different codes. Much like the other panels, slot 01 goes to the Installer Code, and slot 02 goes to the Master Code. These codes cannot be deleted from the panel. Also, slot 07 goes to the Guest Code, and slot 08 goes to the Duress Code. Only codes 03 thru 06 can be assigned to regular user codes.