Technology Posts

Posted By

Many iOS users are looking for ways to build and expand upon their HomeKit networks. One potentially great addition is the iDevices IDEV0010 Wall Outlet. This HomeKit Smart Outlet is easy to install, and it can be conveniently paired with your local WIFI network for connectivity.

Idevices idev0010 in wall outlet

Apple HomeKit is continuing to prove that it is one of the top automation platforms to build around. Alarm Grid has worked with countless customers in helping them get their Honeywell Lyric Security Systems connected and set up with Apple HomeKit. The platform is perfect for iOS users, as using an iPhone and Siri is a super convenient way to control all your HomeKit devices from anywhere. You can also establish robust and intricate HomeKit Smart Scenes so that your devices activate automatically. For example, you might have your HomeKit Lights turn OFF when you arm your Lyric System before leaving for the day.

At Alarm Grid, we particularly big fans of iDevices products, and the iDevices IDEV0010 is no exception. This smart in-wall outlet conveniently replaces a standard receptacle. Just cut the power at the breaker, remove the existing outlet, install the iDevices IDEV0010 in its place. You will then be able to pair it with your HomeKit network and start integrating it with all of your smart scenes. Both the top and bottom ports are operated individually, thereby giving you the ultimate freedom. The device is also compatible with Amazon Alexa and Google Assistant, giving you more options for establishing a truly smart home. We can't think of a better HomeKit Wall Outlet to use!

Remember, no central hub or bridge is needed to get started with iDevices peripherals. And like the other iDevices products, this in-wall outlet can take advantage of both WIFI and Bluetooth connectivity to ensure that it is always ready for use. Whether you're using it at home or remotely, we are sure that you will love the iDevices IDEV0010 In-Wall Outlet. Other features include a customizable LED night light, and energy monitoring features to help you keep expenses low.

The iDevices IDEV0010 and many other great iDevices Smart Home devices are available from Alarm Grid right now. If you want to learn more about these products, or if you are looking to get started with designing your own smart home, please email us at support@alarmgrid.com. We operate support hours from 9am to 8pm ET M-F. We look forward to hearing from you!

Tags: , , , , , ,

Comments


Posted By

When it comes to Z-Wave home automation devices, it is usually understood that they are universally compatible with all Z-Wave controllers and hubs. While this is generally true, some Z-Wave devices may appear as different device types than for what they were originally intended.


If you aren't familiar with Z-Wave, it is an automation protocol that is used with a variety of smart home devices. Some popular Z-Wave accessories include smart lights, door locks, thermostats, smart water valves, and more. In most cases, you can use any Z-Wave device with any Z-Wave controller. However, there are sometimes restrictions on how Z-Wave devices can be used. This depends on the Z-Wave hub that they are enrolled with

A few weeks ago, we wrote an interesting FAQ. It discussed whether not not mixing Z-Wave and Z-Wave Plus devices on the same network is likely to cause issue. Normally, mixing the two protocols will not result in any problems. Z-Wave devices are known for being backwards compatible. You can typically bring a Z-Wave Plus device to a standard Z-Wave controller. And the opposite also applies, as you should have no trouble using a standard Z-Wave device with a Z-Wave Plus controller. The main thing to understand is that by mixing Z-Wave Plus with standard Z-Wave, the devices in which any signal passes (hops) through a standard Z-Wave device will result in the communications functioning as standard Z-Wave.

But there is another issue that we haven't talked about very often. This issue occurs when you pair a Z-Wave Plus device with a standard Z-Wave controller or hub. It's possible that the standard Z-Wave controller might not recognize the Z-Wave Plus device as its proper device type. Instead, the Z-Wave Plus device will still appear in the hub, but it will show up as different device type, usually as a Z-Wave switch.

Some examples of this issue that we've seen are if you try to pair a Qolsys IQ Siren (Z-Wave Plus) with a system that utilizes standard Z-Wave functionality, such as a Honeywell Lyric Controller or a 2GIG GC2. We actually created specific FAQs for using this siren with a Lyric and with a GC2. Another example we recently saw was when someone tried to us an Alarm.com ADC-SWV100 Z-Wave Plus Water Valve with an L7000 System that had an L5100-ZWAVE module. Instead of the system seeing the ADC-SWV100 as a Z-Wave water valve, it saw it as a Z-Wave Switch.

The problem with this issue is that a system only knows how to turn a switch ON or OFF. When a Z-Wave controller sees a device as a "switch", it can only perform the binary function of ON or OFF. And it's won't necessarily know when to automatically activate the device. For example, if a hub sees a Z-Wave siren as a "switch", then it won't know to automatically activate the siren during alarms and to automatically stop it when alarms are cleared.

Fortunately, these situations can often be addressed by creating specific rules and smart scenes that have these devices activate automatically when desired events occurred. This usually requires some very specific instructions, with one scene & rule designed to automatically start the device, and another scene & rule to automatically stop the device. It can be a little tricky to get up, but there is usually some type of work-around other there. Depending on your setup, this may be done locally at the panel, or it may be done through an interactive platform like Alarm.com or Total Connect 2.0.

If you are an Alarm Grid customer needing help setting up your automation devices in the way that you want, please email us at support@alarmgrid.com, and we will be happy to help. Remember that our support hours run from 9am to 8pm ET M-F. We look forward to hearing from you!

Tags: , , , , , ,

Comments


Posted By

We have great news for Total Connect 2.0 users today, as Resideo has made it recently made it possible for a maximum of five (5) SkyBell Video Doorbell devices to a single Total Connect 2.0 account. SkyBell devices are still integrated with Total Connect 2.0 in the same manner as before.

Skybell dbcam trim slim hd video doorbell

If you are unfamiliar with SkyBell Doorbells, they are perfect for monitoring the front of your home and getting activity alerts. These devices conveniently connect with your home's WIFI network, and they can easily replace nearly any doorbell that uses a standard mechanical chime. There is also an adapter available that allows a SkyBell to replace a doorbell that uses a digital chime. Total Connect 2.0 can send updates to your phone whenever a SkyBell device detects motion or whenever someone rings the doorbell. You can also get updates through the native SkyBell app.

Previously, it was possible to only enroll a single SkyBell device with a Total Connect 2.0 account. Users wanting to integrate a second SkyBell device with Total Connect 2.0 needed to get a second account set up. But for many users that will no longer be necessary. And if you were hesitant about getting a second SkyBell because you didn't want to pay extra for an Alarm Grid Video-Only Account, well no you no longer need to worry about that. This is truly the perfect time for you to expand upon your existing SkyBell account.

You do not need true video monitoring service to start using SkyBell Cameras. As long as you have a Total Connect 2.0 account with the SkyBell feature enabled, you will be able to integrate up to five (5) devices with your account. You will need to have your monitoring company enable the feature. Alarm Grid will enable the feature at no additional charge for customers who use our monitoring services. Just contact us at support@alarmgrid.com if you need to have the feature enabled.

We understand that there are some Alarm Grid customers who have existing video accounts for the sole purpose of adding extra SkyBell device. There are even a few Alarm Grid customers with third and fourth accounts just for using extra SkyBell Cameras. The great news for these customers is that these extra accounts no longer necessary. We can deactivate your extra accounts if you have them and help you set up all your SkyBell devices into a single account, provided that you have five (5) or less SkyBell devices. If you fall into this category, please email us at support@alarmgrid.com.

We are also aware that there may be some customers who want to use more than five (5) SkyBell Cameras with a single Total Connect 2.0 account. Unfortunately, this is not possible. This 5 device limit is strict, and we have no way of increasing it. However, you can still use the same solution as before for adding additional SkyBell Cameras beyond the limit. You can add an additional Alarm Grid Video Monitoring Account, and you will be able to set up your additional SkyBell devices with that account. Each account will allow you to use five (5) additional SkyBell Cameras. If you want to use up to ten (10) SkyBell Cameras, you will need two (2) accounts. If you want to use 15 SkyBells, you will need three (3) accounts. And so on.

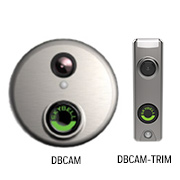
At this time, Alarm Grid only sells one (1) SkyBell Camera for use with Total Connect 2.0. This is the Honeywell SkyBell DBCAM-TRIM. That is the rectangular version of the SkyBell. The round model, the Honeywell SkyBell DBCAM is discontinued and no longer sold by Alarm Grid. But if you come across the round model somewhere else, then you can certainly set it up for use with Total Connect 2.0. Just remember never to use an Alarm.com SkyBell with Total Connect 2.0 or the SkyBell App.

Keep in mind that SkyBell clips are stored on the SkyBell servers. They are not stored on Total Connect 2.0 or AlarmNet360. This means that SkyBell clips will not count towards your Total Connect 2.0 recording limits. They will also not count towards your security camera limits. If you already have Total Connect 2.0 Security Cameras set up, then you can add up to five (5) SkyBell devices without needing to change or remove any of your existing cameras. Remember that SkyBell video clips are available from the SkyBell servers for up to seven (7) days. After that, they are lost forever and no longer available. But it is possible to download and save any clip for permanent use. Just make sure you do so before the clip is deleted forever.

If you want to learn more about the SkyBell Cameras or our monitoring service for accessing Total Connect 2.0 using a Honeywell Security System, please email us at support@alarmgrid.com. We maintain support hours from 9am to 8pm ET M-F. We look forward to hearing from you!

Tags: , , , , , , , , , , , ,

Comments


Posted By

It was another productive week for our video team last week, as eight (8) new videos were released on February 12th and 13th. Jorge appeared in the most videos, but fan-favorite Jarrett also showed up. I even appeared in a couple! Let's check out the newest Alarm Grid tutorial videos!


Checking The Simon XT Firmware Version Number

Jorge explains how you can check the Firmware Version Number of an Interlogix Simon XT Security System. The current highest firmware version for the Simon XT is Version 1.6. However, it is particularly important that the system is on at least Firmware Version 1.3. Firmware Version 1.3 is the minimum version needed to install a cellular communicator in the Simon XT Security System so that you can get it connected with Alarm.com for monitoring service.


Using Home Automation on a Qolsys IQ Panel 2 w/o Monitoring

Jorge shows how you can use a Qolsys IQ Panel 2 System for smart home automation functions even if the system is not actively monitored. However, getting the system monitored and connected with Alarm.com will open up the door for many more automation functions. By connecting the system with Alarm.com, you can set up smart scenes to have devices like lights, door locks, and smart thermostats activate automatically based on a set schedule or with certain system events.


Using Honeywell 5800 Sensors On a Qolsys IQ Panel 2

Our good man Jarrett explains how you can use Honeywell 5800 Series Sensors on the 345 MHz version of the Qolsys IQ panel 2 Plus. This version of the system can also support 2GIG 345 MHz Sensors and DSC PowerG Sensors. It is also important to note that you can only use uni-directional (one-way) 345 MHz sensors with the system. You cannot use any bi-directional Honeywell 5800 Sensors with the 345 MHz IQ Panel 2 Plus.


Response Types for a Honeywell Lyric Alarm System

I explain Response Types on a Honeywell Lyric Controller. Every sensor enrolled with the system is assigned a Response Type. This setting determines how the system responds when the sensor is faulted. Making sure you set the correct Response Type for each zone is important. If you set the incorrect Response Type for a zone, then the system won't respond the way you want it to when a sensor is faulted. Keep in mind that difference Response Types are available for different Device Types.


Changing the Volume of a Qolsys IQ Panel 2

Jorge shows you how to adjust the volume on the Qolsys IQ Panel 2 System. The IQ panel 2 has three (3) volume settings available. There are volume settings Voices, Beeps and Chimes, and Media. Each setting can be adjusted individually as needed. You will need to know the Master Code, the Installer Code, or the Dealer Code to make volume changes. Also keep in mind that setting any volume option to 0 will mute that selection.


Enrolling an IQ Fob with a Qolsys IQ Panel 2

Clean-shaven Jarrett shows you how to enroll a Qolsys IQ Fob with a Qolsys IQ Panel 2 System. The Qolsys IQ Fob is a key fob that operates at 319.5 MHz. It offers buttons for arming, disarming, automation, and an auxiliary panic. The actual functions of the buttons are determined based on the sensor group you assign to the key fob zone. The device has a range of about 100 feet, and it works with nearly any security system that supports 319.5 MHz wireless sensors.


Using a Qolsys IQ Panel 2 with Apple HomeKit

Jorge explains how it is not possible to use a Qolsys IQ Panel 2 Plus System with Apple HomeKit. You cannot have HomeKit devices respond automatically based on system events. But the system does offer integrations with Amazon Alexa and Google Home. Also, you can control the system using Siri Shortcuts through Alarm.com. If you need a system that offers full functionality with Apple HomeKit, then we recommend the Honeywell Lyric Controller. The Lyric offers a great HomeKit integration.


Are There Security Systems Better Than a Qolsys IQ Panel Alarm System?

I explain how there are many security systems that are superior to the original Qolsys IQ Panel. The original IQ Panel was the first system released by Qolsys. It has since been replaced by the Qolsys IQ Panel 2 Plus. The Qolsys IQ Panel 2 Plus supports more advanced features, improved automation functions, more reliable communication, and more robust sensor support. It also offers a slimmer design and a sleeker profile, making it more aesthetically pleasing.

Tags: , , , , ,

Comments


Posted By

The Alarm Grid Video Team has sure had an interesting past few weeks. It all came to head at the start of last week when they uploaded a backlog of seven (7) new videos. No new videos were uploaded after that, so we're rolling with those 7 for this recap. We hope you like the videos!

But where it gets unusual is the fact that four (4) of the new videos featured myself. I don't usually roll up my sleeves and appear in videos, as I don't have quite the star-power of Jorge or the young lad Jarrett. But I was happy to help out. The four videos I appeared in covered the DSC PG9944 Outdoor Image Sensor, which is a great product for anyone with a Qolsys IQ Panel 2 Plus System.

Don't worry - you will still get to enjoy one (1) new video from Jorge and two (2) new videos from that guy wearing the silly Batman jacket. But in all seriousness, we hope you enjoy the new videos and find them helpful in using your security system. Anyway, no more babbling, let's get on with the video recap for the week of February 3rd!


Tilt Sensor That Is Compatible with the Qolsys IQ Panel 2

Jarrett wears a Batman jacket as he explains which tilt sensors are compatible with the Qolsys IQ Panel 2 System. A tilt sensor is typically used for monitoring a garage door and letting the system know when it is opened or closed. The original Qolsys IQ Panel 2 System uses 319.5 MHz tilt sensors like the Qolsys IQ Tilt-S. If you have an IQ Panel 2 Plus, then you should choose a 319.5 MHz, 345 MHz, or 433 MHz wireless tilt sensor based on the version of the system you have. Unfortunately, there is not yet a PowerG Tilt Sensor.


Honeywell Lyric Alarm System vs Tuxedo Touch Keypad

A nice and polite young man named Jarrett covers the differences between the Honeywell Lyric Alarm System and the Honeywell Tuxedo Touch Touchscreen Keypad. These are two completely different devices with totally different functions. The Lyric is a standalone wireless alarm panel, while the Tuxedo is a keypad for a Honeywell VISTA System. You cannot use the Tuxedo Touch as a keypad for a Lyric System. If you are wanting a dedicated keypad for your Lyric System, then you should check out the Honeywell LKP500.


Communicators That Are Compatible With the Interlogix Simon XTi-5i

Jorge covers the alarm monitoring communicators that are used with the Interlogix Simon XTi-5i Security System. The Simon XTi-5i needs a cellular communicator to work with the Alarm.com platform. There are plenty of communicator options for the Interlogix Simon XTi-5i System. But the most notable ones are those from the Alarm.com XT-511 lineup. These include the Alarm.com XT-511-US-AT (AT&T LTE), the Alarm.com XT-511-US-VZ (Verizon LTE), the Alarm.com XT-511-CA-TL (Telus LTE), the Alarm.com XT-511-US-DP-AT (AT&T LTE & IP), and the Alarm.com XT-511-US-DP-VZ (Verizon LTE & IP)


Does the PG9944 Take Pictures or Videos?

I explain that the DSC PG9944 Outdoor Image Sensor takes pictures, not videos. An image sensor is basically a still-motion camera combined with a motion detection sensor. They are great alternatives to security cameras. When the PG9944 triggers an alarm on the system, it will begin capturing images. Ten (10) images are taken and sent to the panel. If you have an IQ Panel 2 Plus, you can view these 10 images as a stop-motion video. Additionally, the first of these images will be forwarded to Alarm.com for remote viewing. But the PG9944 has no way of capturing video.


Enrolling the DSC PG9944 w/ the Qolsys IQ Panel 2 Plus

I show you how to enroll the DSC PG9944 with the Qolsys IQ Panel 2 Plus. All versions of the Qolsys IQ Panel 2 Plus are capable of supporting PowerG Sensors like the PG9944. The sensor is enrolled by putting the IQ Panel 2 Plus into its enrollment mode and then activating the enrollment function on the sensor to learn it in. The enrollment button can be a little difficult to reach with batteries installed, so you will likely need to use a thin object like a screwdriver to press and hold the button.


Viewing the Images Captured By the PG9944 On the Qolsys IQ Panel 2 Plus

I show you how to view images taken by the PG9944 on the Qolsys IQ Panel 2 Plus. The IQ Panel 2 Plus has a Camera Menu where you can see images taken by the system and any enrolled PowerG Image Sensors. This menu is easily accessed by swiping right or left from the main system screen until you reach the appropriate section. The PG9944 takes ten (10) images when it causes a system alarm, and it sends these images to the IQ Panel 2 Plus for local viewing. The images are viewable as a stop-motion video.


Using the PG9944 Outdoors

I explain how the DSC PG9944 is suitable for use in an outdoor environment. The sensor is able to withstand various environmental conditions that are expected to occur outdoors, including rain, wind, dust, heavy sunlight, and extreme temperatures. However, the PG9944 should not be submerged in water at any time. If you are looking for a PowerG Image Sensor to use exclusively indoors, then you might consider the DSC PG9934P instead. The DSC PG9934P is not suitable for use outdoors, but it is smaller and less expensive than the PG9944.

Tags: , , , , , , ,

Comments


Posted By

One great thing about owning a PowerG Security System is that it is super easy to add a wireless siren. DSC manufactures an indoor model and an outdoor model for PowerG users. Whether you are looking for a DSC NEO Wireless Siren or a new siren for an IQ Panel 2 Plus, we have you covered!


The two (2) sirens in the PowerG lineup include the DSC PG9901 Indoor Alarm Siren and the DSC PG9911B Outdoor Alarm Siren w/ Strobe. Both will easily pair with any system that supports PowerG Sensors. These systems include the Qolsys IQ Panel 2 Plus, the DSC PowerSeries NEO w/ added PowerG Transceiver, and the DSC Iotega Security System. Both sirens work great, and they can make a nice addition to nearly any compatible alarm panel.

The Qolsys IQ Panel 2 Plus and the DSC Iotega already include their own built-in sounders that will activate during alarm events. But if you are using the system in a larger home or business, or if you find that the internal sounder isn't loud enough, then you might consider adding an external siren as well. Meanwhile, the DSC PowerSeries NEO Systems are wired panels that are typically paired with hardwired sirens. But if you want to skip the process for wiring a siren, then adding a wireless PowerG Siren can be the perfect solution.

There are two (2) main benefits to adding an external siren with a security system. The first is that most external sirens are louder than the internal sounders built into alarm panels. The Qolsys IQ Panel 2 Plus and the DSC Iotega both have internal sounders rated at 85 dB. The DSC PG9901 and the DSC PG9911B are both rated at 110 dB. Remember that volume increases exponentially with the decibel (dB) rating, so you are certainly getting a major increase in volume output with a DSC PowerG Wireless Siren.

The other major benefit to adding an external siren is that it spreads the sound out during an alarm event. Just because you add an external siren to your wireless system does not mean that the system's internal siren will stop functioning. Instead, both the system's internal sounder and the added siren will activate during alarm events. If you have the external siren in a different area, then you can really spread the sound out. This can be crucial for making sure that everyone on the premises is alerted.

Sirens activate during intrusion, fire, and carbon monoxide (CO) alarms on a system, unless the alarms are specifically set to silent. There are many purposes to alarm sirens, and every system should have one set up. First and foremost, a siren alerts building occupants to let them know that there is danger and that they need to evacuate immediately. A good alarm siren can mean the difference between life and death in many situations.

Sirens also provide assistance to emergency responders, such as police officers, firefighters, and emergency medical technicians. In the heat of the moment, it can be difficult for a responder to determine which home or business is experiencing an emergency. A siren helps eliminate this issue, as the emergency responder will know to go to the location where the siren is coming from. Lastly, sirens are useful during intrusion alarms, as they will often scare off an intruder and prevent them from sticking around to cause more property damage. This is why every security system should have a functional siren set up and configured. And if you have a larger home or business, then setting up multiple alarm sirens is probably in your best interest.

For basic indoor use, the DSC PG9901 is an ideal option. This DSC Indoor Siren produces sounds of up to 110 dB, which is roughly as loud as an industrial grade chainsaw or a live rock concert in a typical venue. If you need a siren for outdoor use, then you should go with the DSC PG9911B. This siren also operates at 110 dB, but it is built to withstand an outdoor environment with its IP55 protection rating. The DSC PG9911B also includes a built-in strobe light, which can be a nice visual indication of an alarm. Please note that some jurisdictions may have restrictions on the color of strobe lights you can use. Make sure to check local laws and see if blue strobe lights are allowed in your area.

Both the DSC PG9901 and the DSC PG9911B are available from Alarm Grid. We're happy to help you get started with a new PowerG Siren. If you have any questions about the DSC PG9901, the DSC PG9911B, or any of the other products on our site, please contact us at support@alarmgrid.com. We operate support hours from 9am to 8pm ET M-F. We look forward to hearing from you!

Tags: , , , , , , , , , ,

Comments


Posted By

If you have a Qolsys IQ Panel 2 Plus, a DSC PowerSeries NEO, or a DSC Iotega, then you have likely worked with PowerG Sensors. These sensors are highly regarded for their impeccable security and great range. But if you really want to go overkill, you can also add a PowerG Repeater.

Dsc pg9920 powerg 915mhz wireless repeater

The DSC PG9920, more commonly known as the PowerG Repeater, effectively doubles the communication range for PowerG Sensors. The way that this works is that the PowerG Repeater will take the signal sent out from a PowerG Sensor and send it out a second time. The repeated signal will then make its way to the panel for regular operation.

Wireless repeaters have been used in the security industry mostly since wireless sensors became the new norm for alarm systems. Up until recently, wireless sensors for security systems typically had pretty lackluster range. It wasn't uncommon to see a wireless sensor with a communication range of under 200 feet. For those older wireless sensors, wireless repeaters are frequently used, as that is often the only way that they will work reliably in larger homes and businesses.

But PowerG Sensors are a completely different animal. When used with the Qolsys IQ Panel 2 Plus, these sensors offer a wireless range of up to 2,000 feet in open air. And if you use a PowerG Sensor on a DSC PowerSeries NEO with an added transceiver, then you can expect a wireless range of 2 km in open air. You read that correctly - 2 kilometers!

Granted, these are open air communication ranges. You will need to consider obstacles like thick walls and large metal obstacles that can reduce wireless range. However, we have had many customers use PowerG Sensors in places like warehouses, strip malls, industrial complexes, and other large locations without experiencing any communication issues. And this is all without the use of a repeater!

With that in mind, the odds of you needing a repeater for your PowerG Security System are pretty slim, unless you're really pushing the limits of wireless communication. Most users are not expecting their systems to work beyond the confines of a home or a small business. But if you do put a PG9920 Repeater to use, then you can expect some truly astounding wireless range. For an IQ Panel 2 Plus, PowerG Sensors can communicate from up to 4,000 feet away in open air once a repeater gets involved. And on a DSC PowerSeries NEO, this range is up to 4 KILOMETERS in open air!

The most common situations where PowerG Repeaters are used are in locations like manufacturing facilities and other major industrial complexes where large metal objects, heavy machinery, and thick walls disrupt the communication range so severely that using a PowerG Repeater is the only way for the sensor signals to make their way back to the panel. But understand that these are very uncommon situations. Most likely, you probably do not need a PowerG Repeater.

If you are setting up a system with PowerG Sensors, then we will typically recommend that you try to do so without using a repeater. You probably don't need one. If you then find that your sensors are experiencing communication issues, then you could try supplementing them with a PowerG Repeater. It is advised that you place it strategically to give the sensors the most benefit. Remember, any PowerG signals detected by the repeater will be sent out a second time so that they can ultimately reach the panel.

Please note that you cannot use multiple PowerG Repeaters to repeat a signal from a PowerG Sensor multiple times. A PowerG Sensor can only have its signal repeated once. Theoretically, you could have two (2) different PowerG Repeaters going out in different directions from the panel to repeat sensor signals coming from both pathways, but that's probably not going to be something you need to do. But if you really have a massive complex with a PowerG Alarm System in the center, it is theoretically possible.

You can get the DSC PG9920 PowerG Repeater from Alarm Grid. But like we said, you probably don't need it. If you have any other questions about the PowerG Repeater or any of the other products on our website, please contact us at support@alarmgrid.com. We operate support hours from 9am to 8pm ET M-F. We look forward to hearing from you!

Tags: , , , , , ,

Comments


Posted By

Alarm Grid is now offering Honeywell LYNX Touch LTE upgrade kits that each include a brand-new LTE communicator and a Honeywell LYNXTOUCH-MSD Updater Tool for updating the system to the latest firmware version. It has never been easier to upgrade a Honeywell LYNX Touch System to use LTE!

Honeywell l5210 lynx touch wireless security system with 4 1 sla

The two (2) new Alarm Grid LTE upgrade kits for the LYNX Touch Panels are the Honeywell LTEUPGKT-L57A (AT&T LTE) and the Honeywell LTEUPGKT-L57V (Verizon LTE). These kits are recommended for anyone with an L5200, L5210, or L7000 that needs a firmware update to support a new LTE communicator. The AT&T LTE version requires firmware update 9.00.201 or higher, while the Verizon LTE version needs update 9.00.209 or higher. If your system is already on a high enough firmware version, then you should just simply buy the standalone communicator module. Also keep in mind that these kits cannot be used with the older L5100 and L5000 LYNX Touch Panels. Those two panels cannot be used with any LTE communicator in any circumstance.

If you aren't sure what firmware version your LYNX Touch Panel is running, you can check by choosing the following options from the main screen: Security > More > Tools > enter your Master Code > Test. You will then access the system's Test Menu, where the firmware version will be displayed at the top of the screen. As you can see in the photo, this L7000 is on a high enough firmware version to support both the AT&T LTE Communicator and the Verizon LTE Communicator.


Any alarm system using cellular communication should be set up with an LTE communicator. And if you have a system that is using a 3G or CDMA communicator, then it is imperative that you upgrade to LTE as soon as possible. Although Alarm Grid will continue to support non-LTE communicators for as long as possible, these communicators will stop working once their associated cellular networks are shut down. This is expected to occur sometime in 2022. The clock is ticking, and you will need to upgrade to LTE if you want to continue using the same system.

Additionally, an LTE communicator will provide better reliability and overall performance than a non-LTE communicator. This is because LTE cellular networks offer faster speeds and improved dependability when compared with older 3G and CDMA networks. By using an LTE communicator, you will receive a quicker emergency response if an alarm occurs on your system. You may also notice that your system responds more quickly to remote commands sent from Total Connect 2.0. This simple change is a great way to improve your alarm system and help it work more effectively.

Some users have expressed concern with LTE communicators, stating that they too will eventually need to be replaced in favor of eventual 5G cellular communicators. We want to address those concerns and say that this will most likely not be an issue until decades in the future. Cellular service providers have repeatedly stated that they plan to maintain and support the infrastructure for their LTE networks for a very, very long time. Even as 5G networks are inevitably introduced and 5G communicators for security systems become a thing, your LTE communicator will still work fine. This is truly a long-term solution that you can count on.

With the impending shut down of 3G and CDMA networks, Resideo stopped allowing activations for those communicators in June of last year. Any new cellular activation must be done with an LTE communicator. You also have the option of activating a LYNX Touch System on IP only by using a Honeywell L5100-WIFI Communicator. This can be a good option if you want to save money in monitoring expenses, as most alarm companies charge less for IP only service. But you should be aware that an internet outage will take your panel offline if you don't have cellular backup. A new L5100-WIFI module will require Firmware Version 8.00.183 on a Honeywell LYNX Touch Panel.

You might also be wondering whether you should get the Honeywell LTEUPGKT-L57A for AT&T LTE service or the Honeywell LTEUPGKT-L57V for Verizon LTE service. The answer is that it depends on the network coverage in your area. You should go with whichever network provides more reliable service in your area, regardless of what provider you use for a personal phone. You should check coverage maps and decide based on the available information. And if you live in a rural area without adequate coverage from either network, then we will be happy to discuss cellular antenna and cellular amplifier options that can boost your system's cellular signals to reliable levels.

Honeywell lte l57a at and t lte cellular communicator for l5210

Whether you use LTE cellular, IP only, or dual-path connectivity with both IP and cellular, activating an AlarmNet Communicator with your LYNX Touch System will make it compatible with Total Connect 2.0. This is an interactive security and automation platform that you can use to control your system remotely from a web browser or mobile app. The service can be used to arm/disarm, check system status, and perform automation functions from pretty much anywhere in the world.

Remember that any communicator will require monitoring service in order to be activated. If you are shopping around for a monitoring plan, make sure to check out Alarm Grid. Our Gold and Platinum Level Plans (Self or Full) can be used with a LYNX Touch System that is set up for cellular service. Our lower-level Bronze and Silver Plans are good if you decide to use the system for IP only, without cellular backup. More information on all our plans can be found on our monitoring page.

If you have any questions about our new Honeywell LTEUPGKT-L57A and Honeywell LTEUPGKT-L57V Upgrade Kits, or any of the other products on our website, then we encourage you to reach out to us. The best way to contact us is to email support@alarmgrid.com. This is also a great email to contact if you are considering starting service with Alarm Grid. Remember that our support hours run from 9am to 8pm ET M-F. We look forward to hearing from you!

Tags: , , , , , , ,

Comments


Posted By

We have very recently seen many customers looking for security systems that support the Apple HomeKit platform. Although the options are still rather limited, you can absolutely find a great HomeKit Security System. Today, we are going to discuss the options that are currently available.


If you aren't familiar with Apple HomeKit, it is the premier smart home and automation platform for iOS users. The market is filled with HomeKit devices that you can include with a HomeKit network. Once you have properly configured your HomeKit network, you can then control your devices remotely using Siri voice commands on your iPhone. You can also create HomeKit Smart Scenes to have your devices activate automatically based on a schedule or with predetermined events.

Integrating your security system with your HomeKit network opens up the door for some extremely useful automation functions. You can have devices on your network automatically respond to actions on your security system, such as arming/disarming or going into alarm. As your security system will likely be an important fixture in your home or business, it is likely that you will want to have your HomeKit devices respond to the events on your alarm system. That is why having a HomeKit Security System is so useful.

At this time, there are only two (2) security systems that support the Apple HomeKit platform. We are very hopeful that more systems will join this elite club in the near future. But for now you have the choice of two systems. Of these two, we highly recommend one over the other. But we will discuss both of these alarm panels so that you can learn all about the HomeKit System options.
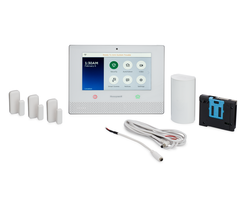
Honeywell Lyric Alarm System

Honeywell lyricpk lte a wireless security system w slash at and The Honeywell Lyric Alarm System is currently our top pick as a HomeKit Security System. This is a very powerful alarm panel that includes support for 128 wireless zones, a built-in 7-inch full-color touchscreen, integrated WIFI, support for encrypted Honeywell SiX Series Sensors, and backwards compatibility with Honeywell 5800 Series Sensors. The panel connects with the Resideo AlarmNet Servers for monitoring service and access to the Total Connect 2.0 platform.

What's great about the Lyric is the fact that the system offers intuitive end user programming. This means that the end user can easily set up their own security system, without needing to hire an installer. You can quickly and conveniently make programming changes to your Lyric System when needed, and you can save a huge amount of money by setting up the system yourself. With a new Lyric Panel, you will have access to the default Installer Code (4112) to make your own system changes whenever you want.

You will also find that it is incredibly easy to set the Lyric up with your Apple HomeKit network. In order to activate HomeKit on the Lyric, you must get the system monitored by an alarm company. Any of the monitoring plans offered from Alarm Grid are perfect for this. You can even use a monitoring plan that is IP only, as opposed to a cellular monitoring plan. Although cellular monitoring is always recommended for optimal reliability, many users use IP only monitoring plans to keep expenses as low as possible.

Bottom Line: The Lyric is the best HomeKit Security System of 2020.

DSC Iotega

Dsc ws900 91lvza iotega 3 1 alarm system kitAt first glance, the DSC Iotega looks like an exceptional HomeKit System. It supports 128 wireless zones, and you can use PowerG Sensors, which are arguably the best in the security industry. The Iotega is also currently the only HomeKit Alarm Panel that can be used with the Alarm.com service, which many experts view as the go-to monitoring and automation platform. In those aspects, the Iotega fills some unique niches that are left unfulfilled by the Lyric.

But the Iotega has some glaring weaknesses. The system's biggest issue is that it offers no local end user programming. You cannot program the system without the help of a monitoring company. Any time you want to make a change to the system settings or add/edit/delete a sensor, you will need to contact your alarm company for help. This includes situations where you are just making a minor settings adjustment. The Iotega is known for being notoriously inconvenient in that aspect, and this limitation rightfully turns many potential customers away.

The aesthetics of the DSC Iotega are also a weakness. The system is just a simple black box with a numeric touchpad that appears when activated. There is no touchscreen, and all commands are made with numeric entries. This can be very non-intuitive for new users, and understanding the system is often very difficult. DSC does offer a touchscreen keypad for the Iotega, but most users prefer getting a system that already has a touchscreen built-in.

There are times where (unfortunately) the Iotega is the best option. PowerG Sensors offer a better wireless range than anything that is available for the Lyric. And if you need to build around the Alarm.com platform due to something like existing Alarm.com Cameras, then you may be tempted to get started with the Iotega. The fact remains that this is currently the only one of the HomeKit Alarm Systems that can be used with PowerG Sensors and Alarm.com.

Bottom Line: Only use the DSC Iotega as a HomeKit System in extremely niche scenarios.

If you have any questions about the Honeywell Lyric, the DSC Iotega, or any of the other products on our site, please reach out to us. We are also happy to discuss our monitoring services if you have any questions or concerns. The best way to reach us is to email support@alarmgrid.com. We maintain support hours from 9am to 8pm ET M-F. We look forward to hearing from you!

Tags: , , , , , ,

Comments


Posted By

Alarm.com users have another reason to be pleased, as the platform's Google Nest integration has made its triumphant return! Customers can once again include their Google Nest Thermostats in with their Alarm.com accounts. We're sure that many Alarm.com users are extremely excited!


In order to complete the Google Nest integration on Alarm.com, you must have the feature enabled on your Alarm.com account. This is something you will need to contact your monitoring company about. If you are monitored through Alarm Grid for Alarm.com service, then you can email us at support@alarmgrid.com to have us apply the integration. If you are not yet monitored with Alarm Grid, then you can check out our monitoring page here.

Once you have the feature applied to your Alarm.com account, you can manually add your Nest device through the Alarm.com website. After logging-in, choose Settings, followed by Add Device. Then choose Thermostat, and select Google Nest Thermostat. You will then begin the installation, during which you must provide your Google account information to complete the integration. It may take a few minutes for Alarm.com and Google to both update so that the feature works as desired.

It is important to understand that only a limited selection of features can be performed for a Google Nest Thermostat through Alarm.com. The integration allows for control of the target temperature, thermostat mode, fan mode, and scene thermostat control. Unfortunately, the integration does not allow for any Alarm.com rule-based automation features, scheduling for thermostat and fan schedules, battery level reporting, or advanced configuration settings including Eco Mode display. All thermostat schedules will need to be configured through the Google Nest platform like before.

If you are still looking for a viable thermostat option for use with Alarm.com, then we personally recommend the Alarm.com ADC-T3000 Smart Z-Wave Plus Thermostat. The ADC-T3000 will offer more features and a more complete experience than what is possible with any WIFI thermostat used with Alarm.com. We like to steer our customers towards Z-Wave thermostats whenever possible, as they tend to integration more nicely with security systems. But if you already have a Google Nest Thermostat and are happy with its performance, then integrating the device with your Alarm.com account is an excellent option.

Remember, if you need us to enable the Nest feature, or if you have any questions about the feature or our monitoring plans in general, please email us at support@alarmgrid.com. Keep in mind that our support hours run from 9am to 8pm ET M-F. We look forward to hearing from you!

Tags: , , ,

Comments