Technology Posts

Posted By

According to a recent report, most Americans have yet to embrace smart home technology. Just 35% of US households have at least one smart home device. Needless to say, adding some automation devices to your home can really put you ahead of the game and make your life more convenient.

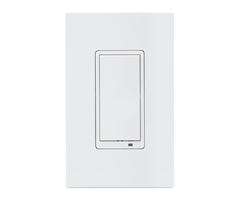
Gocontrol ws15z5 1 z wave smart light switch

The recent study included smart home devices such as security cameras, smart doorbell cameras, smart lighting devices, smart controllers, smart door locks, smart garage door controllers, smart thermostats, and more. The findings state that security cameras represent the most popular smart home item, as they are used by 15% of households. But doorbell cameras are showing the fastest growth, as their use has increased by 64% in the past year.

It should also come as no surprise that the study found high income homes more likely to feature smart home devices. Specifically, it was found that households with an annual income of $150,000 or higher are the most likely to own a broad portfolio of smart home devices. While it's true that smart home devices are generally seen as "luxury items", they are becoming increasingly affordable and accessible to more households than ever before.

While we suspected that the prevalence of smart home devices would be somewhat lacking, we did not expect the figures to be this low. It's clear that there is still much potential for the growth of the smart home industry. With about 65% of households reporting no smart home devices, we are sure that many people could really make their lives more convenient by adding just a few. Security-oriented devices like cameras can also provide major benefits.

What many people don't realize is that smart home devices are actually more accessible than ever. They aren't only restricted to the wealthy. Most middle class households can also get started with home automation. And it doesn't mean you need to deck out your entire house with smart home devices. Many users start small. Maybe you would just add some smart lights to an important room, or you could install a camera to monitor the entrance.

Alarm Grid offers many security systems that feature outstanding smart home integrations, such as the Honeywell Lyric and the Qolsys IQ Panel 2 Plus. And with the right monitoring plan, you can even control your smart devices remotely from virtually anywhere in the world. Whether your smart home plans are big or small, we're here to help you get started. There are all sorts of possibilities when you explore the exciting world of smart home automation!

If you want to learn more about how you can create an affordable and effective smart home to make your life more convenient, send an email to support@alarmgrid.com. Also check out our monitoring page to learn more about the services we offer. If you decide to email us, then keep in mind that our hours for responding via email run from 9am to 8pm ET M-F. We look forward to helping you build a convenient smart home that you and your family will love!

Tags: , , , , , , , , , , , , , , , , , , , , , ,

Comments


Posted By

We're here with another video recap! There are eight (8) new videos for you to check out this week. Once again, I took the role of appearing in all the videos. We hope to have some familiar faces returning soon! But for now, let's take a look at what our video team has been up to.

Alarm grid inside security stickers

Deleting a Wireless Zone from a Simon XT

I show you how to delete a wireless zone from a Simon XT Security System. The Simon XT uses 319.5 MHz wireless sensors, and it has forty (40) zone slots available. By accessing the Sensors Menu of Programming, you can delete any wireless zone that has been set up with the system. You can then enroll a new sensor in that open zone slot if needed. Keep in mind that the zone must be rebuilt from scratch if you decide to re-add the sensor back to the system.


Deleting a Wireless Zone from a Simon XTi or Simon XTi-5

I show you how to delete a wireless zone from a Simon XTi or Simon XTi-5. The Simon XTi and Simon XTi-5 are essentially the same as the Simon XT, except for the fact that these two panels have built-in touchscreen keypad. Both the Simon XTi and Simon XTi-5 have forty (40) available wireless zones, and they both use 319.5 MHz wireless sensors. If you delete a zone from the Simon XTi or Simon XTi-5, then you can reuse the zone with a new sensor.


Disabling Exit Sounds on a Qolsys IQ Panel 2 or IQ Panel 2 Plus

I show you how to disable Exit Delay sounds on the Qolsys IQ Panel 2 Plus. The IQ2 makes Exit Delay sounds for false alarm prevention. The idea is that if you accidentally Arm Away the system, then the Exit Delay sounds will alert you to the situation so that you know to either leave the building or cancel the arming session. But if you find Exit Delay sounds to be bothersome or annoying, there are a couple of different options for muting these sounds.


Cover Tamper Causes the Qolsys IQ Panel 2 to Make Strange Noises

I explain why the Qolsys IQ Panel 2 will make an usual noise every thirty (30) minutes. The reason why this happens is because the panel is not positioned on its back mounting plate properly. It can be a bit tricky to get the panel on the back plate properly, but once you do, the sound should stop occurring. If you absolutely cannot get the panel positioned on the back plate, then you do have the option of disabling tamper cover notifications in programming.


Manually Extending the Exit Delay Time On IQ2

I show you how to manually extend the Exit Delay countdown time on the Qolsys IQ Panel 2 for a single arming session. When you Arm Away on the IQ2, the Exit Delay timer will go into effect. You must then leave the building or cancel the arming session within the exit delay time limit. If you press the green +60 button, then the Exit Delay will be extended by sixty (60) seconds. You can only do this once per arming session. Pressing the button again will do nothing.


Permanently Extending the Exit Delay Time On IQ2

I show you how to permanently extend the Exit Delay countdown time on the Qolsys IQ Panel 2. By permanently extending the Exit Delay, you will have a longer amount of time to vacate the building every time you Arm. The system will use either the Normal Exit Delay setting or the Long Exit Delay setting depending on what zones you have programmed with the system. If you have at least one zone with Sensor Group 12 - Entry/Exit Long Delay, then the system will use the Long Exit Delay setting.


Installing a Honeywell 7847i on a VISTA P-Series Alarm Panel

I show you how to install a Honeywell 7847i on a VISTA P-Series Security System. The Honeywell 7847i is an IP communicator that allows a compatible panel to connect with the Resideo AlarmNet Servers for monitoring service. If you want to use Total Connect 2.0 with your system, then you must be running Firmware Version 9.12 or higher on a VISTA-15P or VISTA-20P. You can determine the firmware by checking the PROM Chip. No version of the VISTA-10P will work with Total Connect 2.0.


Installing a Honeywell 7847i On a VISTA TURBO Panel

I show you how to install a Honeywell 7847i on a Honeywell VISTA TURBO Panel, such as a Honeywell VISTA-128BPT or a Honeywell VISTA-250BPT. The most common reason why someone will choose to use an IP-only communicator is because they want monitoring costs to be as low as possible. IP monitoring is less expensive than cellular monitoring because no cellular service fees are incurred. But keep in mind that an internet outage will take your panel offline if you rely strictly on IP communication for your system.

Tags: , , , , , , , , , , , , ,

Comments


Posted By

After much anticipation, the DSC PG9WLSHW8 PowerG Wired to Wireless Converter is finally available! End users now how a reliable option for taking existing hardwired security and life-safety sensors and interfacing them with a security system that supports PowerG Wireless Sensors.


Wired to wireless converter modules for wireless security systems are nothing new. Hardwired sensors connect with wired to wireless converter modules. The converter then sends wireless signal to the panel on behalf of the connected wired sensors. The wired sensors can then be programmed to wireless zones on the system. As far as the system is concerned, the wired sensors at the converter module are no different than wireless sensors.

How the DSC PG9WLSHW8 differs from prior wired to wireless converters is that it transmits wireless signals across the PowerG wireless protocol. PowerG uses Frequency Hopping Spread Spectrum (FHSS) technology to prevent RF jamming, with the communication signals constantly switching between frequencies from 912 MHz to 918 MHz. In addition to using FHSS technology, PowerG Sensors also take advantage of military grade 128-bit AES encryption for enhanced wireless security. This makes these sensors some of the most secure wireless devices in the industry. Any hardwired sensor connected with the DSC PG9WLSHW8 will utilize this same level of security and protection.

But PowerG Sensors offer more than just top-grade security. They also offer incredible wireless range. Depending on the system being used, a PowerG Sensor is able to communicate from up to two (2) kilometers (km) away in an open air environment. This capability also applies to the DSC PG9WLSHW8. With perfect, direct line-of-sight, you can have the converter module up to 2km away from certain compatible panels and expect the signals to go through reliably. That is perfect for large buildings, including hospitals, warehouses, schools, and more. You would be very hard-pressed to find another wireless sensor lineup with the same communication range capabilities as PowerG.

There are all sorts of possible applications for the DSC PG9WLSHW8 Wired to Wireless Converter. But at this time, the module can only be used with a Qolsys IQ Panel 2 Plus Security System. All versions of the IQ Panel 2 Plus can support the DSC PG9WLSHW8. Please be aware that the IQ2+ has a smaller antenna than the other PowerG Systems, so its wireless range is limited to roughly 2,000 feet in open air. The other very important note is that the "other" PowerG Security Systems will NOT support the converter at this time. DSC says that support for these systems will be added later. These other potentially compatible systems include the DSC Iotega and the DSC PowerSeires NEO with an added PowerG Wireless Transceiver.

But there is so much else about the DSC PG9WLSHW8 that makes it such an exciting piece of equipment! Namely, the unit has four (4) programmable outputs (PGMs) for connecting relay-triggered devices. The second programmable output (PGM2) is particularly notable, as you can connect up to (18) 2-wire smoke detector units at this location. Alternatively, you can also use 4-wire smoke detectors and wired CO detectors are regular zone inputs for the unit. The PGMs are also useful for connecting wired sirens, as the unit provides a supervised bell output of 12V @ 700mA. And installers will really appreciate the fact that the module allows for end-of-line resistor (EOLR) value learning from 1k to 10k ohm resistors. Both single-end-of-line (SEOL) and double-end-of-line (DEOL) resistor wiring is supported.

One final and very important note about the DSC PG9WLSHW8 is that stock for the item is currently severely limited due to the ongoing pandemic. It's possible that if you order the PG9WLSHW8, you might be put on a waiting list for the item, as our manufacturers try and keep up with constant demand for products. If you do end up buying the DSC PG9WLSHW8 while it is back-ordered (BO), then our team will contact you at our earliest convenience to let you know about the situation. If you do decide to cancel the order due to it being back-ordered, then your debit or credit card will be refunded for the entire cost of the order.

If you have any questions about the DSC PG9WLSHW8 or about alarm monitoring in general, then please reach out to us! The best way to contact us is by emailing support@alarmgrid.com. This is also a great email to use if you want to find out if the DSC PG9WLSHW8 or any other product sold by Alarm Grid is currently in-stock or back-ordered. Our team checks email from 9am to 8pm ET M-F. We look forward to hearing from you!
Tags: , , , , ,

Comments


Posted By

Many users consider adding keypads to their alarm systems so that they can control their systems from multiple on-site locations. And for wired panels, at least one keypad is required for on-site operation. Today, we will briefly cover some of the alarm keypads that you might encounter.

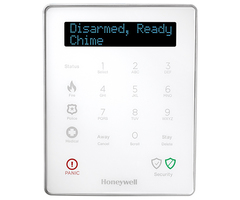
Honeywell lkp500 wireless keypad for lyric controller

First, it is important to understand that a keypad is NOT an actual alarm system. It is merely an input and output device for an alarm system. A user will input commands through the alarm keypad. The system will also provide information about security panel status through the keypad. Nearly all keypads will provide basic functionality, such as arming and disarming and bypassing zones. Some more advanced keypads may offer additional capabilities, such as system programming and performing home automation functions.

If you have a wired system, then you will absolutely need at least one keypad. This is because the panel will need some means for on-site operation. When adding your first keypad to a wired system, it is usually recommended that you get an alphanumeric keypad with a built-in wireless receiver. Alphanumeric means that the keypad will display full language text, which is important for successfully programming the system. Having a built-in wireless receiver will allow you to start pairing wireless sensors with the system, which will give you more flexible installation options. Examples of alphanumeric keypads with integrated wireless receivers include the Honeywell 6160RF for Honeywell VISTA Systems and the DSC HS2LCDRF9 N for DSC PowerSeries NEO Systems. For additional keypads, you should just use standard keypad models, without integrated wireless receiver modules.

But for a wireless system, adding a keypad is almost always optional. This is because a wireless panel is consider "all-in-one", and you can control the system directly from the panel itself. Some wireless panels like the Honeywell Lyric and the Qolsys IQ Panel 2 Plus have built-in touchscreen controllers for this purpose. Other wireless panels like the Honeywell LYNX Plus L3000 have a less fancy, but still perfectly functional, numeric touchpad for this task. Most wireless system users don't bother adding an external system keypad.

That being said, you can still choose to add a keypad to a wireless system if you want. The benefit to adding a keypad is that you will have an additional physical device for controlling your system while you are on-site. This can be very useful if you have multiple entrances for coming and going, such as a front door, back door, and garage door. You might also consider putting a keypad in an easily accessible location, such as by the bed in your master bedroom so that you can conveniently operate your security system from that location as well.

Many systems will provide you with multiple keypad options to choose from. Depending on your needs, you may be selecting between a numeric touchpad keypad and a touchscreen keypad. A numeric touchpad keypad is operated by pressing various buttons on the device to enter specific codes and command sequences. These keypads are relatively basic, but they can be convenient for performing simple system functions. On the other hand, a touchscreen keypad will provide a colorful touchscreen display with intuitive menu icons. This can be more cheerful and inviting for someone who isn't used to operating an alarm system. The downside with a touchscreen keypad is that they are often much more expensive than numeric touchpad keypads. And it's also important to understand that your selection of keypad choices may be limited based on the panel you are using.

But before you navigate our site to start purchasing new keypads for your system, you should really consider if you actually need one. The most common alternative to a secondary system keypad is an interactive service platform that can be accessed through your phone or a web browser. If your system is monitored, then there's a good chance that you already have access to one of these platforms. Most Alarm Grid monitored customers have access to either Total Connect 2.0 or Alarm.com, depending on the system they are using. Both platforms can be conveniently accessed remotely to offer the same functionality that you would get from a physical on-site keypad. So instead of going to your secondary system keypad, you might just pull up your phone to access Total Connect 2.0 or Alarm.com and control your system from there! Check out our monitoring plans to see which ones offer access to these exciting platforms.

Another option is to get a key fob for your system. A key fob is a small handheld device that enrolls with a security system wirelessly to perform various inputs and commands. You can easily carry a key fob around in your pocket or purse, or you can put it on a key ring for easy access. Then, with a press of a button, you can arm or disarm, trigger an automation device, or activate an alarm on your system. Key fobs are often more limited than fixed-location keypads, but they can be very convenient for performing quick commands. Just make sure to not lose your key fob. The devices are quite small, and they can easily become misplaced or lost. The same usually cannot be said for a keypad mounted on your wall!

If you are interested in learning more about alarm system keypads, or if you want to find out which keypads are compatible with your system, then we are happy to help! We offer a wide selection of keypads for use with many types of security systems. The best way to contact us is to email support@alarmgrid.com. If you are trying to determine system compatibility, then you may want to include a picture of your panel so that we know what brand and model you are working with. Remember that our hours for checking email run from 9am to 8pm ET M-F. We look forward to hearing from you!

Tags: , , , , , , , , , , , , , , , , , , , , , , , , ,

Comments


Posted By

There has been some big news coming out of Apple from the World Wide Developers Conference 2020 regarding HomeKit. First it was the refreshed look for HomeKit in iOS 14. Then it was the facial recognition for HomeKit Cameras. Now we have learned about the HomeKit Control Panel in AppleTV.


Just like with the other recent HomeKit news, we have to be somewhat vague on the details, as we're not the authority when it comes to Apple HomeKit. But from what we can tell, the feature will be available with the AppleTV of iOS 14, otherwise known as tvOS 14. We do not have a firm timetable on the iOS 14 release, but we expect it to drop sometime in September.

According to an Apple user who has beta tested tvOS 14, the AppleTV interface will have a new control panel that essentially serves as a HomeKit controller for compatible devices. This control panel will let users quickly perform HomeKit Scenes, as well as view the live feed for a HomeKit Camera. The Honeywell Lyric supports an awesome HomeKit integration and can be used with HomeKit Scenes. You can learn more about the Lyric-HomeKit integration in this prior blog post.

Again, we're sorry we cannot offer more details on the soon-to-be-available HomeKit Panel inside of AppleTV. We advise reaching out to Apple for more information. But the AppleTV Gen 4 or higher makes for a great HomeKit Hub for use with your Lyric System. Using a dedicated HomeKit Hub with your Lyric will let you control the system through Siri Voice Commands from pretty much anywhere in the world.

If you haven't gotten started with the Honeywell Lyric and Apple HomeKit yet, then we can certainly help with that! We offer the Lyric System on our website, and we will be happy to help you set it up for alarm monitoring service. You need monitoring to activate HomeKit on the system and integrate it with your HomeKit network. To learn more about our monitoring services, please email us at support@alarmgrid.com. We check email from 9am to 8pm ET M-F. We look forward to hearing from you!

Tags: , , , , , ,

Comments


Posted By

Resideo has made an exciting new addition to Total Connect 2.0, as users can now live-stream their Total Connect 2.0 HD Cameras from the TC2 website. Previously, this was only possible from the Total Connect 2.0 Mobile App. This is a super convenient way to look-in at your home or business!

All of the HD Cameras for TC2 can be streamed in this way. This includes the 720P Honeywell IPCAM-WIC1, the 1080P Honeywell IPCAM-WIC2, and the 1080P Outdoor Honeywell IPCAM-WOC1. The sample picture above shows the IPCAM-WIC2, and we gotta say that the image quality looks fantastic!

To access the camera streaming feature from the TC2 website, simply log-in to your Total Connect 2.0 from a web browser, then choose Cameras on the left-hand side. Find the camera you want to stream, and then click the play icon in the center of the preview you image. The live-stream should begin after connecting to the camera. Two-way audio is also supported if your camera supports the feature.

One thing that particularly impressed us is just how little of a delay there was between the camera and Total Connect 2.0. This delay is only 1 or 2 seconds at most. I actually had to get one of our support technicians to help me take the picture above so that I could give the camera a nice thumbs-up!

If you are interested in adding video surveillance to your existing Alarm Grid account, or if you are interested in signing-up for new monitoring service, please email our support team at support@alarmgrid.com. We will be happy to help you explore your options so that you can make an informed purchasing decision. Our hours for checking email run from 9am to 8pm ET M-F. We look forward to hearing from you!
Tags: , , , , , , , , , , , ,

Comments


Posted By

Earlier this week, we talked about the new look that will be coming to Apple HomeKit with Apple iOS 14. Well we have more exciting news regarding Apple HomeKit, as it appears that HomeKit-compatible cameras will soon be gaining facial recognition capabilities. This is super exciting stuff!


According to Apple, the face detection feature will be used to identify family members and make sure that there are no unidentified individuals inside the house. If the camera sees a face that it does not recognize, then the user can get an alert through HomeKit regarding the activity. We're sure that this could also work quite well in a small business environment.

As this is a very newly announced feature by Apple, we're not sure whether or not facial recognition will be available for any HomeKit Camera, or if it will only work with certain camera models. We also have no timetable as for when this new feature will be available, though we have heard possibly September. You would need to check with Apple support to receive more specific information.

Unfortunately, Alarm Grid does not offer any Apple HomeKit Cameras at this time. However, we do offer the Honeywell Lyric Alarm System, which offers a great HomeKit integration. Many users will use a Lyric with Alarm Grid monitoring service, while setting up a separate network of HomeKit Security Cameras for video surveillance. This is certainly a viable option.

Another, though admittedly less robust, option is to get a Qolsys IQ Panel 2 Plus System with Alarm.com Security Cameras. Although these cameras are not equipped with facial recognition, they do have powerful Video Analytics features to keep your home or business safe. And the IQ Panel 2 has a built-in camera that uses facial recognition for disarm photos.

Although we don't have much information on the HomeKit Camera Face Recognition feature right now, please stay tuned to our blog, as we will be updating as we learn more. And like always, you can reach out to us for information about our monitoring plans by emailing us at support@alarmgrid.com. We check email from 9am to 8pm ET M-F. We look forward to hearing from you!

Tags: , , , , , , ,

Comments


Posted By

Apple HomeKit will soon be getting a new look to go along with the upcoming Apple iOS 14. This new, refreshed look brings a side-bar to the left-hand side of Apple HomeKit. The functionality should remain largely the same as the current version. But you're sure to love this sleek, new look!


As you know, we are big fans of Apple HomeKit when paired with the Honeywell Lyric Alarm System. By pairing your Lyric System with your Apple HomeKit Network you can control the system from pretty much anywhere using Siri Voice Commands. We have a guide to setting up the Lyric with HomeKit, which you can view here. We also recommend checking out this other guide to setting up HomeKit Automations.

As you can see above, the new look for Apple HomeKit will feature a new side-bar on the left-hand side to make navigation a bit easier. This layout will better utilize the space available on the iPad. However, we still expect the general principles to using Apple HomeKit to remain the same. It's nice to see that Apple hasn't totally overhauled Apple HomeKit, but they are changing it up enough to keep things fresh. From the picture shown at the top of this post, it looks great!

This new HomeKit look won't be arriving until Apple iOS 14 is available. Unfortunately, we don't have a firm release date available quite yet. It is our understanding that it will come out sometime in September. You would need to check with Apple for more info. However, we can assure you that the Apple Home App will automatically update once iOS 14 is installed on your Apple device. Until iOS 14 is out, you'll just have to wait patiently for the time being.

Like we said, we really don't know too much about what Apple is planning for their iOS 14 release. But we can say that we are really excited about the new "change" coming to HomeKit. If you want to learn more about using the Lyric with HomeKit, or if you are interested in our monitoring services, please email us at support@alarmgrid.com. We check email from 9am to 8pm ET M-F. We look forward to hearing from you!

Note: We have learned that this new look for HomeKit for Apple iOS 14 will only be visible for the Apple iPad. The Apple iPhone version of HomeKit will not be getting the same makeover.

Tags: , , , , ,

Comments


Posted By

After a long hiatus, our video recap makes its triumphant return! With our headquarters only partially reopened, all the new videos feature myself. We promise your favorite video stars Jorge and Jarrett will be back soon. But for now, check out these four (4) new videos about Z-Wave locks!


Including the August Smart Lock Pro to the Lyric Controller

I show you how to pair the August Smart Lock Pro with the Honeywell Lyric Alarm System. All Z-Wave operation for the August Smart Lock Pro is accomplished through the August Home App. You will need to first set up the lock through the app before you will be able to pair it with the Lyric System. The app can be downloaded for free from both the Google Play Store and the Apple App Store.


Excluding the August Smart Lock Pro to the Lyric Controller

I show you how to exclude the August Smart Lock Pro from the Honeywell Lyric Alarm System. Just like with the inclusion process, the exclusion process is done through the August Home App. The app will know whether or not the August Smart Lock Pro is currently paired with a Z-Wave network. Unlike most Z-Wave devices, you do not need to perform an exclusion before attempting to pair the August Smart Lock Pro with a Z-Wave network.


Including the Yale Z-Wave Door Lock to the Lyric Controller

I show you how to pair a Yale Z-Wave Door Lock with the Honeywell Lyric Alarm System. Pairing a Yale Lock with your Lyric Panel will offer several advantages. For one, you can control the lock locally at the panel. And if your system is monitored with access to Total Connect 2.0, then you will also be able to control the lock remotely using a phone or web browser, as well as include the lock with Total Connect 2.0 smart scenes.


Exclude the Yale Z-Wave Door Lock to the Lyric Controller

I show you how to exclude a Yale Z-Wave Door Lock from the Honeywell Lyric System. Excluding a Z-Wave device basically means deleting, or clearing, it from a Z-Wave network. Once you do this, you will need to pair the device with a new Z-Wave network before you will be able to use it with a Z-Wave controller. Unlike most Z-Wave devices, you do not need to exclude a Yale Lock from a Z-Wave network before performing the inclusion process.

Tags: , , , , , , , , , , , , , , , , , ,

Comments


Posted By

If you are looking for a wireless sensor solution that comes fully integrated into a door or window, then Andersen Doors and Windows might be for you. There are many Andersen Doors and Windows that come with integrated 345 MHz wireless sensors for using with a compatible alarm system.

Qolsys iq panel 2 plus verizon lte with powerg and legacy honeyw

The wireless sensors that come built into Andersen Doors and Windows are commonly referred to as Andersen Verilock Sensors. For a complete list of Andersen Doors and Windows that utilize these integrated sensors, please see this FAQ as a reference. While we are specifically using this post to highlight the compatibility between the Andersen Verilock Sensors and the 345 MHz Qolsys IQ Panel 2 Plus, there is no reason why you couldn't also use these sensors with a different 345 MHz system, like the Honeywell Lyric or one of the Honeywell LYNX Touch Panels.

The 345 MHz Qolsys IQ Panel 2 Plus serves as a great system for the integrated Andersen Door and Window Sensors, specifically due to the fact that the IQ2+ supports a large number of wireless zones (up to 128). This is important because each Andersen Verilock Sensor will typically use two (2) wireless zones for full system operation. One zone (Loop 1) will monitor for the door or window being opened/closed. The other zone (Loop 2) will monitor for the door or window being locked/unlocked. These sensors have a wireless range of roughly 500 feet when used in an open air environment. Remember that obstacles like thick walls and large metal objects can reduce wireless range.


One very important thing to note about Andersen products is that they are typically only sold through licensed Andersen dealers. Alarm Grid cannot sell these sensors directly. Also, Andersen mandates in its terms of service that their integrated door and window sensors only be installed by professional installers who are certified and approved by Andersen. Failure to comply with the Andersen terms of service can result in the warranty for your door or window being terminated. It is strongly advised that you visit the Andersen website and contact a dealer in your area if you are serious about installing these doors and/or windows.

While Andersen does have strict policies regarding the sale and installation of their integrated sensors, they also have an extensive YouTube Channel with lots of informational and how-to videos involving their products. It is truly a great resource for everyone from the DIY weekend warrior looking to complete their own installation, to the professional installer certified by Andersen. We posted a general informational video from Andersen above, but there are plenty more to check out if you are hoping to learn more about these products.

The best complement for Andersen Security Doors and Windows is alarm monitoring service. And that is a job for Alarm Grid! We offer monitoring plans for all needs and budgets so that you can have an automatic response if your Andersen Door or Window detects activity. If you are hoping to get started with Alarm Grid monitoring service, feel free to email us at support@alarmgrid.com. Our technicians and security planners will be happy to help you get started with monitoring service for your home or business. We check our email from 9am to 8pm ET M-F. We look forward to hearing from you soon!

Tags: , , , , , , , ,

Comments