Why Having a Security System is Important
Posted By Michael GorisIf you don't already have a security system, you may be wondering "well why do I need one?" If your goal is to provide the best possible protection for your home, then having a security system is very important. The benefits of a home security system make the investment worthwhile.
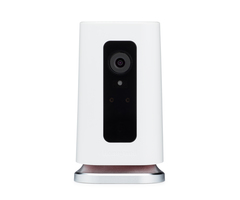
An alarm system is the best way to know what happens in your home while you are away. A modern security system can send alerts right to your phone whenever something occurs in your house. This could include a door being open, someone walking into a particular room, or something being broken. This is possible using an interactive service like Total Connect 2.0 or Alarm.com. All a user needs is a system, the right sensors, and an alarm monitoring plan. A user can also install security cameras that will integrate with their system and provide them with a live look at their property at any time.
Most people who sign-up for alarm monitoring have their systems connected with a central station. If an alarm even ever occurs, the alert will be sent to a 24/7 monitoring station. The station can then request emergency dispatch to be sent out to the home. This can provide great peace of mind for end users in knowing that even if they aren't able to respond to an alarm event, a trusted and qualified operator at a central station will on their behalf. Again, this can be very important for people who are often away from their homes. Keep in mind that if a robbery occurs while you're away and you don't have a security system, there is very little that can be done.
But alarm systems are for more than just security purposes. A user can also integrate smoke and heat detectors into their setup as well. If a fire ever occurs, they can receive automatic fire dispatch, assuming that their system is set up with a central station. And this can even save a user's life if a fire occurs in their building while they are sleeping. There are also other life-safety and environmental sensors that monitor a home for other conditions as well. Some examples of hazards that an alarm system can monitor for include flooding, unusually low or high temperatures, and an outbreak of lethal carbon monoxide gas.
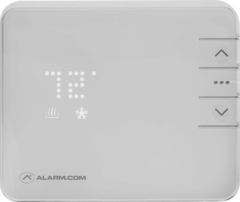
An alarm system can also be useful if a user wants to get started with home automation. Many panels double as Z-Wave controllers for operating smart home devices. These can include lights, locks, thermostats and more. A user can control these devices from their security panel or remotely using an interactive service like Total Connect 2.0 or Alarm.com. They can even have their devices respond automatically based on a set schedule or with predetermined system events. Not only is this very cool to show-off to others, it can also be extremely helpful for saving money on energy bills. So any user who wants to get the most out of the devices in their home can benefit significantly from an alarm system.
There are many reasons to get a security system and to sign-up for monitoring. There truly is no other way to protect yourself, your home and your loved ones. And an alarm system will provide a few other nice perks as well. All of this means that having a security system is very important for almost anyone. Alarm Grid can provide you top-quality monitoring services at a competitive price and no longterm contract. We feature the best customer support in the industry, and our central station partner Criticom is second-to-none. Protect your home with a brand-new security system and a monitoring plan from Alarm Grid today!

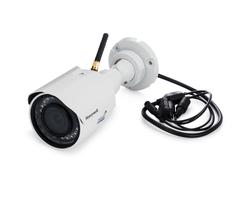


 Remember to check any camera after you have installed it to make sure that it is covering a useful area. You may still need to adjust its angle, or maybe its mounting location wasn't very effective after all. Make any adjustments or changes if needed. Pretty soon your home will be nicely monitored, and you and your family will enjoy great peace of mind with your new home security cameras!


 The L5100-WIFI allows a Honeywell LYNX Touch Panel to connect with a WIFI network. This will allow the panel to receive IP monitoring service and connect with the Total Connect 2.0 interactive platform. Overall, it is one of the most important upgrades that can be made for a LYNX Touch System.