Technology Posts

Posted By

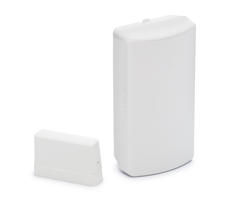
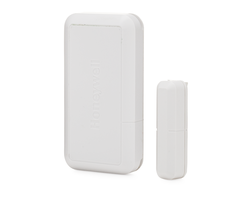
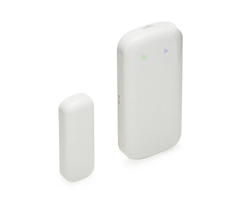
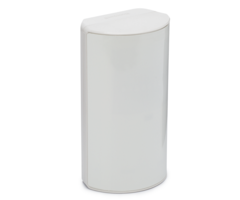
It's the rainy season once again, and one thing you will certainly want to do is monitor your house for floods. This is done using flood sensors. These sensors will send an alert to the alarm system upon detecting water. This can help you detect a flood before serious damage occurs.

2gig ft1 345 flood and temperature sensorFlood sensors typically operate using a water probe. On these probes, there are pins that will cause the sensor to activate when they come into contact with water. Depending on the type of sensor, the pins may need to be exposed to water for a couple of minutes before the sensor will activate and an alarm will occur. This can be helpful for reducing false alarms and only alerting the system when there is a real flooding concern. Some probes come already attached to sensors. Others, like the Honeywell 470PB, will need to be wired to a separate sensor.

For best results, a flood sensor should be installed in a location where a flood is mostly like to occur. This can include basements, kitchens, laundry rooms and bathrooms. It is also a good idea to place these sensors underneath water heaters and sump pumps that could leak and cause serious damage. The earlier that the sensor is activated, the quicker that you can be alerted to the issue and properly solve the problem.

Flood sensors are excellent devices to pair with an interactive service such as Total Connect or Alarm.com. If the flood sensor activates while you are away from home, you will want to know about it as soon as possible. These services can send you text and email notifications as soon as a flood sensor activates. This way, you or a trusted neighbor can properly deal with the issue as soon as it happens. You may be able to stop the flooding before there is serious property damage.

When choosing a flood sensor, you must make sure it is compatible with your alarm system. This is especially true if you are using a wireless flood sensor. You will want to know which wireless frequency is used with your system and which type of wireless sensors are compatible.

Alarm Grid recommends the following wireless flood sensors for these different systems:

Qolsys iq flood flood sensor for the qolsys iq and iq panel 2 qs

Tags: , , , , , , , , ,

Comments


Posted By

Not every opening is conveniently located inside the house. A user may also want to monitor openings that are located outside the house. This could include fences, detached garage doors, barns and patio doors. When doing this, the sensor must be able to survive the outdoor environment.

Durability is a much greater concern with outdoor contacts. While most contacts are kept safe inside the home, an outdoor contact is exposed to a much harsher environment. The sensor will need to work in more extreme temperatures, and it will come into contact with water and dust on a regular basis. Needless to say, if a user tries to use a standard contact, it will not last very long.

Luckily, there are special outdoor contacts that are specifically designed to survive in an outdoor setting. These contacts typically function in the same manner as an indoor contact, using a sensor and magnet. The sensor is installed on the stationary portion of the opening, while the magnet is installed on the moving part. The magnet must be placed very close to the sensor in order for this process to work properly.

When the outside door or fence is opened, the magnet will separate from the sensor. This will cause a reed switch inside the sensor to activate. The sensor will then send a signal to the alarm system to let it know that it has been activated. When this happens, the system can then perform a pre-programmed response. This could include requiring a system disarm or sending out an alarm to a central station.

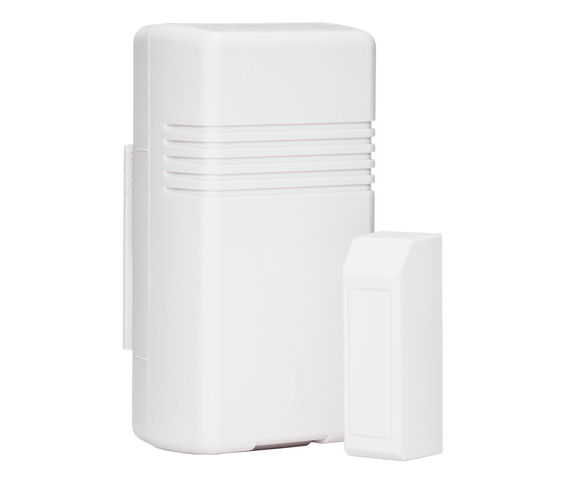
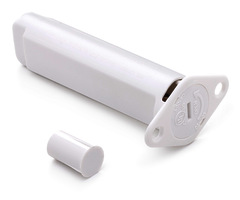
One excellent outdoor sensor for this purpose is the Honeywell 5816OD. This is a 345 MHz wireless sensor that will work with any Honeywell or 2GIG Alarm System. It is fully weatherproof, and it can survive temperatures ranging from -40° to 150° Fahrenheit. The sensor will continue to function properly, even in a very dusty or humid environment. For best results, the sensor should be placed within 1.5" of the included magnet when the opening is closed.

Honeywell 5816od wireless outdoor door and window sensor top

You can purchase this sensor from the Alarm Grid website. If you have any questions about using this sensor, you may contact us via support@alarmgrid.com or by calling us at 888-818-7728 between 9am and 8pm M-F.

Tags: , ,

Comments


Posted By

The Honeywell Lyric Thermostat is an excellent smart thermostat that is designed to connect with a user's Total Connect account and their Lyric Controller security system. The device features WIFI connectivity, allowing it to become a fully integrated part of a user's home automation setup. Once the Lyric Thermostat has been installed and programmed, the user can control the device remotely by using the Total Connect mobile app.

Many users appreciate the geofencing capability of the Lyric Thermostat. By setting up geofencing, a user can have their Lyric Thermostat automatically start heating or cooling their home when they enter within a specific range of their residence. By the time they return home, their house will already be set to the perfect temperature so that they are comfortable as soon as they walk through the door.

Not only is this super convenient, the money saving potential is absolutely tremendous, with some users saving hundreds of dollars per month on their electric bills. The Lyric Thermostat can also be set up to function with various smart devices, such as Apple HomeKit, Samsung Smartthings and Amazon Alexa. All of this makes the Lyric Thermostat an excellent addition to any home that uses the Honeywell Lyric Controller.

Before you can enjoy all of the exciting features that the Lyric Thermostat has to offer, the device must be installed and programmed with your Total Connect account. This guide will focus on the removal of your old thermostat and the installation of the the Lyric Round Thermostat.

For more information on integrating your Lyric Thermostat with Total Connect, please consult the Lyric Thermostat enrollment guide. You can also use the Lyric App to help walk you through the installation process. If you do not have the Lyric App, you can download it for free from the App Store or Google Play. You can make a Lyric account to use with your Lyric thermostat. We strongly recommend following the instructions outlined in the app as you complete the installation.

You can install the Lyric Thermostat by completing the following steps:

1. Turn off the heating and cooling system. When installing the Lyric Thermostat, you should start by shutting off the power to the building's heating and cooling system from the circuit breaker. This will help to avoid any electrical issues during the installation process. To confirm that the power for heating and cooling is shut off. Try increasing of decreasing the set temperature by several degrees. If you hear the building's heater or cooler activate, then the power to the system has not been shut off properly. It is also recommended that you feel the area around the building's air vents to make sure that no hot or cool air is coming out.

2. Remove the old thermostat from its backplate and check its wiring. With the heating and cooling system off, you can then begin removing the old thermostat. Most thermostats are attached to a backplate that is mounted to the wall. Some thermostats will be able to be gently unattached from the backplate, while others will require some screws to be removed. Once you have removed the old thermostat from its backplate, you will be able to see the connected wires and determine the type of power supply that is used for the building's heating and cooling system. If you see thick black wires with wire nuts, then the building uses a line voltage system, and the Lyric Thermostat will not be compatible. You should also check the voltage for the old thermostat. If the old thermostat that was used with the building is 110 volts or higher, then again, the Lyric Thermostat will not function with the building's heating and cooling system. These are very important aspects to check, as setting the Lyric Thermostat with an incompatible heating and cooling system could result in serious damage.

3. Note the wiring and detach the wires. Before removing the wires, take a note of the wiring coloring and what terminals they are connected to. Many users find that it is helpful to take a picture of the wires so that they can reference them later. It is also recommended that you label the wires in some way so that you can differentiate them when you go to connect them to the Lyric Thermostat. This is especially true if the wires are of the same color and no labels were previously applied. The Lyric App will also allow you to note the colors of the wires and their corresponding connections so that the app will outline the proper connections when you go to wire the Lyric Thermostat in a later step. After you have finished examining the wiring setup, you can then remove the wires from the thermostat one at a time. Make sure that the wires do not fall into the wall, as you will need them for installing the Lyric Thermostat. Wrapping the wires around a pen or a pencil can prevent this from happening. Finally, you can unscrew and remove the old mounting plate from the wall.

4. Mount the backplate to the wall. At this point, you will begin installing the Lyric Round Thermostat. Start by snapping the backplate onto the wall cover of the Lyric Thermostat. The wall cover is optional, but it can be useful for covering any marks or blemishes that are on the wall. Next, run the wires through the backplate of the Lyric Thermostat. We recommend twisting the wires together so that they can all be easily passed through the backplate at the same time. You can then screw the backplate onto the wall using the included screws that came with the Lyric Thermostat. You will want to make sure that the backplate is nice and level with the wall when doing this. The backplate comes with a built-in level for the installer's convenience. The screws that come with the Lyric Thermostat are self-anchoring, and they can often be installed in the location of the screws for the previous thermostat. If you do need to drill new holes, the drill bit size is 7/32".

5. Connect the wires to the Lyric Thermostat. You will now be able to connect the wires to the Lyric Thermostat backplate. The wires can be connected to the corresponding terminals based on the setup for the previous thermostat. When wiring the Lyric Thermostat, consult the notes or the picture that you took of the previous wiring setup. You can attach a wire by firmly pushing it into the appropriate terminal. If you accidentally misplace a wire and need to move it to a different terminal, you can use a ballpoint pen to press down on the tab for that terminal and then pull the wire out of place. Once all of the wires have been connected, make sure that they are snug and secure by gently tugging on the wires and ensuring that they remain in place. If you are using the Lyric App to assist you with the installation, it will display the connections that you need to make. Please note that the Lyric Thermostat is a 24 volt thermostat that uses power from the heating and cooling system to stay activated. This means that no common "C" wire will need to be connected to the Lyric Thermostat.

6. Activate the Lyric Thermostat. After completing the wiring process, you can then snap the Lyric Thermostat onto its backplate. A gentle press is all that is required to click the device into place. Next, go to the circuit breaker and restore power to the building's heating and cooling system. If the Lyric Thermostat was wired correctly, the device will automatically power up, and you will be prompted to connect the device a WIFI network. This process is outlined in the Lyric Thermostat enrollment guide.

Tags: , ,

Comments


Posted By

I'm sure many people were disappointed to see the Lyric MR4 firmware get released last month and have the firmware update NOT include the Lyric / Apple Homekit integration that has been promised since the Lyric first debuted at ISC West back in 2015. We've been as frustrated as our users and potential customers have been that have been waiting anxiously for the Homekit integration to the Lyric system, and since Honeywell was at the mercy of Apple releasing the approval for the functionality to be made available, even Honeywell wasn't sure exactly when it was coming.

With all that said, we're excited to announce that as of this week, a Lyric running MR4 firmware can now integrate with Apple's Homekit!

We just found out about the release and we haven't been provided with all the details on the functionality the integration allows but once we get more information from Honeywell and do some testing ourselves, we'll be posting more about this awesome update to the Lyric system!

In the mean time, if you want to confirm your Lyric can do Homekit, just press Security > Tools > enter Master Code > Advanced and if you're on MR4, you should see a Homekit Reset button that wasn't there previously.


If you aren't seeing that button, you should check the System Information tab to see if you're on the MR4 firmware (01.04.07178.491) and if you aren't you can either ask your alarm monitoring company to remote upgrade you or if you have the right firmware version to allow a local firmware update request, you can go to Security > Tools > enter Installer Code to see an option for 'Update firmware' which will get you up to the latest version.

Tags: , , , , , , ,

Comments


Posted By

Last month, Honeywell released a new critical firmware update for the Lyric Controller - 01.04.07178.491 for the American version (shown below) and 01.04.07181.491 for the Canadian LCP500-LC version:

You can request the update on your Lyric system, if you aren't upgraded already, by pressing Security > Tools > entering your Installer Code and then pressing Update Firmware. If you are an Alarm Grid monitored customer, you can also have us send a firmware update to your system remotely. This MR4 firmware brings new functionality that our users have been asking for since the Lyric Controller was first released, new features that were not yet available and fixes to some known bugs.

Quick SiX Programming Mode

While this new feature won't help those that already have their Lyric system fully setup, the addition of a new SiX sensor enrollment mode allows new Lyric users to greatly reduce the time it takes to program SiX Series sensors to the system. Of course, the new SiX Programming option would certainly also be helpful for anyone that has an existing Lyric and is looking to add multiple new SiX devices to their system.

The Lyric has always offered a batch enrollment mode, available within the Zones programming screen, that allows you to learn in a group of SiX devices by simply powering on or activating each sensor. However, you would then need to go in and manually edit each zone by selecting the zone number and clicking Edit, tweaking each programming option and then saving the changes as you would if you were learning in one single sensor.

Now, with the new SiX Programming mode (found by pressing the down arrow once you enter programming mode on a Lyric with the MR4 firmware)


(SiX Programming option on second page of Lyric programming)

you can simply power on (either pull the battery tab or insert batteries) or activate each SiX sensor you want to learn in to the panel to have them all auto learn to the panel and show a screen with all the new learned in devices


(SiXCT and SiXPIR activated in SiX Programming mode)

and you can highlight and click Edit right from that screen to bring up a new screen that shows you all of the device settings so you can set all of your new zones and settings much more efficiently.


(SiXPIR and SiXCT edit screens in SiX Programming mode)

The new SiX Programming mode can save you hours depending on how many SiX devices you need to learn to your Lyric. Keep in mind though, just like with the batch enrollment mode, you can't enroll a SiXFOB to your Lyric using SiX Programming. You still need to use the Keys section of the Lyric programming to enroll a SiXFOB.

Easier Instant Arming Mode

For as long as we can remember, Honeywell systems have supported an Instant arming mode which allows a user to arm the system so that the system's alarm activates as soon as a zone is triggered, even if the zone is normally an entry/exit zone. Instant arming is helpful for ramping up the security of your system when you know that no one should be entering the home (at night or when you go on vacation for instance). Instead of an intruder being able to open your main front door without the alarm going off right away, Instant arming ensures that the Lyric goes into full alarm mode as soon as any door or window is opened. As long as you remember to disarm from a key fob or TC2 before an authorized user needs to enter the property, Instant arming is a great way to enhance your protection at key times.

When Honeywell developed the Lyric they didn't provide an Instant button on the Security screen and many users lamented the loss of Instant arming. The Lyric does in fact allow for Instant arming if you use the Arm Custom option which gets you to a screen where you can de-select the Entry Delay and arm the system so that delayed zones activate the alarm as soon as they are violated but it isn't a great user experience. We had a good amount of feedback from users that had upgraded Honeywell systems that supported Instant arming to the Lyric and were disappointed that arming in that way was more difficult on the Lyric. Thankfully, Honeywell has heard our cries and with the MR4 firmware, you'll notice when you hit the Security icon on your Lyric screen there is an Entry Delay: On/Off toggle at the bottom left of the screen.


If you want to arm Instant (motion detector zones turned off but all other zones active with no entry delay even if programmed as an entry/exit zone), simply tap the Entry Delay words until it shows OFF and then tap Arm Stay and enter your code. If you want to arm Maximum (all zones active with no entry delay even if programmed as an entry/exit zone), simply tap Arm Away with the Entry Delay set to OFF and then tap Arm Away and enter your code.

Skybell Doorbell Chime

You may have noticed if you press Tools and enter your Master Code and then the right arrow, there's a Skybell Setup button. If you did, you probably have wondered why pressing it does nothing. For some reason Honeywell released the Skybell Setup button on a previous Lyric firmware but didn't add the true functionality of the button until the new MR4 firmware. You could still pair a Skybell with a Total Connect 2.0 account but the Skybell wouldn't integrate with the actual Lyric system at all.

Now, pressing the Skybell Setup button allows you to integrate your doorbell camera (the round Skybell HD and Skybell Slim HD) to the Lyric Controller so that if someone presses your Skybell's doorbell, the Lyric sounds one of it's unique Chime tones. You can choose which Chime sound you want during the Skybell Setup process.

Smoke Maintenance Signaling

With MR4 firmware, the Lyric can now trigger a maintenance trouble signal if a connected SiXSMOKE detects that it's sensing chamber has too much dust or dirt for the detector to function properly. Similar to programming a loop 2 maintenance trouble zone for a 5808W3 smoke detector, you'll now know in advance if any of your connected Honeywell smoke detectors need cleaning.

Support of Yale Assure Locks

The Lyric's Automation controller provides support of Z-Wave locks so that you can program the system to auto-arm when you lock your door or auto-disarm your system when you unlock your door. If you have Total Connect 2.0 you can even remotely lock/unlock your doors. We recommend Yale, Kwikset and Schlage locks when connecting Z-Wave locks to your Lyric and with the MR4, the Lyric now officially supports Yale's range of Real Living Assure Locks, the YRD216, YRD226 and the key-free YRD246. We'll have these new Yale Z-Wave locks up on our site in the Home Automation section soon.

Fixed Lyric Keypad Bug

Sometime prior to MR4, we found that if you had an LKP500 Lyric keypad connected to your Lyric system and you had the Lyric's Voice setting disabled, the Lyric keypad would not provide the expected entry tones (beeps when you violate an entry/exit zone warning you that you need to disarm the system to avoid an alarm activation) even if the Entry Tone feature was enabled in the keypad settings.

Once your Lyric is on the MR4 firmware, if you like your system's Voice setting disabled, because you don't want to hear the main panel's voice announcements, you'll still be able to have your auxiliary keypads beep at you to warn you that you must disarm your system when coming home. As it's easy to forget your system was armed if your keypad doesn't beep at you, this is a critical fix for any Lyric user that prefers not to have the Voice setting enabled.

Fixed Lyric Thermostat Bug

We had a customer that noticed that once he connected his Lyric thermostat to his Lyric system, the Lyric was excessively pinging out to the Honeywell servers. We reported the strange IP behavior to Honeywell's engineers and after some testing they were able to replicate the issue and assured us that a fix would be coming. Our customer decided to remove the Lyric thermostat integration from his system for the time being.

Once MR4 was released, we had our user test the Lyric thermostat integration to his Lyric system and this time there was no unusual pings from the panel on his network so we are confident that this Lyric bug has been squashed.

Dealer Branding

The last change that MR4 firmware brings to the Lyric system is the new dealer branding feature. With this new feature, a Honeywell Lyric dealer's company splash page will show as one the Lyric slideshow images as long as the feature is enabled. Any Alarm Grid monitored client will see this image scroll through on their slide show:


In addition to the slide show page, the dealer branding also shows up as a small company logo on the bottom left of the Lyric home screen that you can click to get to a contact information page in case you need to get in touch with us for support.

If you have any questions about this feature of any of the new features and updates and fixes that the latest Lyric firmware brings to Honeywell's aware winning system, please let us know in the comments below or email us at support@alarmgrid.com.

Tags: , , , , , , ,

Comments


Posted By

While the recent Honeywell Lyric security system MR3 firmware release brought enhanced functionality and improved performance to the Lyric controller, Honeywell's engineers unearthed a strange occurrence where the Lyric system would send a false APL report after the first system disarm following a system reboot.

Certain conditions had to be met for the false APL alarm to occur. The Lyric Controller had to have a Lyric-3G or Lyric-CDMA cellular communicator installed and activated. Also, the system's arm away, arm stay and disarm reporting had to be disabled (that reporting is on by default and here at Alarm Grid, we always encourage leaving that reporting enabled). As this was a unique anomaly with a very specific and unique configuration that had to be present for it to occur, Honeywell didn't realize the bug until after the MR3 firmware was released. As the firmware causes the panel to reboot once the update was complete, their technical support team quickly heard reports of the phantom APL alarms once the MR3 was released and the engineering team worked quickly to implement a patch fix.

You may have noticed that your Lyric system wasn't allowing you to update to MR3 firmware between when that firmware was released and today. That was because they pulled that firmware back once they uncovered the APL bug.

The new firmware version 01.03.06586.482 which was released today implements the patch fix to the bug and all Lyric controllers should be able to be firmware updated once again.

We encourage all Lyric users (especially those that did get the MR3 firmware update before it was pulled back from Honeywell) to update their system firmware and we've been told Honeywell will start forcing firmware updates to all installed Lyric panels over the coming weeks.


Tags: , , ,

Comments


Posted By

With heavy hearts, we are sorry to announce that the Total Connect 2.0 service, powered by Honeywell, no longer supports the slide show feature.

While most Total Connect 2.0 users probably never even knew this feature existed, it was a pretty cool option for turning a LYNX Touch security system (models L5100, L5200, L5210 and L7000) into a digital picture frame.

From the TC2 Locations module, you could edit the house icon and click on the 'Edit Slide Show' button to upload images to your account from your computer. Honeywell's servers then download to the LYNX Touch system associated with that TC2 account/location (as long as the system had an ILP5 or L5100-WIFI internet communicator installed and online). Once the images were downloaded to the system, you could use the master programming mode (Security > More > Tools > enter Master Code) to go to the Slide Show option and setup your images to display on the panel's touchscreen when the system was sitting idle.

Honeywell indicated that the feature was removed due to "cyber security concerns" and while you can no longer use your LYNX Touch system as a digital picture frame, the new Lyric Controller does still offer the Slide Show feature. You just have to use a USB stick to load the images to the Lyric locally as the feature has been removed from Total Connect 2.0 on all systems. We have an FAQ on how to use the slide show feature on a Lyric system online at https://www.alarmgrid.com/faq/how-does-slide-show-... and if you have a LYNX Touch system now that was using this feature and want to discuss upgrading to a Lyric, we'd be happy to help. You can email us at support@alarmgrid.com or call us M-F 9-9 EST at 888-818-7728.


Tags: , , , , , , , , ,

Comments


Posted By

Honeywell has recently announced a change in the way that their Total Connect 2.0 video surveillance feature will work and the change will be implemented on or about April 19th (next Wednesday).

Currently, if you have Honeywell AlarmNet IPCAMs, you have the ability to view them remotely and have them record 10-second video clips based on a change in pixelation if you have the right Total Connect 2.0 service plan. We offer the TC2 video features without a contract required through our Self Platinum and Platinum plans at https://www.alarmgrid.com/monitoring and we even have a standalone TC2 video plan available at https://www.alarmgrid.com/video-monitoring for those that don't have a security system but want the TC2 video services.

Using a mobile device running the Total Connect 2.0 app, you can log-in and view up to 6 IPCAMs per TC2 location from wherever you are as long as the cameras are powered on and connected properly to the internet and you can watch any recorded videos.

Using the totalconnect2.com website, you can use the Video module to view the cameras remotely and you can also set up more advanced settings such as 10-second video clip recordings and alerts when video clips are captured. These clips are customized by the user and you can use the wrench icon on each camera to set up the areas of detection for each field of view and the sensitivity selections for how much movement is needed to trigger a clip. You can also setup schedules to determine when you want the cameras to record clips and when you only want live viewing capability with no recording happening.

Once you have the camera recording settings configured properly so that the cameras are recording clips of movement that you feel is important while ignoring other movements that aren't important, a new video clip will be stored to your TC2 account and will be available as a event in the Events & Notifications module. Currently, each TC2 location allows storage of up to 500MB of clips and auto-deletes the oldest available clip once the limit is reached. You do also currently have the option to "lock" certain clips that you don't want to be auto-deleted.

Here's where things change (on or about) April 19th, 2017...

While only Honeywell/AlarmNet IPCAMs currently work with Total Connect 2.0, Honeywell is (with great anticipation!) working on a new line of next generation cameras that will integrate with Total Connect 2.0 (we will have more details on the cameras at a later date) and they should be available sometime towards the end of this year.

New Seven Day Storage for Recorded Clips

In anticipation of the next generation cameras, Honeywell is transitioning all existing Total Connect 2.0 video accounts to a new 7 day plan where clips will only be available through the TC2 website/app for 7 days. The 500MB storage will go away and any clip that is older than seven days will be automatically deleted. Once the change is implemented, any currently recorded clip will be set to expire seven days later with the oldest clips being deleted first.

Regular non-TC2 video events will continue to be stored for 90 days,which is how the service works now, and first-in, first-out logic is employed when deleting the older clips.

No More Locking of TC2 Events

In addition to the changes to the video storage feature, Honeywell is removing the ability to "lock" a TC2 event (all events inclsuding security and video) so that you won't be able to save any event beyond the normal expiration (90 days for security and 7 days for video once the change is implemented).

The existing lock feature that allows you to permanently store a TC2 event/video clip:


They are providing a year grace period so that any currently locked events will stay locked up until April 15th, 2018 when all locked events will be deleted. We encourage all Total Connect 2.0 users to start saving all locked video clips outside of TC2 if you want them to still be available after April 15th of next year.

Also, we encourage all TC2 video users to start setting up email alerts with video clip attachments through their TC2 account so that each recorded clip can be saved/archived through email so that the clips are available beyond the new seven day limit.

While we are excited about the new cameras that are coming and the upgrades to Total Connect 2.0 and the video service, some of these changes may have an adverse affect if you don't update your account now to adjust for these changes. As always, let us know if you have any questions by emailing support@alarmgrid.com or calling M-F 9-9 EST.

4/19/17 - Updated: Honeywell has now scheduled the change to the video storage feature for sometime in May and the removal of the lock feature on the TC2 events is now scheduled for the week of the 24th.

Tags: , , , , , , , , , , , , , , ,

Comments


Posted By

Last week Honeywell released a new critical firmware update (01.03.06549.482) for the Lyric security system:


The update addressed some known bugs on the system and added enhanced functionality to the system as well.

Improved SiX Performance

The Lyric is Honeywell's newest all-in-one wireless touchscreen security system and while it works with the older Honeywell 5800 wireless sensors, it also works with new SiX Series sensors. The SiX Series sensors are one of the main advantages of the Lyric system as they are bi-directional to the panel and also encrypted on their wireless signaling making them much more reliable and secure compared to the existing 5800 Series sensors.


One of the main improvements the new MR3 firmware provides for the Lyric is improved performance of the SiX devices. Once your Lyric is upgraded to the new firmware, it will proactively check the RF environment throughout the day to ensure all of your SiX devices are on the proper RF channel so that your sensor communications stay consistent even if you are adding new wireless technology to your home.

2Gig Wireless Sensor Support

While most people would use Honeywell 5800 or SiX Series sensors with their Lyric system, the new firmware also unlocks the ability to program 2Gig security sensors to a Lyric. 2Gig is another security system manufacturer and 2Gig systems work with Honeywell 5800 Series sensors and 2Gig sensors. Up until this firmware release, no Honeywell system would work with 2Gig sensors though so now the Lyric allows someone with an existing 2Gig system installed to be able to just change out the main all-in-one wireless panel to a Lyric without having to buy all new sensors as well.

LTE Cellular Communications

Prior to the new firmware, the Lyric supported WIFI communications without any extra modules needed. Also, if someone wanted cellular backup to the WIFI communication path which provides for a more reliable form of alarm communication that still works if and when the internet is offline or unavailable, the Lyric supported the AT&T Lyric-3G communicator and the Verizon Lyric-CDMA communicator. Now, with the new firmware, the Lyric will support LTE cellular communicators as well. We are in beta program for an AT&T LTE module that should be released soon and we expect a Verizon LTE module to be coming as well. LTE is a newer, faster cellular network compared to the networks that the Lyric-3G and Lyric-CDMA communicators use and should provide greater long term longevity if and when AT&T and Verizon ever discontinue their respective HSPA and CDMA-1X networks.

Solved LKP500 Keypad Bugs

While you can control the Lyric system from the Lyric touchscreen and from mobile devices, the system also supports a wireless keypad called the LKP500:


The addition of an LKP500 (or multiple LKP500s as the Lyric supports up to 8 wireless keypads) provides another fixed spot in the home that you can arm and disarm your system from as well as being able to see system status and hear zone chime alerts. Unfortunately, there was a known issue where the zone assigned to an LKP500 keypad would report a low battery even when no low battery problem existed. Honeywell has solved that issue and the fix is part of the MR3 firmware release. While Honeywell didn't have documents issues on another issue with the LKP500, we did have a small number of users also report a high pitched tone emanating from the LKP500 when arming to stay mode, during the exit delay countdown. This issue seems to have been solved with the latest firmware release as well.

General Bug Fixes

In addition to the enhancements detailed above, the new MR3 firmware also addressed some other Lyric system bugs that Honeywell didn't detail so we encourage all Lyric system users to update to the latest firmware even if none of the improvements listed above matter to you.

How to Update Firmware

You can request a firmware upgrade by asking the company that monitors your Lyric to send the firmware down remotely or you can run the firmware update yourself by pressing Security > Tools and entering your system's Installer Code followed by hitting Update firmware. Once you hit the Update firmware button, we suggest backing out to the home screen and then waiting a while for it to process. Once it's done, the system should reboot and then you can confirm by pressing Security > Tools > enter Master Code > Advanced > System Information and verifying that the Rev. number on the top line shows the latest firmware version (01.03.06549.482).

Your Lyric system does need to be on a certain version to have the option to update from the panel so if you can access programming mode but you don't see the Update firmware option, your system will need to be updated remotely by your alarm monitoring company.

We applaud Honeywell for continuing to enhance the functionality of the Lyric system and we are excited about even more enhancements that should be coming with future firmware updates as well.

Tags: , , , ,

Comments


Posted By

Back in January of 2013, we discussed the compatibility issues with earlier revisions of the VISTA-21iP alarm system with the VISTA-GSM4G. Traditionally, Honeywell creates a new firmware revision to clearly mark which panels are compatible with specific features. In this case, we found out that revision 3.13 had some panels that supported the 4G communicator and others that did not.

At the time, we explained that Honeywell started tagging the panels with stickers that read, "Supports VISTA-GSM4G." Although Honeywell offers PROM chip upgrades for the VISTA-15P and VISTA-20P there are no PROM upgrades for the VISTA-21iP. The update meant that VISTA-21iP owners without this sticker would need to upgrade their entire alarm panel in order to integrate 4G cellular connectivity.

 The biggest factor in this discussion is the "2G sunset." AT&T announced that they have already started phasing out their GSM 2G cellular network. The kicker is that every 2G cell tower in the nation will be upgraded by the end of 2016. This may have seemed far way but it is only around the corner. So this discussion relates to any VISTA-21iP system owner using cellular communication; not just those looking to upgrade to a faster 4G communicator. The original post seemed like a doomsday if your panel did not have the sticker. Well think again...

Now for the good news! The VISTA-GSM4G is considered an internal communicator for the VISTA-21iP. It is designed to be used as a backup to the built-in IP communicator. However it can be used as a stand alone cellular communicator as well. The important thing here is that the VISTA-21iP supports external Honeywell communicators as well.

The GSMV4G is an external cellular communicator which can be used with any VISTA-21iP revision. If you plan to use the internet as your primary communication path with cellular as secondary, you can use the iGSMV4G instead. In order to tell your panel to use an external communication path you need to disable the internal communications by physically moving a jumper pin on the board. 

There is an "Internal IP/GSM Jumper" that is in the 'on' position by default. This jumper powers the internal communicators: Internet communicator on the panel, the VISTA-GSM4G or both if you have a dual path setup. The jumper is located just beneath the RJ-45 jack which can be found on the top left side of the board. In the 'on' position, the panel powers the internal communicators. In the 'off' position, the panel cuts off power to the internal comm paths.

If you would like to use an external communication path like the iGSMV4G you must power down the system and move the jumper to the 'off' position. Doing this will shut down both the IP and GSM internal communication paths. So if you were already using the on board IP communicator simply disconnect the ethernet cable from the panel and land it on the iGSMV4G!

Similar to a wired keypad, external communicators require a 4 wire connection to the panel's ECP bus which is located on terminals 4-7 on the VISTA-21iP. There is a power connection on terminals 4 and 5 on the panel and a data connection on terminals 6 and 7 on the panel. Although the communicator is already connected to ECP power, it still requires an AC power connection on terminals 1 and 2 of the communicator.

The GSMV4G and iGSMV4G are shipped with their own Honeywell 1361 AC transformer. You can wire the communicator directly to the transformer or you can use a shared transformer with the panel. If you do the shared transformer setup, you need to swap in the beefier 1361 that comes with the communicator. Simply swap the wired connections over to the new transformer. Then land terminals 1 and 2 from the communicator on terminals 1 and 2 on the panel. You can land them in parallel, right on top of the existing connections to the transformer. 

We have made available detailed instructions for installing the iGSMV4G. The wiring is exactly the same for the GSMV4G. The only difference is that you need to connect an Ethernet cable on the RJ-45 port on the iGSMV4G. 

We've already begun to see an increase in people with the older non-4G capable VISTA-21iP panels asking us for upgrade opportunities. We don't like being the bearers of bad news and having to tell those people that they need an entire new alarm control panel and a new cellular communicator so we have begun offering this as a less expensive alternative to upgrade to 4G cellular communications.

While Honeywell engineers didn't design the original VISTA-21iP panel with the option to support the future VISTA-GSM4G communicators, the flexible design of the 21iP, which allows for an internal or external communicator means that their oversight won't have to cost you anymore than the price of a new external 4G communicator.

Tags: , , , , , ,

Comments