Technology Posts

Posted By

Alarm.com partners with electrical power companies all across the country to offer a demand response program they call "Give Back, Get Back". They have recently announced they will be adding AEP I&M to this program. AEP I&M is the power company for some Indiana and Michigan customers.

When summer comes along and temperatures rise, so does the demand for energy. Managing this energy consumption and controlling energy use during high-demand periods, allows the power company to rely on more renewable sources of energy. These high-demand times are called "Peak Energy Use Events". According to the program, there are usually up to fifteen (15) of these events per summer.

When you opt into the program, you will receive notifications when any Peak Energy Use Events occur. Each event typically lasts between two (2) and three (3) hours. During these times, AEP I&M will make slight adjustments to your thermostat in order to decrease overall energy demand. Before a peak event, AEP I&M may alter your set point to help with an expected increased demand. You still maintain control of your thermostat, and you can adjust your thermostat during an event. You also have the ability to opt-out of a particular energy event, or out of the entire program. If you manually adjust your thermostat during an event it may affect your ability to obtain credit for that particular high-demand event.

Alarm.com customers with a compatible thermostat can now enroll in this rewards program through AEP I&M. Upon enrollment, Give Back Get Back participants will receive a $25 credit per device for up to two (2) devices. Plus, Michigan customers will receive a bill credit of $1.95 and Indiana customers will receive a bill credit of $2.40 per Peak Energy Use Event when your participation is at least 50% of the event’s duration.

To be eligible for the program, it does require a compatible WIFI-Connected Smart Thermostat with central air conditioning. Compatible thermostats are listed in the chart below.

AEP I&M Qualifying Thermostats:
Manufacturer Approved Thermostats
ecobee ecobee3; ecobee3 Lite; ecobee4; ecobee Smart; ecobee SmartThermostat with Voice Control
Honeywell Home WIFI Smart Color Thermostat; WIFI 7-Day Programmable Thermostat; WIFI 9000 7-Day Programmable Thermostat; 9000 Smart Thermostat; 7-Day Programmable Smart Thermostat; VisionPro 8000 Smart Thermostat; Round Smart Thermostat; T5+ Smart Thermostat; T6 Pro Smart Thermostat; T9 Smart Thermostat, T10 Smart Thermostat
Amazon Amazon Smart Thermostat

Thermostats and discounts vary, based on your utility provider. If you have Alarm.com and a WIFI thermostat, check enroll my thermostat to see if you qualify for the program in your area. Check our website, to look into adding a compatible thermostat.

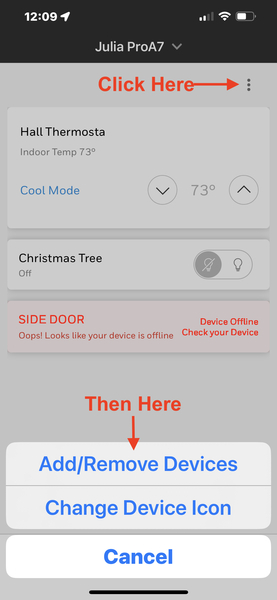
To opt-in from the customer website only, login and click the > symbol on the Thermostat card. If you have an eligible thermostat, you should see an option for "Give Back, Get Back". Click this option, then click Settings and Notifications and follow the instructions. Alarm Grid customers needing additional assistance, please email us at support@alarmgrid.com. Our support hours are from 9:00 AM - 8:00 PM Eastern, Monday - Friday.

Tags: , , , , , , , , ,

0 Comments


Posted By

Alarm.com announced via their Release Notes for the week of 10/24/22 that they will be hosting a firmware update for the Qolsys IQ Panel 2/2Plus panels. This firmware gives a programmer the option to set the panel to report to the monitoring station if the panel is manually powered down.

In addition to this added capability, there will be various fixes implemented. This includes an issue where the panel would sometimes report a false AC Failure trouble condition in error, and also an issue with controlling garage door openers from the panel touchscreen.

There could be more in this firmware upgrade, but Qolsys hasn't yet posted the full Release Notes for it. Nor have they posted the software itself, for those who have a panel that is not connected to WIFI. Once they do, we will update our Qolsys IQ Panel 2 Plus Firmware Updates page.

There have been instances in the past where a firmware patch is never posted to the Qolsys site. This usually only happens if there is some prerequisite that must be verified in the panel before the firmware is applied, and Qolsys deems it necessary to have the Alarm.com server verify this prerequisite prior to downloading the new firmware. If a situation like that arises with this software, we'll let you know.

If the panel has WIFI, then your alarm dealer can simply send the firmware to the panel over-the-air (OTA). You can also request the firmware update manually through the panel touchscreen. The only subscribers who may have an issue are those whose panel cannot connect to WIFI. Qolsys and Alarm.com prevent the Qolsys panels from updating their firmware OTA if there is no WIFI connection at the panel. In other words, the firmware file can't be sent using cellular data.

If you have a Qolsys IQ Panel 2/2 Plus panel and it doesn't have a connection to WIFI, you may still be able to update it OTA. If you have a cellular hotspot, either a stand-alone or by using your cellular phone, you can allow the Qolsys panel to join the hotspot, then request the update OTA while it is connected. Technically, this uses cellular data, but it's the phone or hotspot's cellular data. This tricks the panel and the Alarm.com server into thinking the panel is connected via WIFI.

If the above suggestion is not an option, then check back on our Qolsys IQ Panel 2 Plus Firmware Updates page. If this firmware is made available by Qolsys for SD Card updates to the panel, we will host it on our site.


Tags: , , , , , , , , , , , , , , , , ,

0 Comments


Posted By

Qolsys recently released firmware version 4.2.0, which added a lot of new features as well as fixes and improvements to the panel. However, after updating, a small number of panels reported receiving an error message regarding a panel shut down due to high temperature. This issue is corrected in firmware version 4.2.1.

If you see a message on your Qolsys IQ Panel 4, or IQ4 Hub, that mentions an overheating situation, and/or if the panel shuts itself down without you having a chance to see the message, don't worry. Use the power button on the side of the panel to turn it back on. Press and hold the button for three (3) seconds. Once the panel powers back on, update the firmware to 4.2.1. This should take care of the erroneous panel logic that is making the panel think the battery is too hot. Read the TSB# 221017 IQ Panel 4/IQ4 Hub - 4.2.1 Software Update - Release Notes and Instructions here.

As always, you have three (3) ways to update the panel firmware. If the panel is monitored and has a connection to WIFI, you can have your alarm dealer push the update to your panel over-the-air (OTA) using Alarm.com. You can also choose to request the update from the panel using a Patch Tag. Instructions for how to perform this type of update are included on our Qolsys IQ Panel 4 Firmware Updates page along with the update file, for those who don't have WIFI.

If you don't have a WIFI connection at the panel, then the previous two options are not available to you. In that case, you'll need to download the firmware file, which you can get at our above-linked page, and then use the panel's access point feature to perform the update. Instructions for this type of update are also included on Alarm Grid's IQ Panel 4 Firmware Updates page. We'll post them here as well to make things as easy as possible.

Instructions for Updating the Qolsys IQ Panel 4 Via Access Point

  1. Download and save the required file from our site. You'll need to use a smartphone, tablet, or computer with WIFI capability to perform the update. Remember, the panel should have had 4.1.1 installed prior to installing the 4.2.0 (or higher) firmware.
  2. On the IQ Panel 4, go to Settings > Advanced Settings > Enter Installer or Dealer Code (Default 1111, or 2222 respectively) > Upgrade Software > "Upgrade Using Access Point". The Access Point will need to be enabled in order to use this feature.
    • To enable the Access Point, be sure the panel has WIFI enabled, then go to Settings > Advanced Settings > Enter Installer or Dealer Code > Installation > Devices > WIFI Devices. First, click on WIFI and be sure Activate WIFI has a Check in the box to the right. Then press the back arrow at the bottom of the screen. Go to Access Point Settings. Be sure the WIFI Access Point is enabled with a check in the box at the right. Press the Home button at the bottom of the screen, then go back to Step 2 and continue.
  3. A QR Code will be displayed on the panel. Scan it with your phone or tablet. If you're on a device that won't allow you to scan the QR Code, then you will have to manually join the panel's access point network by entering the panel's SSID and Password which will be displayed on the same screen as the QR Code.


  4. Press "Start" to begin the local server session, then from your device, scan the second QR code provided by the IQ Panel 4. If that is not an option, navigate to the "https:" URL shown on the panel's screen.

  5. Follow the prompts on your phone, tablet, or computer to select the correct files and transfer them to the panel. The file you download is in .zip format. It should automatically unzip and create a folder called Software-Patch-421. This folder will have three (3) files in it.

    When you go to the URL or use the 2nd QR Code, you'll see a screen that will allow you to choose each of these three (3) files. When you click Choose File on each option, it will only allow you to select the correct file from those available. The other two files will be grayed out.


    Once all three files have been successfully chosen, press "Send Files". A progress bar will be shown on the phone, tablet, or computer, showing that the files are being uploaded to the IQ Panel 4. A message will come up saying "Uploaded ALL files successfully". Hit "Close" on the phone, tablet, or computer.
  6. Once the files have been loaded to the IQ Panel 4, it should automatically begin the update. Once the update begins, don't touch the panel screen. The panel will reboot as part of the firmware update process.
Tags: , , , , , , , , , , , , , , ,

0 Comments


Posted By

"That's Brilliant!" You will soon be hearing that a lot in automation circles. Brilliant Smart Home System has managed to gain a lot of ground in a short time. This is due to their many company relationships. Alarm Grid is pleased to offer the complete line of Brilliant Smart Home System products.

Brilliant Smart Home has designed an in-wall Smart Home Controller or Hub, an in-wall Smart Dimmer, and a Smart Plug. The smart home controller incorporates voice control with Alexa built-in. It can also be used with Google Assistant and Apple HomeKit, which offers voice control using Siri. At least one (1) Brilliant Smart Home Controller must be installed in a location in order to use their services.

The convenient thing about Brilliant's Smart Home Hubs is that they replace an existing in-wall switch. A Brilliant hub or dimmer can replace a toggle, paddle, Decora, rocker, or an existing dimmer. These modules are eye-catching and go with just about any decor. Since the Brilliant Control is installed in the wall it eliminates messy, exposed wires, which you usually have with traditional smart hub setups.

Brilliant's line of smart Home Controllers or Hubs includes four (4) options. Each adds a different level of switch control. There is the 1-switch panel, 2-switch panel, 3-switch panel, and 4-switch panel. The hubs each contain a 5" LCD Touchscreen. The 1-switch panel has on/off and dimming for a single light via the touchscreen. The 2-switch panel has on/off and dimming for 2 separate lights. The 3-switch for 3 lights and the 4-switch for 4 lights. These 2, 3, and 4 switch panels, all have separate touch sliders for on/off and dimming capabilities. Each Smart Hub will install in a standard electrical switch box. This should already be in place for retrofit installs.

These smart hubs can do so much more than just operate the lights or outlets they are wired to. They have a built-in camera, a motion detector, and ambient light sensors. They can also integrate with a compatible video doorbell, and allow viewing of the doorbell, and interaction with your visitor, right on the Brilliant 5" touchscreen display. They can connect and control your smart locks, compatible garage door openers, and smart shades. You can utilize the video and audio intercom feature to communicate between rooms. As long as each room has a Brilliant Smart Hub installed.

You can use these smart hubs to control a compatible smart thermostat, a Sonos speaker system, and many other options. They also integrate with Resideo's Total Connect 2.0 remote control platform for alarm systems. This allows for system arming and disarming, notifications, and Z-Wave device control. With this integration, the user can also view TC2 video cameras via the smart hub.

A monitoring plan with Automation enabled is required, and for camera viewing, a plan that includes video. However, the Brilliant integration is included with those plans at no extra cost. For Alarm Grid customers Automation is included with Self Silver, Silver, Self Gold, and Gold plans. Video surveillance is included in our Self Platinum and Platinum plans.

When you are away from home, even if you haven't yet set up scenes to automate your devices, you will still be able to remotely control them using the Brilliant Smart App. It is available as a free download from the Apple App Store or the Google Play Store. Automation scenes can be created based on events, schedules, or a combination of both.

Brilliant expands its range of smart home devices with the Smart Dimmer Switch that can turn on/off, dim, or run a scene based on the user tapping the capacitive touch plate. It has built-in motion detection, allowing the system to automatically turn lights on or off. Alarm Grid offers these smart dimmer switches in White, Black, Light Almond, or Gray. At least one (1) Smart Controller Hub must be installed in order to use the Brilliant Smart Dimmers.

To round out its family of Brilliant Smart Home Products, they offer a Smart Plug. It adds the ability to control nearly any plug-in device along with the option to integrate that device into scenes. Use it for lamps, coffee makers, fans, heaters, and more. At least one (1) Smart Controller Hub must be installed before you can use a Brilliant Smart Plug.

The Brilliant Smart Controller Hubs, and the in-wall smart dimmer switch, both require 120VAC, with a neutral, and a ground, and line and load wires for multi-way switches. They can be set up in a single pole or 3 or 4, multiway configuration. The smart hub can share control with a standard switch as long as there is no dimming capability on it. For the Smart Dimmer, all switches would need to be replaced with Brilliant Switches in a 3 or 4, multiway configuration.

Brilliant is compatible with the following manufacturers, and the list is growing all the time:
  • Voice Assistants:
    • Alexa built-in
    • Apple HomeKit
    • Google Assistant
  • Lighting & Switches:
    • Leviton (via SmartThings)
    • Lutron(via SmartThings)
    • LIFX
    • Philips Hue
    • tp-link
    • WEMO
  • Climate:
    • Ecobee
    • Google Nest
    • Honeywell Home
  • Video Doorbell:
    • Google Nest
    • Ring
    • SkyBell (DBCAM-TRIM2 via Total Connect 2.0)
  • Cameras:
    • Google Nest
    • Ring
    • TC2 Cameras via TC2 Integration (IPCAM-WIC1, IPCAM-WIC2, IPCAM-WOC2)
  • Security (Including Locks & Garage Doors):
    • August Smart Lock
    • ButterflyMX
    • EMTEK
    • Genie
    • Kwikset
    • Overhead Door
    • Resideo (Total Connect 2.0)
      • Vista Panels that support TC2
      • ProSeries Panels
      • Lyric Panels
      • Lynx Panels
    • Schlage
    • Yale
  • Music:
    • Sonos
  • Hubs:
    • SmartThings
  • Property Management:
    • Entrata
  • Motorized Shades:
    • Somfy
    • Hunter Douglas
Tags: , , , , , , , , , , , , , , , , , , , , , , , , , , , , , ,

0 Comments


Posted By

Alarm.com first reported issues with remote commands failing or being heavily delayed at 3:40 AM this morning 10/10/2022. The delay in receiving commands at a customer's system, would also result in notifications being delayed. Alarm.com assured dealers that they were working on the issue.

At 5:10 AM, Alarm.com notified that commands were being processed at that time. When an issue like this occurs, commands that aren't immediately processed aren't necessarily lost. Often they are queued, and once the issue is resolved, those queued commands must then be processed in order. This can make it seem as though an issue still exists when in reality the delay is caused by those queued commands.

At 6:35 AM Alarm.com advised that there was still some delay in remote commands being processed. We can't say for certain these delays were caused by earlier queued commands that were working their way through the system, but that could very well be the case.

At 7:45 AM, Alarm.com provided another update. According to them, the situation had improved, but at this time, there were still some delays in remote commands being received at the alarm system. This was still causing some delays with notifications as well.

At 10:00 AM Eastern Time, Alarm.com advised that this issue has been resolved, remote commands are being processed normally. They are still monitoring the system, and if any issues should appear, they will begin the resolution process immediately.

Tags: , , , , , , , , ,

0 Comments


Posted By

According to Resideo Technical Support, their integration with Accuweather is partially down. This may cause products that receive weather information some issues. Any touchscreen product that can display weather may show incorrect information. Any automation configured for sunrise/sunset may not operate.

We received this information based on a support request we sent to Resideo. In that specific case, automation schedules based on sunrise and sunset that had been programmed through Total Connect 2.0 were not working correctly. So far, there's been no official report of this outage in AlarmNet360. We are hopeful that additional details will be forthcoming.

Do products or TC2 show incorrect weather in addition to the sunrise and sunset timers being off? We don't know for sure. Is this a nationwide issue, or a regional one? We don't know that for sure either. If you have more details or would like to share your experience, leave a comment below. It could be helpful.

Resideo has not had great success with its products and displaying the weather. In the past, we've reported on issues with the older style Tuxedo keypads not updating the weather properly. Hopefully, this is something that will be resolved in due time. In the meantime, if you have automation schedules for your devices that are set to run at sunrise and/or sunset, be aware that they may not function as intended.

Tags: , , , , , , , , ,

0 Comments


Posted By

Since alarm panels began using WIFI as a means to communicate both alarm signals and end-user notifications, issues with connectivity have become an issue for the alarm service technician. The Qolsys IQ WIFI 6 means to make those problems a thing of the past.

Those of us in the alarm industry have all gotten the call. A customer with a panel that uses WIFI calls because their system is offline. After asking some preliminary questions, you discover that the customer switched internet providers and their WIFI network credentials changed along with their provider. They forgot that the alarm panel's WIFI settings need to be updated just like every other WIFI device in the home or business. For Alarm Grid customers, we walk them through updating the settings in their panel with no expensive service call required.

But, what if you could prevent this type of thing from happening in the first place? That's where the Qolsys IQ WIFI 6 comes in. The Qolsys IQ WIFI 6 is a state-of-the-art router that supports both IPv4 and IPv6. It comes with three (3) network partitions enabled. There is a Guest Network, a Main Network, and a Security Network partition. Each partition supports both 2.4 GHz and 5 GHz WIFI and the unit has band steering enabled all the time. This means that devices will be moved between the two network bands automatically, depending on which WIFI band offers the best performance for each individual device.

Most routers are dual-band, and most routers offer a primary network and a guest network, but the IQ WIFI 6 distinguishes itself with its Security Network. By putting all WIFI equipment related to the security system on the Security Network, the dealer can control the credentials for this partition, making sure that they aren't changed, accidentally or otherwise. This means that the equipment associated with the security system will remain connected and able to communicate on behalf of the customer.

Alarm.com's extensive line of cameras and Qolsys alarm panels will move themselves to the Security Network automatically if they are initially set up using one of the other partitions. The alarm dealer can configure and troubleshoot the IQ WIFI 6 remotely using the Alarm.com Partner Portal or the Mobile Tech app. The end-user can also configure their network remotely using the Alarm.com customer website and/or iOS or Android App. That way, the networking guru in your family doesn't have to be onsite in order to help with a WIFI issue. And if you don't happen to have a networking guru, then your alarm dealer can assist you remotely.

The IQ WIFI 6 is powerful and can act as the only router on your network. But, if you have a service where a router from your carrier is provided, or even required, then the WIFI 6 can still be used. It can connect via its WAN port to your existing router, then any ethernet connections you want to make using the WIFI 6 can be run using its LAN port (usually run to a switch if you have more than one device you want to connect in this way) and any WIFI devices you want to connect to the IQ WIFI 6 can be connected using its SSID and Password (or WPS).

This is called a parallel network configuration and using the IQ WIFI 6 in this way provides another layer of security for anyone attempting to hack into your devices from outside. By running the IQ WIFI 6 in parallel, if your ISP changes you can change your main router to whatever equipment is provided by your new ISP, and then connect the IQ WIFI 6 to the new equipment in the same way it was connected to the old. For all of the WIFI devices connected through the IQ WIFI 6, it'll be as if nothing has changed.

The IQ WIFI 6 also works as a mesh network. It has a coverage area of about 1,500 sq ft. (457㎡) per point, and up to eight (8) nodes total can be used. One node, usually the IQ WIFI 6, will act as the controller, and up to seven (7) IQ WIFI devices acting as agents. The IQ Panel 2 & 2 Plus, IQ Panel 4, and IQ4 Hub (coming very soon) panels can all be used to configure the IQ WIFI 6 locally, as long as they're each on the latest version of their respective firmware versions and are connected to the IQ WIFI 6 or IQ WIFI network.

There is a lot to see in the Qolsys IQ WIFI 6 to get the basic technical specs, you can take a look at the IQ WIFI 6 Specification Sheet. We also have the Quick Install Guide, which covers the basics and can get you up and running quickly. And if you need to know everything there is to know about the IQ WIFI 6, you can see the full Install Guide. The Qolsys IQ WIFI 6 is truly next-level. We recommend you check it out and if you're in the market for a new router with lots of features and the latest technology, give it a try!

Tags: , , , , , , , , , , ,

0 Comments


Posted By

Qolsys has released Firmware Version 4.2.0 for the IQ Panel 4, and the IQ4 Hub (coming very soon). This is a huge update with lots of new features and bug fixes. In this blog, we'll discuss what to expect from this release. The IQ Panel 4 MUST be on version 4.1.1 to install version 4.2.0.

For those of you with panels that can't access WIFI, we've updated our Qolsys IQ Panel 4 Firmware Updates page with the newest release. In addition, if your panel isn't yet on version 4.1.1, we have that file available too, so you can get your panel completely updated just by visiting our page. Just scroll down the page until you see the green download button for 4.1.1. Instructions on updating are included on the page.

The marquee feature in this release is support for the new Qolsys IQ WIFI 6. This is an all-new, IPv4 and IPv6 capable router purpose-built for security professionals. Out of the box it has three (3) partitions enabled. A Guest partition that is capable of using both 2.4 GHz and 5 GHz, and the Main partition that also supports both 2.4 GHz and 5 GHz. The biggest differentiator for the IQ WIFI 6 is that it also has a Security partition. This partition is there to support all of the security system elements that use WIFI. This includes the panel itself, any Alarm.com video devices, and remote keypads that use WIFI in order to communicate with the panel. By putting security devices together on a partition that is controlled by the alarm dealer, WIFI issues for accidental configuration changes made by the end-user are virtually eliminated.

Alarm.com cameras will automatically move themselves to the Security partition if they are initially added to the network on one of the other partitions. The alarm dealer will have access through the Partner Portal and through Mobile Tech to configure and troubleshoot the IQ WIFI 6. The end-user will have access to configuration settings through the end-user website and the Alarm.com app.

The IQ WIFI 6 offers band steering, which causes WIFI devices to switch between the 2.4 GHz and 5GHz bands. This is an ongoing process that optimizes both speed and reliability for each device on the network. Let's say you're walking through your home, on your smartphone, which is connected to WIFI, and you're surfing the web as you walk. When you're close to the router, 5GHz is likely the best band for you to be using. But as you walk further from the router, 2.4 GHz may become the better option. The IQ WIFI 6 will automatically cause you to switch from 5GHz to 2.4 GHz without you ever even knowing a change took place. Band steering is always enabled on the IQ WIFI 6. That means if you change the SSID for the 2.4 GHz band, the SSID for the 5 GHz band will be changed to match it.

The Qolsys IQ Panel 4 has an open slot where a new daughterboard can be installed. Qolsys will soon be offering a Zigbee card (QC000E-840) that can be installed in this slot. With the Zigbee card installed, the IQ Panel 4 can support both Zigbee automation devices and Zigbee security devices. There are alarm dealers out there (Comcast Xfinity) who use Zigbee sensors for their proprietary systems. If you have one of these systems and thought you were stuck either staying with your current company or purchasing all new equipment, rest easy. By adding the Zigbee card to an IQ Panel 4, you can replace just the alarm panel, keep your existing sensors, and move to any dealer who supports Alarm.com communication. It just so happens, Alarm Grid is one of those dealers! Firmware version 4.2.0 adds end-to-end Alarm.com support for Zigbee automation devices when the optional Zigbee daughtercard is installed.

This firmware release also prepares the IQ Panel 4 and IQ4 Hub to support Z-Wave 800 Series. At the core of Z-Wave 800 Series are the ZG23 SoC (System on Chip) and the ZGM230S, a module with a ZG23 already connected. Devices using this hardware will have low sleep and active current consumption, with 50% longer battery life than Z-Wave 700 Series. For modules that use coin cell batteries, Z-Wave 800 supports up to ten (10) year battery life. Using the ARM Cortex-M33 microprocessor, Z-Wave 800 delivers ~20% more processing power than the previous Cortex-M4. It can also support Z-Wave Long Range (LR), which has a wireless range of ~1.5 miles.

There is so much to unpack in 4.2.0 that we can't cover it all here. PowerG PIR Cameras, like the PG9934 will now send up to six (6) images to the Alarm.com backend for each device trip during the same arming period. Previously, only images from the first alarm trip were sent. There is a fix for improved WIFI connectivity between IQ Remote Keypads and the alarm panel, basically causing WIFI to toggle OFF and then ON if the remote keypad loses connection to the panel. There is new PowerG Modem Firmware (Version 3.0 / Build 10.87). To see everything that is included in this firmware release, you'll need to read the full Release Notes.

What do you think about Firmware Version 4.2.0 for Qolsys IQ Panel 4 and IQ4 Hub? Are you looking forward to the release of the new panel? Have you been following Z-Wave 800, or is this the first you've heard of it? Drop a comment below and let us know what you think, we always look forward to hearing from our readers. Until next time, stay safe!

Tags: , , , , , , , , , , , , , , , ,

0 Comments


Posted By

10/6/2022: As of now, Resideo has not posted an update showing that this issue has been resolved. They do report that some customers have had success in deleting the SkyBell from Total Connect 2.0, and then re-enrolling it.

Resideo announced today that users of their Total Connect 2.0 service may currently be experiencing impairment in service. This is as of 1:15 PM Eastern Time today. The services affected are TC2 SkyBell Live Streaming, TC2 SkyBell Clip Replay, and TC2 Video Event Capture.

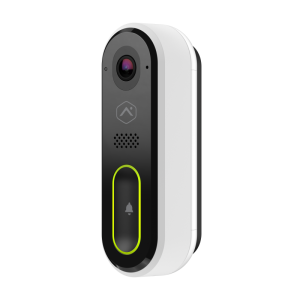
These services are basically the full range of things you might use a video doorbell for. Bear in mind that TC2 and SkyBell use a server-to-server integration. That means that all the heavy lifting with regard to the SkyBell integration is happening on the SkyBell servers. The TC2 servers are just sending requests back and forth to those SkyBell servers. We don't know if this issue is completely on the SkyBell side of things, or if there is a breakdown in communication between the TC2 servers and the SkyBell servers. If any more information comes to light, we'll share it here.

In the meantime, what we do know is that all other aspects of Total Connect 2.0 service are working as they should. Also, and most importantly, the delivery of alarm signals is not in any way impaired by this temporary situation. We know that the issues began at 1:15 PM ET, and as of now, the outage is still ongoing. If we receive information on an end to this situation, we'll post it here, so stay tuned.

Tags: , , , , , , , , , ,

0 Comments


Posted By

The Smart Arming feature can be enabled for any residential customer who has an interactive monitoring plan with Alarm.com. Once enabled, the feature can easily be configured using either the customer website or iOS or Android app.

Once configured, the Smart Arming feature will automatically arm the system to the Stay Mode once the occupants of the home have gone to bed. This can be accomplished using a schedule, or by configuring certain door and/or motion sensors to work in conjunction with the feature. You can reach the Smart Arming settings by going to Security, or through the Automation page. The Smart Arming programming is listed as Goodnight for Arming, and Wake Up for Disarming.


For example, you can set the system to Arm Stay at 10:00 PM, or you can set the system to Arm Stay when no activity has been detected for 30 Minutes between 10:00 PM and 11:30 PM (this is just an example, and you can use whatever time frame you want). If you choose the latter option, you then configure which zones you want to apply this logic to.

For the Stay Arming feature, doors, windows, and motions can be used along with the feature. So, once you choose the zones to be used with this logic, if no activity has been detected on ALL of those zones for a full 30 Minutes, and the time is between 10:00 PM and 11:30 PM, the system will automatically Arm Stay. Smart Arming logic is canceled if the system is already Armed Away.

For Disarming the options are similar. You can set the system to Disarm at a specific time, or you can set it to Disarm when motion is detected on certain motion detectors within a specific time window. For example, in our screenshot below, you can see we have our system set to Disarm if the Upstairs Motion detects movement between 8:00 AM and 9:00 AM. We also have it set so that if no motion is detected, the system will still disarm at 9:00 AM, which is sort of the best of both worlds.

Notice that only Motion Detectors are now available to tie to the Disarm logic. You don't want someone opening a door to disarm the system. By the same token, be sure that no outdoor motions are configured to work with this automation.


This is an excellent new feature that can go a long way toward preventing false alarms. No more forgetting to disarm the system when you go to let the dog out in the morning. As long as you set it up so that a motion you walk past on your way to the door causes the system to Disarm, you're all set. No more laying in bed wondering if you remembered to set the alarm. Now, as long as you have configured the Goodnight options, you know your system will arm itself based on either a schedule or activity (or lack thereof) combined with a time window.

The following Alarm.com compatible panels support this feature:

Panel Compatible Motion Sensor
Groups (Arm & Disarm)
Compatible Contact
Sensor Groups (Arm Only)
2GIG GC2/e 4, 10, 23 1, 2, 3, 4, 5, 8, 10, 23
2GIG GC3/e 4, 10, 23 1, 2, 3, 4, 5, 8, 10, 23
2GIG Edge 4, 10, 23 All
DSC PowerSeries Neo/Pro 4, 5, 9, 10 4, 5, 9, 10
Interlogix Concord 15, 17, 18, 20 14, 16
Interlogix Simon XT/XTi/XTi-5i 15, 35 14, 16
Qolsys IQ Panel 2 17, 20, 44, 43, 35 8, 9, 10, 12, 13, 14, 16, 25
Qolsys IQ Panel 4 17, 20, 44, 43, 35 8, 9, 10, 12, 13, 14, 16, 25
Note: Sensor-based disarming is only available in the Simon XT/XTi/XTi-5i with firmware versions below 193a.

What do you think of this new Alarm.com feature? For that matter, what do you think of Alarm.com's commitment to bringing you new products and features in general? They're doing an excellent job of listening to customers and responding with great new options. Drop us a note in the comments and let us know what you think. We always look forward to hearing from you!

Tags: , , , , , , , , , , , , , , , , , , , , , , , , , , , , , , , , , , ,

0 Comments