Alarm.com Will End Sales of Image Sensors in August, 2022
Posted By Julia RossEffective in August of 2022, Alarm.com is ending sales of Alarm.Com Image Sensors (ADC-IS-220-GC and ADC-IS-300-LP). Alarm Grid has already discontinued these sensors due to the fact that they are in short supply, and no more of them will be produced. Only the Honeywell Home PROINDMV remains.
The 2GIG IMAGE3:
There was some overlap between the Alarm.com Image Sensor models, and the 2GIG and Qolsys Image Sensor models. I have confirmed with Alarm.com that the 2GIG and Qolsys models are also discontinued as of August, 2022. Currently, the only Image Sensors being offered by Alarm Grid are the DSC PowerG and Honeywell Home PROINDMV models which are discussed in more detail below.
Image sensors were a great idea that never really took off. The original image sensors, first offered by 2GIG and Alarm.com, did not have particularly good resolution or picture quality, which is probably one reason they weren't widely adopted by the DIY crowd. By the time the 2nd generation of these sensors came around, people were prepared to simply go with full-on video monitoring or to avoid capturing images altogether.
Both the second and third-generation image sensors that were offered by 2GIG, Qolsys, and Alarm.com had very good image quality. Combine that with Alarm Grid's policy of offering monitoring for image sensors without an additional price markup, and the image sensor was a viable alternative to the use of video cameras. An Alarm.com user could log into their account and perform a "peek-in", meaning they could request that a particular image sensor grab a picture of whatever it was able to see at that moment, and the image (actually two (2) images) would then be uploaded to the customer's alarm.com account for viewing. The sensor could also take images upon sensing motion after a particular period of inactivity, or upon an alarm. For full details on image sensor features and operation, check out this prior post.
DSC offers a couple of PowerG PIR Cameras that will work with the Qolsys IQ Panel 2 and IQ Panel 4 in addition to the DSC PowerSeries Neo panels with a PowerG Transceiver added. These are the DSC PG9934P, Indoor PIR Camera, and the DSC PG9944, Outdoor PIR Camera. These sensors work like any other PowerG Sensor with the Qolsys Panels. They can only capture images when the system is armed and the image sensor is active (not bypassed). They send their images to the panel, and then the first image is uploaded to Alarm.com. A total of ten (10) images are taken, and these images are stitched together by the panel into a sort of stop-motion video where each image can also be viewed individually. This is done via the panel screen itself. When used with the PowerSeries Neo panels, the DSC PIR Cameras can be used for Visual Verification only, they do NOT work like a regular image sensor with Alarm.com.
DSC PG9934P, Indoor Image Sensor:

DSC PG9944, Outdoor Image Sensor:

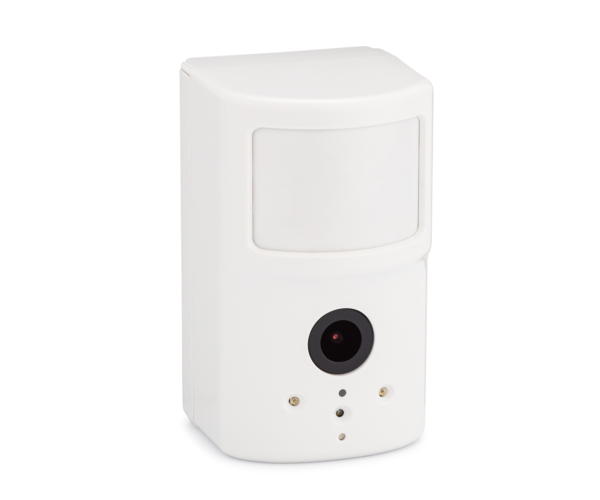
The Honeywell Home PROINDMV is a wireless PIR motion sensor with a camera built-in, just like the 2GIG, Qolsys, and Alarm.com image sensors were. The PROINDMV is currently only supported on the Resideo PROA7PLUSC, and Honeywell Home PROA7PLUS panels. There is no "peek-in" option for these image sensors. They can only capture images when they sense motion while the system is armed in Away mode. Images or videos are captured and uploaded to Total Connect 2.0 for viewing. The user can choose to receive either a still image or a 10-second video clip. You can read their full details of operation in our previous post.
Honeywell Home PROINDMV:

It seems like the era of the image sensor may be coming to a close, at least for now. Who knows, once we're through the global chip shortage, and the availability of components is back to normal, perhaps the humble image sensor will experience a revival. If so, DIYers may want to consider giving these sensors a try. They really are an excellent idea. They can be used for alarm verification in this age of increasing police resistance to alarm response, and they are cheaper, both initially and on an ongoing month-to-month basis, than video cameras.


