Alarm.com Posts

Posted By

If you recall last week, we put out our 2020 holiday buying guide for smart home automation. Today, we wanted to focus on a very small aspect of that buying guide and explore some quick possibilities on how your can use some smart automated plug-in modules around the holiday season.
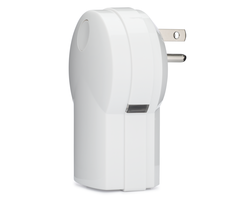

Plug-in modules couldn't be more convenient. You simply plug one into your standard outlet, enroll it with your smart home network (we like Z-Wave Plus), and connect the device(s) you want to control. And just like that, you can take virtually any connected device, and turn it into a smart device. The possibilities around the holiday season are particularly cool.

But before we get into some creative ways to use your plug-in modules, let's take a look at a few of our favorites. You should recall all of these from our buying guide if you read through that, but it never hurts to reintroduce them.

And we also want to give an extra special shout-out to the Resideo Z5SWPIO Z-Wave Plus Outdoor Plug-In Switch. Unlike the other three plug-in modules mentioned here, the Resideo Z5SWPIO is the only one that can be used OUTDOORS. This can certainly come in handy around the holiday season with lighting displays set up outside for the world to see. We can imagine many of you out there will want to bring smart automation to the holiday lights you've worked so hard on. You may as well do things right with an outdoor smart plug-in switch!

But across the board, the name of the game here is scheduling. If you want to have your lights turn ON and OFF automatically on a set schedule, then Z-Wave Plus plug-in modules are the way to go. Sure, you could rely on traditional timers and relays, but this makes things so much easier! And assuming you have your plug-in modules set up with your monitored security system, then all of this can be conveniently done through Total Connect 2.0 or Alarm.com. All you need to do is build a smart scene that sets a time for your devices to turn ON, and another for them to turn OFF later on. It's that simple.

Now, let's think about what you can include in these scenes. We'll start simple. How about your Christmas tree? Turn it into a Z-Wave Plus Christmas tree! This can be very nice if you are away from home for the holidays. By having your Christmas tree turn ON and OFF automatically, you can make it appear like someone is home, even if not a creature is stirring. If you have some other electronic holiday gear, then there's a great chance that it can be included in this setup as well.

If you really want to make things extra special, then get that Resideo Z5SWPIO Outdoor Module we talked about earlier, and use it to put your home's entire holiday lighting display on a schedule! Even if you're away seeking warmer weather, you can still have the best holiday display on the block. With Z-Wave Plus technology, you can ensure that your home lights up the cul-de-sac at night, and then safely powers down once morning arrives. You can even set specific scenes for sunset and sunrise to make scheduling a bit more customized.

And you don't even have to stop with the lights. If you have one of those giant inflatable outdoor snowman, then put that on your plug-in module too. As long as you don't exceed the load limit, then you're good to go! A few plug-in modules will really allow you to get wild. And it's all super easy to set up! If you have any questions about automation, then forward them over to support@alarmgrid.com, and we'll be happy to help. Our team is here from 9am to 8pm ET M-F to answer your questions. We look forward to hearing from you!

Tags: , , , , , , , ,

Comments


Posted By

Alarm.com is back again for the holiday season, as users will once again be able to have Santa appear in screenshots for their Alarm.com Security Cameras. This feature is great for sharing with young family members, as well as for as anyone who loves Christmas and wants to get in the spirit.


The "Santa Security" feature is available on both the Alarm.com website and mobile app. If you are using, the Alarm.com Mobile App, then you may want to verify that you are using a high enough version. For iOS users, Version 4.17 or higher is needed. Android users need at least Version 4.15.1. Remember you can download the app for free from either the Apple App Store or the Google Play Store. And of course, you will need a monitoring plan that includes access to Alarm.com for video surveillance, such as an Alarm Grid Platinum Plan.

To get started, just open the Alarm.com website or mobile app, and then enter the Cameras Menu. Select the video feed for one of your compatible cameras, and then click on the icon of Santa. You can select from a few different Santa images to insert into your camera's screenshot. The Santa image you select can be positioned wherever you like, and you can also resize the Santa image to better fit the setting. Then all you have to do is download the altered picture and share it with your friends and family to show them that Santa visited!

Of course, this isn't capturing the real Santa on your Alarm.com Security Cameras. Santa is much too fast for that, so it won't work if you try to get video of the real Kris Kringle himself. But this is certainly a nice alternative. The feature will be available from December 7th through December 31st. That should give you plenty of time to produce a Santa image to show your kids, loved ones, and anyone else who loves Christmas. No special sign-up is required. All you need is a compatible Alarm.com Camera and a video monitoring plan.

If you have any questions about the Santa Security feature for Alarm.com, then please reach out to us be emailing support@alarmgrid.com. Our team is happy to answer any questions you might have about the Santa feature, or about Alarm.com service in general. This email is also good to use if you want to start new monitoring service. It's not too late to set up an Alarm.com Security System with a camera so that you can enjoy the Santa Security feature this year. As always, we look forward to hearing from you. Happy holidays 2020!

Tags: , , , , , , , , , , , , , , , , ,

Comments


Posted By

Alarm Grid is thrilled to announce that the brand-new Alarm.com ADC-VDB770 Doorbell Camera is now available! This is a state-of-the-art video doorbell camera that provides all the tools you need to monitor the front of your home and quickly and conveniently respond to anyone at your door.


There's so much to discuss when it comes to the Alarm.com ADC-VDB770. But a great place to start is with its recording capabilities. This fully functional doorbell camera has the type of specifications that you would expect out of a high-end security camera. It offers Full HD recording capabilities, with max resolution topping out at 1440 x 1920 pixels. Its High Dynamic Range (HDR) helps recordings appear deeper, while also allowing for superior color detail. And with an astounding Field of View (FoV) of 150° Vertical and 115° Horizontal, the doorbell camera will capture more activity in the front of your home so that you stay informed. It even has IR night vision of up to 15 feet for capturing high-quality and detailed footage in the dark.

What makes the Alarm.com ADC-VDB770 even better is that it supports the use of Alarm.com Video Analytics. If you haven't heard about Video Analytics for Alarm.com, then you really are missing out. You can use Video Analytics to set up special recording rules and alerts based upon the type of activity that is detected. For example, you can easily set up a customizable detection zone that will trigger a video recording when a vehicle pulls into your driveway, but not when a person is walking by on the sidewalk. You can even set up multiple detection zones for added customization. For the ADC-VDB770, the video analytics feature will have the following limitations: One (1) Video Analytics recording rule can be set up per VDB-770, only Ground Zone rules can be created, and only people can be detected. You will most likely want to set up the Ground Zone rule directly in front of your door to detect a person as they approach. This is the ideal resource you need for producing video evidence of a package thief right in the act. Please note that the ADC-VDB770 does not have a conventional motion sensor, and it relies upon Alarm.com Video Analytics for all motion-based triggers and detection.

Of course, you will also receive alerts from the Alarm.com Mobile App on your phone whenever someone rings the ADC-VDB770 Doorbell. You can then connect to a live full portrait video of the person at the door and communicate with them in real-time using two-way audio. This is perfect whether you are away at the office or downstairs in your basement and don't feel like walking all the way upstairs to answer the door. If it's your friend, then you will know to let them in. But if it's just a pesky solicitor, then you can tell them you're not interested without having to go all the way to the door. This is super convenient, and it can really make your day-to-day life easier. You can even use this feature to prevent a possible burglary by answering the doorbell and appearing to be home if a potential intruder tries to ring the doorbell while you are away. Many intruders will first ring the doorbell to see if anyone is home, so this can really come in handy!

The Alarm.com ADC-VDB770 connects with your local WIFI network for pairing with the Alarm.com servers. WPS pairing is supported to make the process easy. One important thing to note is that if you do not have full video monitoring service for your Alarm.com account (e.g. if you are signed up with one of Alarm Grid's Gold Plans), then you will be restricted to using only one (1) ADC-VDB770 device with 1,200 monthly clips and 1,200 total clips. These limits cannot be increased unless you upgrade to full video service (e.g. an Alarm Grid Platinum Plan). If you have full video service with an Alarm Grid Platinum Plan, then the ADC-VDB770 will simply count towards you camera limit and your regular clip limits. More information about all our monitoring plans can be found here. The doorbell camera is eligible for Alarm.com Video Analytics, regardless of whether it is used with a non-video plan or a full video surveillance plan.

The Alarm.com ADC-VDB770 is available for purchase on our site now! If you have any questions about this new doorbell camera, including compatibility requirements, please email us at support@alarmgrid.com. This is also a good email to contact us at if you are interested in signing up for new monitoring service or upgrading your existing plan. We check our email from 9am to 8pm ET M-F. We look forward to hearing from you!

Tags: , , , , , , , , , ,

Comments


Posted By

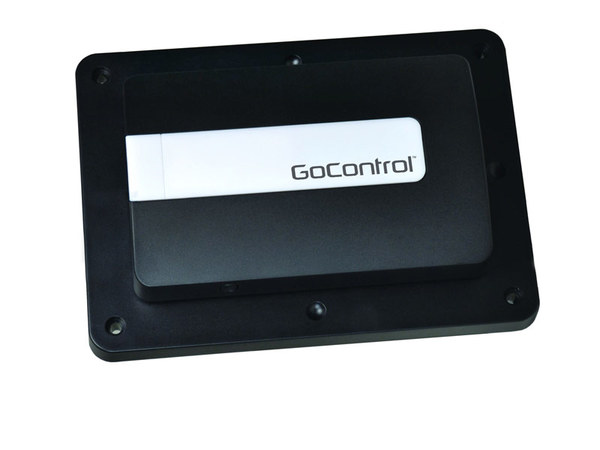
Just last month, we announced that we were offering the Linear GD00Z-7 Z-Wave Plus Garage Door Controller. Well that product was short-lived, as it has already been discontinued and replaced by the GoControl GD00Z-8-GC Z-Wave Plus Garage Door Controller, which is now available on our site.

The GoControl and Linear brands are often used interchangeably. They are both used to identify automation offerings from Nortek Control, which is also the parent company of 2GIG. Whether the company decides to brand a product as GoControl or Linear usually isn't very important, as they basically represent the same product lineups from Nortek Control.

As you may recall, the various smart garage door controllers offered from Nortek through the years have usually been sold under the Linear banner. Some of these products include the Linear GD00Z-4, the Linear GD00Z-5 and, of course, the Linear GD00Z-7 that we mentioned earlier. From what we can tell, the introduction of the GoControl GD00Z-8-GC was only done to rebrand the product as GoControl instead of Linear. We say that because, from what we can tell, the Linear GD00Z-7 and GoControl GD00Z-8-GC are virtually identical, other than the name written across the front.

This isn't a bad thing though, as the Linear GD00Z-7 was an excellent product. All of the same great features return for the GoControl GD00Z-8-GC. It is a Z-Wave Plus garage door controller that is wired to your garage door motor. By pairing the device with your Z-Wave hub, you can open and close your garage door and check its current status remotely. This is done by using a compatible interactive automation platform for the Z-Wave controller, such as Alarm.com. You can also include it with smart scenes for automatic operation.

Just like its predecessors, the GoControl GD00Z-8-GC cannot check the open/close status of the garage door on its own. Instead, it interfaces with a tilt sensor that is installed on top of the garage door. This tilt sensor will relay status to the GD00Z-8-GC so that it knows whether the garage door is opened or closed. This tilt sensor comes included with the product, so you do not need to purchase one separately.

An exception to the above rule is if you wish to have the garage door monitored by your burglar alarm system. The tilt sensor that comes included only conveys the garage door status to the GD00Z-8-GC, not to the alarm panel being used. So, if you want to monitor the state of the garage door as a part of your alarm system, then you will need to purchase a separate, compatible garage door sensor.

Also returning to the GoControl GD00Z-8-GC is the ability to utilize the S2 Security Protocol with Z-Wave Plus controllers that support S2. This security suite offers advanced levels of protection to keep your automation equipment safe. We recently did a great post on the S2 Security Protocol, which you can check out here. Keep in mind that the same compatibility restrictions of the older Linear and GoControl Garage Door Controllers also apply to the GD00Z-8-GC. This means that you cannot interface the unit with the Honeywell Lyric or the Honeywell LYNX Touch Panels. Make sure to check compatibility before purchasing.

If you want to check compatibility, or if you have any other questions about the GoControl GD00Z-8-GC2 or monitoring service in general, please email us at support@alarmgrid.com. We will check your email at our earliest convenience and reply back as soon as possible. Remember that our business hours for checking email run from 9am to 8pm ET M-F. We look forward to hearing from you!
Tags: , , , , , , ,

Comments


Posted By

Network security is more important than ever, as hackers constantly strive to expose vulnerabilities and steal personal information. If your alarm system is associated with an interactive platform, then a flaw in network security could give an intruder easy access to your home or business.


The key to protecting your network and your personal information is to have multiple layers of security in place. You shouldn't just rely on one single security method, even if that one method is known for being very secure. If a vulnerability or an opening is ever exposed within that method's framework, then you could be left vulnerable.

An example of this can be seen in a vulnerability that was discovered in SonicWall Network Security Appliance (NSA) devices last month. This left more than 800,000 VPN appliances vulnerable. A patch has since been applied to these affected SonicWall devices, but that doesn't change the fact that many users were running unsecured VPNs for quite some time. Another example occurred last September, when it was found that FortiGate VPNs are vulnerable to Man-In-The-Middle (MITM) attacks when used in their default configuration.

This doesn't mean that using a VPN is a bad idea. Having a VPN in place is a great way to protect your network and your personal information. But it's important to understand that a VPN should be one of multiple protection layers keeping you safe. That way, even if your VPN fails, you will still have other mechanisms providing protection.

Network vulnerabilities can have severe consequences. Hackers can use vulnerabilities to access your personal information, including your passwords, credit card info, browsing history, and virtually all other data that you have shared with your network. In the context of a monitored security system, this can include information associated with an interactive service platform, such as Total Connect 2.0 or Alarm.com. Keep in mind that if an intruder accesses your TC2 or ADC account, they can disarm your system at-will and freely access your home or business. Having access to TC2 or ADC is basically the same as having a system code!

Fortunately, there are multiple security provisions you can set up to protect yourself. A strong VPN is a nice start. You should also set up firewalls as an added layer of security. And of course, always use secure, difficult-to-guess passwords, and never share them across different websites. You may also want to consider using two-factor authentication when available. Just yesterday, we made a post about two-factor authentication on Alarm.com. That is also an excellent way to keep your account protected.

Remember, protecting your network is your responsibility. Nobody else will do it for you. But we're here to help you. If you're monitored with Alarm Grid, feel free to reach out to us for more tips on keeping your private data safe. You may also contact us if you are interested in starting new monitoring service. Emailing our team at support@alarmgrid.com is the best way to get a prompt response. Keep in mind that we check our email from 9am to 8pm M-F. We look forward to hearing from you!

Tags: , ,

Comments


Posted By

We have learned that Alarm.com now allows users to receive two-factor authentication (2FA) links via email when logging into the Alarm.com website. This is in addition to the two-factor authentication via text message when accessing the Alarm.com platform. You can set up the feature in ADC.


When two-factor authentication is enabled for your Alarm.com account, your login process will have an added layer of security. Upon logging into your Alarm.com account via the website or mobile app on a device that you haven't saved, you will need to verify yourself by providing a secret access code. You will get this code via text message or email, depending upon how you have set up the 2FA feature. In other words, accessing your Alarm.com account on a new device will require your username, password, and access to either your phone or email. This is great for keeping your Alarm.com account as secure as possible.

Remember, 2FA will only be required when you access Alarm.com from a new device. For example, if you frequently access Alarm.com using the same web browser on your computer, and you tell Alarm.com that the device can be safely trusted, then you will only need to perform 2FA the first time you login, as well as anytime you login after clearing your cookies. Some users are hesitant to enable 2FA, because they don't want to have to go through the inconvenience of entering a secret code every time. Fortunately, that isn't a concern, as Alarm.com can remember your usual devices and skip the process for these trusted devices. You can also tell Alarm.com to trust your phone so that you will only need to perform 2FA if you get a new phone or if you are using a different mobile device than usual to access your account. Whenever you access Alarm.com through a new device, after completing the 2FA process, Alarm.com will ask you if you want to save that device so that you do not have to complete 2FA every time. This protects your account, while still maximizing convenience.

If you want to enable two-factor authentication for your Alarm.com account, start by logging into the Alarm.com website. Choose Settings on the left-hand side of the screen, then choose Login Information, and then Two-Factor Authentication. Then set up the feature through email address or text message by following the on-screen prompts. If you have questions, email us at support@alarmgrid.com. This email is also great if you are interested in starting new monitoring service for access to Alarm.com. We look forward to hearing from you!

Tags: , ,

Comments


Posted By

2GIG has recently updated their logo to provide a more "modern" look. The change is very subtle, as it only includes thinner text, with virtually no other adjustments. This comes ahead of the release of the new 2GIG Security System, the 2GIG Edge, which should be available in February 2021.


Our main takeaway here is that 2GIG is really trying to invoke a "modern" and "clean" image, without making any major changes that may result in a loss of identity or brand recognition. The company most likely wants to refresh its branding ahead of their new panel release. We're sure 2GIG is hard at work on their new alarm panel, though it will take an incredible effort to overthrow the existing Qolsys IQ Panel 2 Plus as the top security system option for use with Alarm.com. It seems 2GIG is holding nothing back ahead of the anticipated release.

Unfortunately, we don't have any new details on the 2GIG Edge at this time. We promise to check-in with 2GIG soon to see if we can learn more. We also have no word on how the new Edge will affect the existing 2GIG GC2e and 2GIG GC3e Security Systems. It's fair to expect that the 2GIG Edge will have a completely revamped programming setup, so it may or may not replace their existing offerings. For now, we strongly recommend checking out our prior post with an in-depth discussion on the 2GIG Edge, which can be seen in its entirety here.

You may also recall that the parent company of 2GIG also performed its own rebranding, as Nortek Security & Control simply became Nortek Control. We're not entirely sure if that name change has anything to do with 2GIG revamping its logo, or with the upcoming release of the 2GIG Edge in February 2021, but we wouldn't rule out that possibility. You can learn more about the name change for Nortek Control in this prior blog post.

Remember to please email us at support@alarmgrid.com if you have any questions about the upcoming 2GIG Edge System, any of the other great systems we support, or about alarm monitoring services in general. We check email during our usual business hours of 9am to 8pm ET M-F. We look forward to hearing from you!

Tags: , ,

Comments


Posted By

We actually missed this about a month ago, but it appears Alarm.com has updated their website camera video feed viewer to use native browser streaming. This replaces the old Adobe Flash video viewer. This change does not come as a surprise, as Adobe Flash will soon reach its end of life.


Being able to live-stream the video feed for Alarm.com Security Cameras is one of the most important features of these devices. This can be done using the Alarm.com website or the mobile app. The change being discussed here affects streaming through a web browser and the Alarm.com website. Before, it was only possible to stream Alarm.com Cameras on the website by using the Adobe Flash video viewer. The update provides support for native browser streaming. This will make it easier for most viewers to access their camera feeds.

With Adobe Flash reaching its end of life by the end of the year, this update was basically a no-brainer for Alarm.com. Users will still have the ability to view their cameras using Adobe Flash until the end of the year. At that point, only native browser streaming will be supported for camera streaming through the Alarm.com website. Native browser streaming is easier to maintain, and it does not require users to install and update a Flash plug-in. Native browser streaming support was actually made available towards the end of September, but we never covered the news in our blog prior to now.

When you access your Alarm.com account through the website, the Video section will appear on the left if Video Surveillance has been added to your account. By clicking on this section then Live Video, you will be able to choose a camera for streaming. In the upper-right corner there will be a toggle bar for you to enable or disable the "New Viewer. When the bar is blue, the New Viewer is enabled, and native browser streaming will be used. This is the default option. You can click the toggle bar to turn off the New Viewer and use Adobe Flash streaming. This will only be available until the end of the year. After that, no Flash streaming will be available.


Please note that the New Viewer and native browser streaming only allows the live video stream to be maintained for a few minutes at a time. After that, you will get a message that the stream has "timed out". You will need to refresh the stream to resume viewing. This is normal, and it's just a limitation that comes with Alarm.com Camera streaming. Simply click the "Play" button that appears on the screen to refresh the stream and continue watching.

Also note that while the camera viewer now has native browser streaming available, the streaming video recorder (SVR) timeline page still uses Adobe Flash. Native browser streaming is not yet available for SVR functions on the Alarm.com website. We expect that to change in the near future, as Alarm.com continues to make their transition away from Flash. We do not have an ETA on when that will become available, but we will be sure to provide an update once we learn more.

If you have any questions about Alarm.com Camera streaming, or if you are interested in monitoring service to gain access to Alarm.com, please email us at support@alarmgrid.com. Remember that Alarm Grid customers need either a Platinum Level Plan or a Video-Only Plan to gain access to Alarm.com for camera streaming. Our team is happy to address any questions or concerns you may have via email. We check our email during our usual business hours of 9am to 8pm ET M-F. We look forward to hearing from you!

Tags: , , , , , , , , , , , , , ,

Comments


Posted By

It's time for our weekly video recap! And this might be our biggest one yet! We have a few videos back from the 16th that didn't make it into the last recap, as well a bunch of new videos from last week. We have videos featuring Jorge, Jarrett, and myself. Let's check out the videos!

Properly Replacing a Bad Sensor On a 2GIG GC3 or GC3e

Jarrett demonstrates the correct process for replacing a bad sensor on a 2GIG GC3 or 2GIG GC3e. The steps to follow for replacing a bad sensor on the GC3 or GC3e include clearing out the zone and then reprogramming it from scratch. Simply deleting the Serial Number (SN) and providing the new one can result in a "bypassed at device" error message. This will result in the sensor not working correctly. Other unusual system behavior may also occur.


Alarm.com Limits for Z Wave Devices

I explain the Alarm.com limit for the number of Z-Wave devices per account. Up to 122 devices from the panel will be pushed over to the Alarm.com platform for remote access and control. All Z-Wave devices numbered 123 and beyond will only be available at the panel for local operation. You can delete older Z-Wave devices that are still paired with Alarm.com to make room for new ones. You should pair the 122 devices that you want to use remotely first, allow Alarm.com to sync, and then add additional sensors for local control only last.


Clip Limits With Alarm.com Video Service

I explain the clip limits for Alarm.com Video Service. In order to get true video surveillance with Alarm Grid, you must have either a Platinum Level Plan (Self or Full) or a Video-Only Plan. At the base level, a true video plan will offer support for 1,000 monthly and total clips, as well as four (4) cameras and an SVR device. But by upgrading to Video Analytics, your monthly and total clip limits will both increase from 1,000 monthly and total clips to 3,000 clips of both types.


Changing the SiXCOMBO Batteries

I show you how to replace the batteries for the Honeywell SiXCOMBO. This wireless sensor uses four (4) lithium CR123A batteries for power. Its expected battery life is about five (5) years. You must open up the SiXCOMBO by twisting the sensor counterclockwise against its back plate. When closing the sensor, make to align it properly, and twist clockwise to secure. You get a low battery message on the panel to let you know when replacements are needed.


Self-Monitoring a Honeywell L3000

I explain how you can self-monitor a Honeywell L3000 System. Self-monitoring means that the system is not connected with a central station, and all system alerts are sent to the end user via text and/or email. For an L3000, this is possible using the Total Connect 2.0 service from Resideo. You will need a compatible AlarmNet Communicator for the L3000 System to make this possible. Both the Honeywell LTE-L3A and the Honeywell LTE-L3V work great for this job when used with the L3000.


Enrolling a PowerG Wireless Sensor to an Alarm Panel

Jorge shows you how to enroll a PowerG Sensor with a compatible alarm panel. PowerG Sensors are wireless devices that offer a fantastic signal range and 128-bit AES encryption. Compatible systems for PowerG Sensors include all versions of the Qolsys IQ Panel 2 Plus, the DSC Iotega, and any DSC PowerSeries NEO System with an added PowerG Module. Most PowerG devices can transmit a signal for auto-enrollment by either powering on or by pressing and holding a device enrollment button until its LED light turns solid orange.


Connecting the 2GIG GC3e to WIFI

Jarrett shows you how to connect the 2GIG GC3e to a local WIFI network. The 2GIG GC3e System will use its WIFI connection to communicate with Alarm.com. However, Alarm.com requirements mandate that the system also has an active cellular communication path set up. This will require an added cellular communicator. The WIFI connection will just work as an additional pathway for facilitating communication between the GC3e and Alarm.com. Remember that you will need the WIFI network password to complete the connection.


Checking Zone Faults on a Tuxedo Touch Keypad

Jorge shows you how to check for faulted system zones using a Honeywell Tuxedo Touch Keypad. A faulted zone refers to a programmed sensor that is in a non-restored or "active" state. A common example is a contact sensor in a faulted state due to a door or window being left open. The Tuxedo will display a message at the top of its main screen to indicate when there is at least one faulted zone. You must bypass or restore faulted zones before the system can be armed.


Scenes From Alarm.com Won't Be Pushed to GC3 or GC3e

I explain how when you build a smart scene in Alarm.com, that scene will not be pushed down to a 2GIG GC3 or GC3e Panel for local operation. Instead the scene will only be available for remote access through the Alarm.com website or mobile app. Likewise if you build a scene on the GC3 or GC3e, then it will not be pushed over to Alarm.com. You can include various smart home devices with scenes, including programmed lights, locks, thermostats, and more.


Checking the Firmware Version on a Tuxedo Touch

Jorge shows you how to check the firmware version for a Honeywell Tuxedo Touch Keypad. The Honeywell Tuxedo Touch is both a touchscreen keypad for a Honeywell VISTA System and a Z-Wave automation controller. Firmware updates for the Tuxedo may be periodically released to provide new features and improve device performance. The Tuxedo Touch receives firmware updates from an SD card slot. You must download the update to the SD card and then apply it to the Tuxedo Touch.


Getting Into the Z Wave Programming Section of a Tuxedo Touch Keypad

Jorge explains how to access Z-Wave programming for the Tuxedo Touch. Z-Wave functionality is one of the key features for this wired touchscreen keypad. You must access the Z-Wave Programming Menu for the Tuxedo Touch to begin enrolling Z-Wave smart home devices. It is advised that you clear any Z-Wave device from the network before attempting to enroll it with the Tuxedo. This is true even if the device is brand-new and you have never paired it with a Z-Wave network before.


Converting a Wired Alarm Into Wireless

I explain how you can convert a wired alarm system into a wireless alarm system by using a wired to wireless converter module. With a wired to wireless converter, you can take your existing hardwired sensors and use them with your new wireless security system as wireless devices. This can save you money by not having to purchasing as many wireless sensors. When choosing a wired to wireless converter, you must make sure that the module communicates at a wireless frequency that is compatible with your new wireless system.

Tags: , , , , , ,

Comments


Posted By

If you follow this blog regularly, then you probably already know about the significance of the 3G and CDMA Sunset. Now, Alarm.com is taking their own steps to demonstrate the urgency by listing a "Trouble" status condition next to all 3G and CDMA accounts on the alarm dealer end.


Alarm dealers like Alarm Grid who provide service with Alarm.com will notice a "Trouble" status condition next to all customer accounts who are still connected using an AT&T 3G or a Verizon CDMA Communicator. The purpose of this trouble condition is so that dealers can properly notify end users who need to upgrade to LTE to avoid a loss of service. Cellular service providers are expected to shut down older 3G and CDMA Networks in 2022.

When a cellular network is shut down, all cellular devices designed to connect with the network will stop working. This includes cellular communicators for security systems. The 3G and CDMA shutdown will inevitably affect countless security systems across the country. Anyone still using a system with a 3G, 4G, or CDMA Communicator is heavily urged to upgrade to LTE as soon as possible.

While this news does not impact end users in any manner (including those still using 3G or CDMA), it does go to show how important this issue is. We have been doing our part by informing users about the importance of upgrading. Recently, our marketing team even sent out emails to customers still lagging behind to try and get the word out. We have also been regularly blogging about the subject.

Fortunately, most users with a 3G or CDMA Communicator can simply swap out their existing communicator for a new LTE model. The term LTE stands for "Long-Term Evolution", and an LTE communicator will keep your system online well into the very distant future. You may have heard about the rise of 5G cellular communication and think that LTE will soon be outdated as well. But the truth is that LTE will serve as a valuable backup to 5G. Both AT&T and Verizon have promised to keep their LTE networks online for many, many years, possibly decades.

If you need assistance finding an LTE communicator for your security system, then we are more than happy to help. We urge you to not wait until the last minute, as many users will be trying to upgrade at the same time. Upgrading early helps prevent a logjam when it comes to be crunch time later on, and it greatly reduces the burden on us. Please, contact us with your panel information, and we will assist you in making a seamless transition.

The best way to contact us regarding LTE upgrades is to email support@alarmgrid.com. If you are currently monitored with Alarm Grid, then we will be able to pull up your panel info. But if you are looking to switch to Alarm Grid, then please provide us with a picture of your alarm panel. This includes a picture of the inner circuit board if you have a hardwired panel. Remember, we check email from 9am to 8pm ET M-F. We look forward to hearing from you!

Tags: , , , , , , ,

Comments