Alarm Grid Returns to Florida Office for New Year 2021
Posted By Michael GorisWelcome to the first post of 2021 from Alarm Grid! It's almost cliché to say by this point, but we're just as happy to transition into 2021 as you are. And we're looking to start the year off on the right foot by having our Florida team members return to the Alarm Grid headquarters.

Since Thanksgiving, our Florida office has remained closed, and virtually all team members who normally work here have instead been performing their regular duties from their homes. Only our satellite offices in Kentucky and Connecticut have remained active during this time. Well now it's back to business as usual, as we have transitioned back into our usual location. We are happy to be back, as while we love our homes, the office is really the best place for staying focused and providing our customers with the support and assistance they need.
One other small note as we leave 2020 behind, we know that normally we do a "Year In Review" blog post around this time, to look back on all the events that occurred. But unfortunately, that will not be happening this year. We actually had one planned out, but due to technical difficulties, the content was deleted, and we were unable to recover it. Also, there has been so much security news as of late that we really haven't had the time. Not to mention the fact that most people consider 2020 to have been a "below average" year, so we're sure that most of our readers are ready to move forward rather than look into the rearview. But if you were looking forward to that, then we do apologize.
With that out of the way, let's start thinking about what we can expect for 2021. Our three biggest manufacturers - Resideo, Qolsys, and 2GIG - all have big plans for the year. We expect this to be the year that the Honeywell Home PROA7PLUS Alarm Panel really comes into itself, as Resideo is expected to make local end user programming available for the system, and there is a good chance that Apple HomeKit support will also be added later this year. We've also heard that there will be a "stripped-down" version of the PROA7PLUS called simply the PROA7 that will not offer Z-Wave or WIFI connectivity unless added separately. And there have also been some small rumblings of a wired and wireless hybrid panel from Resideo that is tentatively being called the Honeywell Home PROH8PLUS.
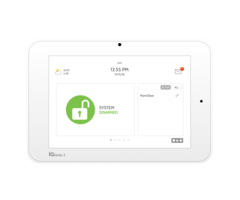
Qolsys is likely going to debut their much-anticipated Qolsys IQ Hub in 2021. We were actually expecting it to hit the market in 2020, but that obviously never happened, possibly due to the ongoing pandemic. We have periodically asked Qolsys about the IQ Hub, and they continue to say that it should be available early this year. All signs point to it being released very soon. As we have mentioned before, we don't necessarily expect the IQ Hub to replace the IQ Panel 2 Plus, and instead it will be an option for users who don't really need all of the advanced features of the company's flagship alarm panel. We strongly recommend checking out this post to learn more about what may be coming for the IQ Hub.
Lastly, 2GIG is set to release their own brand-new security system, the 2GIG Edge, in February. The website promoting the upcoming panel is vague on details and specifications, but we're guessing that 2GIG is going to hold nothing back on their new panel. They have some very stiff competition with Resideo and Qolsys afterall. For more information on what the 2GIG Edge Security System might have to offer, please check out our initial post on the subject, where we made some interesting predictions and speculations based on information that is currently available.
Remember to stay tuned to our blog so that you can remain up-to-date on the latest security news and happening throughout 2021 and beyond. And if you ever need any help with your Alarm Grid System, or if you are looking to join Alarm Grid as a monitored customer, then please email us at support@alarmgrid.com. We're available to check your emails from 9am to 8pm ET M-F. Happy New Year, and we look forward to hearing from you!
 We do have one thing to mention for users of the Qolsys IQ Panel 2 Solar Integration. If you are using the IQ2 Solar Integration then, DO NOT UPGRADE TO 2.5.4


