Smart Home Posts

Posted By

With ISC West 2021 quickly approaching, we thought it would be nice to take a quick look at various security manufacturers to speculate about what they might be presenting. Keep in mind, this is purely speculation. None of this is guaranteed, it's just our guess as what we might see.

Before you read about the various security and smart home automation offerings that we might see, make sure to check out our earlier post on the ISC West 2021 Health and Safety Guidelines, if you haven't already. Remember that this year's ISC West runs from Monday, July 19th through Wednesday, July 21st at the Sands Expo Center in Las Vegas, NV. With that out of the way, let's begin discussing some manufacturers.

Resideo

Resideo will certainly want to showcase its new system, the PROA7PLUS. We would expect to see both the Honeywell Home PROA7PLUS and the virtually identical Resideo PROA7PLUSC showcased prominently at ISC West 2021. You will also likely see its accompanying hardware, including the PROLTE-A and PROLTE-V Communicators, the PROTAKEOVER Legacy Receiver Module, and the PROSIX Series Encrypted Wireless Sensors. All of this aforementioned equipment is already available for purchase.


As for new products, we would be surprised if we didn't see Resideo releasing a new lineup of security cameras, perhaps under the Honeywell Home brand. With the Honeywell IPCAM-OC1 Outdoor Camera being discontinued, the selection of Total Connect 2.0 Cameras is pretty weak compared to the selection of Alarm.com Cameras. As such, a user getting security cameras as part of their system is more likely to choose an Alarm.com System than a Resideo System that is being used with Total Connect 2.0. We're sure Resideo wants to change that, so it would be disappointing if we don't see some new Resideo Cameras.

Lastly, we have heard rumors of a new hardwired system that would essentially replace the Honeywell VISTA Series. This lineup of wired panels is rumored to be named the Honeywell Home PROH8PLUS, and it would be a fully hybrid system able to support both hardwired sensors and wireless sensors, possibly using the PROTAKEOVER Module Legacy Receiver. While there's nothing inherently wrong with VISTA Alarm Panels, we might see Resideo updating their technology a bit, and bringing the hardwired selection lineup to the next level.

Nortek & 2GIG

From what we can tell, Nortek is very pleased with their 2GIG Edge Security System, and it's a fair bet that that 2GIG Edge Alarm Panel will be the main highlight of the 2GIG and Nortek Booth at ISC West 2021. And it's rightfully so, as the Edge is a highly advanced alarm panel with great features like facial recognition and Bluetooth disarming. What remains to be seen if Nortek will decide to roll-out a lineup of 2GIG Edge-exclusive encrypted sensors, perhaps to break away from the existing 2GIG eSeries Sensors that work with the Edge and the older GC2e and GC3e. However, we haven't actually heard anything about new 2GIG Edge Sensors, so that is just pure speculation. That being said, you can bet on 2GIG to heavily feature the 2GIG Edge Alarm System in their booth. If you haven't seen it an action yet, then ISC West 2021 figures to be a great opportunity. The 2GIG Edge and its accessories are currently available for purchase from Alarm Grid.

Qolsys

Qolsys has been secretly working away on some new alarm panels, and we figure ISC West 2021 to be right opportunity for Qolsys to unveil them to the public. The company needs to make a big splash to keep up with household names like Honeywell Home and 2GIG. We can expect to see the new Qolsys Budget Panel, the Qolsys IQ Hub, which we have been expecting for quite some time.


This may also be the chance for Qolsys to unveil their big new flagship alarm panel, the Qolsys IQ Panel 4. We are expecting the IQ Panel 4 to be a tremendous juggernaut in the home security industry, as the new alarm system will boast a Snapdragon Chipset running Android 9 Software, and come complete with an 8MP front-facing camera, all-new lifestyle automation pages, and oodles of great features. There's a chance Qolsys might be secretive and keep the IQ Panel 4 tucked away, but we would be pretty sad if we don't get to see it at ISC West 2021. We are hopeful that the Qolsys IQ Panel 4, Qolsys IQ Hub, and Qolsys IQ Router will be made available later this year.

DSC

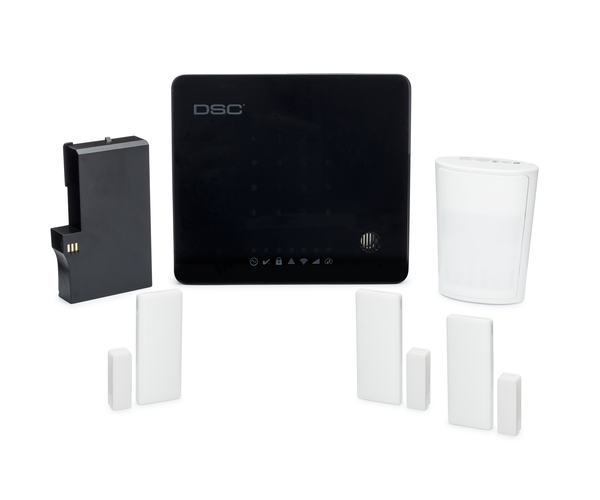
Digital Security Controls (DSC) has been at the forefront of Canadian Home and Commercial Security for years. But now that both DSC and Qolsys are under the Johnson Controls banner, we may see considerably less of the DSC brand out in the limelight. As security systems are being made "sexier" and flashier to fit-in with a modern home, a bulky wired alarm system like the DSC PowerSeries NEO just isn't suitable for most residential applications. We don't expect DSC to be completely absent from ISC West 2021, but don't be surprised if Johnson Controls is putting Qolsys out on center stage, while DSC may remain more in the background as more of a commercial security option. The PowerSeries NEO and the existing DSC Iotega are both candidates to be featured in ISC West 2021. We have not yet received any word on possible "new" DSC equipment that may be featured.

Alarm.com

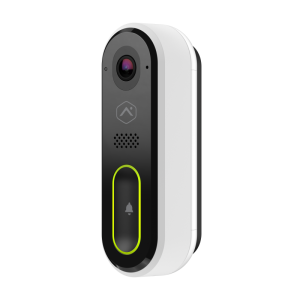
Alarm.com always has a prominent showing at ISC West, and we don't expect this year to be any different. However, we aren't really sure what to expect from Alarm.com, if anything new. It's possible that Alarm.com might try to make ISC West 2021 more of a quiet showing. It's likely that the Alarm.com Smart House will return, allowing users to interact with the latest smart home automation and video surveillance offerings from Alarm.com. The ADC platform strives to be a leader in terms of home automation, and they will likely use this ISC West to showcase their complete array of offerings and how their equipment can be used together to create a complete smart home. We are also regularly pleased with all the Alarm.com Video Camera offerings, so it's fair to expect their cameras to make an appearance. We aren't necessarily expecting any new cameras, but we definitely anticipate seeing great devices like the ADC-V523, ADC,V622-WELL, ADC-V723, and ADC-VDB770 Doorbell Camera.

Z-Wave Alliance

You can always bet on seeing the Z-Wave Alliance tucked away in the back corners of the ISC West Showroom Floor. Z-Wave wireless communication has secured itself as the leading protocol in smart home automation, and it continues to dominate for good reason. ISC West 2021, figures to be a huge opportunity for Z-Wave 700-Series Technology to really present itself to the public and showcase its rich capabilities. Z-Wave 700-Series, also being called Z-Wave Plus V2, promised extended wireless range, and a longer battery life of at least ten (10) years. Z-Wave Plus V2 sensors are also required to be built on the Z-Wave S2 Security Protocol, thereby making them more secure than most Z-Wave 500-Series devices.

Of course, the Alarm Grid team will be returning to ISC West 2021, ready to post about the latest security offerings from all the major brands. Be sure to keep-up with the Alarm Grid Blog if you can't make it to ISC West 2021 yourself. We will let you know the latest news for Resideo, Honeywell Home, 2GIG, Qolsys, and more as we attend the event in Las Vegas, NV. Stay tuned for more ISC West 2021, especially as we get closer to the even on July 19th through July 21st. We're super excited, so get ready for more content coming soon.

Tags: , , , , , , , , , ,

Comments


Posted By

Alarm Grid is offering new Alarm.com System Enhancement Modules (SEMs) for Honeywell VISTA P-Series Alarm Panels. The ADC-SEM300-VT-AT (AT&T LTE & IP) and ADC-SEM300-VT-VZ (Verizon LTE & IP) are both available now. They provide reliable alarm monitoring and Z-Wave Plus capabilities.

If you aren't familiar with Alarm.com System Enhancement Modules (SEMs), they are basically cellular communicators that allow hardwired alarm panels to connect with the Alarm.com servers. The reason why SEMs for Honeywell VISTA Systems are so interesting is because normally these Honeywell-manufactured Alarm Panels are used in conjunction with the Resideo AlarmNet Servers and the Total Connect 2.0 Security Notification and Automation Platform. With an SEM, you can take control of your Honeywell VISTA Alarm Panel and instead have it communicate with the Alarm.com servers and the Alarm.com platform. Alarm Grid customers can choose from a variety of alarm monitoring plans to use with SEMs, including our Gold and Platinum Level Plans (Self & Full) and our Cellular-Only Plan. You can learn more about all our monitoring plans in this comprehensive blog post.

When you break-down what Alarm.com offers versus Total Connect 2.0, both platforms are remarkably similar. However, there are some cases where a user may prefer to go with Alarm.com over Total Connect 2.0. The biggest reason why we can think of is that the user wants to take advantage of the robust selection of Alarm.com Security Cameras. If you compare the selection of Alarm.com Cameras versus the Total Connect 2.0 Camera Selection, then it's clear that Alarm.com is (at least for now) the hands-down winner. Even if you aren't using security cameras in your setup, maybe you want a better integration with the Alarm.com Smart Water Valve, or maybe there's an Alarm.com Demand Response Program in your area that you want to take advantage of. In any case, if you have a VISTA P-Series Panel (e.g. VISTA-10P, VISTA-15P, VISTA-20P, VISTA-21iP, VISTA-21iPLTE), then an Alarm.com SEM will give you the option of using their services instead of AlarmNet and TC2.

When you compare the new "300-Series" SEMs with the previous VISTA SEMs, the ADC-SEM210-VT-AT and the ADC-SEM210-VT-VZ, the new ones have a couple of advantages. For one, the new 300-Series SEMs utilize much lower power consumption at just 230mA. The new modules also have the ability to be used without an external power supply, which was required with the older modules. In the setup without an external power supply, all of the power is supplied from the panel. However, you can still use an external power supply with the new SEMs if you do not have 230mA available from your panel. Also, the new 300-Series SEMs have new externally-facing LED status lights that are easier to read when needed.

Just like the prior editions, the new ADC-SEM300-VT-AT and ADC-SEM300-VT-VZ offer ultra-reliable connectivity across both an LTE cellular network and internet service using a wired ethernet connection. In addition, the new SEMs also return with Z-Wave Plus functionality, thereby allowing you to build a robust and complete smart home network around your security system. If you have been wanting to setup smart devices around your Honeywell VISTA Alarm System for use around the Alarm.com Security and Automation Platform, then these new SEM devices are perfect for the job at-hand. They are available right now and ready for use with Alarm Grid!

Do you have any thoughts about the new Alarm.com 300-Series SEMs, the ADC-SEM300-VT-AT and ADC-SEM300-VT-VZ? Would you consider switching over your Honeywell VISTA System to the Alarm.com Platform from Total Connect 2.0? Or maybe you're already happy with using your VISTA System with its current LTE cellular communicator? Let us know your thoughts in a comment down below. We would love to hear what you have to say. We always make sure to cover new product releases and the latest security system news, so make sure to stay tuned to the Alarm Grid Home Security Blog for more great content coming soon!

Tags: , , , , , , , , , , ,

Comments


Posted By

Alarm Grid has learned that Alarm.com now supports Ecobee WIFI Thermostats. Users can integrate Ecobee devices with their Alarm.com accounts for operation through the Alarm.com website and mobile app. The Ecobee Thermostat integration can be added to any Alarm.com account using the website.

According to Alarm.com, the Ecobee SmartThermostat, the Ecobee4 Thermostat, and the Ecobee3 Lite Thermostat are all eligible for the integration. Users who set up the integration will be able to control their Ecobee WIFI Thermostats alongside their other automation and security devices in the Alarm.com website and/or mobile app. If you are an Alarm.com user, and you already have a compatible Ecobee device, or you are thinking about getting one, then now is a great time to get started!

Ecobee says that their smart thermostat devices help users save up to 26% on their heating and cooling costs. The company offers a nice selection of ENERGY STAR certified thermostats, as well as their own suite of smart home automation products. Not only does Ecobee work to help customers save money on heating and cooling costs, but they also strive to create a more sustainable world as part of their dedicated efforts.

One interesting thing about Ecobee is that the company has a long-standing relationship with an Alarm.com subsidiary called EnergyHub. Since 2015, Ecobee and EnergyHub have worked together on more than 40 special programs designed to deliver grid management services to utilities and wholesale market operators. Thus, it's no surprise that Ecobee and Alarm.com have come together to create this new partnership.

Any Alarm.com user with a compatible Ecobee Thermostat can get started with the integration by setting it up through the Alarm.com website. Simply be sure the Thermostats or the Lights & Thermostats service package is enabled on your account. Then, login to Alarm.com using a compatible web browser, choose Settings on the left-hand side, followed by Manage Devices, then press the blue "Add Device" button in the upper-right, pick Thermostat, and then select the option for Ecobee. From there, just follow the on-screen instructions to complete the integration!

If you have any thoughts about the new Ecobee integration for Alarm.com, or if you want to share your experience with Ecobee Thermostat devices in general, then please leave a comment down below. We would love to hear what you have to say. Also, if you're excited about this new integration and what it can offer, then please let us know. It's great to see Alarm.com continuing to expand their smart home automation and energy-saving ecosystem. Stay tuned to the Alarm Grid Blog for more security and automation news coming soon.

Tags: , , , , ,

Comments


Posted By

Welcome to a special Tuesday edition of an Alarm Grid Video Recap! We normally do these on Mondays, but we pushed this one back a day due to the time-sensitive nature of yesterday's post. Make sure to go and check that one out if you use the Nest Thermostat integration for Alarm.com.

As for today's video recap, it's mostly just business as usual. We have three (3) new videos today, all of which feature the 2GIG Edge. This innovative and feature-rich security system has certainly kept us busy and given us a lot to explore and share with you. We have even received some comments from users on YouTube asking us to cover specific 2GIG Edge features and functions. If you have anything that you would like to see from Alarm Grid, then make sure to leave a comment on this post down below. There's a great chance that you will see it in a future Alarm Grid video!

We know that you're on the EDGE of your seat waiting to see these new 2GIG EDGE videos, so let's get started! Here are the latest tutorial videos from Alarm Grid:

2GIG Edge: Clearing a Tamper Error

I show you how to clear a tamper error trouble condition from the 2GIG Edge. A tamper error occurs when the panel's internal tamper switch is not held down probably. This is usually the result of the panel being opened. When the issue occurs, a trouble notification will appear as a yellow circle with number inside it. Also, the panel will begin emitting a soft beeping sound. Once you properly close the panel so that the tamper switch is pressed down, the trouble notification will go away, and the beeping will cease.


2GIG Edge: Adding a Z Wave Device

I show you how to pair a Z-Wave device with a 2GIG Edge. Inside every 2GIG Edge is a Z-Wave Plus V2 700-Series Controller. This allows users to enroll a wide selection of Z-Wave peripherals, such as smart lights, door locks, programmable thermostats, and more. Z-Wave devices can be controlled locally at the panel, plus remotely from Alarm.com if the system is monitored with a plan that includes automation services. You can also create customized Alarm.com Smart Scenes to have your Z-Wave activate automatically.


2GIG Edge: Removing a Z Wave Device

I show you how to clear a device from the Z-Wave network using the 2GIG Edge. When you remove, or clear, a Z-Wave device, you are wiping out all its Z-Wave network data. This will allow the device to pair with a new Z-wave controller or hub. A user will typically remove a Z-Wave device if they no longer intend on using it. However, a user should also perform the clearing process before attempting to pair a device. This will ensure that no residual Z-Wave network data remains lingering inside the device.

Tags: , , , , , , , ,

Comments


Posted

Welcome to our PROA7PLUS Cheatsheet! This document will cover various procedures and information associated with the Honeywell Home PROA7PLUS, Honeywell Home PROA7, Resideo PROA7PLUSC, and Resideo PROA7C. First, we'll cover a preface, and then we'll dive deep into various system processes.

Table of Contents


Preface

The PROA7PLUS, along with its variants, represents the latest alarm panel from Honeywell Home and Resideo. Sometimes referred to as the ProSeries 7" All-In-One Systems, these are wireless all-in-one panels that connect with AlarmNet for alarm monitoring service. They can also be set up for use with the Total Connect 2.0 interactive platform, provided that access to the service is included in the user's alarm monitoring plan. Since AlarmNet supports IP-only alarm monitoring, cellular-only alarm monitoring, and dual-path alarm monitoring with both IP and cellular, you can technically use the PROA7PLUS and its variants with any alarm monitoring plan from Alarm Grid. To learn more about the Alarm Grid Monitoring Plans, please review this helpful post.

It should be mentioned that end-user programming for the ProSeries Panels is not available as of May 2021. The feature is currently in beta development and only available to those in the alarm industry. That is how we are able to provide information on how end-user programming looks and how it works. It is expected that the feature will be made available to the general public via a firmware update in the very near future. But please note that if your ProSeries System has not yet been updated to the firmware version that supports end-user programming, then the feature will not be available on your panel.

Right out of the box, the ProSeries Panels can support all of the Honeywell Home PROSIX Series Sensors and the Honeywell SiX Series Sensors that were originally built for use with the Honeywell Lyric Alarm System. It is important to note that once you pair a SiX Series Sensor with a ProSeries Panel, it will receive a firmware update and can never be reverted back to be used with a Lyric again. Once it goes to ProSeries Panel, it can never go back. The ProSeries Panels each have (127) zones available for the encrypted PROSIX and SiX Series Sensors.

Legacy sensor support is also available for the ProSeries Panels. If you add a Honeywell Home PROTAKEOVER Module to the panel, then you can pair sensors from one (1) of five (5) possible legacy frequency. The legacy frequency you decide to use is selected via an adjustable dial on the PROTAKEOVER Module. The available options include Honeywell 5800 Sensors (but not 2GIG), 2GIG 345 MHz Sensors (but not Honeywell), 319.5 MHz Sensors (Qolsys, Interlogix, GE), 433 MHz Sensors (DSC), and Bosch Sensors. You can only add one (1) PROTAKEOVER Module to a ProSeries Panel, so only one (1) legacy frequency can be used with the system at any given time. Up to (123) legacy zones are available on the ProSeries Panels. When combined with the encrypted zones for PROSIX and SiX Sensors, a maximum total of (250) zones are available on one of these systems.

One key characteristic of the PROA7PLUS is that the system is split into four (4) different variants, based on two (2) deciding factors, with each factor having two (2) options. First, you must decide whether you want the PLUS version or the BASE version. Most users ultimately go with the PLUS version, as the BASE version is more limited and requires an added communicator to get the system monitored. Second, you must decide whether you want the Honeywell Home version for residential use or the Resideo version for commercial use. Unlike the first decision, this second one really comes down to personal preference, and it won't really affect the performance of the system in any way.


PLUS Versions
BASE Versions
Honeywell Home Versions
Honeywell Home PROA7PLUS

Honeywell Home PROA7

Resideo Versions
Resideo PROA7PLUSC

Resideo PROA7C

PLUS vs. BASE

Most users who buy a ProSeries System opt for a PLUS Model. There are a few differences to be discussed between the PLUS Models and the BASE Models. A PLUS Model comes with a Honeywell Home PROWIFIZW Module already built-in for WIFI and Z-Wave Plus support. A BASE Model does not have this, but you can add one separately. If you only want WIFI support, and you don't care about Z-Wave Plus for home automation, then there is also a Honeywell Home PROWIFI that provides WIFI, but no Z-Wave Plus. Honeywell has chosen to go with a very modular design, so that users don't have to pay for features they may never intend to use.

A PLUS Model can be set up for IP-only monitoring (WIFI) right out of the box. You only need to add a cellular communicator if you want to set up a PLUS Model for dual-path monitoring with both IP and cellular. Conversely, a BASE Model cannot be set up for alarm monitoring right out of the box, as it does not have a built-in communicator. You must add an IP communicator and/or a cellular communicator to get the system monitored. If, for example, you want cellular-only monitoring, it may make sense for you to buy the BASE Model, and a cellular communicator, but only if you don't want any of the other features that are supported only on the PLUS Model. We'll cover those features in just a bit.

For reference, the IP communicators are WIFI modules that support wireless WIFI connectivity, and they cannot be used for wired ethernet connectivity. The options include the Honeywell Home PROWIFI, which adds WIFI only, and the Honeywell Home PROWIFIZW, which adds both WIFI and Z-Wave Plus. As of May 2021, only LTE modules are available for cellular connectivity. The options include the Honeywell Home PROLTE-A (AT&T LTE) and the Honeywell Home PROLTE-V (Verizon LTE). It's possible that a 5G cellular module might be released for the system someday, but that is not an option now.

There are two (2) other big differences between the PLUS Models and the BASE Models. One, a PLUS Model has a built-in camera for taking disarm photos on the system, while a BASE Model does not have an integrated camera. There is no way to add a panel camera to a BASE Model, so this will always be a feature you miss out on if you decide to get a BASE Model. Two, a PLUS Model supports Bluetooth LE connectivity for automatic Bluetooth disarming, while a BASE Model does not support Bluetooth. There is no way to add Bluetooth connectivity to a BASE Model, so again, this will be a feature you miss out on if you opt for a Base Model.

Honeywell Home vs. Resideo

Unlike the PLUS vs. BASE debate, the Honeywell Home vs. Resideo decision is more of a personal preference decision. The difference here is that the Honeywell Home Models say "Honeywell Home" across the front, while the Resideo Models say "Resideo" across the front. Other than that, they are exactly the same. Technically speaking, the Honeywell Home Models are intended for residential use, while the Resideo Models are intended for commercial or industrial use. But there is actually nothing stopping you from using a Resideo Model inside a home, or a Honeywell Home Model inside a business. For more information on the subject, we recommend checking out this blog we wrote on the subject.


General System Information

Below is some of the general information for the Honeywell Home and Resideo ProSeries Panels:

  • Panel Type: Wireless All-In-One
  • Voltage Input: 9VDC, 2.5A Transformer (Included - P/N 300-10260)
  • Backup Battery: 24 Hour Rechargeable Lithium Ion 3.6/4.2V, 5200mAH (Included - P/N 300-11186)
  • Total Zones: 250 Security Protection Zones
  • PROSIX and SiX Series Zones: 127 Zones
  • Legacy RF Support: 123 Zones, 319.5 MHz, 345 MHz, 433 MHz, or Bosch (with added takeover module)
  • Legacy RF Notes: Uni-Directional Only; Requires PROTAKEOVER Module
  • KeyFob Slots: 32 (ProSix & SiX Fobs)
  • User Codes: 96 (Master Code Hardcoded to Slot 1)
  • Partitions: 4
  • Automation: Z-Wave Plus (Automatically Included with PLUS Models Only)
  • Z-Wave Device Limit: 78 (Automatically Included with for PLUS Models)
  • Compatible Keypads: Resideo PROSIXLCDKP, Resideo PROWLTOUCH (Requires PROWIFIZW or PROWIFI)
  • Maximum Keypads: 8 per Partition
  • Event Log: 4,000 Events
  • Other Features: WIFI. The following features are supported on the PLUS Model only: Integrated Camera, Automatic Bluetooth Disarming, Wiselink (PROINDMV & PROOUTMV)
  • Package Contents: Panel, PROWIFIZW Module (installed, PLUS Models Only), Transformer (9VDC, 2.5A), Backup Battery, Manuals, Mounting Hardware w/ Wall Plate
  • Dimensions: 5.75"L x 7.875"W x 1.0"D
  • Mounting Options: Wall Mount or Desk Mount (Sold Separately)
  • Default Master Code: 1234 (should change for security purposes)
  • Default Installer Code: 4112 (recommended to keep at default)


Wiring

The ProSeries Alarm Panels include a transformer for powering on the system, but a user must supply their own wiring. The use of a prepared wire, such as a Honeywell LT-Cable is advised. However, traditional wiring is perfectly suitable. You should use a wire gauge between 16-gauge and 22-gauge. If you decide to use traditional wiring that you have prepared yourself, then please observe the following strict wire limits:

Wire Gauge Max Wire Run
16 AWG 110 Feet
18 AWG 70 Feet
20 AWG 45 Feet
22 AWG 25 Feet


Local Alarm Mode

Local Alarm Mode is used when the system needs to be set up and tested, but it's not yet registered with the AlarmNet server. The PROA7PLUS is meant to be monitored in some fashion. If Local Alarm Mode is not enabled, then as soon as the panel powers up, it reaches out to the AlarmNet360 server in an attempt to register and retrieve its communicator programming. If an account does not yet exist on the server for the panel, it will return a communicator error which will not clear until registration occurs. When Local Alarm Mode is enabled, the communicator for the panel is disabled, and this process of attempting to register does not occur. Therefore, no communicator error will be displayed. To enable or disable Local Alarm Mode, select the Menu Icon from the bottom-center of the home screen, then scroll down to Tools. Enter the Installer Code (Default is 4112) when prompted for a code, then select Local Alarm Mode. The feature is toggled ON or OFF from this screen. Bear in mind, when this setting is changed the panel will reboot, and this process can take several minutes.


System Arming

Arming the security system puts it into a secured state. If activity is detected while the system is armed (e.g. a door/window being opened, movement being detected, etc.), then the system may go into immediate alarm or require that a user verify their identity with a valid code to prevent an alarm. Please note that this does not apply to 24-Hour Zones, which will trigger an immediate alarm when activated, even if the system is in a disarmed state. Common examples of 24-Hour Zones include smoke detectors, carbon monoxide detectors, and emergency exit doors.

To arm a ProSeries Panel, click the ARM button on the main screen. Then choose the arming type to arm the system. You can Arm Away or Arm Home, with Arm Home being the system's version of Arm Stay. The difference between these arming modes is that interior sensors are automatically bypassed (ignored) when you choose Arm Home. This allows anyone still inside the building to move around freely, without triggering a false alarm. But in Arm Away, interior sensors are active and able to cause alarms on the system. There should be nobody remaining inside the building after you have enabled Arm Away mode. Please note that at least one (1) Entry/Exit Zone must be faulted during the Exit Delay countdown when Arming Away, or else the system will revert to Arm Home mode instead. This is because the system will assume no one left after arming, and that the user must have meant to Arm Stay. This is known as Auto-Stay Arming, and it is a false alarm prevention feature.

Keep in mind that if multiple partitions are set up with the system, then you will be able to select which partition you want to control before you press the ARM button on the main screen. You can select any of the four (4) partitions that are enabled on the system. A partition dropdown selection option will only be shown if multiple partitions are configured on the system. If partitions have not yet been configured, and the system still only has a single partition, then this dropdown option will not be displayed. Partitions are covered in greater detail later in this cheatsheet.

A feature called Quick Arm is enabled by default, but can be disabled by partition, in each partition's settings. This affects what happens after selecting your preferred arming method (Home or Away). When this feature is enabled, the PROA7PLUS will not prompt for a user code to complete arming. This can save time when arming. This also allows anyone to be able to arm the alarm. A valid user code is still always required to disarm. This poses little to no risk, as long as you remember your user codes. When armed with Quick Arm, the panel's event log shows that it was armed by a generic user. Some choose to disable this feature because they prefer to know who exactly armed the system. When disabled, the actual user number will be logged as the user who armed the partition.

Another option called Arm Night will also be available if you have at least one motion sensor programmed on the system with the Arm Night feature enabled. Arm Night is a more secure version of Arm Home (Stay), in which any interior motion sensor with the Arm Night feature enabled will NOT be automatically bypassed. That is, if that sensor detects activity while in Arm Night mode, it will trigger a response (e.g. an alarm) on the system. Meanwhile, motion sensors that have Arm Night disabled will be bypassed and ignored by the system.

Also when arming the system, you can choose to enable or disable Entry Delay and Silent Exit. The default selection is to enable Entry Delay, and disable Silent Exit. If Entry Delay is disabled it will result in the system going into immediate alarm when an Entry/Exit Zone is faulted, as opposed to going into an Entry Delay countdown, during which the user can disarm the system before an alarm occurs. Silent Exit being enabled will result in the panel not producing any sounds as the Exit Delay countdown occurs. Please note that if Silent Exit is enabled, then the Exit Delay countdown timer will be automatically doubled for that arming session. This will give the user extra time to vacate the building, as there won't be any countdown timer reminding them that they need to exit immediately.


Please note that you can also arm the system via Total Connect 2.0 if the system is monitored and set up with the service.


System Disarming

Disarming the system takes it out of a secured state and puts it into a Disarmed mode, in which only 24-Hour Zones are able to trigger system alarms. You can only disarm the system while it is in an armed mode. Please note that if you have Armed Home or Armed Night, then an option for Quick Exit will be available. This feature allows a user inside a location that is Armed Home or Armed Night to briefly step outside, for instance, to take out the trash, or to retrieve something from their car. When you press Quick Exit, the system begins the normal Exit Delay countdown. During this time, any Entry/Exit door can be opened without causing an alarm. As long as the door is secured again before the countdown expires, the system will return to its prior arming state at the end of the countdown. This prevents the user from having to disarm, then arm again.


In Arm Away mode, the only available option is to Disarm.


To disarm the system, you must have a valid code. This can be a regular user code, or the Master Code. Click the Disarm button to pull-up a numeric digital keypad. Then enter the valid code into the digital keypad. The system will disarm. Don't forget that if you need to disarm a different partition than the one displayed on the screen, then you should first select that partition from the dropdown menu and provide a user code with authority for the selected partition. This dropdown menu will only be present if multiple partitions are set up on the system.

Please note that you can also disarm the system via Total Connect 2.0 if the system is monitored and set up with the service.


Adding a Zone

To add a zone to a ProSeries Panel, you must have access to end-user programming. Otherwise, all zone programming is completed remotely by your monitoring company. To access the system's auto-enrollment mode, start from the main screen and click the small menu button (three horizontal bars) at the bottom of the home screen, and then choose Tools, enter the Installer Code (default 4112), and then choose Programming, and then choose Peripherals, and then press the + button at the top of the screen to put the system into its auto-enrollment mode.


With the system in this mode, you can then fault (activate) a sensor to get it to auto-enroll. You will be taken to the Edit Sensor screen where you can configure the zone settings. The following programming fields are available:

  • Sensor Type: Set automatically during auto-enrollment. This is the model of sensor that was enrolled (e.g. SIX-Contact, SIX-Motion, etc.)
  • MAC: Set automatically during auto-enrollment. This serves as a Serial Number identifier for PROSIX and SiX Sensors. Please note that if you enroll a legacy sensor using the PROTAKEOVER Module, then this will instead be a Serial Number or a Sensor DL ID Field.
  • Partition: Allows you to assign the sensor to a specific system partition. Only enabled partitions can be selected.
  • Service (with grey background): Available on certain types of SiX and PROSIX Sensors. Allows you to add an additional (secondary) function for the sensor. An example is adding support for an external NC Contact that is wired into a PROSIXCT or SiXCT terminals when its primary function is the Reed Switch.
  • Zone Number: Cannot be changed. Shows which Zone Number the sensor is being assigned. Remember that the system supports (127) encrypted PROSIX and SiX zones, plus (123) non-encrypted legacy zones, for a total of (250) zones.
  • Service (with white background): Available on certain types of PROSIX and SiX Sensors. This allows you to set the primary function for the sensor. An example would be choosing between the Reed Switch function and the External Contact function on a PROSIXCT or SiXCT. If the Reed Switch is the primary function, the Contact Terminals would then be the secondary function.
  • Zone Descriptors (1 & 2): Used for naming the zone. The ProSeries Panel will speak the Zone Descriptors, plus the Device Type, when the sensor is faulted. For example, if you have Zone Descriptor 1 set as "East", Zone Descriptor 2 set as "Door" and Device Type as Door, then the panel will speak "East Door Door" when the sensor is faulted. In this case, Zone Descriptor 2 is unnecessary. Please note that you do not technically need to provide any Zone Descriptors for the zone. You can leave one or both of the fields blank. Many users will just program Zone Descriptor 1 and leave Zone Descriptor 2 blank. If you leave both of them blank, then the zone will only be known as whatever is set for Device Type.
  • Device Type: This is used to set the type of sensor you are adding (e.g. Door, Window, Flood, etc.) Along with the Zone Descriptors, the Device Type is spoken by the panel when voice annunciation is enabled and the sensor is faulted. Depending on the Device Type you choose, only certain types of Response Types will be available. If you want access to a certain Response Type that isn't available for the sensor's normal Device Type, then you may consider setting the Device Type to "Other", which will result in all Response Types being available. Please note that if you set the Device Type to "Other", then it will not be spoken when the sensor is faulted and voice annunciation is enabled. For example, if you had Zone Descriptor 1 set as "East" and Zone Descriptor 2 set as "Bedroom" and the Device Type set as "Other", then the panel would only speak "East Bedroom". Available Device Types include Door, Window, Garage Door, Other, Police, Environmental, Glassbreak, Flood, Medical, Motion Sensor, and Temperature.
  • Response Type: This option determines what action the system will take when the sensor is faulted or activated. Depending on the Device Type you set, only certain Response Type options will be available. If you want to choose from every available Response Type, set the Device Type to "Other", and you will have a complete selection of possible Response Types. Available Response Types include: Not Used, Entry Exit 1, Entry Exit 2, Perimeter, Interior Follower, Day/Night, 24 Hour Silent, 24 Hour Audible, 24 Hour Auxiliary, Interior Delay, Monitor, Trouble, Arm Stay, Arm Away, Disarm, No Response, Silent Burglary, Garage, Garage Monitor, and Local Alarm.
  • Supervised: Toggle ON or OFF. When Supervised is ON, the system will expect the sensor to check-in periodically to ensure that it is working properly. If Supervised is ON, and the sensor fails to check in (due to environment or range issues, the unit being powered down, or having a dead battery, or the device having been removed), then the system will display a trouble condition to alert the user.
  • Alarm Report: Toggle ON or OFF. When Alarm Report is ON, the system will report to AlarmNet when the zone causes an alarm on the system. AlarmNet then forwards the signals to the user's Central Station. This is assuming that the system is being monitored. If Alarm Report is OFF, then no alarm signal will be sent out if the zone causes an alarm on the system. However, if Total Connect 2.0 is enabled for the user, an email or text notification can still be sent.
  • Version: Cannot be changed. Shows the firmware version of the programmed sensor.
  • Chime: This is the sound the panel will make when the sensor is faulted. Choose from a variety of Chime options, or set to Disabled to turn OFF the chime for the zone.
  • Armed Night: Only available if a Device Type of Motion Sensor is selected. Toggle option for ON and OFF. If Armed Night is ON, then the sensor will remain active when the system is set to Armed Night mode, as opposed to being automatically bypassed as an interior sensor. Please note that you must have at least one programmed motion sensor with Armed Night turned ON in order for the Arm Night option to be selectable from the arming screen.
  • Supervision Time: Cannot be adjusted from this screen. If a sensor fails to check in with the system for longer than this period of time, the system will put that sensor into a Trouble or Check condition. The panel is literally telling you to check on that sensor.


When you are finished adjusting the zone settings, choose either Save or Save & Add Another to save the change. If you choose Save, then you will be taken to the Peripherals List. If you choose Save & Add Another, then you will be taken back to the Add a Peripheral Screen so you can enroll another sensor. You can edit the zone settings later by selecting the sensor within the Peripherals List.


Deleting a Zone

If you need to delete an existing zone, start from the main screen of the system, and click the menu button (three horizontal bars) at the bottom of the screen. Then choose Tools, and enter the system's Installer Code (default 4112). Then choose Programming, followed by Peripherals. This will access the Peripherals List. Find the zone you want to delete and check the box on the right-hand side. If you are deleting multiple zones, then check the box for each zone you want to delete. With all the necessary boxes checked, click the black "Delete" button in the upper-right corner. The system will ask you to confirm. Choose Delete on the right-hand side to confirm that you want to delete the sensor(s).


Adding a Z-Wave Device

You can only add a Z-Wave device if there is a PROWIFIZW Module inside of the ProSeries Panel. The PROA7PLUS and PROA7PLUSC have this module included out of the box, but it must be added separately to the PROA7 and PROA7C. When you add a Z-Wave device to the system it can then be controlled both locally at the panel and remotely from Total Connect 2.0 if the system is monitored with a plan that includes automation services. You can also include Z-Wave devices with smart scenes so that they activate automatically based on a set schedule or with predetermined system events.

To add a Z-Wave device, start from the main screen of the system, choose the menu button at the bottom (the three horizontal bars), followed by Tools. Enter the Installer Code for the system (default 4112). Choose Programming, and then Z-Wave Peripherals. It is advised that you clear (Exclude) the device from the panel first to wipe out any residual Z-Wave network data. You can do this even if the Z-Wave device in question is not enrolled with a Z-Wave controller. Many Z-Wave devices will have residual Z-Wave network data left over from the factory, so "excluding" first is almost always a good idea. Choose Exclusion Mode to put the panel into a mode for clearing Z-Wave devices. Then activate the inclusion/exclusion function on your Z-Wave device. There may be a button on the Z-Wave device for this purpose, or you may need to enter a specific programming code. Refer to the manual for your Z-Wave device for more information. The panel should show a device as excluded. Press done after the device has been excluded. Then choose Inclusion Mode to put the panel into a mode for adding Z-Wave devices. Activate the inclusion/exclusion function for the Z-Wave device again. This may be the same function you used when clearing the device from the network. The panel should show that a Z-Wave device was added. Press the done button when finished.


Deleting a Z-Wave Device

Deleting a Z-Wave device will clear it from the network so that it is no longer paired with the ProSeries Panel. You can then pair the Z-Wave device with a new Z-Wave network. Please note that deleting a Z-Wave device may also be referred to as clearing the device or excluding the device. Z-Wave devices are typically cleared from the network before pairing to ensure that any remaining Z-Wave network data is properly wiped out.

To delete a Z-Wave device, begin from the home screen of the panel, select the menu button at the bottom (the three horizontal bars), and then press Tools. Provide the Installer code for the system (default 4112). Select Programming, and then Z-Wave Peripherals. Choose Exclusion Mode to put the system into a mode for clearing Z-Wave devices. From there, activate the Inclusion/Exclusion function on the Z-Wave device. This process will vary depending upon the Z-Wave device in question. It may have an inclusion/exclusion button, or there may be a different process. Check the manual for the Z-Wave device to find out for sure. The panel should show that a device has been cleared from the network.


Changing the Master Code

A ProSeries Panel will have a default Master Code of 1234. You will want to change this code for security purposes. Choose a different code that is easy for you to remember, but difficult for someone else to guess. To begin, start from the main screen of the panel. Click the menu button (the three horizontal bars), and then choose Settings. Select User Management. Then provide either the Master Code (default 1234) or the Installer Code (default 4112) for the system. This will allow you to access the Users Menu.

Click on the Master option from within the user list. This will take you to the Master User settings screen. Find the field for pin, and click the pencil icon on the right-hand side of that field. You will be asked to provide a new pin. Be sure the 4-digit code you enter is unique within the system. Enter the desired pin code. Then confirm that pin code by entering it a second time. Then press Save in the upper-right corner. You will be asked to enter the Master Pin to save. You should enter the EXISTING Master Code at the screen. If you are changing the code from the default of 1234, then you will enter in that 1234 default, and not the new code that you changed the Master Code to. After you enter the existing Master Code, the change will be saved and applied. The Installer Code can be used to get into this programming area, but it cannot be used in the final step, the existing Master Code must be known in order to change it.


Adding a User

There are (96) user slots available on the ProSeries Panels. When you add a new user code, you will be able to use that code for arming and disarming. To get started, click the Menu button (the three horizontal bars) at the bottom on the home screen of the panel, and then choose Settings, followed by User Management. Provide either the Master Code (default 1234) or the Installer Code (default 4112) to gain access to User Management. Click the + icon in the upper-right corner to begin adding a user. You will then provide a name for the user. After you save the name, you will be taken to a settings screen for that user. Make sure to provide and confirm a pin code for the user. Then at the bottom, you will need to set which partition(s) the user has access to. Make sure to set the partition access, or else the user code will not have any authority. In fact, the system will not let you add a code until you have set both a pin code and access authority. You can also set options for Bluetooth Disarming and Z-Wave Lock Control at this time, or you can save that for later. When you are finished, press Add in the upper-right corner. You will be asked to provide a pin to confirm the adding of the new user. Enter in the system's Master Code (default 1234). The Installer Code will not work for this. The new user will be added to the Users List. If you click on the user name, then you can edit its settings.


Deleting a User

After you delete a user, that code will no longer be able to disarm the system. To delete a code, you must access the User Management Menu. Begin from the main screen of the system. Click the three horizontal bars menu button at the bottom of the screen. Choose Settings, followed by User Management. Provide either the Master Code (default 1234) or the Installer Code (default 4112) to gain access. You will enter the User Management Menu. Find the user that you want to delete, and click the checkmark box on the right-hand side of that user. You can also delete multiple users at once by checking the box for every user you want to delete. Once you have selected the user(s), press the Delete button in the upper-right corner. You will be asked to provide the Master Code to confirm deletion. After entering the code, the user(s) you had selected will be deleted. Those user slots will be opened and available for assigning new codes.


Bluetooth Disarming

Automatic Bluetooth Disarming will allow the system to disarm from Armed Away mode automatically upon detecting a paired Bluetooth-compatible phone. Up to six (6) Bluetooth-compatible phones can be set up with this feature. Each of the 6 phones must be associated with a different user. The Master User can also be set up with a Bluetooth Phone for automatic disarming. A phone will only be able to disarm the system if it is removed from the area before the system is fully armed. If the Exit Delay countdown expires and the phone is still detected in the area, then it will be disabled and ignored for that arming session and unable to disarm the system. This prevents the system from disarming immediately due to someone forgetting their phone and accidentally leaving it behind. The feature will go into effect, and the system will immediately disarm upon the user faulting an Entry/Exit Zone with the phone properly connected across Bluetooth. You must set up the feature before it can be used. The feature is completely optional, and it can be turned OFF at any time.

You set up the Bluetooth Disarming feature within the User Management Menu. Begin from the main screen of the system. Click the three horizontal bars menu button at the bottom of the screen. Click Settings, followed by User Management. Provide either the Master Code (default 1234) or the Installer Code (default 4112). Click on the user you want to set up for Automatic Bluetooth Disarming. Then choose the field for Disarm With Bluetooth. At this time, you should activate Bluetooth pairing mode for the phone that is being paired. Press the blue Pair button in the top-right corner of the ProSeries Panel. On the phone, find the ProSeries Panel and click on it. The panel and the phone will both display pairing messages and a pairing key. Click pair on both devices to complete the pairing process. When you back out to the user settings screen, make sure to press Save in the upper-right corner. If you are saving the Master User, then you will be asked to provide its code for confirmation.


Partitions

If you are unfamiliar with security system partitions in general, please read this FAQ. Basically, partitions allow you to "section-off" your alarm system so that certain sections (partitions) of the system can be armed or disarmed, while the other sections (partitions) remain in their current armed or disarmed state. Up to four (4) partitions can be configured on a ProSeries Panel. By default, only the first partition is enabled. Partition 2, Partition 3, and Partition 4 will only be used and in effect after they have been added. You need to first access the partition settings menu. Begin from the main screen of the ProSeries Panel. Click the three (3) horizontal bars menu button at the bottom. Then choose Tools, and enter the system's Installer Code (default 4112). Click Programming, followed by Partitions. The list of enabled partitions will be shown on the screen. To add a new partition, click the + icon in the upper-right. You will then be able to configure various settings for the partition. These are mostly arming settings that you should configure as needed based upon how the system is being used. You want to set Entry/Exit Delays to proper settings so that no false alarms occur on the system. When you are finished, press Save in the top-right. If you ever need to delete a partition, you can access the Partitions Menu, click on the checkmark box on the right-hand side of any partition that is being deleted to select it, and then press Delete in the top-right. Please note that you cannot delete the main Partition, which is Partition 1.


Whenever you are at the main screen of the system, you can set which partition you want to control. There will be a dropdown menu you can click on to choose a different partition to switch to. Whenever you go to switch partitions, you must provide a code with access to that partition. You can also provide the Master Code which has global authority and access to any system partition. Note that only enabled partitions will be present.


Advanced Settings

The Advanced Settings Menu is a programming menu that includes sub-categories for Communicator, System, and Reporter. Many of these options are fairly complex, and it is suggested that you not change them unless instructed by your monitoring provider, or you are formally trained in alarm systems and you know what you are doing. To access this menu, begin from the main screen of the system. Click the three horizontal bars menu button at the bottom. Press the Tools option. Provide the system's Installer Code (default 4112). Choose Programming. Then choose Advanced Settings. You will then be in the Advanced Settings Menu to make system changes. Once finished, press the Save button in the top-right to save any changes you have made.


Miscellaneous Settings

This section will very briefly cover other settings that haven't been covered earlier in this cheatsheet. This includes setting the WIFI network for the panel. To access the Settings Menu, begin from the main screen of the system. Click the three horizontal bars menu button at the bottom. Then choose Settings. You will have options for WI-FI, User Management, and Secondary Keypad. You may be asked to provide the Master Code (default 1234) or Installer Code (default 4112) before configuring these settings.


Please note that you can also configure settings for Backlight Timeout, Voice, Chime, Brightness, Volume, and Screen Cleaning right from the main screen. Just click or drag down the bar from the top of the system's home screen to access the primary settings. No access code is needed!


Total Connect 2.0

Total Connect 2.0 is the interactive security notification and automation platform used with the ProSeries Alarm Panels. You can access Total Connect 2.0 remotely using a web browser or by using the free Total Connect 2.0 Mobile App that you can download from the Google Play Store or Apple App Store. Your system must have some type of monthly monitoring plan to be used with Total Connect 2.0. Your monitoring company will help you get started with the Total Connect 2.0 service, usually by sending you a Total Connect 2.0 activation email after you are activated for alarm monitoring service. You will need to create a username and password for logging into Total Connect 2.0. For Alarm Grid customers, your username will typically be the email address associated with the monitored account. You can use Total Connect 2.0 to arm and disarm the system, check its current status, control programmed Z-Wave devices, and more!


Conclusion

We hope that you found this Honeywell Home PROA7PLUS Cheatsheet to be useful! We want you to get the very most out of your Resideo Alarm System. And keep in mind that this post may be updated in the future to include new information. It's very likely that Resideo will be updating the ProSeries Panels in the future to include new features and functions, and we will make sure to provide you with the resources you need to take advantage of whatever is offered. Also, if there's anything else that YOU would like to see included in this cheatsheet, please leave a comment down below, and we just might add it in. This is a living, breathing document, and we will likely update it as we learn more. And stay tuned to the Alarm Grid Blog for more great content coming soon!

Tags: , , , , , , , , , , ,

Comments


Posted By

Total Connect 2.0 users may have recently noticed some Push Notifications showing that certain events originated from "[External] ApiGee". This is the result of an integration that Resideo is configuring. These alerts usually originate from a third-party integration.


Resideo, also known as Honeywell Home, is constantly working to improve the user's Total Connect 2.0 experience. They're working in the background to implement suggested improvements provided by both customers and alarm dealers. ApiGee appears to be one of those integrations. We don't have any details about what expanded features this may include, but the work they are doing in the backend has caused a few odd Push Notifications to be generated.

In most cases, we've seen these push notifications associated with using Alexa in conjunction with the Total Connect 2.0 skill. You probably noticed if you are using Alexa to access and control your system that when you enabled the TC2 Skill you had to provide your Total Connect 2.0 Login and Password. This creates what's called a server-to-server integration. Once the skill is enabled and proper login credentials have been entered, you'll see an option to enable the skill for the alarm panel and automation devices and then the skill is ready to go. If you have multiple locations being used with a single TC2 login you'll only be able to select one location to access using this particular Alexa account.

When you ask Alexa, for example, "Alexa, ask Total Connect 2 what the status of my alarm system is." The server at Amazon uses the credentials you provided at the time you set up the skill to actually log into Total Connect 2.0 and query the system status. This, of course, happens very quickly. Currently, this log-in appears to sometimes be viewed as a user logging in and is therefore triggering a push notification. This will only happen if you have Administration type notifications enabled. Administration notifications include Login, Logout, Login Instlr-Read Only, and so on. However, rather than Alexa's access being logged as the person whose credentials were used for the integration, it is instead being logged as [External] ApiGee.

At the time of this writing, March 3, 2021 at around 6:00 pm, it appears the issue with push notifications may have been resolved. We attempted to cause one of these notifications so that we could obtain a screenshot, but we were unable to do so. It appears that in the Activity screen if you select the icon to Show Admin Logs at the top, you will still be able to see these events being logged. The Admin Logs is the screenshot shown at the top of this post. It's probable that these events are meant to show up here, but were never meant to produce a push notification. Hopefully, this relatively minor issue has been resolved, and whatever this new feature may be, it will be available soon.


Tags: , , ,

Comments


Posted By

We have some exciting news from Alarm.com. The latest version of the Alarm.com Mobile App for iOS (Version 4.18) will make your enrolled smart locks compatible with Siri Shortcuts. This means that you will be able to control your smart locks with spoken voice commands. How convenient!


If you aren't familiar with Alarm.com Siri Shortcuts, they represent an innovative way to control your system and its integrated accessories using spoken voice commands. Each command is customized so that it performs the exact actions you want. Siri Shortcuts are available for iOS 12 and higher, so make sure your iOS device is on a high enough version before trying to set them up. We very strongly recommend reading this post from a couple years prior to refresh your memory on Siri Shortcuts and how they can be used. Overall, we think the Siri Shortcuts feature serves as a nice alternative to Apple HomeKit, which isn't compatible with Alarm.com or its associated security systems.

From what we can tell, the only way that a Siri Shortcut could control a smart door lock prior to Alarm.com iOS Version 4.18 was to do so indirectly through a smart scene. In other words, the user must create a smart scene that tells a door lock to LOCK or UNLOCK, and then create a customized Siri Shortcut to run that smart scene. Of course, a user would need separate scenes for LOCKING and ULOCKING, and they would need different scenes for each individual lock if they wanted complete control over their entire network of door locks. But with the update in iOS Version 4.18, smart lock control is made much more convenient and more easily accessible.

Thanks to the update, users can now create Siri Shortcuts that deal with locks directly, rather than being part of a smart scene. Each Siri Shortcut can control a single door lock, or a user can control all their locks at the same time with one single command. For a single lock, it's as simple as asking Siri to LOCK or UNLOCK a door based on the name of the lock. For example, you might say,

  • "Hey Siri, UNLOCK the FRONT DOOR."
  • "Hey Siri, LOCK the BACK DOOR."

Or if you wanted to control multiple doors,

  • "Hey Siri, LOCK all the doors."
  • "Hey Siri, UNLOCK every door."

Keep in mind that this door lock control for Siri Shortcuts is being made available in Alarm.com iOS Version 4.18. This update isn't available quite yet, but we expect it to be released in the coming days. At the time of this writing, the newest iOS Version we see is 4.17.3. You can check the version you're running by logging into the Alarm.com iOS App, and then choosing the Menu button (three horizontal bars) in the upper-left corner, and then selecting About in the bottom-left, and then About Alarm.com. The App Version will be displayed in white text across the top orange bar.


Remember to check the Apple App Store for the release of Alarm.com iOS App Version 4.18. Then open Settings within the Alarm.com Mobile App to access Siri Shortcuts. That is where you can enable the "Share Activity with Siri" settings and build customized Siri Shortcuts for use with your door locks. Remember that you can only control door locks that are enrolled with your Alarm.com account. Z-Wave door locks work great for this, and we have plenty of options available for purchase on our site if you are looking to get started.

Remember to check out our monitoring page if you are interested in starting monitoring service for access to Alarm.com. And please don't hesitate to reach out to us if you need help getting started with Alarm.com Siri Shortcuts for door locks. We're here to help you get the most out of your door locks and your Alarm.com service.

Tags: , , , , , , , , , , , , ,

Comments


Posted By

Welcome to the second Alarm Grid video recap of 2021. It has been awhile since our first recap of the year, but we really hope to make this a regular thing like it was before. Technical difficulties have slowed us down, but we're going to be back in the swing of things very soon!


Only two (2) new Alarm Grid videos were uploaded in the past week, both of them on Monday, February 15th. They cover the Alarm.com ADC-T2000 Thermostat and the DSC PG9905 Temperature Sensor, respectively. Both videos featured myself as the actor. We hope to have our other video stars back as soon as possible, but it looks like you may have to settle with just me for the foreseeable future. Expect more videos coming really soon. Anyway, onto the newest Alarm Grid videos!

Setting an ADC-T2000 Back to Factory Default

I show you how to restore an Alarm.com ADC-T2000 Z-Wave Plus Thermostat to its factory default settings. All settings and configurations for the thermostat will be set to the same values as when the device was brand-new and fresh out of the package. You normally only factory default the ADC-T2000 Thermostat if you are selling it or giving it away to someone else. You may also perform a factory reset as a last-resort troubleshooting step if nothing else seems to fix an issue.


Programming DSC PG9905 to Qolsys IQ Panel 2 Plus

I show you how to program the DSC PG9905 Temperature Sensor to a Qolsys IQ Panel 2 Plus Alarm System. If your IQ Panel 2 Plus System is monitored with access to Alarm.com, then you can receive alerts for when your PG9905 Sensor is activated. However, if you set up the zone so that reports are sent out for Alarm.com alerts, then you will only be able to configure the PG9905 zone for either high temperature or low temperature alerts. The only way you can have a single PG9905 alert the system for both high and low temperatures is if you set the zone so that it does not report out to Alarm.com. Any temperature thresholds can be adjusted on the system as desired.

Tags: , , , , , , , , , , , , ,

Comments


Posted By

You may recall that we made a post about a month ago discussing "issues" that have been affecting the IQ Panel 2 Plus and its ability to be used as a secondary Z-Wave controller. We have a rather extreme follow up today, as Qolsys has revealed that the system never supported the feature!


When we released the initial post on the subject, we were not aware of the true" extent" of the issue. We certainly didn't expect to find out that Qolsys never even made it possible for the feature to work. We won't dive super deep into the subject here, as there really isn't much to say, The raw truth is that you cannot use the IQ2 as a secondary Z-Wave controller.

It is possible to add a secondary Z-Wave controller to the IQ Panel 2 and have the IQ2 operate as the primary controller. But you can never make the IQ Panel 2 System a secondary Z-Wave controller. We apologize for any inconvenience or confusion that this may have caused. For a more in-depth look at the subject, we strongly recommend reading this comprehensive FAQ that explains the inability of the IQ2 to be used as a secondary controller in much greater detail.

Now, maybe you have explored the Qolsys IQ Panel 2 Advanced Z-Wave Settings Menus in glorious detail, just like we have. If you have, then you will know that secondary controller options do exist within the IQ2 menus. Based on that alone, you would think that there must be a way to get this type of setup to work, right? That's the problem. The menu options might be there, plain as day. But trust us, if you try to make the IQ2 a secondary Z-Wave controller, then it will not work,

What we need to do now is focus on the implications that arise from the system's inability to be used as a secondary controller. As a result of the IQ Panel 2 being unable to operate as a secondary Z-Wave controller, the system loses out on potential compatibility with a wide selection of automation hubs. This includes compatibility with Samsung SmartThings, Vera Smart Controllers, Nexia Smart Home Automation Systems, and much more. Seriously, while the IQ2 once had excellent prospects of pairing nicely with almost any centralized Z-Wave hub, those prospects are all but gone.

Fortunately, there are other alarm systems that do not share this same limitation of the Qolsys IQ Panel 2 and IQ Panel 2 Plus. Most notably, we will recommend the Honeywell Lyric Controller. The Lyric has proven on repeated occasions to "play nicely" as a secondary controller. One example can be seen in this FAQ, which explains the benefits of making the Lyric a secondary Z-Wave controller, while also helping users get started. If you are thinking about purchasing a new Honeywell Lyric Alarm System for its excellent versatility in smart home automation, then you may also want to check out this buying guide. Although that particular buying guide was written for the Lyric during a holiday buying season a couple of years prior, it is still relevant in helping new Lyric System users explore their options for getting the most out of the system.

If you have any questions about the Honeywell Lyric or any other popular alarm control panel, or if you want to learn more about our monitoring services, send an email to support@alarmgrid.com. We're here to check your emails from 9am to 8pm ET M-F. We look forward to hearing from you!

Tags: , , , , , , , , , , , ,

Comments


Posted By

A recent article indicated that 52 publicly traded companies dealing in smart home automation experienced an average stock price increase of 34.5% in 2020. This is yet another indication that the smart home industry is stronger than ever, as expectations are being set high for 2021.

Of the 52 publicly traded smart home automation companies followed from January 2020 to January 2021, 38 saw their stock price increase, compared with only 14 that experienced a decline in stock price across the same time frame. For comparison, a similar study of 52 smart home automation companies from the year prior reported that only 8 companies saw stock price declines in 2019, while the other 44 companies had their stock prices increase. Because of this, we can't say that the smart home industry was stronger in 2020 compared with 2019. But 2020 was still a fairly successful year. And as the economy looks to recover following the COVID-19 pandemic, we expect that things will only get better in 2021.

One company in the list that had a particularly strong showing was Alarm.com. They enjoyed a fantastic 141% stock price increase, as their price of $42.97 in January 2020 was up to $103.45 in January 2021. Johnson Controls, the owner of Qolsys and DSC, experienced a more modest gain of 14%, as their stock price rose from $40.71 in January 2020, to $46.59 in January 2021. The same can be said for Silicon Labs, the operator of the Z-Wave Alliance. Their January 2020 stock price was $115.98, and it rose to a January 2021 stock price of $127.34, for a nice 10% increase.

Alarm Grid was happy to see some of the companies and manufacturers we work with have a successful 2020 year, despite all of the global challenges involved. If you are interested in starting alarm monitoring service with Alarm Grid so that you can take full advantage of great equipment from companies like Alarm.com, Johnson Controls, and Silicon Labs, please feel free to email us at support@alarmgrid.com for more information. We're here to check your emails from 9am to 8pm ET M-F. We look forward to hearing from you!

Tags: , , , , , ,

Comments