Smart Home Posts

Posted By

Our video team had a decent time last week, as five (5) new videos were released. This time, the videos feature myself and Jarrett. As always, we hope that you find them to be helpful, informative, and interesting. Remember, we make these videos to help you! Let's check out the videos.

Finding the Date Code On the FF345

I show you how to find the date code on the Encore FF345. The FF345 is a listening module for smoke detectors and CO detectors that alerts the system upon hearing the unique sound of an activated smoke detector or carbon monoxide sensor. The device is designed to be used with 2GIG Panels and Honeywell Panels. However, FF345 units from a certain batch had an error that prevented them from working with Honeywell Systems. Checking the date code is useful for determining if your unit is affected.


Cameras that Work w/ the Lyric and Total Connect

Jarrett explains which security cameras are compatible with the Honeywell Lyric and the Total Connect 2.0 platform. The only cameras that can work with TC2 are Honeywell IP Cameras. Of these cameras, only the legacy models that are no longer sold are able to interface with the Lyric for live-streaming on the panel. None of the current Honeywell HD Cameras can be streamed on the Lyric. One important note about the legacy IP cameras from Honeywell is that they had to be online to receive a critical firmware update to continue being used to this day.


The Lyric Built-In Camera Disarm Pictures Cannot be Used With HomeKit

Jarrett explains how the disarm photos that are taken using the front camera on the Honeywell Lyric will not appear on the Apple HomeKit platform. While there is a nice integration between the Lyric and HomeKit, it is only used for automation purposes and a very limited selection of security functions. Disarm photos are considered to be a security function, and they will not appear in HomeKit. The only platform that allows you to view disarm photos taken by the Lyric is Total Connect 2.0.


Night Stay On Qolsys IQ Panel 2 Plus

I explain how there is no Night Stay option for a Qolsys IQ Panel 2 Plus. Night Stay is a special type of Arm Stay. Normally, when you Arm Stay, interior zones are automatically bypassed. But when you Night Stay, motion sensors that are designated for Arm Night will remain active, instead of being bypassed. The feature is available on most Honeywell Panels, but it is not supported on the IQ2+. But there is an okay workaround for the IQ2+ that involves using specific Sensor Groups for programmed motion sensors that you want to remain active when Arming Stay.


Number of Zones On a Hardwired System Cannot be Increased

I explain why the number of zones on a hardwired alarm panel cannot be increased. The maximum number of zones that a system can support is built into its logic, and it cannot be increased. For a wired panel, only the on-board zones are initially accessible. You will need to add one or more wired expansion modules and/or a wireless receiver to open up the other zones. This will allow sensors to connect with the zones and interface with the system.

Tags: , , , , , , , , , , , , , ,

Comments


Posted By

If you are a Honeywell VISTA System user, then you have likely heard about the Honeywell Home Tuxedo Keypad. The Tuxedo serves as a touchscreen keypad controller, and also as a Z-Wave Plus hub. But one limitation for the unit is that it cannot be configured as a secondary Z-Wave controller.


Setting up a hub as a secondary Z-Wave controller involves pairing it with a separate Z-Wave hub, which will serve as the primary. When you do this, all Z-Wave devices paired with the primary controller will be automatically pushed over to the secondary, as long as they are compatible. These devices will also remain on the primary controller, meaning that you can operate them from both hubs.

If you decide to use this type of setup, it is advised that you clear all Z-Wave devices enrolled with the secondary controller, and instead enroll them with the primary controller beforehand. Then perform the process of setting up the secondary controller to the primary. This will ensure that all of the Z-Wave devices you want to use are available on both controllers.

Remember, Z-Wave devices paired with the secondary controller will not be pushed over to the primary. When you get a new Z-Wave device, you must enroll it at the primary Z-Wave controller, not the secondary. In most cases, Honeywell Z-Wave Hubs are used as secondary controllers, and Z-Wave devices paired directly with the primary controller are then shared with the Honeywell Z-Wave Controller. One of the most common primary Z-Wave hubs to use for this type of setup is Samsung SmartThings. Other popular third party Z-Wave hubs should work just as well.

Being able to set up a Z-Wave hub as a secondary controller, is technically one of the more advanced Z-Wave functions that you would ever try to perform on a smart home automation network. But while it is quite advanced, it is also very standard. It is somewhat unusual to encounter a Z-Wave automation controller with no primary and secondary configuration options. But that's exactly the case with the Honeywell Home Tuxedo. You can't set it as a secondary Z-Wave controller, which is a big letdown for anyone who wants to use the device in conjunction with a different Z-Wave hub, such as Samsung SmartThings.

According to Resideo, the ability to set the Tuxedo as a secondary Z-Wave controller will come from a future firmware update. At this time, we do not have any estimate for when such a firmware update would be made available. If you want to learn more about firmware updates for a Tuxedo Keypad, please refer to this FAQ.

However, we can speculate that once the feature is available, you will be able to configure Tuxedo primary/secondary options by starting from the main keypad screen, and choosing the Devices option, followed by the Z-Wave Setup button at the bottom of the screen, and then selecting More in the lower-right corner. If you do that now, you will notice that the "Learn Mode" option currently does not exist.


Remember to stay tuned to our blog for future updates on the Honeywell Home Tuxedo. We will be sure to let you know about any new features made available for the keypad. If you have any questions about the Tuxedo or Z-Wave home automation, please feel free to email us at support@alarmgrid.com. We check our email from 9am to 8pm ET M-F. We look forward to hearing from you!

Tags: , , , , , , ,

Comments


Posted By

Alarm Grid is here again with its latest video recap! We have a lot of videos featuring touchscreen keypads this week, though some other topics are covered as well. As usual, Jorge, Jarrett, and yours truly are all represented. Let's check out the latest Alarm Grid videos from the team!

Pairing a 2GIG SP2 with the 2GIG GC3e

Jarrett helps you pair a 2GIG SP2 Keypad with a 2GIG GC3e Security System. Adding the SP2 Keypad will provide you with a secondary on-site location for controlling your GC3e System. You might consider installing it by your front door, by your garage door, by your back door, or in your master bedroom. Remember that the SP2 is for security functions only, and it cannot perform automation commands. The wireless keypad pairs with the GC3e through WIFI or by using an Access Point (AP).


How to Tell If a Keypad Has an RF Receiver Built-In

Jorge explains how you can determine if your alarm system keypad has a built-in RF receiver. It can be easy to confuse a keypad like the Honeywell 6160RF, which has an integrated receiver, with a similar-looking keypad that does not, such as the Honeywell 6160. If you have a hardwired alarm system, then the benefit of adding a wireless receiver is that you will be able to begin pairing compatible wireless sensors with the system. And if your keypad has a built-in receiver, then you won't need to add a standalone receiver unit.


Remove a PG9914 From its Mounting Bracket

Jarrett shows you how to remove a DSC PG9914 PowerG Motion Detection Sensor from its mounting bracket. Like all motion sensors, properly positioning and mounting the PG9914 is very important for achieving the results you want. If it is positioned improperly, then it may cause false alarms, or it may not activate when movement is present in the area. Proper mounting is also crucial if you intend to use the motion sensor for pet immunity. The PG9914 supports pet immunity of up to 85 pounds.


Determining if Your Keypad is Alphanumeric

Jorge explains the difference between an Alphanumeric Keypad like the Honeywell 6160 and a Fixed English Keypad like the Honeywell 6150. Both keypad types are good for arming and disarming and bypassing sensors. But only an Alphanumeric Keypad is good for menu-driven programming. This is because an Alphanumeric Keypad will display the relevant information as you move through the menus. If you try to program on a Fixed English Keypad, you will basically be operating blindly.


Checking the ECP and RIS Address on the Tuxedo Touch

Jorge teaches you how to check the ECP Address and the RIS Address for a Honeywell Tuxedo Touch Keypad. These settings are important when you go to set up the Tuxedo Touch with a Honeywell VISTA Security System and Total Connect 2.0. The ECP Address is used for setting up the Tuxedo Touch as a keypad controller on the VISTA System, and the RIS Address is used for setting up the Tuxedo Touch as an automation controller on Total Connect 2.0.


Disarming Using the Tuxedo Touch Keypad

Jorge shows you how to disarm your Honeywell VISTA Alarm System by using a connected Honeywell Tuxedo Touch Keypad. Since the Tuxedo Touch is a wired touchscreen keypad controller for the system, it needs to be able to perform all the standard security functions. These include arming and disarming the system. When you are disarming, you are taking the system out of a secured state so that burglary/intrusion zones are unable to cause alarms on the system.

Bypassing Zones Using a Honeywell Tuxedo Touch Keypad

Jorge explains how to bypass zones using a Honeywell Tuxedo Touch Keypad. When the zone associated with a sensor is bypassed, that sensor is ignored by the system. In other words, the system will not provide any response if that sensor is faulted. You must bypass or restore any faulted zones prior to arming the system. Bypassing is often preferred over deleting a zone entirely, as you do not have to reprogram a zone after bypassing. You can just unbypass the zone later on and use it as normal.


Providing AC Power to an Alarm System

I explain how AC power is provided to an alarm system. AC power comes from a plug-in transformer that connects to an alarm panel using wire. The transformer takes the high-voltage power provided from the outlet, and it transforms it into low-voltage power that is suitable for powering a security system. The power travels down the wire and reaches the panel. This represents the primary power source for an alarm system. If AC power is lost, then a backup battery can keep the system running temporarily until AC power is restored.

Tags: , , , , , , , ,

Comments


Posted By

If you have been keeping up with Z-Wave home automation lately, then you have likely at least heard about the S2 Security Protocol. The security suite offers an advanced level of protection to keep smart home devices safe. Today, we're checking out the S2 Protocol to learn more about it.


Before we get into the specifics of Security 2 (S2), it is important to understand which Z-Wave setups will support it. In order to achieve a proper S2 setup, the Z-Wave controller and the paired device itself must both support the S2 Protocol. If either end is not S2-compatible, then the protocol will not be used. If you pair a non-S2 device with a controller that supports S2, then the device will simply pair using the S0 Protocol instead. Likewise if you have a hub that does not support S2, then none of the devices on the network will use S2, including those that technically are capable of supporting the protocol. Not to worry, if you do have an S2-compatible controller, then it is certainly possible to have a mixture of S2 and S0 devices on the same Z-Wave network.

The S2 Security Protocol is optional for 500-Series Z-Wave Plus devices and hubs. In other words, some 500-Series Z-Wave Plus smart home devices and controllers will support S2, while others will not. You need to check the specifications for the exact device and hub that you are working with to see if it is supported. In some cases, it may be possible to perform an over-the-air (OTA) update for a 500-Series accessory or controller so that it can support the S2 protocol, even if it did not previously. An example of this is when you upgrade the Z-Wave firmware on the Qolsys IQ Panel 2 Plus to Version 6.81.03. That is the first Z-Wave firmware version for the system that supports S2. Older versions do not. The panel firmware should be on version 2.5.3 or higher when using S2.

But for 700-Series Z-Wave Plus V2 equipment, support for S2 is required. In order for a device or hub to be certified as 700-Series by the Z-Wave Alliance, it must support the S2 Protocol. Therefore, if you see equipment listed as 700-Series, then you will know for certain that the technology is supported. As of October 2020, we have not seen many Z-Wave Plus V2 controllers or devices available. One 700-Series device that is available now is the 2GIG STZ-1 Thermostat. We hope that more 700-Series equipment will be hitting the market soon.

Looking at what S2 actually entails, you should understand that it isn't just one aspect or factor that makes the protocol what it is. There are many different components coming together to create a single protocol that is extremely secure. But perhaps the single most crucial aspect of S2 is that it is readily built into the Z-Wave framework for use by software developers. This makes it very easy for a developer to implement the technology into any given Z-Wave Plus device. Prior to the introduction of S2, there was no security built into the Z-Wave framework. The only option for a developer was to implement their own security protocol, and this was completely optional. Many develops would elect not to provide any security and just leave automation devices vulnerable. But when a device is listed as S2, you can be absolutely certain that it is meeting an advanced standard of security and protection.

Just like many other secure protocols, S2 makes use of an asymmetric key exchange, which at the simplest level involves a public key and a private key. Any command can be encrypted using the public key, but only the specific private key can unlock it. This ever-crucial private key is protected using Elliptic Curve Diffie-Hellman (ECDH) technology. Thanks to this advanced method, the task of deciphering the key is all but impossible. Additionally, different devices on the same network can be separated into different groups. Each device group can be assigned its own set of encryption keys. Often, devices that require greater security, such as door locks, are included with more secure groups that also require authentication during the network inclusion process. Meanwhile, the support of a highly secure TLS 1.1 Tunnel for all Z-Wave Over IP (Z/IP) traffic removes almost any possibility of cloud vulnerability. For the record, the S2 Protocol is rated at 128-bit AES in terms of overall security level.

One other big factor for the S2 Protocol is that it makes use of a single-frame transmission, which is a massive improvement over the three-frame transmission used by the S0 Protocol. Simply put, single-frame transmission is significantly more efficient than three-frame transmission. The improvement in efficiency allows for extended battery life, enhanced reliability, and a huge cut-down on latency. This means that a device using S2 technology will require less maintenance, including fewer battery changes. It will provide more consistent performance, and experience shorter operation delays. This alone makes S2 vital for anyone looking to achieve the most efficient automation network possible.

Understanding this technology in advanced detail may seem a bit daunting. But you just need to know that S2 makes Z-Wave home automation more secure, faster, and more efficient than ever before. If you have any further questions about S2, or if you want some tips for getting started with home automation, please email us at support@alarmgrid.com. We check our email from 9am to 8pm Eastern Time M-F. Also remember to check our monitoring page if you are interested in learning more about the monitoring services we offer. We look forward to hearing from you!

Tags: , , , , , , , , , , ,

Comments


Posted By

It's time for our weekly video recap! And this might be our biggest one yet! We have a few videos back from the 16th that didn't make it into the last recap, as well a bunch of new videos from last week. We have videos featuring Jorge, Jarrett, and myself. Let's check out the videos!

Properly Replacing a Bad Sensor On a 2GIG GC3 or GC3e

Jarrett demonstrates the correct process for replacing a bad sensor on a 2GIG GC3 or 2GIG GC3e. The steps to follow for replacing a bad sensor on the GC3 or GC3e include clearing out the zone and then reprogramming it from scratch. Simply deleting the Serial Number (SN) and providing the new one can result in a "bypassed at device" error message. This will result in the sensor not working correctly. Other unusual system behavior may also occur.


Alarm.com Limits for Z Wave Devices

I explain the Alarm.com limit for the number of Z-Wave devices per account. Up to 122 devices from the panel will be pushed over to the Alarm.com platform for remote access and control. All Z-Wave devices numbered 123 and beyond will only be available at the panel for local operation. You can delete older Z-Wave devices that are still paired with Alarm.com to make room for new ones. You should pair the 122 devices that you want to use remotely first, allow Alarm.com to sync, and then add additional sensors for local control only last.


Clip Limits With Alarm.com Video Service

I explain the clip limits for Alarm.com Video Service. In order to get true video surveillance with Alarm Grid, you must have either a Platinum Level Plan (Self or Full) or a Video-Only Plan. At the base level, a true video plan will offer support for 1,000 monthly and total clips, as well as four (4) cameras and an SVR device. But by upgrading to Video Analytics, your monthly and total clip limits will both increase from 1,000 monthly and total clips to 3,000 clips of both types.


Changing the SiXCOMBO Batteries

I show you how to replace the batteries for the Honeywell SiXCOMBO. This wireless sensor uses four (4) lithium CR123A batteries for power. Its expected battery life is about five (5) years. You must open up the SiXCOMBO by twisting the sensor counterclockwise against its back plate. When closing the sensor, make to align it properly, and twist clockwise to secure. You get a low battery message on the panel to let you know when replacements are needed.


Self-Monitoring a Honeywell L3000

I explain how you can self-monitor a Honeywell L3000 System. Self-monitoring means that the system is not connected with a central station, and all system alerts are sent to the end user via text and/or email. For an L3000, this is possible using the Total Connect 2.0 service from Resideo. You will need a compatible AlarmNet Communicator for the L3000 System to make this possible. Both the Honeywell LTE-L3A and the Honeywell LTE-L3V work great for this job when used with the L3000.


Enrolling a PowerG Wireless Sensor to an Alarm Panel

Jorge shows you how to enroll a PowerG Sensor with a compatible alarm panel. PowerG Sensors are wireless devices that offer a fantastic signal range and 128-bit AES encryption. Compatible systems for PowerG Sensors include all versions of the Qolsys IQ Panel 2 Plus, the DSC Iotega, and any DSC PowerSeries NEO System with an added PowerG Module. Most PowerG devices can transmit a signal for auto-enrollment by either powering on or by pressing and holding a device enrollment button until its LED light turns solid orange.


Connecting the 2GIG GC3e to WIFI

Jarrett shows you how to connect the 2GIG GC3e to a local WIFI network. The 2GIG GC3e System will use its WIFI connection to communicate with Alarm.com. However, Alarm.com requirements mandate that the system also has an active cellular communication path set up. This will require an added cellular communicator. The WIFI connection will just work as an additional pathway for facilitating communication between the GC3e and Alarm.com. Remember that you will need the WIFI network password to complete the connection.


Checking Zone Faults on a Tuxedo Touch Keypad

Jorge shows you how to check for faulted system zones using a Honeywell Tuxedo Touch Keypad. A faulted zone refers to a programmed sensor that is in a non-restored or "active" state. A common example is a contact sensor in a faulted state due to a door or window being left open. The Tuxedo will display a message at the top of its main screen to indicate when there is at least one faulted zone. You must bypass or restore faulted zones before the system can be armed.


Scenes From Alarm.com Won't Be Pushed to GC3 or GC3e

I explain how when you build a smart scene in Alarm.com, that scene will not be pushed down to a 2GIG GC3 or GC3e Panel for local operation. Instead the scene will only be available for remote access through the Alarm.com website or mobile app. Likewise if you build a scene on the GC3 or GC3e, then it will not be pushed over to Alarm.com. You can include various smart home devices with scenes, including programmed lights, locks, thermostats, and more.


Checking the Firmware Version on a Tuxedo Touch

Jorge shows you how to check the firmware version for a Honeywell Tuxedo Touch Keypad. The Honeywell Tuxedo Touch is both a touchscreen keypad for a Honeywell VISTA System and a Z-Wave automation controller. Firmware updates for the Tuxedo may be periodically released to provide new features and improve device performance. The Tuxedo Touch receives firmware updates from an SD card slot. You must download the update to the SD card and then apply it to the Tuxedo Touch.


Getting Into the Z Wave Programming Section of a Tuxedo Touch Keypad

Jorge explains how to access Z-Wave programming for the Tuxedo Touch. Z-Wave functionality is one of the key features for this wired touchscreen keypad. You must access the Z-Wave Programming Menu for the Tuxedo Touch to begin enrolling Z-Wave smart home devices. It is advised that you clear any Z-Wave device from the network before attempting to enroll it with the Tuxedo. This is true even if the device is brand-new and you have never paired it with a Z-Wave network before.


Converting a Wired Alarm Into Wireless

I explain how you can convert a wired alarm system into a wireless alarm system by using a wired to wireless converter module. With a wired to wireless converter, you can take your existing hardwired sensors and use them with your new wireless security system as wireless devices. This can save you money by not having to purchasing as many wireless sensors. When choosing a wired to wireless converter, you must make sure that the module communicates at a wireless frequency that is compatible with your new wireless system.

Tags: , , , , , ,

Comments


Posted By

As you may recall last week, the 2GIG STZ-1 Smart Thermostat became one of the first 700-Series Z-Wave devices available on the Alarm Grid website. We figured we would explore the Z-Wave 700-Series and see what it brings to the table, as it appears more products will be available soon.


We were a bit surprised with the release of the 2GIG STZ-1 Smart Thermostat, as there just aren't many controllers or hubs that take full advantage of 700-Series Z-Wave technology quite yet. Like prior generations of Z-Wave, the 700-Series devices should be compatible with older controllers and hubs. But you won't be able to take full advantage of these devices unless you use them with true Z-Wave 700-Series Controllers. And while we haven't seen many 700-Series Hubs available become available, we are sure they will be arriving soon.

It should come as no surprise that extended wireless range and longer battery life will become a mainstay with Z-Wave 700-Series. We have heard that the 700-Series devices will consume 64% less power for wireless communication, and the technology allows for resting when the device is not being used. Thanks to this more efficient performance, it's likely that you will see many 700-Series devices go up to ten (10) years between battery changes. Furthermore, the 700-Series is expected to allow for communication that is 250% further than the Z-Wave Plus 500-Series. This translates into roughly 200 feet between signal hops!

But perhaps the biggest surprise with the 700-Series is its improvements in security. While the 500-Series devices introduced optional S2 Security, SmartStart capabilities, 128-bit AES encryption, Elliptic-curve Diffie-Hellman (ECDH) protocol technology, and Man-In-The-Middle (MITM) protection. These features will become mandatory in the 700-Series for any device to receive certification from the Z-Wave Alliance. In other words, a device will only be able to list itself as having 700-Series Certification if it uses some of the most advanced wireless protection capabilities ever seen in home automation.

While the 700-Series technically made its public debut in April of 2019, we still haven't seen its usage become widespread. We expect that the pandemic played a large part in slowing the rollout of this latest smart home technology. But the recent release from Nortek and 2GIG is certainly a good sign. Of course, we'll also need security manufacturers to step up and build systems with 700-Series support. With any luck, maybe we'll see 700-Series support from the Qolsys IQ Hub later this year!

If you have any questions about the 700-Series of Z-Wave or about home automation in general, please email us at support@alarmgrid.com. We will be happy to discuss automation possibilities for your home or business and provide you with as much detail as we know about the exciting up-coming technology. We check our email from 9am to 8pm ET M-F. We look forward to hearing from you soon!

Tags: , , ,

Comments


Posted By

We have some new offerings from 2GIG that have just been added to our website. These include the 2GIG STZ-1 Z-Wave Plus 700-Series Thermostat, the 2GIG CO8 Wireless Carbon Monoxide Sensor, and the 2GIG CO8e Encrypted Wireless Carbon Monoxide Sensor. All three are available as of now!


Starting with the 2GIG STZ-1, this is a smart thermostat that uses the latest Z-Wave Plus 700-Series technology. This represents the next generation of Z-Wave Smart Home Automation after the 500-Series of Z-Wave Plus. The 2GIG STZ-1 is actually one of the very first 700-Series Z-Wave Plus devices we have ever seen. You may also see this protocol referred to as Z-Wave Plus V2. Although we haven't encountered many 700-Series Z-Wave controllers or hubs quite yet, we are sure that they will begin to pop up before too long. This new generation of Z-Wave will provide even better battery life and wireless range capabilities than ever before.

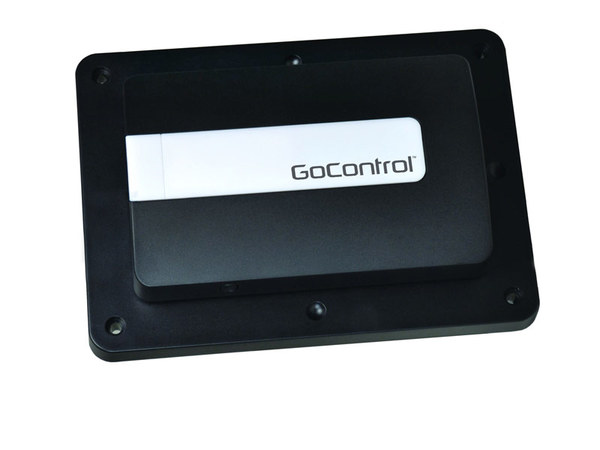
For the time being, you will have no trouble using the 2GIG STZ-1 with Z-Wave Plus controllers like the 2GIG GC3e, 2GIG GC3, 2GIG GC2e, Qolsys IQ Panel 2 Plus, and Honeywell Home Tuxedo. However, 2GIG has stated that the STZ-1 Thermostat is not compatible with their older 2GIG Go!Control GC2, which only has a classic Z-Wave controller. Therefore, you may want to refrain from getting the 2GIG STZ-1 if your automation network is still centered around a classic Z-Wave hub. But the good news is that you can take advantage of advanced features like SmartStart QR Code Pairing and the S2 Security Protocol when using it with the latest Z-Wave Plus hubs.

The 2GIG STZ-1 is also no slouch when it comes to controlling an HVAC system. The thermostat supports 3-Stage Heating and 2-Stage Cooling, humidity and fan control, and the ability to be used without a "C" wire connection and rely solely on battery power. Like any Z-Wave thermostat, you can include the 2GIG STZ-1 with smart scenes so that it automatically begins heating or cooling your home or office on a set schedule. This is great for keeping energy costs to a minimum, while also ensuring that you stay comfortable!

Meanwhile, the 2GIG CO8 and the 2GIG CO8e serve as the latest carbon monoxide sensors from Nortek Control. The 2GIG CO8 joins the always popular 2GIG 345 MHz Sensor Lineup, while the 2GIG CO8e is part of the 2GIG eSeries Lineup of encrypted sensors. The 2GIG CO8 is a non-encrypted wireless sensor, and it is compatible with a wider selection of alarm systems, including all of the 2GIG Panels, the 345 MHz Qolsys IQ Panel 2 Plus, and the Honeywell Lyric on Firmware Version MR3 or higher. The 2GIG CO8e is only compatible with the 2GIG GC2e and GC3e, but it uses encryption for better wireless security and protection.

Whether you go with the CO8 or CO8e, you will be providing valuable carbon monoxide detection for your home or office. Carbon monoxide (CO) gas is odorless and tasteless, and it kills hundreds of people every year in the United States. Most CO-related deaths occur in the winter months when heaters are more frequently used. With the winter quickly approaching us, now is a great time to get started using carbon monoxide sensors. You will have peace of mind in knowing that you and others around you will be alerted in case a CO gas situation occurs. And with central station monitoring service, help will be automatically sent to the location in the event of a carbon monoxide alarm. Remember to check out our monitoring page if you are interested in learning more about alarm monitoring.


If you have any questions about the 2GIG STZ-1 Thermostat, 2GIG CO8 Carbon Monoxide Sensor, or 2GIG CO8e Encrypted Carbon Monoxide Sensor, please email our support team at support@alarmgrid.com. We check our email from 9am to 8pm ET M-F. We look forward to hearing from you!

Tags: , , , , ,

Comments


Posted By

We are happy to announce that some new products are available on our site. The Linear GD00Z-7 Garage Door Opener and the Alarm.com ADC-SWM150 Smart Water Valve and Meter can both be purchased from Alarm Grid. Both devices use Z-Wave Plus technology for communicating with a compatible hub.


Starting with the Linear GD00Z-7, this new Z-Wave Plus unit replaces the older Linear GD00Z-5 model previously offered on our site. This new unit connects with a compatible garage door motor to provide smart control for the connected garage door. You can open and close your overhead garage door using an interactive service platform like Alarm.com, and you can also include the device with smart scenes for automation operation.

Unlike previous models, the new Linear GD00Z-7 can utilize the S2 Security Protocol when it is paired with a Z-Wave Plus controller that supports the protocol. This is only available on the most advanced Z-Wave controllers, including the Qolsys IQ Panel 2 Plus once the Z-Wave Firmware is upgraded to Version 6.81.03. It is also backwards compatible with most other Z-Wave controllers, where it will simply use the older S0 Protocol. However, it cannot be used with the wireless Honeywell Panels. Any Lyric or LYNX Touch owner should still get the Honeywell GDCK, which is also sold by Alarm Grid.

As for the Alarm.com ADC-SWM150, it is a complete smart water valve and meter that can be used for both controlling water flow and monitoring water usage for energy monitoring and consumption purposes. Once installed, the unit detects leaks of any size in the building, and you can access it remotely to shut off the main water supply in the event of a leak.

If you have ever experienced a flood or serious water leak, then you know how costly of a situation it can become. Being able to shut off the water flow remotely can really come in handy when time is of the essence. Many users will pair the ADC-SWM150 with one or more flood detection sensors and build smart scenes to have the water shut off automatically once a sensor is triggered.

The difference between the ADC-SWM150 and the previously released ADC-SWV100 is that the new ADC-SWM150 also includes an advanced water meter for tracking water usage and flow. If a leak occurs, whether it be from a burst pipe or a dripping faucet, you can see the information on the mater. Also included with the ADC-SWM150 is the ability to use the S2 Security Protocol when paired with a compatible Z-Wave Plus controller.


Both the Linear GD00Z-7 and the Alarm.com ADC-SWM150 are available now from the Alarm Grid website. If you have any questions about either of these products, please reach out to us by emailing support@alarmgrid.com. We check email during our usual business hours of 9am to 8pm ET M-F. We look forward to hearing from you!

Tags: , , , , ,

Comments


Posted By

There will soon be yet another update available for the Alarm.com Mobile App. This time, both the iOS and Android mobile app versions are receiving updates. According to Alarm.com, the new mobile app versions should be made available for free download sometime within the next week.


Alarm.com Mobile App Version 4.16 for iOS will add smart lighting control as a new Siri Shortcut option. This will allow a user to more easily set up their lights so that they can be controlled using Siri Voice Commands. We have found Alarm.com Siri Shortcuts to be very useful for easily controlling one's security system through spoken voice commands. For more info on using Siri Shortcuts with Alarm.com, please check out this prior blog post.

Alarm.com Mobile App Version 4.15 for Android will provide video doorbell support to the Shortcuts feature for the app. This will allow the user to access the live video feed for their Alarm.com Doorbell Camera with a long press of the app launcher icon. This is believed to be similar to the doorbell shortcut for the iOS version that was released in the prior update. In addition, Android users will also gain the ability to set an "Override Do Not Disturb" option to ensure that they do not miss critical alerts from Alarm.com. This option will be available from within the Alarm.com Notifications Page.

As usual, both the new iOS and Android App Versions will also include general stability fixes and improvements to help ensure seamless performance. These new app versions are expected to be made available sometime next week, so keep an eye out for them in the Apple App Store and the Google Play Store.

Alarm Grid will provide further updates if we learn anything else. If you have any questions regarding Alarm.com Mobile App Version 4.16 for iOS or Alarm.com Mobile App Version 4.15 for Android, or if you are interested in starting monitoring service for accessing Alarm.com, please do not hesitate to email us at support@alarmgrid.com. We check our email from 9am to 8pm ET M-F. We look forward to hearing from you!

Tags: , , ,

Comments


Posted By

HomeKit users may notice two (2) new device categories in the platform. Apple iOS 14 has added device categories for both TV Set Top Boxes and Streaming Sticks. These categories will appear when you go to add an accessory and have a compatible TV Set Top Box or Streaming Stick within range.


The two new device categories have appropriate icons to go with them. It's possible that the new categories could have other implications for Apple HomeKit. Some have speculated that Apple may be in the process of providing HomeKit support to various streaming devices, other than their own AppleTV.

It is likely that HomeKit-compatible TV Set Tox Boxes and Streaming Sticks will behave in a similar manner as HomeKit-compatible televisions when used with the platform. The devices appear in the Apple Home App so that you can navigate and control the connected device through the app or by using the Siri Voice Assistant.

You will only find the new device categories when using HomeKit on Apple iOS 14, which was just made available last week. Alarm Grid previously covered how iOS 14 was set to introduce a new look for HomeKit on the iPad and facial recognition for HomeKit-compatible security cameras. Alarm Grid recommends the Honeywell Lyric as a HomeKit-compatible security system.

We are impressed with how Apple continues to update their HomeKit platform. We think it is a great resource for Apple users. If you have any questions about HomeKit, including the compatibility between the Lyric and HomeKit, please email us at support@alarmgrid.com. We check our email from 9am to 8pm ET M-F. We look forward to hearing from you!

Tags: , , ,

Comments