Home Security Blog

Posted By

Alarm.com Rogers Communicators may be experiencing connectivity issues due to a temporary issue with the carrier. No other carriers are affected. We expect the issue to be resolved relatively soon. Alarm Grid will provide further updates once we receive more information from Alarm.com.

Update: This issue has since been resolved. Please contact us at support@alarmgrid.com if you are continuing to experience issues.

Tags: ,

Comments


Posted By

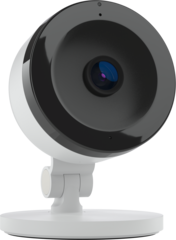
Hi DIYers! Today, we're checking out the newest camera from Alarm.com, the ADC-V723. This is an outdoor security camera designed for use with the Alarm.com platform. It packs some powerful and impressive features into a compact design, making it ideal for virtually any home or business.


The ADC-V723 is an Alarm.com Security Camera that captures clear, pristine video at up to 1080P. The device is fully compatible with all of the excellent Video Analytics features from Alarm.com. This allows you to receive specific alerts regarding detected movement so that you are only notified for important events. Another great feature of the device is its High Dynamic Range (HDR) functionality to reliably capture activity when it occurs.

With its 117° field of view, you can rely on the ADC-V723 to cover a wider area than most other cameras. This increases your area of video surveillance, without having to add multiple video capture devices for adequate coverage. The camera also boasts an IR night vision range of about 40 feet, making it superb for capturing activity and movement in the darkest of settings. And its IP66 weather-resistant rating allows it to stand up to almost anything nature can dish out.

The ADC-V723 connects with a WIFI network across a 2.4 GHz or 5 GHz band. Remember that you will need an Alarm.com account with video surveillance. If you have a security system connected with Alarm.com through Alarm Grid, then you will probably want to upgrade to a Platinum Plan (Central Station or Self) if you haven't already. You can learn more about our Platinum Plan on our monitoring page. We also have a Video-Only Monitoring Plan, which is great if you want video surveillance without actually owning a security system.

If you have any questions about the new ADC-V723 or any of our products or monitoring services, you are welcome to email us at support@alarmgrid.com. Remember that our support hours for replying to emails are from 9am to 8pm ET M-F. Our team will check your email at our earliest convenience and reply back as soon as possible. We look forward to hearing from you!

Tags: , , , , , ,

Comments


Posted By

Hi DIYers! Today, we wanted to quickly discuss some of the various integrations that have been made available for Alarm.com. We will be checking out the Sonos, Legrand, Rachio, and Rain Bird integrations. They are great for any ADC user who wants to control their audio or irrigation system!


If you have a smart audio system from Sonos or Legrand, or a smart irrigation system from Rachio or Rain Bird, then it is likely that you can set it up for use with Alarm.com. This will allow you to control your audio or irrigation system conveniently from the Alarm.com Mobile App. All you need to do is have the appropriate options enabled for your Alarm.com account and complete a simple pairing process.

The Sonos and Legrand Audio Systems can also be included with Alarm.com Smart Scenes to have your music or audio play automatically based on a schedule or with certain system events. Your sound system can even be set to activate alongside other devices, including your smart lights, thermostat, door locks, and even your security system! This is perfect for creating the perfect scene for listening to music or your favorite podcast! You might also run a scene while you are away to make it appear like you are really home.

Meanwhile, the Rachio and Rain Bird Irrigation System integrations offer their own benefits. You can use the Alarm.com Mobile App to set your irrigation system to a Rain Delay, initiate watering for any irrigation zone for a set period of time, and view the last time a zone was watered. Additionally, the Irrigation Card from the main screen of the Alarm.com Mobile App will show the current status of your irrigation system.

In order to use Sonos and/or Legrand with Alarm.com, you must have the Audio Integration Service Package Add-On applied to your Alarm.com account. Likewise, you will need to have the Irrigation Service Package Add-On Applied to your Alarm.com account if you plan to use Rachio and/or Rain Bird with Alarm.com. Keep this in mind before you go to complete one of these integrations.

Alarm Grid will apply the Audio and Irrigation Add-Ons to any Alarm.com account at no additional charge. You just need to have an Alarm Grid monitoring plan with access to Alarm.com. Any customer with a Gold or Platinum Plan and a compatible Alarm.com Security System can access the Alarm.com platform. This includes any Self or Central Station Plan. We recommend checking our monitoring page for more information.

At this time, the Sonos, Legrand, and Rachio integrations can all be completed by an end user through the Alarm.com Mobile App. Just make sure that the appropriate Audio or Irrigation Add-On has been applied to your Alarm.com account. However, the Rain Bird integration must be manually performed by your alarm monitoring company. For more information on completing any of these four (4) integrations, we recommend checking out one of the following FAQs:

If you are an Alarm Grid customer and you need a service package added to your Alarm.com account or you need help setting up any of these integrations, then you should email us at support@alarmgrid.com. You are also invited to email us if you are interested in our monitoring services and you would like to learn more. Remember that our support hours for responding to emails are from 9am to 8pm ET M-F. We look forward to hearing from you!

Tags: , ,

Comments


Posted By

Hi DIYers! We have some important information that is applicable for anyone with central station monitoring service from Alarm Grid. Our alarm monitoring partner, Criticom Monitoring Services (CMS), has announced some important changes regarding their text and email notifications.


Starting December 1st, 2019, all text message notifications and automated notifications from Criticom will come from the short code 60281. We recommend marking this number with your phone service provider so that it is not blocked as part of anti-spam measures. Additionally, all automated email notifications from Criticom will come from noreply@myalarms.com. You should mark this email so that any incoming messages do not end up in your spam folder.

Additionally, CMS has alerted us that blocked calls to customers have been reported. This is due to anti-spam measures put into place by phone companies. As an Alarm Grid customer, it is crucial that you are able to receive incoming phones calls from CMS at all times. Failure to answer these calls may result in unnecessary emergency dispatch. We have actually discussed this subject at length before in a previous blog post.

We recommend saving ALL contact numbers for CMS in your contacts list. It is also recommended that you contact your phone carrier directly and ask them to allow incoming calls from these numbers. We also understand that some customers may have downloaded third party apps that will detect and block incoming toll-free and/or believed "spam" numbers. If you have one of these apps, you should delete it, or adjust its settings so that CMS phone numbers are not blocked.

As a reference, the five (5) phone numbers listed below are associated with Criticom Monitoring Services, and they should not be blocked or ignored under any circumstance:

  • Longwood, FL: (800) 432-1429
  • Manasquan, NJ: (800) 631-2299
  • Cypress, CA: (714) 373-7000; (800) 468-4640; (800) 482-9800

Keep in mind that you may not always receive incoming phone calls from the same CMS phone number. In the event that one monitoring center is temporarily taken offline for any reason, any incoming alarms will be automatically re-routed to a different monitoring center. This redundancy helps ensure that customers always get the help they need when alarm events occur. For that reason, make sure to save all five (5) of the CMS phone numbers listed above.

You may also want to sign-up for text notifications from CMS. Text messages sent from CMS are sent from the CMS secure short code that should not be blocked under any circumstance. Remember, this short code will be 60281 starting December 1st, 2019. This number should be saved as a contact in your phone so that you can quickly recognize any incoming message as being associated with your security system and/or monitoring service.

If you want to learn more about our monitoring plans that include central station service, we recommend checking out our alarm monitoring page. If you have any questions, you should email us at support@alarmgrid.com. Remember that our team responds to emails during our regular support hours of 9am to 8pm ET M-F. We look forward to hearing from you and answering any questions you have about monitoring service.

Tags: , ,

Comments


Posted By

Hi DIYers! Today, we want to discuss an unusual quirk we found with Alarm.com. It turns out that the Alarm.com platform cannot receive alerts from temperature sensors. This is important for any Alarm.com user who wants to receive remote alerts for unusually high or low temperatures.


When you use sensors with a security system, the expectation is that you will be able to receive alerts from an interactive service platform whenever the device is activated. But with Alarm.com, the platform cannot receive incoming signals from a system regarding faulted Temperature Zones. This means that you cannot use Alarm.com to receive text and/or email alerts regarding an activated temperature sensor.

We discovered this issue due to a customer using a DSC PG9905 Temperature Sensor with a Qolsys IQ Panel 2 Plus System. We quickly discovered that the issue also applied to any temperature used with an Alarm.com Security System. This is important to note, as we know that many users out there will want to know about any unusual temperatures in their homes and businesses. Many people rely on using these sensors with their security systems so that they know if their HVAC systems break before serious and expensive damage occurs.

Fortunately, there is still another way you can receive alerts from Alarm.com regarding an unusually high or low temperature. If you pair a Z-Wave thermostat with your system, then you can set up notifications to be sent out whenever the detected temperature goes outside of a set threshold. A good Z-Wave thermostat to use for this application is an Alarm.com ADC-T3000 Thermostat. This thermostat also supports the ADC-S2000 Temperature Sensor, which will allow you to monitor the temperature in a second area of the building as well.

Another option is to use the Total Connect 2.0 platform with a Resideo Security System instead. Unlike Alarm.com, the Total Connect 2.0 service can be set up to send out text and/or email notifications for any sensor type, including temperature sensors. The Resideo LYNX Touch and Lyric Systems also have designed Temperature Zones that are used with Z-Wave thermostats to end high-low temperature alerts to AlarmNet360 and TC2 whenever an unusual temperature is detected. Just make sure that any Temperature Zone is noted as such on your central station document. These zones are frequently mistaken for 24-hour auxiliary medical zones.

If you have any questions about the functionality of temperature sensors, the Alarm.com and Total Connect 2.0 platforms, or any of our other products or services, please email us at support@alarmgrid.com. Remember that our support hours are from 9am to 8pm ET M-F. We also recommend checking out our monitoring page to learn more about our monitoring services. We look forward to hearing from you and providing top-quality monitoring service for your home or business.

UPDATE: This issue was later addressed in Qolsys IQ Panel 2 Plus Firmware Update 2.5.0. Please see this post for more information.

Tags: , , , , , , , ,

Comments


Posted By

Hi DIYers! We're back with another video recap, this time covering the newest videos that were posted last Thursday and Friday. Our video team put up six (6) videos this past week, with Joe, Jarrett, and Jorge all having two (2) videos. Let's take a look at the newest Alarm Grid videos!

Alarm grid inside security stickers

Adding a Siren to a Honeywell VISTA Alarm System

Joe is enthusiastic as he teaches you how to add a hardwired siren to a Honeywell VISTA Security System. Adding a siren is important for making sure that all building occupants are alerted to an intrusion or fire. Luckily, the VISTA Systems make it very easy to add a siren, as you can just connect it to panel terminals 3 & 4. You can also daisy-chain multiple sirens together. Just make sure you do not exceed the power limit of 2A.


Changing the Date and Time on a Honeywell VISTA System

Joe shows you the very exciting task of changing the date and time on your Honeywell VISTA Security System. This is something that you will normally do when setting the panel up for the first time. You will also need to do it when Daylight Savings Time occurs, as the panel cannot update the time on its own. Powering down the panel completely at any time will remove the date and time settings and require you to readjust. You should use an Alphanumeric Keypad for this job.


Dual-path Monitoring and the VISTA-21iP

Jarrett, the nice young man you all love so much, talks about dual-path monitoring options for the VISTA-21iP System. Although the VISTA-21iP has a built-in IP communicator, you cannot simply add a cellular communicator to achieve dual-path connectivity. Instead, you must disable the internal IP communicator and add either a Honeywell LTE-IV (Verizon LTE & IP) or a Honeywell LTE-IA (AT&T LTE & IP) for dual-path service. Remember that the new VISTA-21iPLTE System supports plug-in LTE communicators for enabling dual-path functionality.


Using the Honeywell L7000 With SmartThings

Jorge shows off his automation expertise by teaching you how to pair a Honeywell L7000 System with Samsung SmartThings. In order to complete this integration, the L7000 must have a Honeywell L5100-ZWAVE module installed. We recommend pairing all your Z-Wave devices with your SmartThings Hub before adding the L7000 as a secondary controller. Any Z-Wave device that is paired with the L7000 should be excluded from the network and then paired with SmartThings. This will ensure the best possible results when the integration is complete.


Using the Honeywell L5210 With SmartThings

Jorge continues to impress by explaining how the Honeywell L5210 System can be used with Samsung SmartThings. This is done by setting the L5210 up as a secondary Z-Wave controller for your SmartThings Hub. Any Z-Wave device that is paired with your SmartThings Hub will be pushed over to the L7000. This will let you control them both from the panel and from SmartThings. Any Z-Wave Plus device that is used in this configuration will retain its Z-Wave Plus functionality, as it is still ultimately paired with the SmartThings Hub.


Monitoring Requirements for Using Total Connect 2.0

The ever-appreciated man of amazement Jarrett explains the monitoring requirements for accessing Total Connect 2.0. This interactive monitoring and automation platform is used exclusively with Honeywell and Resideo Security Systems and Total Connect 2.0 IP Cameras. Any system used with this service must be connected with the AlarmNet360 Servers for monitoring service. This will require an alarm monitoring plan, such as one offered from Alarm Grid. Only Honeywell Systems set up for IP and/or cellular service can be used in this manner.

Tags: , , ,

Comments


Posted By

We have learned that there are some temporary server issues affecting the Total Connect 2.0 service. These issues may lead to "latched" alarms and/or trouble conditions. Users may also experience delays using the TC2 platform and have trouble logging into their accounts during this time.

As a result of these issues, users may find that system alarms and trouble conditions are becoming "latched" on their Total Connect 2.0 account. This means that these events are still appearing on TC2, even though the issue has been cleared locally. You should be able to clear these events by using the "Refresh Status" button on TC2. If you find that you cannot clear these events, then you should email us at support@alarmgrid.com so that we can clear them for you. Please note that other TC2 functions, such as remote access and system alerts, should still be operating as normal.

Alarm Grid has reported these issues to Resideo's AlarmNet360 division, and the problem is being addressed at this time. We expect the matter to be resolved as soon as possible. We will provide an update when the matter is fixed. Stay tuned to our blog for updates.

Update: Resideo has reported that the issue has been resolved as of about 5:30pm ET.

Tags: , ,

Comments


Posted By

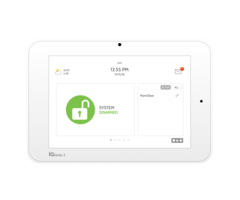
Hi DIYers! We know by now you are probably aware of the Alarm.com integration for Amazon Alexa. Today, we just wanted to remind you of the superb features and functions this integration offers and how it can make your life more convenient. Prepare to learn about the Alarm.com Alexa Skill!


It goes without saying that Amazon Alexa is one of the most popular smart home automation platforms available today. This is due in large part to its accessibility. An Alexa Hub is extremely easy to set up and use. And since so many people use Amazon Prime for ordering products online, they realize that adding a simple Alexa Hub in their homes makes sense.

There are many functions you can perform through Amazon Alexa voice commands if you have an Alarm.com Security System. You can have Alexa arm your system, check the current system status, perform entire smart scenes, and control individual Z-Wave smart home devices. Truly, the automation features offered from Alexa voice commands for Alarm.com are particularly exciting.

Alexa even allows you to set up special "Secure Commands" for Alarm.com, which include disarming your system, opening your garage door, and unlocking your Z-Wave door locks. These Secure Commands require you to provide a valid PIN code when speaking with Alexa. This way, you can be sure that it is you or someone you trust controlling your system through the hub!


To get started using Amazon Alexa with Alarm.com, you must first have access to the Alarm.com Platform. This will require having a system with a compatible Alarm.com Cellular Communicator. You will also need to get an alarm monitoring plan that includes access to Alarm.com. Two of the best plans to choose from are the Alarm Grid Gold Plan and the Alarm Grid Platinum Plan. You can learn more about these plans, plus all our other monitoring plans, on our alarm monitoring page.

Once your system is activated for monitoring service, and you have successfully created your Alarm.com account, you can then enable the Alarm.com Alexa Skill. Simply search for Alarm.com in the Skills & Games section of the Alexa App, and locate the Alarm.com Skill. You will need to provide your Alarm.com account information when you go to enable the skill. This will allow Alexa to communicate with your Alarm.com account.

You can then try controlling your system and paired smart home devices through Alexa voice commands! Remember that commands for use with your system will lead in with "Alexa, tell Alarm.com to..." As long as you remember that, you will have no shortage of exciting and convenient voice commands that you can use with Amazon Alexa and Alarm.com!

If you have any questions, then remember that the Alarm Grid Support Team is happy to help! We will answer any questions you have about the Alarm.com Alexa Integration or about the Alarm.com platform or our monitoring services in general. The best way to contact us if you have questions is to email support@alarmgrid.com. Remember that our support hours are from 9am to 8pm ET. We look forward to hearing from you!
Tags: , , , , , , , , , , , , , , , , ,

Comments


Posted By

Hi DIYers! We have great news for anyone clinging on to an old Honeywell LYNX Touch L5200 System. The panel now supports the use of a new Honeywell LYNXTOUCH-MSD Updater Tool and can be upgrade to the latest firmware. This means the L5200 can now use one of the LYNX Touch LTE Communicators!

Honeywell l5200 lynx touch wireless home security system and alarm control panel

This news was brought to our attention thanks to Resideo Technical Notification #43, which you can view here. According to this document, the L5200 can now receive a firmware upgrade from a newly released LYNXTOUCH-MSD Firmware Updater Tool. These newly released updater tools will have the following sticker on the box:


It is our understanding that any existing LYNXTOUCH-MSD Firmware Updater Tools WILL NOT work with the L5200. However, we are still awaiting word from Resideo regarding confirmation. We also believe that it will no longer be possible to have firmware updates pushed down to the L5200 over-the-air (OTA). Instead, all future updates for the L5200 must now occur using the updater tool. Please note that by upgrading the L5200 System to run the latest firmware, AlarmNet360 will view the system as an L5210 running the latest firmware. As far as AlarmNet is concerned, the L5200 and L5210 are the same system once the panel is on the latest firmware.

Update: Resideo confirmed that only LYNXTOUCH-MSD Firmware Updater Tools manufactured after October 2019 will work with the L5200.

The new updater tool will also continue to support the L5210 and L7000 Systems like normal. For more information on using the Honeywell LYNXTOUCH-MSD Firmware Updater Tool, please review this helpful FAQ. We offer step-by-step instructions and a video that will help you use the device to upgrade any Honeywell LYNX Touch System.

By upgrading to the latest firmware, you can use the LTE cellular communicators with the L5200 System. These include the Honeywell LTE-L57A (AT&T LTE) and the Honeywell LTE-L57V (Verizon LTE). Upgrading to LTE is crucial for extending the life of your security system. Please note that Firmware Revision 9.00.209 or higher is needed to use the LTE-L57A, and Firmware Revision 9.00.201 or higher is needed to use the LTE-L57V.

Remember that older cellular networks like AT&T 3G and 4G and Verizon CDMA are set to be shut down in the coming years. Meanwhile, support for LTE Networks will be maintained well into the very distant future! Remember that Alarm Grid customers will need a Gold Plan or higher to use cellular communication with any system.

Additionally, you might also need to update the firmware for your L5200 to use a newer Honeywell L5100-WIFI Module. Any L5100-WIFI module with any updated MAC prefix can only be used with a LYNX Touch System running Firmware Revision 8.00.183 or higher. If your L5200 is running an old firmware version, you can upgrade to the latest version using the newly enhanced LYNXTOUCH-MSD Updater Tool. This will allow you to use any L5100-WIFI Module with the system. More information on the L5100 MAC prefix update can be found in this blog post.

This is certainly great news for any L5200 owner, as the system has essentially been "resurrected", and can now be set up to use fast and reliable dual-path connectivity (LTE & WIFI) just like any top-of-the-line security system! If you have any questions about the Honeywell LYNXTOUCH-MSD Firmware Updater Tool or any of the products on our site, please reach out to us by emailing support@alarmgrid.com. Remember that our support hours are from 9am to 8pm ET M-F. We look forward to hearing from you!

Tags: , , , , , , , , , ,

Comments


Posted By

Hi DIYers! We have learned that Alarm.com has been pushing out automatic firmware updates for their security cameras. These updates are designed to make the cameras compatible with future enhancements that may be released at a later date. Alarm.com SVR Devices are also being updated.

Alarm dot com adc vc736 outdoor 1080p poe large bullet camera wiAccording to Alarm.com, any non-doorbell camera or SVR device that is online with a strong connection will have the update pushed down automatically. Alarm.com states that 95% of all compatible cameras and accessories have already received the updates. Cameras that are offline or set up with a weak connection will not be able to receive the automatic update. Alarm.com says that they are still trying to get all compatible devices set up with the update.

In the near future, users may notice problems for any camera that has not yet received the update. Specifically, these cameras may stop showing the device name and timestamp on their on-screen displays. Additionally, any SVR devices that have not received the update may stop supporting video recording and video playback. These issues will persist until the device receives the update.

Users may also find that their cameras and/or accessories are displaying a trouble condition for out-of-date firmware. This trouble condition is to let any end users know that they should update the firmware for their cameras and/or accessories as soon as possible. Fortunately, these issues can be properly addressed by simply updating these devices to their latest firmware versions.

If you notice this trouble condition you can manually push down an update yourself by accessing your Alarm.com account through the website and choosing Video > Settings > Select Device > Video Device Info > Update Firmware. You may also contact us to have us push down the update for you. Remember that your camera will need to be online with adequate signal strength in order to receive the update. There is no charge for us to push down this update to your ADC devices.

If you have any questions about the new Alarm.com Firmware Update, or if you need us to push down an update for you, please email us at support@alarmgrid.com. Remember that our support hours are from 9am to 8pm ET M-F. We look forward to hearing from you and making sure that your Alarm.com devices are properly updated!

Tags: , , , , , , , , , , , , , , , , ,

Comments