Home Security Blog

Posted By

Hi DIYers! We have learned about a super convenient feature for Total Connect 2.0. You can now set smart scenes on Total Connect 2.0 to have your Lyric Arm or Disarm automatically based on a set schedule. This was previously only possible for Alarm.com users. TC2 users rejoice!

Honeywell lyric controller encrypted wireless security system

This feature is extremely convenient if you want to have your Resideo Lyric Panel Arm or Disarm at a set time on a regular basis. You can select both the day(s) of the week and the time of the day when the Arm or Disarm will occur. If your system is already Armed or Disarmed accordingly, then no change will occur. Otherwise, the scene will go through automatically, with no code being required.

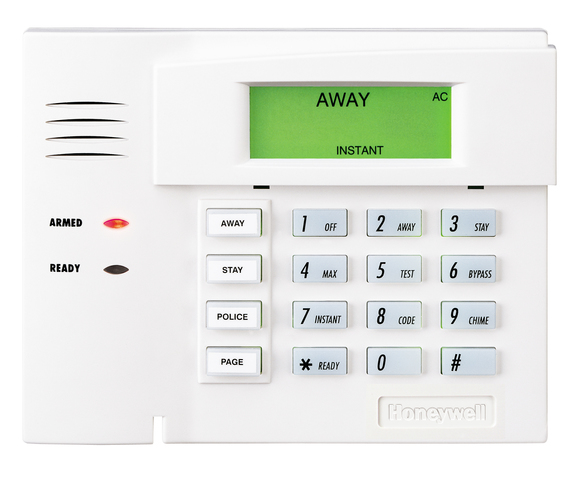
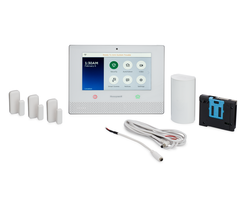
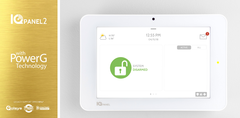
Please note that this feature is only available for the Lyric Controller. It will not work with other Honeywell Panels that can use Total Connect 2.0 like the VISTA Panels or the LYNX Touch Panels. If you want to use this feature with TC2, then you will need to upgrade to the Lyric System. This is a great system anyway with its increased zone support and HomeKit compatibility. You might also consider going with an Alarm.com System, as the Alarm.com platform supports this feature for all their compatible panels. A great option is the 345 MHz version of the IQ Panel 2 Plus, which can support the same great 5800 Series Sensors that are commonly used with LYNX and VISTA Panels.

Users who follow a set routine every day should find that this feature is extremely useful. For example, if you go to work at the same time Monday thru Friday, you can set the system to Arm automatically shortly after the time you leave every day. You won't have to remember to Arm your system before you leave. Likewise, you can also have your system automatically Disarm a little before you normally return home. No more racing to beat your system's Entry Delay! Another example is if your kids leave the house after you do, and they sometimes forget to arm the system, you can set an arming schedule to run just after they are set to leave to be sure the system arms.

And if you ever want to make sure that your system Armed or Disarmed like it was supposed to, you can always check the Total Connect 2.0 Mobile App on your Android or iOS device. The app is also a great way to Arm and Disarm your system, and you can use it from pretty much anywhere. Another option available to make sure the system is Armed or Disarmed is to create Open (Disarm) and Close (Arm) notifications that will be sent via text, email, or push notification any time the system is armed or disarmed. We are sure that many of you will love automatic Arming and Disarming for your Lyric from Total Connect 2.0.

For our example, we will show you how to set up automatic Arming and Disarming from a web browser. But you should also have no problem doing this from the mobile app. To get started, login to your TC2 account on the website. Once you have logged-in, click "Scenes" on the left side of the page.


Then click the "Add Scene" button at the top of the screen.


Then give a name for your scene. We recommend choosing something easy to remember, like "Automatic Arm Away" or "Automatic Disarm". In our example, we just went with "Test Arm Stay". Then press the blue Continue button in the lower-right corner. When asked what you want the scene to do, choose Security. Then choose the status you want to put your system in when the scene activates. In our example, we choose "Arm Stay". Then press the blue Continue button in the lower-right corner.


Assuming that you only want the scene to Arm or Disarm your system, press the blue Continue button again. You will then be able to set the schedule for the scene. Start by pressing the "On a recurring schedule" button near the top.


And now you will set the schedule. You can choose multiple days of the week and the time. You can also choose to have the scene occur at Sunrise and/or Sunset on the selected days. For our test example, we set the scene to occur Monday thru Friday at 11:00am. Press the blue Continue button after making your selection.


Finally, press the blue Save button in the lower-right corner to save your new scene!


If you ever want to run the scene manually, you can press the Play button next to the scene. Otherwise, in our example, the scene will run automatically at 11:00am M-F if the system is Disarmed at the time. Once the scene runs, the system will automatically go into Arm Stay mode. If the system is already Armed at 11:00am M-F, then nothing will happen. The picture below shows the play button if you wanted to run the scene manually.


Remember that you will need to create separate scenes if you want to have your Lyric System both Arm and Disarm automatically at separate times. Also keep in mind that you can only do this on TC2 if you have a Resideo Lyric Controller. If you don't have a Lyric yet, now is a great time to upgrade to this powerful wireless security system.

If you have any questions about this feature, please reach out to us! We are happy to provide technical support for Alarm Grid monitored customers. The best way to reach us is to email support@alarmgrid.com. If you would prefer to call us, you can reach us at (888) 818-7728 during our regular business hours of 9am to 8pm Monday thru Friday. We look forward to hearing from you!

Tags: , , , , ,

0 Comments


Posted By

Hi DIYers! It's time for our weekly video recap. We have a great batch of videos for you all today. Our technicians Joe, Jarrett, and Jorge will all help you learn how to use your alarm systems and get the most out of your equipment. Let's check out the latest videos from the team.

Alarm grid inside security stickers

Adding Wired Motion Detectors to the VISTA 20P

Joe teaches users how to add wired motion detection sensors to a Resideo VISTA 20P System. Hardwired motion sensors will use a 4-wire connection, with two (2) wires being used for the zone input, and two (2) wires being used for power. Most hardwired motion sensors use a Normally Closed (NC) wiring configuration, meaning that they are wired in Series. However, there are some Form C motion sensors that can use a Normally Open (NO) wiring configuration for wiring in parallel.


Troubleshooting a Low Battery Condition on a VISTA Panel

Joe explains how to troubleshoot a low battery condition on a Resideo VISTA Alarm Panel. You will need a voltmeter to do this. The first step is to check the AC voltage. You should expect to see about 18 to 19 volts on a 16.5VAC transformer. Next, check the Auxiliary Power. You should see a reading of 13 volts or higher. Finally, you should check the charging voltage. This should be the same as the auxiliary power voltage.


Adding a 2-Wire Smoke to the Qolsys Hardwire 16-F

Joe teaches users how to add 2-wire smoke detectors to a Qolsys Hardwire 16-F. Any 2-wire smoke detectors used with the Hardwire 16-F must be connected at Zone 16. You must wire the smoke detector(s), plus any other sensors used with the module, before enrolling the Hardwire 16-F with the panel. This lets the module know the proper configuration for each zone. The 2-wire smoke detectors will use Normally Open (NO) wiring. Most burglary devices use Normally Closed (NC) wiring. CO detectors cannot be used with the Hardwire 16-F. You will also need 4.7k resistors at each zone.


Turning Off "Arm Confirm" in a Qolsys IQ Panel 2 Plus

Jorge explains how you cannot turn off the Arm Confirm feature on a Qolsys IQ Panel 2 Plus System. The Arm Confirm feature has the panel produce a loud tone when the system is Armed Away using a key fob or wireless keypad. The purpose of this tone is to make sure that the user knows that they have set their system to Arm Away and that they should exit the premises. Unfortunately, you cannot turn off the Arm Confirm feature on the IQ Panel 2 Plus System because it does not exist.


Arm Away Vs. Arm Maximum

Jarrett discusses the difference between the Arm Away and Arm Maximum modes. When you Arm Maximum, you are telling your system to ignore all of the Entry Delay Periods on your system. This means that if you open an Entry/Exit Zone while the system is set to Arm Maximum, then an immediate alarm will occur. If you are outside the building, you will need to disarm using a key fob or an interactive platform like Total Connect 2.0 or Alarm.com.

Tags: , , , , ,

0 Comments


Posted By

Resideo has announced that there is an issue affecting certain Honeywell 6150 Keypads. This issue only affects 6150 Keypads manufactured within a certain time period. Any 6150 Keypad affected by this issue that was purchased through Alarm Grid should be returned to us for a free replacement.

Honeywell 6150 fixed english alarm keypad with function buttons

According to Resideo, this issue may affect Honeywell 6150 Keypads that have a date code starting with "C107". It is unknown if this issue affects all 6150 Keypad with this date code prefix or just certain models within the batch. This date code is relevant to any Honeywell 6150 Keypad manufactured between April 17, 2019 and July 19, 2019. For that reason, Resideo is instituting a shipping and manufacturing hold on the Honeywell 6150 Keypad, effective immediately.

Resideo states that the issue in question affects the panic functions of the keypad. When an affected keypad is programmed to enable its dual-button press panic functions, the device will not function as intended. Because of this defect, any affected 6150 Keypad will have its dual-button triggers for panics not work correctly. However, the associated single-button panic inputs should still work as intended, if they are enabled.

On the VISTA P-Series Systems, Zone 95 is, by default, not programmed. However, for Alarm Grid customers who choose to use this panic it is suggested that it be set as an audible Fire Panic. This audible fire panic is triggered by pressing both the [1] and [*] keys together, or by pressing and holding the [A] function key on the left side of the keypad. The [A] function key is the top of the four (4) function keys at the left side of the keypad.

On the VISTA-TURBO Panels, such as the Vista-128BPT or Vista-250BPT, this is programmed as Zone 995, and it is enabled by default. These panels differ slightly in the way that keypad panic keys are programmed. But in the end, the functionality is very similar. Once the panic key is programmed, pressing both the [1] and [*] keys together or pressing the [A] function key can initiate the panic.

On the VISTA P-Series Systems, Zone 99 is, by default, set as a silent police panic. This silent police panic is triggered by pressing both the [*] and [#] keys together, or by pressing and holding the [B] function key on the left side of the keypad. The [B] function key is the second of the four (4) function keys from the top. But on the VISTA-TURBO Panels, this is programmed as Zone 999. It is also set, by default, as a silent police panic. Once enabled, the functionality on the TURBO Panels is the same as on the VISTA P-Series Systems.

Lastly, Zone 96 is, by default, not enabled on the VISAT P-Series Systems. But it is enabled by default, as Zone 996, on the VISTA-TURBO Panels. On the VISTA P-Series Systems, this button is often programmed as an auxiliary medical panic. On the VISTA-TURBO Panels, it is configured as an auxiliary medical panic by default. When this panic is programmed, it is triggered by pressing both the [3] and [#] keys together, or by pressing and holding the [C] function key on the left side of the keypad. The [C] function key is the third of the four (4) function keys when moving from top to bottom.

Only the Zone 95/Zone 995 or [1] and [*], and Zone 96/Zone 996 or [3] and [#] panic options are affected!

It is possible that your system has none, some, or all of these inputs programmed. This depends on your programming settings. But because of this defect, even if you have these inputs programmed, they may not work as intended. It is strongly recommended that you have the single-button panics enabled - those being the [A], [B], and [C] function keys - as there do not appear to be any issues with these single-button inputs. We are happy to help any Alarm Grid monitored customer program these buttons if necessary.

In addition to the Honeywell 6150, the following other keypads are also affected by this same issue:

  • 6150PL2
  • 6150ADT
  • V15PACK
  • V20PACK
  • V20PTISPKNA

If you need to confirm the manufacture date on your 6150 Keypad, then there is a way to do this. However, it requires opening up the keypad. There are two (2) tabs at the bottom of the keypad that you will need to press in. We recommend using a small screwdriver to do this. Once the tabs have been pressed in, you will be able to separate the keypad from the back cover. Then on the circuit board, there will be a sticker with the date code printed in black. This date code consist of one (1) letter, followed by three (3) digits.

Resideo uses a unique process to decipher the date code. The letter C indicates that the 6150 was manufactured in 2019. If the code starts with any letter other than C, then your 6150 Keypad is unaffected. Then the three digit code corresponds to the day of the year. April 17th is the 107th day of the year. July 19th is the 200th day of the year. With that in mind if the date code reads any value between C107 and C200, then the 6150 may be affected.

The picture below shows the date code on a Honeywell 5828V Keypad. This keypad follows the same date code format as the 6150. Note that this date code reads B249, so it would NOT be affected by this problem.


If the product is still in the box, then you can alternatively check the date code on the sticker on the outside of the box. This can be see in the following images below. Note that the date code in these images reads C192, so this keypad may be affected.


Remember, if the date code on your Honeywell 6150 falls between C107 and C200, then it MAY be affected. Just because it falls within this range does not mean for sure that it is affected. The only way to determine for certain is to test the keypad. If you have any of the [1 + *], [* + #], or [3 + #] functions programmed, then you should test them to make sure they work properly. Remember to place your system on test mode before doing this to prevent false alarms! If you get the proper panic response, then you are fine. If not, then you must return the keypad to us if you purchased it from Alarm Grid.

Every customer who returns an affected 6150 Keypad will receive a complimentary Honeywell 6150RF Keypad as a replacement. The 6150RF is the exact same keypad as the 6150, except that it includes a built-in 345 MHz wireless transceiver for supporting Honeywell 5800 Series Wireless Sensors. The 6150RF is basically an "upgraded" 6150, so you're really getting an even better keypad. Please note that this offer is only valid thru the end of the month. That is August 31, 2019.

If you are in the market for a new keypad for a Resideo VISTA System, then now is a great time to get a Honeywell 6160 Keypad. The 6160 is an even BETTER keypad than the 6150. This is because the Honeywell 6160 is an Alphanumeric Keypad, while the 6150 is a Fixed English Keypad. You need an Alphanumeric Keypad if you want to make menu-level programming changes. With a Fixed English Keypad like the 6150, you are operating blindly when you enter programming. For that reason, trying to program a system with a 6150 is strongly discouraged. With that in mind, the 6160 is the better keypad in every aspect. We actually offer the 6160 for a lower price than the 6150 ($52.99 vs $54.99) because we want our customers to have a keypad that they can use to confidently program their systems.

If you are indeed affected by this issue, then we urge you to contact us as soon as you can. The best way to reach us is to email support@alarmgrid.com. We will check your email at our earliest convenience and respond back as soon as possible. If you would prefer to call us, we can be reached at (888) 818-7728 during our regular business hours of 9am to 8pm EST M-F.

We sincerely apologize to anyone who may have been affected by this issue. But we promise to make things right and make sure that you have a keypad that works with all its functions as intended. Please reach out to us if you have any questions. As always, thank you for being a valued Alarm Grid customer.

Tags: , , , ,

0 Comments


Posted By

We have learned that some spam blockers have been incorrectly marking one of the Criticom Monitoring Services outbound phone numbers as "spam". This is a serious issue, as it is very important for all our customers with central station service to be able to receive incoming calls from CMS.

CMS Logo

If you are not aware, Criticom Monitoring Services (CMS) is the official monitoring partner of Alarm Grid. Anyone with an alarm monitoring plan from Alarm Grid who receives central monitoring service has their security system connected with CMS. If you have central station service from us, then it is crucial that you are always able to reliably receive incoming phone calls from CMS.

The phone number in question that has been being incorrectly labeled as "spam" is (800) 432-1429. This is not a spam number. This is not a telemarketer. This is Criticom trying to contact you with important information regarding your home or business security system. If you ever see this number calling in, you should make sure to answer. There are also other phone numbers that Criticom may use to call you. But, to our knowledge, this is the only one we have been seeing marked as "spam".

For a reference, below are all of the numbers that CMS may use to try and contact you:

  • Longwood, FL: (800) 432-1429
  • Manasquan, NJ: (800) 631-2299
  • Cypress, CA: (714) 373-7000, (800) 468-4640, and (800) 482-9800

We strongly recommend that you add ALL of these numbers to the contacts list on your phone. That way, if CMS ever contacts you, then you will know that the call is from them. Remember, you may not always receive calls from the CMS monitoring center closest to you. If one office is ever down or unavailable, calls will be re-routed to one of the other two (2) monitoring centers. This redundancy ensures that CMS is always able to receive incoming alarm signals. This reliability is a big reason why we have chosen CMS as our monitoring partner.

If you use a spam blocker on your phone, that is fine. But you must make sure to "whitelist" this number so that calls can come through successfully. To do this, you should contact your phone service provider and make sure that this number is not blocked. If you use an app on your phone to block numbers, use that application to whitelist the number. We have found that this issue mostly affects T-Mobile users who have the new Name ID App, but users from other carriers who have spam-blocking apps may be affected as well.

Remember, CMS will call you whenever there is an urgent event regarding your security system. This can include a burglary or life safety alarm. If an alarm occurs on your system when it is not warranted, you will need to answer the incoming call from CMS and provide your false alarm password. Otherwise, the trained operator will follow the instructed action listed on your account. This usually involves dispatching the local authorities. If the incoming call is blocked as "spam", then you won't be able to answer the call, and you may receive unnecessary emergency dispatch. This can result in a major inconvenience for your local authorities and heavy fines for you. At Alarm Grid, we always do our part to prevent false alarms. You must do your part as well. Always make sure that you can receive calls from CMS.

If you have any questions or concerns about this issue, please do not hesitate to reach out to us. One of our top priorities is making sure that you can reliably communicate with our monitoring station partner. The best way to contact us is to email support@alarmgrid.com. You are also welcome to call us at (888) 818-7728 during our normal business hours of 9am to 8pm EST M-F.

Remember, our team is here to make sure that you always feel confident about the operation of your alarm system and the response of our central station partner. Thank you for being a valued Alarm Grid customer, and we look forward to hearing from you.

Tags: ,

0 Comments


Posted By

Hi DIYers! We have a simple tip today that will be helpful for anyone looking to buy a new home security system. That tip is that the cellular communicator used with your panel is different than the one used with your phone. This is very important to keep in mind when buying a system.

Honeywell lyricpk lte a wireless security system w slash at and

As you probably know, cellular communication is not the only communication path available for security systems. There are also internet (IP) communicators and even traditional telephone dialers. But cellular communication is by far the most reliable. Unlike other communication paths, cellular service almost never goes down or becomes unavailable. Modern cellular communication has also improved tremendously through the years, and it is now nearly as fast as IP communication. For that reason, we recommend that everyone uses cellular communication with their alarm systems.

You may be surprised to learn that many people think they have to get a cellular communicator for their alarm system that uses the same service provider as their cell phone. That is false. You can certainly use a different service provider with your security system than what you use with your phone. There is nothing wrong with using the same service provider, but this is by no means required.

Your phone and your alarm system are completely separate devices. They are not related in any way. They have separate billing cycles, and the service for one will not affect the other. Of course, you may receive text alerts regarding system activity. And if you have a system like the Qolsys IQ Panel 2 Plus, you may use Bluetooth disarming with your phone. But the fact remains that your system and your smartphone are totally separate.

Qolsys iq panel 2 plus at and t lte with powerg s line and legac

The reason we bring this up is because we have customers all the time who think that they must have the same service provider for their phone as they do their alarm system. They don't. This is a complete fallacy. Your service provider for your phone should have very little impact on which service provider you choose for your system. For example, if you have an AT&T Phone, then there's nothing wrong with choosing a Verizon Communicator for your system, or vice-versa.

Now, there's nothing wrong with considering how the service for your smartphone fares in your home when you are choosing service for your alarm system. For instance, if you think, "Gee, I have an AT&T Phone, and my service works excellent while I am at home!", then by all means, go with an AT&T Communicator for your system. It's just important to understand that this isn't mandatory.

You should also understand that a cell phone and an alarm panel using cellular communication operate in a very similar manner. Both will send out signals across a cellular network. Both have a SIM Card. The only difference is that one communicator is inside a phone, while the other is inside an alarm panel. If you have a phone with a service provider that provides strong service in your home, then it's fair to expect that the same cellular network can also provide strong service for your alarm system.

But if you find that your phone does not receive strong cellular signal strength while you are at home, then please, choose a different service provider for your alarm system! With your phone, you might sacrifice signal strength at home because the network provides better signal strength while you are at work or while you are in town. But your alarm system isn't going anywhere. You should choose your alarm system's cellular service provider based solely on how it performs at the location where it is used.

You should also realize that the costs for cellular alarm monitoring will remain the same, regardless of which service provider you choose. This is different for your phone, where you may shop around for different rates. For an alarm system it's a little bit different. You do not pay the cellular service provider directly. Instead, you pay your alarm monitoring company all the fees for your monitoring service. Your monitoring company will then handle any of the fees for cellular service. No matter which cellular provider you go with, your monthly cost will remain the same. It is the same cost for AT&T, Verizon, or any other cellular service provider you might use.

Cost and the service provider for your phone should not be factors when choosing a cellular service provider for your alarm system. The only factor you should consider is how well that service provider fares in the location of the system. You should check coverage maps and select the service provider that works best in that area. Whether that service provider is the same as the one you use for your phone should not make any difference.

2gig ltev1 a gc2 alarm dot com verizon lte cellular communicator

Remember, to use any cellular communicator, you will need a monitoring plan that includes cellular service. We recommend choosing one of our Gold or Platinum Level Plans so that you can take full advantage of the great features that Alarm.com and Total Connect 2.0 have to offer. More information about these plans is available on our alarm monitoring page. If you don't need the convenience of interactive monitoring and smart home automation, we also offer a Cellular-Only Plan that is less expensive and doesn't include access to Alarm.com or Total Connect 2. This plan is perfect for users who want reliable central station monitoring service, and nothing more.

If you have any questions about cellular communicators or alarm monitoring in general, we encourage you to reach out to us. Our planning department is here to help any potential customer make the best decisions for their needs. The best way to reach us is to email support@alarmgrid.com. We will check your email at our earliest convenience and respond back as soon as possible. You may also call us at (888) 818-7728 during our regular business hours of 9am to 8pm EST M-F. We look forward to hearing from you and helping you with all your home security needs.

Tags: , , , , , , ,

0 Comments


Posted By

Hi DIYers! Are you still looking for the perfect smart lock? We have some brand-new options available with the Yale YRL236 and Yale YRL256. Both options utilize Z-Wave Plus connectivity and make great additions to your growing smart home network. They are perfect for use with TC2 and ADC.

When it comes to choosing a Z-Wave Plus Smart Lock, you want to make sure that the device you choose is easy to use and does its job of keeping your home safe. With a proven company like Yale from Assa Abbloy, you can rely on these smart locks with complete and total confidence. It has never been this easy to protect your home.

The Assure Lever Locks from Yale feature aesthetically pleasing designs that fit-in nicely with any home decor. Both the YRL236 and YRL256 models come in three (3) different finish options. These are Polished Brass, Satin Nickel, and Oil Rubbed Bronze. We know that the stylish consumer will find the design that matches their home the best. After all, we know that appearance matters too.

There is one major difference between the YRL236 and YRL256 models. The YRL236 includes a more traditional acrylic push-button keypad, while the YRL256 uses an electronic touchscreen. The acrylic keys of the YRL236 are durable and specifically designed to not wear-off with repeated use. The touchscreen keypad of the YRL256 is state-of-the-art and perfect for users who want a more advanced experience.

Whether you choose the tried and true push-button keypad of the YRL236 or the futuristic touchscreen keypad of the YRL256, you can be sure that you are getting an exceptional smart device. Both options feature back-lighting, which means that you will have no trouble using your door lock at night when it's dark outside. Other built-in features include auto re-locking, privacy mode, and tamper alarms.

The YRL236 and YRL256 both pair nicely with any Z-Wave controller. We recommend using a Z-Wave Plus controller for optimal wireless range and battery life. Both of these Yale Smart Locks are excellent devices for your smart home. You can get both the YRL236 and the YRL256, plus many other smart home devices, right from the Alarm Grid website. We also encourage you to check out our alarm monitoring page so that you can learn more about accessing Total Connect 2.0 and Alarm.com.

If you have any questions about the YRL236, the YRL256, or any of our smart home products, please reach out to us. The best and most efficient way to ask us questions is to email support@alarmgrid.com. You may also call us at (888) 818-7728 during our regular business hours of 9am to 8pm EST M-F. We look forward to answering all your smart home questions!

Tags: , , , , , ,

0 Comments


Posted By

Hi DIYers! We are thrilled to announce that the 2GIG GC3e is now available for purchase from Alarm Grid. Just a couple weeks ago we blogged about the new 2GIG GC2e System. Well now the other new wireless encrypted system from 2GIG is available as well. This is truly an exciting day!


The 2GIG GC3e Wireless Encrypted Security System is an upgrade over the existing 2GIG GC3 System in virtually every conceivable aspect. If you are already used to the original GC3, then you will have no problem transitioning to the GC3e. The system features a similar design, and it provides a familiar layout and user interface (UI) to help new users feel comfortable. But with its refreshed look, the GC3e fits in even better with most decor. End users are sure to love the sleeker design of this advanced new panel. Plus the 7" capacitive touchscreen looks absolutely beautiful. You can even set up a slideshow feature so that you and your guests can enjoy some pleasant pictures!

Of course, the GC3e is more than just a pretty face. It also provides support for the upcoming 2GIG Encrypted Sensors. Along with the GC2e, this panel will be the first-ever release from 2GIG with support for these devices. Wireless encryption is huge, as it makes these sensors virtually impossible for others to hack or takeover. This is crucial for anyone who wants to achieve the highest level of security possible for their home or business. Although the 2GIG Encrypted Sensor Lineup is still in development, you can currently use the existing 2GIG 345 MHz Sensors and the Honeywell 5800 Series Sensors with the GC3e. That's right, the system is backwards compatible! Up to 100 wireless zones can be added to the 2GIG GC3e.

The 2GIG Smart Areas feature has also returned for the GC3e. This allows users to set up four (4) distinct partitions. If you aren't familiar with partitioning, it refers to the ability to section-off an alarm system into multiple sections. You can control each section individually, without having to bypass a large number of zones. For example, you might arm one partition, while leaving the rest of the system disabled so that people can continue to move throughout those areas. 2GIG refers to these partitions as "Smart Areas", and each one can have its own access codes and zones. This feature is perfect for use in offices, multi-family homes, guest homes, and rental properties. And don't worry, you can still bypass individual zones within each partition when needed.

Z-Wave Plus functionality comes built right into the 2GIG GC3e. Its 500-Series Chipset lets you take full advantage of all of the great features that come with Z-Wave Plus. This includes extended wireless range and enhanced battery life with Z-Wave Plus devices. You can still use classic Z-Wave devices with the system as well. Just keep in mind that you will need to use Z-Wave Plus peripherals if you want maximum battery life and range. And by getting the system connected with Alarm.com, you will be able to control your smart home devices remotely from your Android or iOS device. You can also create smart scenes to have your Z-Wave devices activate automatically based on a schedule or with certain system events.

In order to access Alarm.com and receive alarm monitoring service, you will need two things. The first is an Alarm.com Cellular Communicator. You can choose from an AT&T LTE Communicator (coming soon!) and a Verizon LTE Communicator (available now). These modules are super easy to install, and they will provide your GC3e with the most reliable monitoring service available. Making things even better is that the system already comes with a built-in WIFI card. Once you add a cellular communicator, the GC3e will become dual-path ready. All you will need then is a monitoring plan. You will need a Gold or Platinum Level Plan from Alarm Grid to unlock the system's full potential. More information can be found on our alarm monitoring page.

In addition to its 100 wireless zones, the 2GIG GC3e supports two (2) on-board wired zones, up to 32 keyfob devices, up to eight (8) keypads (choose from 2GIG SP1, 2GIG SP2, and 2GIG PAD1-345), and up to 100 unique user codes. The GC3e receives power from a 1.7A 14VDC transformer that comes included. However, you will still need to provide your own wiring. We recommend using a Honeywell LT-Cable. Firmware updates for the GC3e can be pushed down over-the-air (OTA) from Alarm.com or applied locally using a USB drive.

If you have any questions about the 2GIG GC3e, you can always email us at support@alarmgrid.com. We will check your email at our earliest convenience and reply back as soon as possible. We look forward to hearing from you and helping you find the perfect alarm system for your home or business!

Tags: , , , , , , , , , , ,

0 Comments


Posted By

Hi DIYers! It's time for another Alarm Grid video recap! We have videos from all the usual team members. Those team members are Jarrett, Joe, and Jorge, and they're all here to help you learn how to use your security system. Let's check out the latest videos from the Alarm Grid video team!

Troubleshooting 2-Wire Smokes on the Qolsys Hardwire 16-F

Joe explains the best practices for troubleshooting 2-wire smoke detectors when they are used with a Qolsys Hardwire 16-F Wired to Wireless Converter. The Qolsys Hardwire 16-F supports 2-wire smoke detectors when they are wired at Zone 16. This wired to wireless converter can work with any 319.5 MHz wireless alarm system, including the 319.5 MHz version of the Qolsys IQ Panel 2 Plus. Remember that you will need to wire the 2-wire smoke detectors to Zone 16 before enrolling the Hardwire 16-F with the system. You must also use a 4.7k end of line resistor.


Testing the Honeywell 5808W3 Smoke Detector on the Qolsys IQ Panel 2 Plus

Jarrett rocks some protective ear gear while he explains how to test the Honeywell 5808W3 Smoke and Heat Detector on the 345 MHz version of the Qolsys IQ Panel 2 Plus. The Honeywell 5808W3 Smoke and Heat Detector has a recessed test button that you can test using a thin object like a screwdriver. If you want to test the actual functionality of the sensor, you can use a hair dryer for the heat detection function and canned smoke for the smoke detection function. Always remember to put your system on test mode before testing this sensor!


Using Power over Ethernet (PoE) on Alarm.com Cameras

Joe discusses how you can use Power over Ethernet (PoE) with certain Alarm.com Cameras. Power over Ethernet means that the camera will receive both power and data from the same ethernet cable. This means that you will not need to connect a power adapter to the camera. You can just use the ethernet cable. This can help reduce installation time and allow you to utilize a more flexible wiring configuration. In order to complete a PoE setup, you may need a PoE injector like the Alarm.com ADC-POE-INJ. This will depend on the network switch or router being used.


Using the Qolsys IQ Siren with a Honeywell LYNX Touch Panel

Jorge explains how to use the Qolsys IQ Siren with a LYNX Touch System. The Qolsys IQ Siren is a Z-Wave Siren that communicates with a system wirelessly. To pair this siren with a LYNX Touch System, the panel must have an L5100-ZWAVE Module installed. Since these panels will see the IQ Siren as a light switch, you must create special scenes for it to work properly. You need a scene to activate the siren during intrusion alarms, a scene to activate the siren during fire alarms, and a scene to stop the siren when an alarm is cleared.


Zone Status Indications on the Qolsys IQ Panel 2 Plus

Jarrett discusses the various zone status symbols that will appear next to zones on the main screen of the Qolsys IQ Panel 2 Plus. The different statuses that can be displayed include Open, Closed, Active, Idle, Unreachable, and Tampered. The Open and Closed statuses are for door and window contact sensors. The Active and Idle statuses are for motion sensors, glass break sensors, environmental sensors, and life-safety sensors. The Unreachable status refers to a sensor experiencing loss of RF supervision. The Tampered status means that someone has activated the tamper cover for the sensor.

Tags: , , , , , , ,

0 Comments


Posted By

Hi DIYers! Are you looking for a reliable medical alert button for your elderly or mobility-challenged loved one? We have an answer with the Qolsys IQ Fall Pendant. This device will let your loved one live as independently as possible, while still being able to call for help when needed.


We know that having an elderly or mobility-challenged family member or loved one can present a tough dilemma. You want to respect their independence and privacy, but you also want to make sure that they can get help if you're not around. Medical alert buttons represent a good answer to this problem. Your loved one can continue to live on their own, but you will both know that help is available with the press of a button. We are sure that many users can get exactly the results they want with the IQ Fall Pendant.

The IQ Fall Pendant from Qolsys, which is also known as the QS1314-840, includes an attached 18-inch lanyard that is conveniently worn around the neck. Your family member or loved one can adjust the length of this lanyard so that it feels as comfortable as possible. Another convenience is the IP 45 water-resistant rating of the IQ Fall Pendant. This means that it can be safely brought in the bath or shower. Just make sure that it is not fully submerged for an extended period of time.

There are two (2) ways to activate the Qolsys IQ Fall Pendant. The standard method is to press and hold the center button. This button must be held down for a full half-second in order for it to activate. But the device also offers built-in fall detection using its integrated accelerometer. This way, if your family member or loved one experiences a fall and is unable to press the button, the device will still activate and alert the panel because of the rapid acceleration of the fall. As a safety precaution, you should instruct your loved one to always press and hold the center button after a fall. This is to make absolutely sure that the device activates when needed.

The IQ Fall Pendant is a 319.5 MHz medical alert button that was specifically created with the 319.5 MHz version of the Qolsys IQ Panel 2 Plus in mind. But you can really use it with any 319.5 MHz alarm system. This includes the original Qolsys IQ Panel 2 and the Interlogix Alarm Panels. If you have a Resideo Lyric Security Panel or a 2GIG Panel, then you might consider using the 2GIG F1-345, which also offers automatic fall detection. If you have a different 345 MHz system, such as Honeywell LYNX Touch Panel, then the Honeywell 5802WXT is a strong option. Although the 5802WXT doesn't offer fall detection, it is still a reliable medical alert button. And if you have a PowerG-compatible system, then the DSC PG9938 is a strong choice as well.

Regardless of which sensor you choose, you will want to make sure that you have central station monitoring service to accompany the device. This is the only way to ensure that your loved one receives the help that they need during alarm events. A central station monitoring plan will connect your alarm system with a round-the-clock, 24/7 monitoring station for emergency help whenever an alarm occurs. If your loved one triggers an auxiliary medical alarm by activating their help button, a trained dispatcher will know to send help immediately. You can learn more about alarm monitoring by checking our monitoring page.

If you have any questions about the Qolsys IQ Fall Pendant or any of our wireless medical alert buttons, please reach out to us! The best way to contact us for questions is to email support@alarmgrid.com. We make sure to check our email often, and we will reply back to your email at our earliest convenience. Another option is to call us at (888) 818-7728 during our regular business hours of 9am to 8pm EST M-F. Our planning department will be happy to help you determine the best medical alert button for your needs. And remember that we offer free technical support for all our monitored customers. We look forward to hearing from you!

Tags: , , , , , , , ,

0 Comments


Posted By

Last night, July 24th, 2019, Alarm.com was experiencing server issues. You may have noticed problems with signaling and with your interactive account. We would like to let all of our Alarm.com customers know that these issues have been resolved. The service should now be working properly.

All Alarm.com users should now find that they can successfully access the platform and that their systems can report to Alarm.com without issue. We apologize for any inconvenience that these problems with Alarm.com may have caused for you last night. But we are now happy to report that these issues should now be resolved

If you are an Alarm Grid customer and you are still experiencing any issues with your Alarm.com, we urge you to email us at support@alarmgrid.com immediately. We will check your email at our earliest convenience and work to get your service working as soon as possible. Again, we apologize for any inconvenience you may have experienced last night, and remember that our team is here to help.

Tags: , ,

0 Comments