Alarm.com Posts

Posted By

Hi DIYers! Today, we are promoting a new add-on package available for Alarm.com users. Alarm Grid is now proud to offer the Alarm.com Wellness Platform for customers receiving service from Alarm.com. This robust add-on is perfect for anyone with an elderly or mobility challenged loved one.


If you have an elderly, disabled, or mobility challenged loved one, then you are likely aware of the challenges involved. On one hand, you want to respect their privacy and allow them to live as independently as possible. But you also want to make sure that they are kept safe and that they can get help if needed. We have seen many offerings through the years that help users accomplish this goal. But the Alarm.com Wellness Platform might the most complete yet.

Just last week, we talked about some of the new Alarm.com wellness sensors. It seems Alarm.com is really pushing this market with their all-new wellness platform. This is more than just an emergency alert button or an occupancy sensor. This is an entire platform and user interface (UI) designed to monitor your loved one's activity and let you know about any unusual occurrences. This is yet another great way to take advantage of your Alarm.com Security System.

The Alarm.com Wellness Platform provides you with many great features that are perfect for monitoring your loved one. You can receive text and/or email alerts from the platform so that you are kept informed about any important activity. Below are just some of the ways you can use the platform:

  • Establish patterns of your loved one's usual activity, and receive alerts if activity occurs at an unusual time.
  • Make sure your loved one is active and moving around like normal.
  • Receive alerts regarding any strange or suspicious wandering or activity at odd hours.
  • Set automated security and smart home functions to make your loved one's life easier.
  • Integrate with personal emergency response pendants to know if your loved one needs help.
  • Monitor your loved one's activity, including how long they stay in bed, remain seated, or spend time outside.
  • Create an organized method for keeping track of caregivers and knowing when they come and go.

Once you have your Alarm.com account enabled for the wellness platform, you can start creating specific wellness alerts regarding the activity you want to monitor. This will allow you to know that your loved one is alright, while still maintaining their independence and privacy. Alarm.com has also released a variety of products designed to be used with the platform. At this time, we are offering the following Alarm.com Wellness Products:

The Alarm.com Wellness Platform is also great for pairing with fall pendants. These pendants go above and beyond the typical medical alert button. These devices feature built-in accelerometers that will trigger an emergency medical response upon sensing a fall. This way, your loved one will still receive help even if they fall and are unable to press the button themselves. We currently have two (2) fall pendants available:

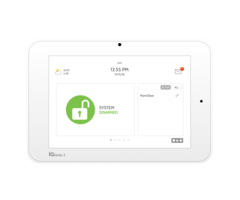
We also want to give a special shout-out to the Qolsys IQ Panel 2 Plus for its innovations in the wellness arena. As part of Firmware Version 2.4.0, the panel offers a Wellness Menu that allows for nurses and/or caregivers to check-in/out as needed. You can easily integrate this feature with the Alarm.com Wellness Platform as well. This Wellness Menu also offers a big auxiliary panic button in case of an emergency. You can enable the menu from within Installer Settings.


In order to use the Alarm.com Wellness Platform, you must first have a monitoring plan that includes Alarm.com service. If you are monitored with Alarm Grid, you will need a Gold or Platinum Level Plan (Self or Full). More information is available on our monitoring page. From there, you will also need your monitoring company to enable the Wellness Platform add-on package on your account. Please note that enabling this service may result in an increase to your monthly monitoring fee.

If you are an Alarm Grid customer and you are looking to add this service to your account, we recommend emailing us at support@alarmgrid.com for more information. You may also email us if you have any questions about this platform. Remember that our support hours are from 9am to 8pm EST M-F. Keep that in mind if you email us outside of our usual business hours. We look forward to hearing from you and answering your questions about the ADC Wellness Platform!

Tags: , , , , , , , , , , , , , ,

Comments


Posted By

Hi DIYers! We are happy to announce that we have some new wellness sensors available from Alarm.com. These are great for use with elderly or mobility challenged loved ones. There is an Alarm.com Bed Sensor and an Alarm.com Chair Sensor available on our website. Both operate at 319.5 MHz.


Having peace of mind in knowing that your elderly or mobility challenged loved one is alright can be very important. That is why Alarm.com created these new wellness sensors. They both work in a similar manner. The bed sensor will let you know when your loved one gets in and out of bed. The chair sensor will let you know when they sit down and get up from their usual chair. Both will activate upon sensing 50+ pounds of weight.

These wellness sensors are known as "occupancy sensors". We don't talk about these sensors fairly often, but they are relatively easy to understand. When your loved one is sitting down or in bed, the sensor will be in an "occupied" state. And when the bed or chair is empty, the sensor will enter a "vacant" state. Your system will announce whenever there is a change in status for the sensor.

But the real beauty in these sensors comes in their ability to be used with the Alarm.com platform. You can get text and/or email alerts regarding any sensor activity. It is also possible to configure notifications so that you only get alerts during certain times of day. This way you can set a schedule based around your loved one's usual activity.

The bed sensor is quite useful when paired with the "Sensor Left Open" notification. You might set up a notification to be sent if your loved one is out of bed for more than an hour. And you can also set a time frame so that notifications are only sent during periods when they are almost certainly in bed, say between midnight and 6am. That way, if your loved one gets out of bed in the middle of the night and suffers a fall and is unable to make it back, you will get an alert.

Even better is the new Alarm.com Wellness Platform that allows for even more detailed notifications. You might set up alerts to be sent if your loved one never gets out of bed in the morning, or if they have remained seated for an unusually long period of time. We hope to show-off the feature in greater detail sometime soon. For now, just be aware that it is available upon request for Alarm.com users. Remember, Alarm Grid customers need a Gold Plan or higher to use ADC.

At this time, we are only offering 319.5 MHz versions of the bed and chair sensors. You will need a compatible 319.5 MHz system to use them. Examples include the Qolsys IQ Panel 2 Plus w/ 319.5 MHz Daughtercard and the Interlogix Simon Alarm Panels. For the IQ2, we recommend using Sensor Group 25 - Local Safety Sensor and an Occupancy Sensor Type. For an Interlogix Panel, you should use either Sensor Group 40 (chime) or 27 (no chime).

We expect other wireless frequencies to be available sometime in the near future. We will let you know once we have them available. If you have any questions about these new sensors or the new Alarm.com Wellness Platform, please reach out to us! The best way to contact us is to email support@alarmgrid.com. We will check your email at our earliest convenience and reply back as soon as possible. We look forward to hearing from you!

Tags: , , , , , , ,

Comments


Posted By

Hi DIYers! Today, we wanted to talk about how you can use Lutron Caseta on Alarm.com. This is a great way to have your Alarm.com Security System and your smart lights on one convenient platform. Controlling the devices in your home has never been this simple, and getting started is easy!

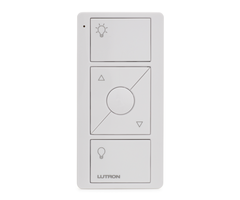
Lutron caseta p pkg1p wh lamp dimmer remote kit

As you may know, the Alarm.com integration for Lutron was made possible with the release of the PRO-model for the Lutron Caseta Smart Bridge. At this time, Alarm Grid offers the Lutron Caseta Smart Bridge PRO 2 for integrating Lutron Lights with Alarm.com. You might also know the Smart Bridge PRO 2 as the Lutron L-BDGPRO2-WH. Both names refer to the same device. With it, you can integrate all you Lutron accessories with Alarm.com.

The Lutron Caseta Smart Bridge PRO 2 serves as the central hub for your Lutron Smart Lighting setup. All your Lutron devices will communicate with this hub. This includes any Lamp Dimmer Modules, In-Wall Switches, In-Wall Dimmers, and Pico Remotes. Setup is extremely straightforward. Just connect the smart bridge to your IP router using an ethernet cable. Then pair your Lutron devices using the Lutron Mobile App. You can pair up to 50 Lutron devices.

Being able to control your Lutron Smart Lights with Alarm.com offers many advantages. For one, you can use the Alarm.com App for virtually all of your home automation control. This will allow you to control your lights from pretty much anywhere. You can also include all your Lutron Lighting devices into Alarm.com for automation operation. For example, you might have your lights turn on whenever you disarm your security system or unlock your Z-Wave door lock.

One other aspect we want to mention is the fact that both Alarm.com and Lutron are compatible with Sonos. If you didn't know, Sonos is highly respected in the smart audio community, and they have been making some outstanding sound systems and speakers throughout the years. Your can integrate your Sonos setup with Alarm.com to have music play automatically based on scenes. Lutron even offers a special audio Pico Remote specifically for use with Lutron!

Remember that you will need an alarm monitoring plan that includes access to Alarm.com to get started using the platform. Alarm Grid customers can choose from one of our Gold or Platinum Plans. More information is available on our monitoring page. From there, we will be happy to help you get started using Lutron Caseta on Alarm.com. If you have any questions, please email us at support@alarmgrid.com. We look forward to hearing from you!

Tags: , , , , ,

Comments


Posted By

Hi DIYers! It's time for our video recap again, this time covering September 9th thru 13th. We have five (5) new videos this time featuring Jarrett, Jorge, and myself. We have been getting some positive feedback regarding our videos lately, thank you so much! Let's check out the new ones!

Enrolling the 2GIG PAD1-345 Wireless Keypad to the 2GIG GC2

I show you how to enroll a 2GIG PAD1-345 with a 2GIG GC2 Security System. The 2GIG PAD1-345 is a relatively simple push-button keypad that is great for basic arming and disarming. You can keep it by a second entrance in your home or business so that you can arm and disarm as you come and go. It is also compatible with other 2GIG Systems. These include the 2GIG GC2e, the 2GIG GC3, and the 2GIG GC3e.


Using a WIFI Communicator with a Honeywell Alarm System

Jorge from Alarm Grid talks about using a WIFI communicator with a Honeywell System. This can be a great way to monitor your system if you have WIFI in your home or business. IP communication is known for being fast and relatively reliable for the most part. You just need to be wary of internet outages, as they will leave your system unmonitored. For that reason, you might want to get cellular backup for your system as well.


Using L7000 Alarm Panels Together

Team MVP Jorge explains how you cannot use two Honeywell L7000 Systems together. As a general rule, it is not possible to use multiple security systems together. You cannot pair one alarm control panel with another alarm control panel. This is true even if they are the same exact system. If you want a second controller for operating your alarm system, then you should get a keypad instead. A good keypad for the L7000 is the Honeywell 5828.


Self-Monitoring an Alarm.com Security System

Super Alarm Grid Hero Jarrett explains how you can self-monitor an Alarm.com Security System. The Alarm.com service is used with many security systems. This service will send you text and/or email notifications regarding any system activity. As a result, it is possible to use an Alarm.com System without it being connected with a central monitoring station. This practice is known as self-monitoring. Just remember, it will be up to you to contact the authorities if needed!


Defaulting a Resideo Lyric Controller

Wonder Boy Jarrett shows you how to default a Resideo Lyric Alarm System. Performing a factory default on a Lyric is normally only done if you are planning to get rid of the system, or as a last resort troubleshooting step. Doing this will reset the Installer Code back to 4112 if it was changed. All zones from the system will be cleared. It will reset the panel time. And all general system settings will be reset back to their default values.

Tags: , , , , , ,

Comments


Posted By

Hi DIYers! We made a post last week that briefly discussed Firmware Version 2.4.0 for the Qolsys IQ Panel 2 and IQ Panel 2 Plus. We want to take a closer look at some of the great new features offered from this latest firmware update. Now is certainly a great time to get an IQ Panel 2 Plus!

Qolsys iq panel 2 verizon 7 security panel w slash z wave ready

Panel Scene Control

New with Firmware Version 2.4.0 is the ability to activate Alarm.com Smart Scenes directly from the IQ Panel 2. Previously, this could only be done from the Alarm.com website or mobile app. This is much more convenient than having to control each Z-Wave device and the system individually. You can also control scenes from the IQ Remote Keypad if you have one.

To get started, you will first need to have at least one smart scene created on your Alarm.com account. Remember, you can create smart scenes from the Alarm.com website or mobile app. When making the scene, make sure to include all of the relevant devices. This can include Z-Wave devices programmed with the system, as well as the system itself.

You must also enable the feature for the panel. This can be done at the panel itself. Start from the main screen of the panel, and click the small grey bar at the top. Choose Settings > Advanced Settings > enter Installer Code (default 1111) > Installation > Installer Settings > Check the box next to Scenes Support (you'll need to scroll down). Then return to the main screen by clicking the home button at the bottom.


You will now be able to run Alarm.com Smart Scenes from the panel itself. From the main screen, click the Scene Control button in the bottom-left corner:


Then choose the scene you want to run. We made a scene called "Test Scene", which locks a Z-Wave Lock, sets our Z-Wave Thermostat to 70 degrees Fahrenheit, and sets the system to Arm Stay. We can confirm that the new panel scene feature works perfectly!


IQ Remote Camera Streaming

One new feature we are sure that many users are sure to be excited about is the ability to live-stream Alarm.com Cameras from the IQ Remote Touchscreen Keypad. We have previously discussed the ability to live-stream compatible ADC Cameras from the panel itself. But now you can do it from the IQ Remote. This is great for anyone with a surveillance camera setup who uses the IQ Remote as a secondary keypad for the system.

The same restrictions for streaming from an IQ Panel 2 apply when streaming from an IQ Remote. This means that only Alarm.com Cameras that support the panel streaming feature can be streamed from the IQ Remote. Additionally, it is only possible to stream video from the IQ Remote. You cannot stream audio like you can on the IQ Panel 2. For more information on setting up the camera streaming feature, please review this helpful FAQ. You must have the main panel streaming feature enabled to be able to stream from the IQ Remote.

You also have to enable panel streaming for the IQ Remote. You can do this from the main panel. Start from the main screen of the system. Click the small grey bar at the top. Choose Settings > Advanced Settings > enter Installer Code (default 1111) > Installation > Installer Settings > Check the box next to Stream Live Video Cameras to IQ Remote. Then return to the home screen by pressing the picture of the house at the bottom.


You will then be able to access the same menu option from the IQ Remote that you use on the main panel to stream video. Just swipe left or right on the IQ Remote home screen until you reach the option to choose a camera. You will have to excuse our desk clutter, but the image looks just as good on the IQ Remote as it does on the IQ Panel 2. Quite awesome!


Wellness & Check In/Out Screens

This feature is pretty unique. You can have the main screen of the IQ Panel 2 serve as an Auxiliary Panic button for triggering a medical alarm. This also allows you to set up a Check In/Out function for the system. This is great for anyone with a business who may want to monitor when employees come and go. The panel will take a picture whenever a user checks in or out. You can also get text and/or email alerts regarding this activity from Alarm.com. It really goes to show that Qolsys is working hard to make the IQ Panel 2 Plus the premier security system for small businesses!

There are a few things to keep in mind when using this feature. First is that Check-In & Check-Out can only be enabled if the Wellness Page is enabled. Second, enabling Check-In & Check-Out feature will also enable Settings Photos from the panel camera. This is so that a picture can be taken when a user checks in or out. Finally, you cannot enable the Wellness Page if Partitions are enabled for the system.

Again, the feature must be enabled from the Installer Settings Menu. From the main screen of the system, press the small grey bar at the top. Choose Settings > Advanced Settings > enter Installer Code (default 1111) > Installation > Installer Settings > Check the box by Wellness Page > Check the box by Check-In / Check-Out. You can then return to the home screen by clicking the picture of the house at the bottom.


When you return to the main screen, you will notice that you are at the Wellness Menu. This is where you can trigger an Auxiliary Medical Panic on the system. To get to the usual Arming/Disarming screen, just swipe left once.


Any Questions?

If you have any questions about Firmware Version 2.4.0 for the IQ Panel 2 Plus, please do not hesitate to reach out to us! Remember that we offer free online and phone support for our monitored customers. The best way to reach us is to email support@alarmgrid.com. We will check your email as soon as possible and reply back at our earliest convenience. You may also call us at (888) 818-7728 during our normal business hours of 9am to 8pm EST. We look forward to hearing from you and telling you all about the IQ Panel 2 Plus System!

Tags: , , , , , , , ,

Comments


Posted By

Hi DIYers! Welcome to another Alarm Grid Video Recap, this time covering videos published on September 5th & 6th. We have a big recap this time, with eight (8) new videos being published. Jarrett, Jorge, and Joe all make appearances. Let's get right into it and check out the new videos!

Finding the CRC on a Honeywell-Resideo Wireless Alarm System

Jarrett explains how to find the CRC code for a wireless Honeywell or Resideo System. The CRC code is a 4-digit code that is unique to the panel's IP communicator. Along with the 12-digit MAC address, the CRC code is very important when activating a system for alarm monitoring service. You should make sure to write the code down and save it in a safe place once you have obtained it. You may need this code again at a later time.


Explaining the 6F Message on an Alarm Keypad

Jorge talks about the "6F" message that can appear on a wired keypad for a Honeywell VISTA Alarm System. This code is actually "bF", which stands for "backup failure". The message indicates that there is a problem with the system's communicator. The "bF" message will only appear on a Fixed English Keypad, like a Honeywell 6150. An Alphanumeric Keypad like a Honeywell 6160 will instead display "Check 103, Long Rng Trbl", which means the same thing.


Arming-Disarming the Qolsys IQ Panel 2 From Your Phone

Jorge shows you how to arm and disarm a Qolsys IQ Panel 2 Plus System using your phone. This is done using the Alarm.com service. The Qolsys IQ Panel 2 Plus includes integrated LTE and WIFI communicators for connecting with Alarm.com. You just need to have the system activated with an alarm monitoring plan that includes access to the Alarm.com platform. You can then use the Alarm.com Mobile App on Android and iOS devices to arm and disarm remotely.


Replacing a Honeywell 1321 Transformer with a 1361 Transformer

Joe is back, and he answers the question of whether or not you can replace a Honeywell 1321 Transformer with a Honeywell 1361 Transformer. The answer is that you can always replace a 1321 with a 1361. However, you cannot always replace a 1361 with a 1321. This is because the 1361 supplies more power than the 1321. A setup that was using a Honeywell 1361 Transformer for power might not receive enough power from a 1321 Transformer used in its place.


Displaying the MAC ID On a Honeywell Wireless Alarm System

Jarrett teaches you how to find the MAC ID on a Honeywell Wireless Alarm System. This applies to any Honeywell Panel with an IP communicator. To find the MAC address, you will need to enter programming. This requires providing the Installer Code for the system. Remember that the default Installer Code on most Honeywell System is 4112. The MAC address and MAC CRC are found within the Comm Diagnostics Menu. Clicking on Communication ID Numbers will display the codes at the top of the screen.


Devices Used With a 2GIG XCVR2-345 Transceiver on a Go!Control GC2

Jorge talks about the 2GIG XCVR2-345 and the devices that are used with it. The 2GIG XCVR2-345 is an add-on accessory for the 2GIG GC2 System. This communicator is what allows the system to work with bi-directional devices. These are devices that must both send and receive signals with the GC2 System. Some of the devices that require the use of a 2GIG XCVR2-345 include the 2GIG Go!Bridge IP Communicator and the 2GIG TS1 Touchscreen Keypad.


Monitoring and Controlling the Temperature On a Honeywell L5210

Jorge explains how you can monitor and control the temperature using a Honeywell L5210 Security System. For this to work, you will need a Honeywell L5100-ZWAVE Card installed inside the system. This is a Z-Wave controller that allows the system to support Z-Wave smart home devices. From there, you can enroll a Z-Wave thermostat with the system. This will allow you to monitor and control the temperature for the building directly from a Honeywell L5210 Alarm Panel.


Programming the Alarm Monitoring Account Information on a Honeywell L5210

Jorge covers the process for programming the alarm monitoring account information on a Honeywell LYNX Touch System. This is an important step for setting up a system for alarm monitoring service. Completing this process will allow the system to communicate with the central station. Normally, an end user will only complete this process themselves if they are bringing the system over to a new monitoring company. This process only needs to be completed if the communicator has not been released by the old monitoring company.

Tags: , , , , ,

Comments


Posted By

Hi DIYers! Today, we wanted to let you know about some of the new security system kits that are available from the Alarm Grid website. We have new kits that feature the Resideo Lyric, the Qolsys IQ Panel 2 Plus (319.5 MHz, 345 MHz, and 433 MHz), the 2GIG GC3e and the 2GIG GC2e Systems.

Honeywell lyricpk10 lte enc encrypted at and t lte alarm system

Our system kits are perfect for anyone just getting started with alarm monitoring service. Each one includes a brand-new alarm panel, some door and window sensors, a motion sensor, an LTE cellular communicator, and a power cable. You can easily expand around any of these systems later on if needed. Just remember that you will need a monitoring plan to use one of these systems with Alarm Grid. A Gold Plan or higher is needed for cellular communication.

Now that you know a little bit about our kits, let's take a look at each new one individually:

Resideo Lyric w/ Verizon LTE Communicator Kits

Lyric Verizon-LTE 3-1 Kit


Lyric Verizon-LTE 10-1 Kit

  • Lyric System
  • LYRICLTE-V Verizon LTE Communicator
  • 10 Versa-2GIG Contacts
  • SiXPIR Motion
  • LT-Cable


Lyric Verizon-LTE 3-1 Encrypted Kit


Lyric Verizon-LTE 10-1 Encrypted Kit

  • Lyric System
  • LYRICLTE-V Verizon LTE Communicator
  • 10 SiXMINICT Contacts
  • SiXPIR Motion
  • LT-Cable


Qolsys IQ 319.5 MHz PowerG Kits

IQ Panel 2 319.5 MHz AT&T LTE 3-1 Kit


IQ Panel 2 319.5 MHz AT&T LTE 10-1 Kit
  • IQ Panel 2 Plus 319.5 MHz w/ AT&T LTE
  • 10 PG9303 PowerG Contacts
  • PG 9914 PowerG Motion


IQ Panel 2 319.5 MHz Verizon LTE 3-1 Kit


IQ Panel 2 319.5 MHz Verizon LTE 10-1 Kit
  • IQ Panel 2 Plus 319.5 MHz w/ Verizon LTE
  • 3 PG9303 PowerG Contacts
  • PG 9914 PowerG Motion


Qolsys IQ 345 MHz PowerG Kits

IQ Panel 2 345 MHz AT&T LTE 3-1 Kit


IQ Panel 2 345 MHz AT&T LTE 10-1 Kit

  • IQ Panel 2 Plus 345 MHz w/ AT&T LTE
  • 10 PG9303 PowerG Contacts
  • PG 9914 PowerG Motion


IQ Panel 2 345 MHz Verizon LTE 3-1 Kit


IQ Panel 2 345 MHz Verizon LTE 10-1 Kit

  • IQ Panel 2 Plus 345 MHz w/ Verizon LTE
  • 10 PG9303 PowerG Contacts
  • PG 9914 PowerG Motion


Qolsys IQ 433 MHz PowerG Kits

IQ Panel 2 433 MHz AT&T LTE 3-1 Kit


IQ Panel 2 433 MHz AT&T LTE 10-1 Kit

  • IQ Panel 2 Plus 433MHz w/ AT&T LTE
  • 10 PG9303 PowerG Contacts
  • PG 9914 PowerG Motion


IQ Panel 2 433 MHz Verizon LTE 3-1 Kit


IQ Panel 2 433 MHz Verizon LTE 10-1 Kit

  • IQ Panel 2 Plus 433 MHz w/ Verizon LTE
  • 10 PG9303 PowerG Contacts
  • PG 9914 PowerG Motion


2GIG GC3e Kits

2GIG GC3e Verizon-LTE 3-1 Kit


2GIG GC3e Verizon-LTE 10-1 Kit

  • 2GIG GC3e System
  • 2GIG LTEV-1-A-GC3 Verizon LTE Communicator
  • 10 2GIG DW10e Door and Window Sensors
  • 2GIG PIR1e Motion
  • LT Cable


2GIG GC2e Kits

2GIG GC3e Verizon-LTE 3-1 Kit


2GIG GC2e Verizon-LTE 10-1 Kit

  • 2GIG GC2e System
  • 2GIG LTEV1-A-GC2 Verizon LTE
  • Communicator
  • 10 2GIG DW10e Door and Window Sensors
  • 2GIG PIR1e Motion
  • LT Cable


All of these great kits are available from Alarm Grid right now. If you have any questions or need help choosing a system, please email us at support@alarmgrid.com. You may also call us during our regular business hours of 9am to 8pm EST M-F. We look forward to hearing from you!

Tags: , , , , , , , , , , , , , , , , , , , , , , , , , , , , , , , ,

Comments


Posted By

Hi DIYers! We are excited to learn that Firmware Version 2.4.0 is now available for the Qolsys IQ Panel 2 and IQ Panel 2 Plus. The update can easily be applied at the panel or pushed from Alarm.com. Many new features and automation capabilities come included with the firmware update.

Qolsys iq panel 2 verizon 7 security panel w slash z wave ready

The following updates to the system are applied with Firmware Version 2.4.0:

Improved User Interface (UI)
- Ability to Hide Security, Lock, and Thermostat Pages
- Dynamic Screen Lock Page - Enable Independently from Partitions
- All-New Automation & Wellness Pages

Improved Partitions 2.0
- Global Arming
- Bluetooth Disarming by Partition

LiftMaster MyQ Garage Control
- New Panel UI for LiftMaster Garage Door Devices Paired w/ Alarm.com

ADC Scene Control
- Control Alarm.com Scenes Directly from Panel

IQ Remote Enhancements
- Alarm.com Videos thru Built-In Camera
- Live-Stream ADC Cameras and Video Doorbell thru IQ Remote (No Audio)
- Connectivity Improvements

Home Automation
- Support for Z-Wave Version 6.81.03 - Including S2 Security & SmartStart
- Note: Only for Panels Manufactured w/ 2.4.0 & Above; Not for Panels Receiving Update OTA
- Support for LQI 2 (link quality indicators)
- Emergency Heat Mode for Z-Wave Thermostats now supported

PowerG
- PowerG Modem Firmware Update 80.25
- Fixes Compatibility with the DSC PG9312 Outdoor Contact

Panel Motion
- Sensitivity Settings - High, Medium, Low
- Mask-Off Up to Four (4) Distinct Areas

Other
- QR Code Scanning for S-Line Sensor Enrollment (319.5 MHz Panel Only)
- Language Improvements

While we will certainly be showing off these features in greater detail sometime in the near future, for now we just want to show you how to download the new firmware. You can have the update pushed down automatically from the Alarm.com servers free of charge. Alarm Grid customers can do this by emailing us at support@alarmgrid.com. You will need to have the panel monitored with Alarm Grid and connected to WIFI for us to do this.

But the easiest way to update is to apply the update yourself at the panel. Again, make sure your system is monitored and connected to WIFI before you begin. It will also need to be plugged-in and not have a low-battery condition. Start from the main screen of the system. Click on the small grey bar at the top. Choose Settings > Advanced Settings > Installer Code (default 1111) > Upgrade Software > Patch Tag > type in iqpanel2.4.0 > OK > Upgrade Using Network. If done correctly, the new firmware update should be downloaded. Once it has been completely downloaded, press "OK" to begin the update process. The panel will reboot as part of the update. The entire process will take around five (5) minutes and is complete after the reboot.

If you have any questions about this update, please email us at support@alarmgrid.com. This looks to be a very exciting update for the IQ Panel 2 plus, and we can't wait for you to check it out. We will be showing off some of these features in greater detail in the coming days. Keep checking our blog for more information!

Tags: , , , , , , , , ,

Comments


Posted By

Alarm Grid is very happy to announce that the Lutron Caseta Smart Bridge PRO 2 is now available for purchase from our website. This device serves as the central hub for a Lutron Smart Lighting setup. It offers a brand-new integration with Alarm.com for added flexibility and control.

Lutron caseta pj2 3brl wh l01r 3 button wireless pico remote wit

It's funny, we were just talking about Lutron the other day and how great their lighting products are. We didn't know that just a few days later we would be talking about the exciting Lutron Caseta Smart Bridge PRO 2. This hub supports all of the same great integrations and features as the original Lutron Caseta Smart Bridge. These integrations include Apple HomeKit, Amazon Alexa, Google Home, Nest, Sonos Sound, and more.

But the Lutron Caseta Smart Bridge PRO 2 adds the ability to integrate your Lutron Lights with Alarm.com. This is huge news for anyone with an Alarm.com Security System. Now you can control your Lutron devices and your security system from the super convenient Alarm.com App. You can even include your Lutron Lights with smart scenes for automatic operation based on a schedule or with certain system events!

If you are not familiar with Lutron Lights, then prepare to have your life brightened! These smart lights offer a multitude of great features that help them outshine similar products. By using the free-to-download Lutron App, you can create smart schedules to have your lights turn ON and OFF at set times of the day.

The Lutron App also supports Geofencing features to have your lights respond based on the location of your smartphone. This is great if you want to have your lights turn ON automatically when you arrive home, or shut OFF when you leave for the day. There is also a cool feature called "Smart Away" that will have your lights turn ON and OFF at random times during the evening to make it look like you are home. This is perfect for when you are traveling.

Remember, you will need a monitoring plan that includes Alarm.com if you want to integrate your Lutron Caseta Smart Bridge PRO 2 with that platform. For Alarm Grid customers, this includes any Gold or Platinum Level Plan. More information about our monitoring services is available on our alarm monitoring page.

The Lutron Caseta Smart Bridge PRO 2 is compatible with all of the existing Lutron Caseta devices that were already sold on our site. We have all the resources you need to create complete smart lighting network based around Lutron. If you have any questions about Lutron or the new Lutron Caseta Smart Bridge PRO 2, please reach out to us by emailing support@alarmgrid.com. We look forward to hearing from you!

Tags: , , , , , , , , , , , , , , , , , , , , , , , , , , , , , , , ,

Comments


Posted By

Hi DIYers! Today, we are taking a look at one of the more interesting products we have available, the 2GIG GNGRD1-345 Gun Trigger Lock. This gun-safety device is a combination lock that prevents the unauthorized use of a firearm. It will also alert a compatible alarm system when moved.


If you are a responsible gun owner, then you know how important it is to prevent others from using your weapons. This is especially true if you have young children in the home who may accidentally get into your firearms. With the 2GIG GNGRD1-345, you can put these concerns to rest. This safety device fits conveniently over the trigger on your fire arm to prevent it from being activated. The only way to fire the weapon will be to remove the trigger lock. The device fits a wide-variety of different firearms, including handguns, pistols, rifles, and shotguns. It is even California Gun Safety (DOJ) Device Certified.

The 2GIG GNGRD1-345 features a 3-digit combination lock, and it can only be removed if the correct code is entered. The device is extremely strong and tough, and an unauthorized user will not be able to remove the trigger lock without destroying the weapon itself. This will give you peace of mind in knowing that your weapons are secure. While we always recommend keeping any weapons out of reach from unauthorized users, especially children, this device will prevent them from using them if they do gain access. Please note that we do not recommend using the device on a loaded firearm.

If the 3-digit combination lock were not enough, the device also contains a built-in sensor to detect if the firearm is ever moved in any way. If anyone picks up the weapon or tries to remove the sensor, then it will send an alert to your security panel. If you have an interactive service platform like Total Connect 2.0 or Alarm.com, then you can receive remote alerts right to your smartphone while you are away. This is great for knowing if your young kids or someone else gets into your weapons. Remember to check out our monitoring page to learn more about accessing TC2 or ADC.

As a 2GIG 345 MHz Sensor, the GNGRD1-345 will work with a variety of different systems. It is specifically built for the 2GIG GC2, the 2GIG GC3, and the new encrypted 2GIG Systems, the 2GIG GC2e and 2GIG GC3e. However, the non-encrypted 2GIG 345 MHz signal is also accepted by other systems. You can use the GNGRD1-345 with the Resideo Lyric Panel and the 345 MHz version of the Qolsys IQ Panel 2 Plus. And even if you do not pair it with a system for movement detection, the device will still work as a trigger lock.

You can buy the 2GIG GNGRD1-345 Gun Trigger Lock right now on the Alarm Grid website. We know that not everyone chooses to keep firearms in the home. But if you do, you can keep your weapons safe with this trusted device. If you have any questions about this firearm safety product, or any of the other products on our site, please reach out to us by emailing support@alarmgrid.com. We look forward to hearing from you!

Tags: , , , , , , ,

Comments