Industry News and Discussions Posts

Posted By

Hi DIYers! We would like to inform you that Software Update 2.3.3 is now available for the Qolsys IQ Panel 2 Plus and original IQ Panel 2. This update does not add any new features, but it does include some useful system improvements and general fixes. The update can be easily applied.

Qolsys iq panel 2 at and t wireless security system with at and

Software Update 2.3.3 really only applies useful improvements for the IQ Panel 2 Plus. However, original IQ Panel 2 owners can still perform the update to get their systems on the latest version. This update is very important for helping our technicians provide the best possible support for IQ Panel 2 Plus owners.

The following general improvements are included in Software Update 2.3.3:

  • Can now obtain the Long Sensor ID for the PowerG board and report it to Alarm.com
  • Can now obtain the Device Firmware Version for any auto-learned PowerG Sensor enrolled after updating to 2.3.3 and report it to Alarm.com.
  • Can now send Alarm.com the Radio Firmware Version and Modem Firmware Version for the PowerG board.

To perform the update, your system must be running at least 2.0.1, be connected to a local WIFI network, have its power transformer plugged-in, and have a charged battery. Once you have met the requirements, start from the main system screen. Press the small grey bar at the top. Choose Settings > Advanced Settings > enter the Installer Code (default 1111) > Upgrade Software > Patch Tag > enter iqpanel2.3.3 > OK > Upgrade Using Network > OK.

It will take about five (5) minutes for the update to download. The panel should reboot to the home screen when complete. If you have any questions about this update, do not hesitate to email us at support@alarmgrid.com, or call us at (888) 818-7728 during our regular business hours of 9am to 8pm EST M-F.

Tags: , , , , , , , , , , , , , , , ,

Comments


Posted By

Alarm Grid has learned of technical difficulties between certain PowerG Sensors and the Qolsys IQ Panel 2 Plus. These issues affect the PG9914 Wireless Motion Sensor and the PG9933 Wireless Carbon Monoxide Sensor when used on an IQ2+ System running PowerG Version 80.17.

Qolsys iq panel 2 at and t wireless security system with at and Due to this issue, any DSC PowerG PG9914 Wireless Motion Sensor manufactured before August 23, 2018 will not work with a Qolsys IQ Panel 2 Plus running PowerG Firmware Version 80.17. This includes any PG9914 running firmware V3.0.5 or V3.0.7. Also, if the first four (4) digits of the Serial Number are less than "3618", then the device is affected.

Below are some pictures of a PG9914 that will not work with an IQ Panel 2 Plus running PowerG Version 80.17:


Additionally, any DSC PowerG PG9933 Carbon Monoxide Sensor manufactured before March 26, 2019 will not work with a Qolsys IQ Panel 2 Plus running PowerG Firmware Version 80.17. Any PG9933 manufactured after this date will include a sticker indicating compatibility with the IQ Panel 2 Plus.

If you want to check the PowerG Firmware for your IQ Panel 2 Plus, you can do so from the panel. Start from the main screen. Press the small grey bar at the top. Choose Settings > Advanced Settings > enter the Installer Code (default 1111) > About > PowerG. You should check the Radio Firmware Version.


If you have any questions about these incompatibilities, please reach out to us. The best way to contact us is by emailing support@alarmgrid.com. We will check your email at our earliest convenience and respond back as soon as possible. We look forward to hearing from you.

Tags: , , , , , ,

Comments


Posted By

Hi DIYers! We have learned that Resideo has updated Total Connect 2.0. The update is Version 2.12.4. The biggest offering from this update is the ability to control smart home devices more easily. It is also now easier to see the status for smart home devices across multiple locations.


Any Total Connect 2.0 user with multiple locations can see the status for their programmed smart locks and smart thermostats from the Locations Menu. This feature allows users to more quickly review the current status for these smart devices all at once. If you have multiple homes or businesses, this is a great way to easily check your various smart locks and thermostats all at once.

Additionally, the System Administrator and Master Users can now access TC2 to modify the ability for Panel Only Users to control Z-Wave Locks. Before this most recent update, this ability could only be modified directly from the panel. Now you can access TC2 to give a Panel Only User the ability to control Z-Wave locks using their code or take the ability away.

Update 2.12.4 also provides various fixes. This includes correcting a problem that prevented Internet Explorer users from using the New Users Spreadsheet to create multiple new users at once. The update also fixes a problem on the Camera Settings page where the WIFI signal strength indicator for C-Series HD Cameras was displayed incorrectly. Finally an old problem with the End User License Agreement (EULA) on Internet Explorer has been corrected.

You may also notice a new design from the login screen:


If you have any questions about this new update, please reach out to us at support@alarmgrid.com. We look forward to answering any questions you might have.

Tags: , , , , ,

Comments


Posted By

Hi DIYers! We have learned that a new law has been signed in Tennessee that disallows local governments from charging security companies fines for false alarms. The law also prohibits fees for alarm permits. The bill was signed by Tennessee Governor William "Bill" Lee on May 8th, 2019.

Under the new law, alarm monitoring companies cannot be charged fines for any false alarms that occur. Additionally, local governments cannot charge alarm companies fees for alarm permits or alarm permit renewals. End users may still be charged by local governments for causing excessive false alarms and for obtaining permits and renewals. The law goes into effect June 19, 2019.

Alarm Grid strongly supports this new law, as it makes it easier for us to provide customers with quality service. Preventing false alarms is the responsibility of both the alarm monitoring company and the end user. Alarm Grid does its part to ensure that customers cause as few false alarms as possible. We accomplish this by educating our customers about the best practices for reducing false alarms. The vast majority of end users do not actively seek out ways of causing false alarms. Most will do whatever they can to prevent them.

Some of the practices used to reduce false alarms include setting appropriate Entry and Exit Delay times, enabling Alarm Report Delay (if needed), and encouraging the use of Arm-Confirm features. Alarm Grid also offers certain panels that are compliant with the standards mandated by CP-01 of the Security Industry Association (SIA) for reducing false alarms.

At Alarm Grid, one of our top goals is to empower the end user. We strive to help our customers understand how their systems work so that false alarms occur less frequently. End users should also make sure to follow the manufacturer’s recommendations for installation and panel programming.

We are also pleased that monitoring companies will no longer need to worry about alarm permit fees. These fees only make it more difficult for alarm companies to provide service to their customers. Many companies avoid providing alarm monitoring service in certain areas because they do not want to pay permitting fees. Thanks to the removal of these fees, it will be easier to provide service to our customers in Tennessee moving forward.

Alarm Grid wants to help you avoid false alarm dispatches. But we also want you to know that your home or business will receive help in a real emergency. That is one of our top goals as an alarm monitoring company. If you want to learn more about how we work to prevent false alarms, please reach out to us. The best way to contact us is through email at support@alarmgrid.com. We will check your email at our earliest convenience and respond as soon as possible. We look forward to hearing from you.

Tags: , ,

Comments


Posted By

Hi DIYers! We're back with another Alarm Grid Tip. Today's tip is to always know your Entry and Exit Delay periods and how they are used. Nearly every alarm system has these settings, and configuring them properly is important for any DIY user. Let's take a look at Entry and Exit Delays!

Alarm grid inside security stickers

Let's start with Entry Delays. When you enter your home while your system is armed, you probably don't want an alarm to occur. After all, you've done nothing wrong. All you've done is open a door. It's not like you smashed a window or burst open a wall. But at the same time, you want your alarm system to confirm that it's you that entered your home. For example, if you forgot to lock the door, an intruder might walk right inside.

This is actually where the very premise of alarm systems comes into play. In its Armed state, your system will want you to Disarm when an Entry/Exit door is opened. But you aren't a magician or a wizard. You can't just, poof, Disarm your system instantly. You have to get inside, close the door, set your stuff down, calm down your dog or cat, walk over to your keypad, enter your code and Disarm your system. Needless to say, this might take a minute or so.

That is why Entry Delay periods are important. They give you a small period of time for you to Disarm your system before it goes into alarm. Since you know your system's code, you should be able to Disarm in a timely manner. But an intruder who doesn't know the code won't be able to provide verification in time. The Entry Delay period will expire, and the central station will come calling to make sure everything is alright. An intruder won't know the false alarm passcode, and emergency dispatch will be sent out momentarily.

Qolsys iq panel 2 at and t wireless security system with at and

But wait! We understand the stress that Entry Delay periods can present! If you have a short Entry Delay period, you might be running frantically to your keypad to avoid that awkward conversation with the central station dispatcher.

"Yeah, sorry, I didn't get to the keypad in time. My false alarm passcode is DIYer." - The person with too short of an Entry Delay period.

But fortunately, you're a DIYer! You can go into programming and adjust your Entry Delay period. That way, you can set it to a duration that allows you to comfortably and calmly reach your system's keypad and Disarm the system. But remember, the shorter you keep this delay period, the sooner dispatch will be sent out in a real emergency.

We also understand that some situations require longer Entry Delay periods than others. For example, you might enter your home from your basement door. It might take you longer to walk up those stairs and reach the keypad than if you entered from your front door. Never fear, alarm manufacturers covered that as well. This is done by having multiple Entry Delay periods on the same system. They are usually conveniently named "Entry Delay 1" and "Entry Delay 2". We know, these are very creative names.

Each delay zone can be set individually to work with either Entry Delay 1 or Entry Delay 2 based on its programmed Response Type. So if you want a longer or shorter Entry Delay period for certain zones, then you have the power! Please note that the Entry Delay 2 period should always be the longer of the two, and is also commonly associated with Garage Door Zones. Keep this in mind when system planning.

Of course, you can also Disarm your system before even entering your home using a keyfob. Or if you have Total Connect 2.0 or Alarm.com, you can just open the mobile app on your smartphone and Disarm from there. But hey, maybe you forgot your phone and keyfob inside. In that case, knowing your Entry Delay period and how long you have to Disarm your panel is important!

Some common Response Types that use Entry Delay periods: Entry Exit 1, Entry Exit 2, Interior With Delay, Garage.

Honeywell lyric controller encrypted wireless security system

Whew! That was a lot to take in. But we saved time to discuss Exit Delay periods. When you Arm your system, there is usually that brief period of time where you need to collect your belongings, say bye bye to your precious puppy, leave the premises and lock the door behind you. During this time, you don't want your system to go into alarm because you activated a sensor. You want to have a moment to safely leave without worry. That is why we have Exit Delay periods.

The Exit Delay gives you a chance to exit the premises without worrying about setting off an alarm. Once the Exit Delay period expires, your system will be Armed. However, it's also important to touch on Auto-Stay Arming here. When you Arm Away using your panel or keypad, the assumption is that you will activate an Entry/Exit Zone on the way out. If no Entry/Exit zone fault and restore is seen by the system, it will assume that someone (you) is still present inside the building. If Auto-Stay Arming is enabled, the system will prevent false alarms by switching to Arm Stay at the end of the Exit count down, even though you Armed Away. To avoid this, open an Entry/Exit Zone during the Exit Delay countdown, or disable Auto-Stay Arming.

Just like with Entry Delay periods, you, as a DIYer, can adjust your Exit Delay. Most systems only have a single Exit Delay period, but you can easily configure it based on your needs. Find a time period that allows you to comfortably leave your home without worry, and set that as your Exit Delay. That way, you won't be scrambling to rush out the door whenever you Arm your system!

And again, you can always Arm from outside your home using a keyfob or a mobile app. Doing this will tell the system to ignore any Auto-Stay Arming settings, as you may not fault an Entry/Exit Zone when using a fob or app. Using either of these methods from outside your house will eliminate any worry you have about Exit Delay periods. But if you ever find yourself Arming from your panel or keypad like many of us do, you will want to keep that Exit Delay period in the back of your mind. Make sure you get out in time!

Honeywell sixfob key fob for lyric controller

We hope that this post was helpful in explaining Entry and Exit Delay periods to you! If you have any further questions or you need help changing the Entry and/or Exit Delay periods on your panel, please reach out to us. We offer free support for Alarm Grid monitored customers! The best way to reach us is to email support@alarmgrid.com. You may also call us during our regular business hours of 9am to 8pm EST M-F. We look forward to helping you get the most out of your security system.

Tags: , , ,

Comments


Posted By

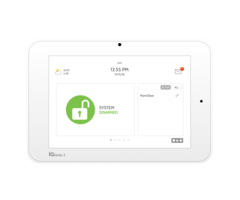
Hi DIYers! We are excited to announce that the Qolsys IQ Panel 2 Plus with support for legacy 319.5 MHz sensors and PowerG sensors is now available for just $399.99. This is significantly reduced from the previous price-tag of more than $500. Now is a great time to buy an IQ Panel 2 Plus!

Qolsys iq panel 2 plus verizon lte with powerg s line and legacy

The IQ Panel 2 Plus is one of the most advanced wireless all-in-one security systems on the market today. The system supports up to 128 wireless zones, and it serves as a fully functional Z-Wave Plus controller. It also offers advanced features like Bluetooth disarming, live streaming with Alarm.com Cameras, facial recognition, partitioning and more. This version of the IQ Panel 2 Plus supports both PowerG sensors and legacy 319.5 MHz sensors from Qolsys and Interlogix/GE. It is available in both Verizon LTE and AT&T LTE options. Both 319.5 MHz versions have been reduced in price to $399.99 effective as of now.

Please note that this price reduction only affects the 319.5 MHz versions of the IQ Panel 2 Plus. The 345 MHz versions (legacy Honeywell and legacy 2GIG) and the 433 MHz versions (legacy DSC) have retained their original pricing. These versions are also available in AT&T LTE and Verizon LTE variants. You can find those panels with the following links:

We would also like to announce that the original IQ Panel 2 has been discontinued. It is no longer available for purchase, effective immediately. As a result, all of the Alarm Grid System Kits that included the original IQ Panel 2 have been updated to offer the IQ Panel 2 Plus 319.5 MHz System instead. At this time, we are only offering kits with the 319.5 MHz version of the IQ Panel 2 Plus. If you want the 345 MHz or 433 MHz version of the IQ Panel 2 Plus, you will need to purchase the system individually.

Each IQ Panel 2 Plus System Kit includes a brand-new IQ Panel 2 Plus 319.5 MHz System, Versa-GE Door and Window Contacts (3 or 10 depending on the kit), a single Qolsys IQ Motion-S Sensor, a power cable, a plug-in transformer, and a built-in LTE communicator (AT&T or Verizon). You can find these kits in the links below:

If you have any questions about the IQ Panel 2 Plus, please reach out to us. The best way to reach us is to email support@alarmgrid.com, and we will respond back as soon as possible. You may also call us at (888) 818-7728 during our normal business hours of 9am to 8pm EST M-F. We look forward to hearing from you!
Tags: , , , , , , , , , , , , , , , , , , ,

Comments


Posted By

Hi DIYers! Today, we're taking a look at SimpliSafe and how their monitoring service and equipment compares with Alarm Grid. We believe that this information will be helpful to end users when deciding upon an alarm monitoring provider. Let's see how SimpliSafe stacks up with Alarm Grid.

Alarm grid inside security stickers

Proprietary Equipment

When a customer signs up for SimpliSafe, they are required to purchase a security panel and sensors directly from the company. This equipment is proprietary to SimpliSafe, and it will only work with their monitoring service. A user cannot take their SimpliSafe System and bring it to a different monitoring company. The equipment is for use with SimpliSafe only.

SimpliSafe does not require its customers to sign contracts. Their monitoring service is offered on a month-to-month basis. A customer can leave SimpliSafe at any time. The problem is that their system will be useless for alarm monitoring with any monitoring service outside of SimpliSafe. Unless a customer is willing to buy a completely new system, they will be stuck with SimpliSafe as their only option.

Alarm Grid does not manufacture its own equipment. Instead, Alarm Grid sells equipment from reputable manufacturers like Resideo/Honeywell, 2GIG, Qolsys and Interlogix. All the equipment sold on the Alarm Grid website is non-proprietary. If a customer decides to leave Alarm Grid, they can certainly bring their alarm panel, sensors and communicator with them to a new company.

Customers do not need to purchase their equipment from the Alarm Grid website. If they can find a better deal elsewhere, then we will encourage them to buy it from that location instead. Likewise, if a customer has an existing alarm system, we will do everything possible to take it over and make it work with our service. At Alarm Grid, we want to minimize the cost for our customers. Many systems and sensors can be taken over so that the customer does not need to buy new equipment.

Just like SimpliSafe, Alarm Grid is no contract, and customers pay on a month-to-month basis. The difference is that if a customer leaves Alarm Grid, they can take their system with them. Since the equipment we service is all non-proprietary, it can be taken over by any willing monitoring company. As a result, customers stick with Alarm Grid because they are pleased with the service and support we provide. This is the reason our customers refrain from taking their system and business elsewhere.

Equipment Compliance

Any reputable security equipment should be listed by a Nationally Recognized Testing Laboratory (NRTL). This is mandatory for meeting the requirements of National Electrical Code, NFPA 70 and UL Standards. For SimpliSafe, the proprietary wireless smoke detector and proprietary wireless carbon monoxide detector are both listed and labeled by the NRTL Intertek. This puts these devices in compliance with the aforementioned standards.

However, no other piece of SimpliSafe equipment is listed by Intertek. This includes the SimpliSafe Base Station (Panel) and the rest of the SimpliSafe Sensors. In fact, this equipment is not listed by any NRTL. In other words, this equipment is not necessarily compliant with UL Standards. It has not met the UL requirement of independent third-party testing needed for certified equipment. SimpliSafe says that they test their own equipment to UL standards, but this is different from the required third-party testing.

The equipment sold on the Alarm Grid website is UL or ETL listed and properly certified. It has met the third-party testing requirements. Additionally, the equipment we are familiar with taking over is also compliant with these standards. Again, companies like Resideo/Honeywell, 2GIG and Qolsys are known for their strict compliance. When you buy equipment from Alarm Grid you can be certain that you are getting quality equipment that is certified with the latest requirements.

Destruction Protection

Just like many systems, the SimpliSafe Base Station is designed to be placed out in the open for easy access. If an intruder destroys the base station before an alarm signal is sent out, then the signals might not go through successfully. To prevent this, SimpliSafe recommends disguising their system. One article claimed that a SimpliSafe representative suggested disguising their base station with a "lamp shade".

For Alarm Grid customers, their systems are connected with a reporting service like AlarmNet or Alarm.com. AlarmNet offers Advanced Protection Logic (APL), while Alarm.com provides "Crash & Smash". Although these features differ slightly, their general principle is the same. Both features are designed to ensure that the authorities are still properly dispatched if the security panel is destroyed.

The basic premise behind APL and Crash & Smash is that an alarm panel will immediately send an alert to the reporting service (AlarmNet or ADC) when an Entry Delay or communication delay period is activated. The reporting service will then know that either a system Disarm or an Alarm signal must logically follow. If after a certain period of time no signal is received, then the service will know that the panel must have been destroyed. In this case, APL or Crash & Smash will take effect, and the monitoring station will be notified.

Simply put, SimpliSafe does not offer this type of protection. Instead, the company advises its customers to hide and disguise its system. This can be very risky if an intruder recognizes the SimpliSafe Base Station and knows to destroy it. Additionally, the SimpliSafe Sensors do not include tamper covers. It's easily possible for a smart intruder to remove the cover for the sensor, take out the battery and beat the SimpliSafe System.

Life-Safety Offerings

Section NFPA 72 of the National Fire Alarm and Signaling Code requires that smoke detectors and CO detectors have the technical capability to produce distinct Temporal 3 and Temporal 4 sounding respectively. This is crucial for being able to actively distinguish between the type of danger at-hand and take the appropriate action.

SimpliSafe Smoke and CO Detectors do not have this functionality. As a result, they are non-compliant with NFPA 72. The only way for a SimpliSafe user to determine the cause of the alarm is to check the system's keypad or the associated text message from the SimpliSafe network. The SimpliSafe Base Station has an 85 dB sounder that meets code. However, this sounder is positioned downward. This positioning can muffle the siren and make it less likely for others to hear it.

SimpliSafe does offer an unsupervised external wireless siren that operates at 105 dB. However, this siren has no tamper switches and can be easily disabled by anyone who gains access. If the siren were to be taken offline, it is possible that the end user might not find out about this until it's too late.

Alarm Grid sells smokes and CO detectors with built-in sounders that meet the respective Temporal 3 and Temporal 4 sounder requirements. We also advise the use of supervised sirens that are either wired-in with the panel or protected by the system. Additionally, the wireless panels we sell feature built-in sounders that are positioned in such a manner that they can be easily heard when activated.

Conclusion

Whether you decide to go with SimpliSafe, Alarm Grid or a different monitoring company entirely is up to you. We can say that with Alarm Grid you can obtain a quality system that meets all the needed standards and requirements for your area. If you ever aren't satisfied with Alarm Grid for any reason, you can take the system you invested money into elsewhere and use it with a different monitoring company. You will also receive monitoring service that protects you and your family if your system is ever destroyed during a break-in.

We encourage you to check out our alarm monitoring page for more information about our monitoring services. If you decide that Alarm Grid is the right choice for your home, you can select a monitoring plan right from the same page. This page is also available through the orange "Alarm Monitoring" button at the top of any page on our website.

If you have any questions or you want to learn more about alarm monitoring, we invite you to reach out to us. The best way to reach us is to email support@alarmgrid.com. You can also call us at (888) 818-7728 during our normal business hours of 9am to 8pm EST M-F to speak with one of our security planners. Our team is here to help you make the right choice for home security monitoring, and we look forward to protecting you and your loved ones.

Tags: , , , ,

Comments


Posted By

Hi DIYers! It's hard to believe, but it's already May. Time sure flies doesn't it? Summer is quickly approaching and now is a great time to buy temperature sensors for your home. This way, you can be quickly notified if your home's AC system is ever not cooling the building properly.

Honeywell 5821 wireless temperature sensor and water sensor exte

Temperature sensors aren't just for letting you know about low-temperatures. They can also let you know about unusually high temperatures that would only occur if the AC went out. This is great for ensuring that the house you come home to is nice and comfortably. There's nothing worse than ending your day only to find that your AC went out and your home is uncomfortably hot! Our temperature sensors are also great for pairing with smart thermostats, which can often send you remote alerts when temperatures go outside certain thresholds.

Today, we're taking a look at three temperature sensors that you might consider adding to your system. We'll be focusing on the high-temperature sensing capabilities here, but we may brush over other features as well. Let's take a look!

Honeywell 5821

The Honeywell 5821 has two possible temperature settings. If programmed as Loop 2 with both DIP switches OFF, the sensor will alert the system when the temperature rises above 95°F for more than 10 minutes. You can also set it to SW1 DIP Switch ON and SW2 DIP Switch OFF on Loop 2 to have the sensor activate when the temperature rises above 75°F for more than 10 minutes.

The option to choose between a 95°F and a 75°F threshold is very useful, as some homes in different areas will certainly have different normal temperatures! The sensor also offers freeze detection and flood monitoring when paired with a water detection probe. An optional wired temperature probe is also available. The device operates at 345 MHz.

Qolsys IQ Temp

The Qolsys IQ Temp offers high-temperature detection at 100°F. The zone will then restore when the temperature falls below 95°F. Although this might be too high for many homes, there are some very hot areas that frequently exceed 110°F or even 120°F. This is a relatively simple device that can easily pair with nearly any 319.5 MHz alarm system. It also offers freeze detection at 40°F and restores once the temperature rises above 45°F. Like most temperature sensors, the high and low temperature zones will need to be configured separately.

2GIG FT6-345

The 2GIG FT6-345 Wireless Flood and Temperature Detector is a 345 MHz sensor designed with 2GIG Security Systems in mind. The sensor uses Loop 2 for high-temperature detection. It activates when a temperature of 95°F or higher is detected for three straight minutes. The sensor will restore when the temperature falls below 95°F for three straight minutes. The sensor can also be programmed with Loop 1 for freeze detection (41°F or lower for three straight minutes) or Loop 3 for water detection.

If you need help choosing a high-temperature detector for your home, please reach out to us! We can help you determine the best solution for your needs. The best way to reach us is to email support@alarmgrid.com. We will check your email at our earliest convenience and respond back as quickly as possible. We look forward to hearing from you!

Tags: , , , , , , ,

Comments


Posted By

Hi DIYers! We're a little late in reporting this news - in fact it happened a few weeks ago. But we forgot to mention that the Qolsys IQ Panel 2 Plus received the Most Valuable Product Award for Intrusion Detection at ISC West 2019. Congratulations to Qolsys and the IQ Panel 2 Plus System!


The 2019 Edition of ISC West brought us the 5th Annual Most Valuable Product (MVP) Awards, which are part of the larger SAMMY Awards. The MVP Awards are designed to highlight products that make particularly large impressions on the industry. The candidates were judged on innovation, functionality, competitive advantages, monitoring provider benefits, installer benefits and end user benefits.

We are very proud to say that the Qolsys IQ Panel 2 Plus was the winner of the MVP Award in the category of Intrusion Detection. The Alarm Grid Team actually had a great time at the Qolsys Booth during ISC West 2019. We had the opportunity to discuss the company's overview and general outlook, as well as their new commercial platform. You can check out these posts below:

The Qolsys IQ Panel 2 Plus is one of our favorite wireless all-in-one alarm systems. The system supports up to 128 wireless zones and top-of-the-line DSC PowerG Sensors. Each IQ Panel 2 Plus also comes equipped with a WIFI card, a built-in 5 megapixel camera, a 7-inch touchscreen display, an integrated glass break sensor and an LTE cellular communicator (AT&T or Verizon). The system also boasts advanced features like automatic Bluetooth disarming, facial recognition and partition support. Each system comes with a choice of legacy sensor frequency (319.5 MHz, 345 MHz or 433 MHz).

If you want to learn more about the IQ Panel 2 Plus for residential or commercial use, please reach out to us. We want to help you find the perfect system for your needs, and the IQ Panel 2 Plus is one of the best available. The best way to reach us is to email support@alarmgrid.com. One of our security planners will check your email at our earliest convenience and respond as soon as possible. You may also call us at (888) 818-7728 during our normal business hours of 9am to 8pm EST M-F. We look forward to hearing from you and helping you design a great home or business security system!

Tags: , , , , , , , , ,

Comments


Posted By

Hi DIYers! It's time for a new video recap. Our video team has settled down and gotten back in the swing of things since ISC West 2019. This time, we have six new videos for you to check out. The videos feature Jorge and Joe to help you learn how to use your alarm system. Let's take a look!

Fire Sensor Notifications from a Lyric via Apple HomeKit

Jorge explains why users don't get specific notifications regarding fire-safety sensors on their Honeywell Lyric Alarm Systems from Apple HomeKit. The important thing to remember is that HomeKit only provides specific notifications for security Response Types. If a life-safety sensor like a smoke detector or a CO detector activates, then HomeKit will only provide a General Lyric System Alert. That is why it is important to continue to use the Total Connect 2.0 platform alongside the Apple HomeKit service. Total Connect 2.0 will provide specific notifications for any Response Type.


Excluding A Yale Z-Wave Lock

Joe shows users how they can exclude a Yale Z-Wave Lock from their Z-Wave network. You should always make sure to exclude a Z-Wave device before attempting to pair it with a Z-Wave network. The Z-Wave device may have been paired with a different network for factory testing purposes. Clearing the lock from the network first ensures that it will be able to pair successfully. Please note that the exclusion command for Yale Z-Wave Locks is [Master PIN] + [#] + [7] + [#] + [3] + [#].


Defaulting A Yale Z-Wave Lock

Joe demonstrates the process for performing a factory reset on a Yale Z-Wave Lock. Doing this will reset the Master PIN Code back to 12345678, delete any added codes and reset any configured Z-Wave settings. The device will need to be re-enrolled with a Z-Wave controller after doing this. You will still need to exclude the device from the Z-Wave network before you will be able to re-enroll it. The factory reset process is performed by pressing and holding the reset button as you apply power to the lock.


Including A Yale Z-Wave Lock

Joe helps users with including a Yale Z-Wave Lock into a Z-Wave network. The process involves putting the Z-Wave controller or hub into its inclusion mode and then activating the inclusion function on the Yale Z-Wave Lock. You should clear the lock from the network before you attempt to perform the enrollment process. The command for activating the inclusion function on the lock is [Master PIN] + [#] + [7] + [#] + [1] + [#]. You may need to configure the lock settings after enrollment.


Keyfobs That Are Compatible With the IQ Panel 2 Plus

Jorge shows users which key fob devices are compatible with the IQ Panel 2 Plus. This depends on which type of IQ Panel 2 Plus System is being used. These systems can support 915 MHz PowerG Key Fobs and one type of legacy frequency (319.5 MHz, 345 MHz or 433 MHz). The 319.5 MHz varieties support Qolsys Key Fobs and Interlogix/GE Key Fobs. The 345 MHz varieties support Honeywell 5800 Series Key Fobs and 2GIG Key Fobs. The 433 MHz varieties support Legacy DSC Key Fobs.

Putting the 2GIG GC3 into RF Learn Mode

Jorge shows users how to put a 2GIG GC3 Alarm System into its enrollment mode for learning-in new sensors. This is a necessary step when you go to add new equipment to your GC3 System. After you have accessed the wireless zone you want to configure, you can choose the "Serial Number" field. This will give you an option to put the panel into its wireless enrollment mode. You can then activate the sensor to learn it in. You must configure the zone settings after enrollment.

Tags: , , , ,

Comments