Video Recap Posts

Posted By

We're here with another video recap! There are eight (8) new videos for you to check out this week. Once again, I took the role of appearing in all the videos. We hope to have some familiar faces returning soon! But for now, let's take a look at what our video team has been up to.

Alarm grid inside security stickers

Deleting a Wireless Zone from a Simon XT

I show you how to delete a wireless zone from a Simon XT Security System. The Simon XT uses 319.5 MHz wireless sensors, and it has forty (40) zone slots available. By accessing the Sensors Menu of Programming, you can delete any wireless zone that has been set up with the system. You can then enroll a new sensor in that open zone slot if needed. Keep in mind that the zone must be rebuilt from scratch if you decide to re-add the sensor back to the system.


Deleting a Wireless Zone from a Simon XTi or Simon XTi-5

I show you how to delete a wireless zone from a Simon XTi or Simon XTi-5. The Simon XTi and Simon XTi-5 are essentially the same as the Simon XT, except for the fact that these two panels have built-in touchscreen keypad. Both the Simon XTi and Simon XTi-5 have forty (40) available wireless zones, and they both use 319.5 MHz wireless sensors. If you delete a zone from the Simon XTi or Simon XTi-5, then you can reuse the zone with a new sensor.


Disabling Exit Sounds on a Qolsys IQ Panel 2 or IQ Panel 2 Plus

I show you how to disable Exit Delay sounds on the Qolsys IQ Panel 2 Plus. The IQ2 makes Exit Delay sounds for false alarm prevention. The idea is that if you accidentally Arm Away the system, then the Exit Delay sounds will alert you to the situation so that you know to either leave the building or cancel the arming session. But if you find Exit Delay sounds to be bothersome or annoying, there are a couple of different options for muting these sounds.


Cover Tamper Causes the Qolsys IQ Panel 2 to Make Strange Noises

I explain why the Qolsys IQ Panel 2 will make an usual noise every thirty (30) minutes. The reason why this happens is because the panel is not positioned on its back mounting plate properly. It can be a bit tricky to get the panel on the back plate properly, but once you do, the sound should stop occurring. If you absolutely cannot get the panel positioned on the back plate, then you do have the option of disabling tamper cover notifications in programming.


Manually Extending the Exit Delay Time On IQ2

I show you how to manually extend the Exit Delay countdown time on the Qolsys IQ Panel 2 for a single arming session. When you Arm Away on the IQ2, the Exit Delay timer will go into effect. You must then leave the building or cancel the arming session within the exit delay time limit. If you press the green +60 button, then the Exit Delay will be extended by sixty (60) seconds. You can only do this once per arming session. Pressing the button again will do nothing.


Permanently Extending the Exit Delay Time On IQ2

I show you how to permanently extend the Exit Delay countdown time on the Qolsys IQ Panel 2. By permanently extending the Exit Delay, you will have a longer amount of time to vacate the building every time you Arm. The system will use either the Normal Exit Delay setting or the Long Exit Delay setting depending on what zones you have programmed with the system. If you have at least one zone with Sensor Group 12 - Entry/Exit Long Delay, then the system will use the Long Exit Delay setting.


Installing a Honeywell 7847i on a VISTA P-Series Alarm Panel

I show you how to install a Honeywell 7847i on a VISTA P-Series Security System. The Honeywell 7847i is an IP communicator that allows a compatible panel to connect with the Resideo AlarmNet Servers for monitoring service. If you want to use Total Connect 2.0 with your system, then you must be running Firmware Version 9.12 or higher on a VISTA-15P or VISTA-20P. You can determine the firmware by checking the PROM Chip. No version of the VISTA-10P will work with Total Connect 2.0.


Installing a Honeywell 7847i On a VISTA TURBO Panel

I show you how to install a Honeywell 7847i on a Honeywell VISTA TURBO Panel, such as a Honeywell VISTA-128BPT or a Honeywell VISTA-250BPT. The most common reason why someone will choose to use an IP-only communicator is because they want monitoring costs to be as low as possible. IP monitoring is less expensive than cellular monitoring because no cellular service fees are incurred. But keep in mind that an internet outage will take your panel offline if you rely strictly on IP communication for your system.

Tags: , , , , , , , , , , , , ,

Comments


Posted By

It's Monday again, and it's time for another Alarm Grid video recap! We have six (6) new videos for you. Five (5) feature the DSC PowerSeries NEO, while the last one covers the Honeywell LTE-IA and LTE-IV Communicators for VISTA Systems. All videos feature yours truly. Let's check them out!

Alarm grid inside security stickers

Adding a DSC HS2TCHP Touchscreen Keypad to a DSC PowerSeries NEO

I show you how to add a DSC HS2TCHP Touchscreen Keypad to a DSC PowerSeries NEO Security System. Adding a touchscreen keypad like the DSC HS2TCHP to a system can be more inviting and easier for end users to understand than a traditional numeric keypad. The DSC HS2TCHP connects with the same on-board panel terminals as any other keypad for the system. Remember to power down your NEO Panel completely before adding a keypad or making any other hardware changes.


Adding Hardwired Zone to DSC PowerSeries NEO Security System

I show you how to add a wired sensor to a DSC PowerSeries NEO Security System. As a hardwired alarm panel, the DSC PowerSeries NEO can used wired sensors with no extra add-ons being required. All wired zones on the NEO will use end of line 5.6k ohm resistors, which are color coded green-blue-red-gold. This includes wired zones that are not actively being used with the system. New wired sensors will be connected with the panel, and the appropriate Zone Definition will be set at the corresponding zone.


Program a Wireless Zone to a DSC PowerSeries NEO

I show you how to add a wireless sensor to a DSC PowerSeries NEO Security System. The NEO cannot support wireless sensors right out of the box. Instead, a wireless transceiver must be added to the system. The NEO supports PowerG Transceivers that will allow you to use PowerG Wireless Sensors with the system. The advantage to using wireless sensors is that they are much easier to install than wired sensors. This is because you will not need to run wires for wireless sensors.


Enrolling a PowerG Sensor to a DSC PowerSeries NEO

I show you how to add a PowerG Sensor to a DSC PowerSeries NEO Security System. This will require that a PowerG Transceiver is added to the system, such as a DSC HS2LCDRF9 N Keypad or a DSC HSMHOST9 Standalone Transceiver. PowerG Sensors are widely seen as some of the best wireless sensors in the security industry. This is because these sensors offer a wireless signal range of up to 2km in an open air environment, and they utilize military grade 128-bit AES encryption for exceptional security.


Delete a Zone From a DSC PowerSeries NEO

I show you how to delete a zone from a DSC PowerSeries NEO. This process differs depending on whether the zone is wireless or hardwired. For a wireless zone, you are clearing the sensor from the system so that it is no longer recognized. For a wired zone, you are merely changing the Zone Definition for the associated wired zone to [000] for Null Zone. Deleting a zone from a DSC PowerSeries NEO will open up the zone so that it can be used with a different sensor.


Installing a Honeywell LTE-IA or LTE-IV Communicator to a VISTA-21iP System

I show you how to add a Honeywell LTE-IA or a Honeywell LTE-IV to a Honeywell VISTA-21iP Security System. The LTE-IA and the LTE-IV are dual-path communicators that use both IP connectivity (wired ethernet) and LTE cellular connectivity. When adding one of these communicators to a VISTA-21iP, you must first disable the internal IP communicator for the system. This is done by re-positioning the white jumper to the bottom two (2) prongs. Make sure to power down the panel before re-positioning the jumper and installing the communicator!

Tags: , , , , , , , , , , , ,

Comments


Posted By

Alarm Grid is back with another video recap, this time covering videos from July 21st thru July 24th. The highlights this week include a classic video from Jorge, as well as the start of a new video series where I teach you how to set up the DSC PowerSeries NEO. Let's check out the videos!

Connecting a Honeywell Tuxedo Touch to WIFI

Jorge shows you how to connect a Honeywell Tuxedo Touch to a local WIFI network. The Tuxedo Touch uses an internet connection for sending and receiving Z-Wave signals from Total Connect 2.0. It is important to understand that the Tuxedo Touch is not actually an AlarmNet Communicator for facilitating monitoring service. Its internet connection is merely for automation purposes and displaying the current weather forecast. Without a reliable internet connection, the current status of Z-Wave devices on TC2 cannot be updated.


Powering the DSC PowerSeries NEO Security System

I show you how to provide power to a DSC PowerSeries NEO Security System Primary power comes from a 16.5VAC, 40VA transformer. Since AC power is being used, polarity does not matter when connecting wires to the module. We recommend using 18-AWG, 2-Conductor wire for this job. But if you have existing wire lying around, then that should work fine, as long as maximum wire run limits are observed. The PowerSeries NEO also receives backup power from a connected battery.


Add Wired Keypad to DSC PowerSeries NEO Security System

I show you how to add a wired alphanumeric keypad to a DSC PowerSeries NEO Alarm System. The first keypad you add to your NEO Panel should be a wired alphanumeric model for programming purposes. In particular, we recommend using the DSC HS2LCDRF9 N for this purpose. That model includes a built-in PowerG Transceiver so that you can begin adding wireless PowerG Sensors with your system. The initial keypad allows for one-touch enrollment, while additional keypads must be added through the initial keypad.


Tags: , , , , , , , ,

Comments


Posted By

It's Monday again, and this is normally when we would be present you with a video recap. But since we're still working on getting our entire video team together, we figured this was a good time to catch up on some videos we missed in previous recaps, as well as present some classic videos.


How Do I Clear a Latched Alarm Using a Tuxedo Touch Keypad?

I show you how to clear a latched alarm on a Honeywell Tuxedo Touch Keypad. This is done by performing a typical disarm and then clearing the faulted zone. The reason why alarms become latched or stuck is because of the alarm memory feature on the Honeywell VISTA Systems. The panel wants to be sure that you are aware that an alarm previously occurred, so it makes you clear the faulted zone, even after disarming at the keypad.


Programming a Zone to a 2GIG GC3e

I show you how to program a wireless sensor to a 2GIG GC3e Security System. This is a very important step when setting up a security system. Every sensor used with the system will require at least one zone on the system. When you program the zone, you will set various options and configurations that will determine how the system responds when the associated sensor is faulted. You will also enroll the Serial Number with the GC3e so that the panel can recognize the sensor.


Honeywell 5808W3: Program Low-Temp to Lyric

Alarm Grid Co-Founder Sterling shows you how to program the low-temperature detection function for a Honeywell 5808W3 Smoke Detector to a Honeywell Lyric Alarm System. The Honeywell 5808W3 is a smoke and heat detector that also offers low-temperature detection, which is commonly referred to as freeze detection. The 5808W3 uses Loop Number 3 for low-temperature detection, and it activates a temperatures below 41°F. This is good for letting the user know before the pipes potentially freeze.


Lyric Security System: Change Master Code

Sterling shows you how to change the Master Code on a Honeywell Lyric Security System. The Master Code is used primarily for arming and disarming the system and accessing the Master Tools Menu. It can be used to adjust or change a limited selection of system settings. However, changing most advanced settings and making zone changes will require the Installer Code. We strongly recommend changing the Master Code from its default of 1234 for security purposes. But we advise leaving the Installer Code at its default of 4112.

Tags: , , , , , , , , , ,

Comments


Posted By

Alarm Grid has a short but sweet video recap for you! Last week's recap was skipped to spread the cheer about our headquarters reopening, but we're here now! Unfortunately, we only have three (3) videos to share. Also, our usual team wasn't quite ready yet, so I had to make more appearances.

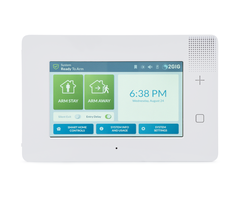
2gig gc3e wireless encrypted alarm panelThis week's videos are centered around the 2GIG GC3e Security System. This is a wireless all-in-one panel with support for encrypted 2GIG eSeries Sensors, as well as non-encrypted 345 MHz sensors. The system has a beautiful 7-inch touchscreen, built-in WIFI, partitioning support, and an integrated Z-Wave Plus controller. We hope these videos help you feel more comfortable in setting up your own 2GIG GC3e System for your home or business!

Pairing a Z-Wave Device to the 2GIG GC3e

I show you how to pair a Z-Wave device with the 2GIG GC3e. The GC3e has a built-in Z-Wave Plus controller, which allows you to pair Z-Wave Plus and classic Z-Wave devices with the system. Common Z-Wave devices include lights, door locks, thermostats, and more. Programmed Z-Wave devices can be controlled from the panel and remotely from Alarm.com if the system is monitored. Most Z-Wave devices are excluded, or cleared, from the network before being added.


Programming a Key Fob Into a 2GIG GC3e

I show you how to add a key fob to a 2GIG GC3e. A key fob is a small handheld device that you can use to control your security system from a distance. Most key fobs will allow you to conveniently arm and disarm your system and operate programmed relay-triggered devices. Many key fobs also have the ability to set off panic alarms in distress situations. The 2GIG GC3e supports various 345 MHz wireless key fobs.


Adding or Changing User Codes on a 2GIG GC3e

I show you how to add, change, and delete user codes on a 2GIG GC3e. A user code is a sequence of numbers that you enter into a system to verify that you are an authorized user. The 2GIG GC3e supports up to 100 user codes. It is advised that each regular user has their own code. Each new code on the GC3e must be enabled for the use with system after it has been added.

Tags: , , , , , , , , , , ,

Comments


Posted By

After our big return last week, we're back in a major way with 12 new videos this week! As our headquarters has only partially reopened, I had to try doing some videos again. But a familiar face has returned. We're sure you're eager to see who. Anyway, here come the new Alarm Grid videos!


Adjusting Z-Wave Device Limits On My Qolsys IQ Panel 2 Plus

I show you how to adjust the Z-Wave device limits on your Qolsys IQ Panel 2 Plus Security System. The Z-Wave device limits determine how many of each Z-Wave device type you can pair with the system. There are limits for thermostats, smart sockets, door locks, lights, garage doors, and "other" Z-Wave devices. The maximum total limit for all devices combined is 152 Z-Wave devices. You will need the Installer Code or Dealer Code (default 1111 and 2222, respectively) to change these limits. Also note that the Z-Wave device limit for Alarm.com is 122 Z-Wave devices.


Upgrading the Z-Wave Firmware for My Qolsys IQ Panel 2 Plus?

I show you how to upgrade the Z-Wave firmware for a Qolsys IQ Panel 2 Plus System. This is something you may want to do if the system is running a Z-Wave firmware of less than 6.81.03. At that Z-Wave firmware, you unlock the Smart Start feature for quickly adding Z-Wave devices, and you upgrade the system to the S2 security protocol for automation devices. Any Qolsys IQ Panel 2 manufactured with System Firmware Version 2.4.0 or higher (upgrading later doesn't count) will already have this Z-Wave Firmware Version.


Overview of the Smart Start Feature on the Qolsys IQ Panel 2 Plus

I talk about the Smart Start feature that can be used with any Qolsys IQ Panel 2 that is running Z-Wave Firmware Version 6.81.03 or higher. The Smart Start feature allows you to pair Z-Wave devices by scanning a QR code, instead of performing a traditional inclusion/exclusion process. As of June 2020, only a very limited selection of Z-Wave devices from Qolsys, Alarm.com, Eaton, and Danalock are compatible with the feature. But it can save you time if adding a large number of Z-Wave devices.


Using the Smart Start Feature on the Qolsys IQ Panel 2 Plus

I show you how to use the Smart Start feature on a Qolsys IQ Panel 2 Plus to add new Z-Wave devices. If your IQ Panel 2 is on Z-Wave Firmware Version 6.81.03 or higher and you have a compatible Z-Wave device, then you can use the Smart Start feature to add it to the Z-Wave network. Depending on the Z-Wave device, the QR code may be on the packaging or on the device itself. Some may have the code on both the packaging and the device.


How Many Z-Wave Devices are Supported on the 2GIG GC2 or GC2e?

I discuss the Z-Wave device limits for the 2GIG GC2 and the 2GIG GC2e. The classic GC2 has a standard Z-Wave controller, while the newer GC2e has an upgraded Z-Wave Plus controller. Both support the same Z-Wave devices, though Z-Wave Plus devices will get an extended range and battery life when used with the GC2e. The Z-Wave device limit for both systems is 232 Z-Wave devices, though it should be considered that adding a very large number of Z-Wave devices can diminish system performance.


How Many Z-Wave Devices are Supported on the 2GIG GC3 or GC3e?

I discuss the Z-Wave device limits for the 2GIG GC3 and 2GIG GC3e. Both of these systems have built-in Z-Wave Plus controllers for building an automation network of smart devices. Just like the "lower-end" 2GIG Systems, the GC3 and GC3e can support a maximum of 232 Z-Wave devices, though usually far fewer are actually used in practice. You should also keep in mind that Alarm.com has its own Z-Wave device limit of 122 devices. This means that only the first 122 Z-Wave devices paired with the system will get pushed over to Alarm.com.


Excluding the Kwikset Z-Wave Lock from the Lyric Controller

I show you how to exclude a Kwikset Z-Wave Lock from a Z-Wave network using a Honeywell Lyric Alarm System. Clearing the lock from the network will wipe out all of its residual Z-Wave data. This is normally done before adding the lock to the Z-Wave network, or when you need to delete it from the system. The Lyric can be used to clear the Z-Wave network data in the lock, even if the lock wasn’t paired using the Lyric to begin with.


Including the Kwikset Z-Wave Lock from the Lyric Controller

I show you how to pair a Kwikset Z-Wave Lock with your Honeywell Lyric Alarm System. This will allow you to control the lock from the panel and remotely from Total Connect 2.0 if the system is monitored and set up with the service. Normally, an exclusion process is performed before the inclusion process. Most Kwikset Locks have a simple button that is used for including and excluding. Pressing this button while the system is in its inclusion mode will include the lock into the Z-Wave network.


Excluding a Schlage Z-Wave Lock with the Honeywell Lyric

I show you how to exclude a Schlage Z-Wave Lock from a Z-Wave network using the Honeywell Lyric Alarm System. Just like most other Z-Wave devices, an exclusion process is normally performed either before adding the device to the Z-Wave network, or when deleting the device from the Z-Wave hub. For a Schlage Lock, you must access the programming code that is found on a white sticker underneath the lock's main cover. You will need a screwdriver to remove this cover.


Including a Schalge Z-Wave Lock with the Honeywell Lyric

I show you how to include a Schlage Z-Wave Lock to the Lyric's Z-Wave network. A Schlage Lock will follow the same process for inclusion as it does for exclusion. However, you will normally want to exclude the lock first to wipe out any residual Z-Wave data. To include the lock, simply enter the programming code on the lock's sticker, followed by the [0] key while the Lyric System is in the appropriate Z-Wave inclusion mode.


Enrolling a Z-Wave Lock to My Qolsys IQ Panel 2

In his triumphant return, the always fantastic Jorge shows you how to enroll a Z-Wave door lock to your Qolsys IQ Panel 2 System. This is done by putting the IQ Panel 2 into its Z-Wave inclusion mode and then activating the inclusion function on the lock. For most locks, you will want to clear the lock from the network to wipe its residual Z-Wave data before completing the inclusion process. The lock can then be controlled from the panel, as well as from Alarm.com if the system is monitored with access to the service.


Resetting an Interlogix Simon XT to Factory Defaults

This is an update from a previous video shot more than a year ago. Jorge shows you how to reset an Interlogix Simon XT System back to its factory default settings. This will reset the Master Code (1234) and the Installer and Dealer Codes (both 4321), delete any added codes and system zones, and restore all settings and configurations to their default values. It is important to note that if the option for "Phone Lock" in system programming is enabled, then certain settings will not be affected by the default.

Tags: , , , , , , , , , , , , , , , , , ,

Comments


Posted By

After a long hiatus, our video recap makes its triumphant return! With our headquarters only partially reopened, all the new videos feature myself. We promise your favorite video stars Jorge and Jarrett will be back soon. But for now, check out these four (4) new videos about Z-Wave locks!


Including the August Smart Lock Pro to the Lyric Controller

I show you how to pair the August Smart Lock Pro with the Honeywell Lyric Alarm System. All Z-Wave operation for the August Smart Lock Pro is accomplished through the August Home App. You will need to first set up the lock through the app before you will be able to pair it with the Lyric System. The app can be downloaded for free from both the Google Play Store and the Apple App Store.


Excluding the August Smart Lock Pro to the Lyric Controller

I show you how to exclude the August Smart Lock Pro from the Honeywell Lyric Alarm System. Just like with the inclusion process, the exclusion process is done through the August Home App. The app will know whether or not the August Smart Lock Pro is currently paired with a Z-Wave network. Unlike most Z-Wave devices, you do not need to perform an exclusion before attempting to pair the August Smart Lock Pro with a Z-Wave network.


Including the Yale Z-Wave Door Lock to the Lyric Controller

I show you how to pair a Yale Z-Wave Door Lock with the Honeywell Lyric Alarm System. Pairing a Yale Lock with your Lyric Panel will offer several advantages. For one, you can control the lock locally at the panel. And if your system is monitored with access to Total Connect 2.0, then you will also be able to control the lock remotely using a phone or web browser, as well as include the lock with Total Connect 2.0 smart scenes.


Exclude the Yale Z-Wave Door Lock to the Lyric Controller

I show you how to exclude a Yale Z-Wave Door Lock from the Honeywell Lyric System. Excluding a Z-Wave device basically means deleting, or clearing, it from a Z-Wave network. Once you do this, you will need to pair the device with a new Z-Wave network before you will be able to use it with a Z-Wave controller. Unlike most Z-Wave devices, you do not need to exclude a Yale Lock from a Z-Wave network before performing the inclusion process.

Tags: , , , , , , , , , , , , , , , , , ,

Comments


Posted By

Looking for a quick lighthearted laugh? Check out the blooper reel our video team made. It features some familiar faces and funny moments that occurred while our technicians shot some videos. Not everything comes out perfect the first time, and we make sure to put these outtakes on camera.


Remember though, we don't make these videos for laughs. We make them to help you learn about our products and services. But that doesn't mean we can't have some fun along the way. We make setting up your home or small business security system an easy and painless process. If you would like to learn more about our monitoring services, please visit our monitoring page or email support@alarmgrid.com. We operate support hours from 9am to 8pm ET M-F. We are eager to help you get started, so please reach out!

Tags: ,

Comments


Posted By

We're back with a new video recap! We apologize that we were unable to post this recap yesterday. Since our Florida office has been closed, we won't be able to shoot new videos until it reopens. But we are working to resume business as usual as soon as possible. For now, let's check out our newest videos!

Adding a Wireless Zone to a Qolsys IQ Panel 2

Jorge shows you how to add a new zone to a Qolsys IQ Panel 2 Security System. The process is the same, regardless of which version of the IQ Panel 2 or IQ Panel 2 Plus System you are using. You need to put the system in its auto-enrollment mode and then fault the sensor you are adding to transmit a signal to the panel. The system should then receive the signal and allow you to add the sensor to the system and configure the settings for that zone.


Adding a 2GIG GB1 to the 2GIG GC3

Your friend Jarrett shows you how to add a 2GIG GB1 Glass Break Detector to a 2GIG GC3 Security System. The 2GIG GB1 is a glass break detector that transmits signals at 345 MHz. The device actively listens for glass break events. It must hear both the low-pitched "thud" of an object striking against the glass and the high-pitched "shattering" of the glass breaking in order to activate. This dual-detection method helps prevent false alarms on the system.


Using a 5853 Glass Break Detector with a 2GIG GC3

Jarrett explains how you can use a Honeywell 5853 Glass Break Sensor with a 2GIG GC3 Alarm System. The Honeywell 5853 is part of the Honeywell 5800 Sensor lineup, and it transmits signals at a wireless frequency of 345 MHz. The sensor can be conveniently auto-enrolled with the GC3 System by putting the panel into its auto-enrollment mode and then activating the tamper cover for the sensor. You will need to adjust the Loop Number for the sensor when programming.


Using WIFI as Primary and GSM as Backup On My Qolsys IQ Panel 2

Jorge explains how the Qolsys IQ Panel 2 Plus System uses both cellular and IP connectivity to communicate with the Alarm.com servers. Alarm.com requires that any system connected with its servers has a cellular communicator installed and registered. The IQ Panel 2 System has both an LTE cellular communicator and a WIFI card built inside. Most users will set up the system to communicate across both pathways for optimal performance and reliability. This will require a monitoring plan that includes cellular connectivity.


Adding a Remote Keypad to the Qolsys IQ Panel 2

Jorge covers the process for adding a Qolsys IQ Remote Keypad to a Qolsys IQ Panel 2 Security System. In order for the pairing to work, the IQ Remote Keypad and the IQ Panel 2 System should be connected with the same WIFI network. If no WIFI is available, then the system and keypad can connect using a wireless access point (AP). Once you have completed the pairing process, you should test the IQ Remote by arming and disarming the system to ensure that it is working properly.


Using the Chime feature On a Qolsys IQ Panel 2

Jorge explains how chimes work on a Qolsys IQ Panel 2 Security System. A chime is a quick sound the system makes when a connected sensor is faulted or activated. They are useful for quickly letting you know about system events. You can set up individual chimes for each zone on the system. However, no chimes will be produced if system-wide chimes are disabled. If there is a zone for which you don't want any chime sounds to occur, then you can set its chime setting to None.


Using 2GIG Sensors On a Qolsys IQ Panel 2

Jarrett explains how you can use 2GIG Sensors with the 345 MHz version of the Qolsys IQ Panel 2 Plus. Any sensor you want to use with the system will first need to be enrolled. We recommend auto-enrolling, as this ensures that the sensor can communicate with the panel successfully. Any uni-directional 2GIG 345 MHz Sensor can be used with the 345 MHz IQ Panel 2 Plus. Please note that this does not include the 2GIG eSeries Encrypted Sensors, which are for the 2GIG GC2e and 2GIG GC3e only.

Tags: , , , , , ,

Comments


Posted By

It's time for another Alarm Grid video recap. We only have three (3) videos for the week. But the good news is that all of the videos this week feature Jorge. We hope that you find them helpful in learning how to use your security system. Let's take a look at the new videos from Alarm Grid!

Connecting an iPhone to a Qolsys IQ Panel 2

Jorge explains how you can use an iPhone to control a Qolsys IQ Panel 2 Plus System. This is done using the iOS version of the Alarm.com Mobile App. You will need an alarm monitoring plan that includes access to Alarm.com. The panel will communicate with the Alarm.com Servers using an LTE cellular connection, and you can also set up an IP (internet protocol) communication path as well. By accessing the ADC App on your iPhone, you can arm/disarm, check system status, control automation devices, and more.


The Number of Hardwired Zones Supported On a Qolsys IQ Panel 2

Jorge explains how there are two (2) hardwired zones built into the Qolsys IQ Panel 2 Plus System. These hardwired zones are for normally closed contact sensors. You can connect the sensors and then enroll them with the panel by putting the system into its auto-enrollment mode and faulting the sensors. If you want to use additional hardwired zones with an IQ Panel 2 Plus, then a wired to wireless converter is a good option. Just make sure the converter communicates at a frequency compatible with the version of the IQ Panel 2 Plus that you have (319.5 MHz, 345 MHz, or 433 MHz).


Upgrading a Honeywell LYNX Touch to Use LTE

Jorge shows you how to upgrade a Honeywell LYNX Touch System to use an LTE cellular communicator. This is possible on an L5200, L5210, or L7000 LYNX Touch System. There are two (2) LTE communicators available for these systems. These are the Honeywell LTE-L57A (AT&T LTE) and the Honeywell LTE-L57V (Verizon LTE). You must make sure your LYNX Touch System is on a high enough firmware version to support one of these communicators. If you need to upgrade the firmware, you can do so using the Honeywell LYNXTOUCH-MSD Firmware Updater Tool.

Tags: , , ,

Comments