Training Posts

Posted By

Hi DIYers! It's time for another video recap. We've had an unusual production schedule for videos lately. So this update will contain more videos than usual. This update covers the dates from July 13th thru July 19th. Let's take a look at what our awesome team has been working on.


General Overview of Honeywell VISTA Programming

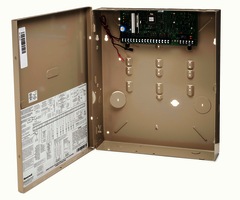
Joe demonstrates the basics of programming for a Honeywell VISTA System. This is done using an alphanumeric keypad, like the 6160RF. To access programming, a user will need to provide the system's Installer Code or use the backdoor method. The sections of programming are split up into different fields. Each programming field uses its own unique set of key commands. Users should check out the VISTA Programming Guide for more information on the different programming fields. Once finished, use [*99] to exit programming.


Adding Email Notifications in Total Connect 2 0

Jorge goes over the process for receiving email notifications from Total Connect 2.0. When a system event occurs on their Honeywell Alarm System, a user can receive an email notification to let them know what has taken place. In the Total Connect 2.0 Mobile App, there is a profile section where a user can manage their notification settings. A user will need to confirm their email address before they can receive email notifications. It is also possible to receive text notifications from Total Connect 2.0.


Adding a 5834 4 to a LYNXTouch

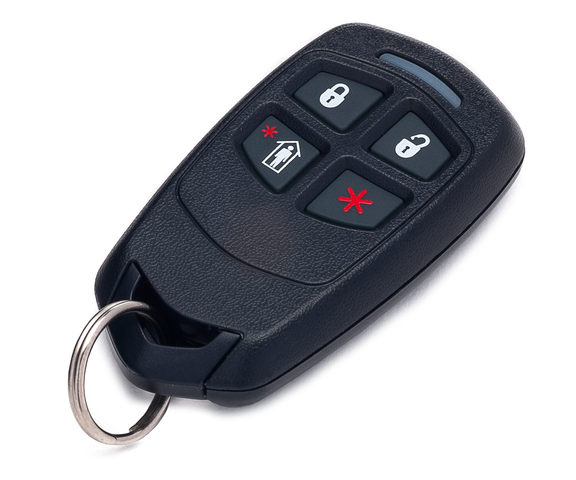
Dylan explains how to program a Honeywell 5834-4 Key Fob with a Honeywell LYNX Touch System. This process is completed through key fob programming on the system. The 5834-4 has four buttons, and up to eight functions can be programmed by using dual-button presses. The number of available key fob zones varies depending upon the type of LYNX Touch Panel that is being used. A key fob is learned in by putting the system in its learn mode and then pressing and holding one of the key fob buttons. Each input uses a separate Loop Number from the others.


Connecting a Lyric Alarm to the Local WiFi

Jorge covers the process for connecting the Honeywell Lyric Controller to a local WIFI network. The Lyric Controller comes with a built-in WIFI card for connecting to a 2.4 GHz WIFI network. WIFI, along with cellular service, is the main way that a Lyric System will receive monitoring service. WIFI service will also allow the Lyric Controller to connect with Total Connect 2.0. In order to connect the system to a WIFI network, a user must know both the system's Master Code and the WIFI network password.


Using a 2GIG Go!Control w/o Monitoring

Dylan talks about using a 2GIG GC2 System without monitoring service. By doing this, the system will only serve as a local sounder. It will have no way of sending alerts to a central monitoring station or text and email notifications to the end user. In other words, if the user is off-site, a burglary or fire alarm will probably go unnoticed, and the authorities won't be contacted. It will also be impossible to connect the system with Alarm.com for remote operation. However, for users who are almost always on-site, forgoing monitoring service can be a viable option.


Connecting an iPhone to the Lyric Alarm System

Joe explains how a user can connect their iPhone to their Honeywell Lyric Controller. This will allow a user to operate their Lyric Controller System using their iPhone. The two ways to do this are through the Total Connect 2.0 Service and the My Home Controller App. In order to use Total Connect 2.0, alarm monitoring service is required, and the Lyric will need to be using an active internet or cellular connection. However, the My Home Controller App does not require any monitoring service.


What Does Interactive Alarm Monitoring Mean?

Jorge talks about interactive alarm monitoring and the purpose it serves. Simply put, interactive services allow users to control their alarm systems remotely. Some of the most popular interactive services include Total Connect 2.0 and Alarm.com. Total Connect is for Honeywell Systems only, while Alarm.com is used with many manufacturers. In order to use an interactive service, the alarm system will need to be using a cellular or IP connection. The user will also need to have an alarm monitoring plan that includes access to one of these services.


Arming/Disarming Lyric Alarm System from Phone, Tablet, or iPad

Jorge explains how to arm and disarm a Honeywell Lyric Controller from a smartphone or tablet. The two ways to do this are through Total Connect 2.0 and through the My Home Controller App. Total Connect 2.0 requires active monitoring service for the system. But the My Home Controller App can be used without alarm monitoring. However, the Lyric System will need to be connected with a WIFI network to be operated through My Home Controller.


Lyric Alarm System Slideshow

Jorge shows users how to set up the slideshow feature on a Honeywell Lyric Controller. This will have the system act as a sort of digital picture frame when left idle for a certain period of time. The images are uploaded to the panel through a USB drive that is inserted into the bottom of the system. A user can pick and choose which images to use. They can also decide how long each image will be displayed until switching to the next one.


Turning On the Chime on a Lyric Alarm System

Joe demonstrates how to turn on the chime for a Honeywell Lyric Controller. There are two types of chime on the Lyric System. These are the tone chime and the voice chime. If voice chime is used, the panel will read out the zone descriptors when the sensor is triggered. The chime function can be configured for each individual zone on the system. There is also a menu option for controlling the chime settings for the system as a whole.


Managing Total Connect 2 0 User Profiles from a Tablet

Jorge goes through the process of adding, editing and deleting user profiles on Total Connect 2.0 by using a tablet. This is done through the Settings Menu of Total Connect 2.0. The layout for iOS and Android Total Connect 2.0 Apps is slightly different, but the process is mostly the same. The information from Total Connect 2.0 will be sent to the panel so that the logins can be used. The type of access for each user can also be set from Total Connect.

Tags: ,

Comments


Posted By

Hi DIYers! We're back with another recent video recap. This recap showcases videos from our techs Joe and Dylan as they show users how they can get the most out of their security system setups. We've got a great set of helpful videos this time around. Let's go and check them out.


Central Station Alarm Monitoring and How It Works

Dylan talks about the intricacies of central station monitoring and how it functions. The main purpose of central station alarm monitoring is to receive automatic dispatch in the event of an alarm. When an alarm occurs, a signal will be sent from the system to a central monitoring station to alert an operator of the event. The station operator can then alert the appropriate authorities on the behalf of the user. To prevent false alarms, a user can instruct the central station to try and contact them first before requesting emergency dispatch.


What Is Cellular Alarm Monitoring

Joe discusses the benefits of using cellular service with an alarm system. Cellular monitoring is seen as the most reliable communication path available. In order to receive cellular monitoring, the user will need a system with a cellular communicator and an alarm monitoring plan that includes cellular connectivity. The cellular communicator that is used must be compatible with the security system. Some security systems, like the Qolsys IQ Panel 2, come with a cellular module that is already included for this purpose. Others, like the Honeywell Lyric Controller need to have one added separately.


Wholesale Home Alarm Monitoring w: Alarm Grid

Dylan explains what wholesale alarm monitoring is and how Alarm Grid supports this type of monitoring. Wholesale alarm monitoring is where a single customer receives service for multiple locations. The customer will need a separate monitoring plan for each location. However, they will still be able to manage the systems for all of their locations with just one Total Connect or Alarm.com account. This possibility is useful for people who own multiple residences, as well as those running a business with multiple locations.


Add a Honeywell GSMX4G to a VISTA Security System

Dylan shows users how to add a Honeywell GSMX4G Cellular Communicator to a VISTA Security System. The GSMX4G is a 4G communicator that connects with the AT&T cellular network. The device receives power directly from the panel using a four-wire connection with the ECP bus. These terminals are four thru seven. The communicator receives this connection via a plug-in port. By feeding the wire through the slot, there will be no exposed wires. The communicator will need to be activated by the user's alarm monitoring company before it will work.


Adding a wired siren to a 2GIG GC3

Joe goes over the process for adding a hardwired siren to a 2GIG GC3 System. To do this, a user will need a power supply, a power relay and a backup battery. The panel will connect with the power relay through its bell terminals, and the negative (black) wire will also parallel splice to the power supply. The relay will connect with the panel, the siren and the power supply. The siren will connect with the relay and the power supply. The backup battery will connect with the power supply exclusively. A plug-in transformer connects with the power supply. A full diagram can be seen here.


Voice Commands on the Lyric Security System

Joe talks about the voice control feature on the Honeywell Lyric Controller. This feature is often overlooked on the system, but it can be very useful when used effectively. Voice commands can be used to control smart scenes and to open the camera menu for older model Honeywell IP Cameras. Voice command options can be set from within the Master Tools menu. It is recommended that a user completes the voice training on the system so that the Lyric Controller can better understand the user's voice.


Tags: ,

Comments


Posted By

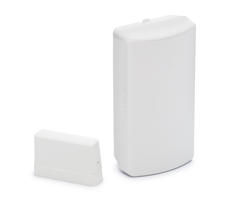
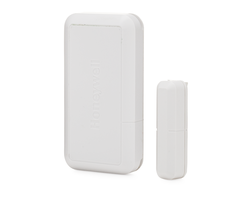
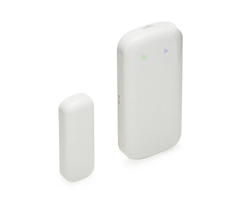
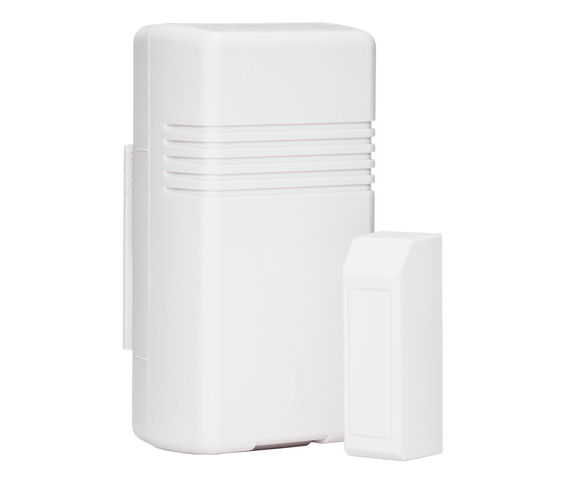
Honeywell is known for producing some outstanding security equipment, and their wireless door and window contacts are no exception. With wireless contacts available from both the 5800 Series lineup and the SiX Series lineup, there are certainly some great options. But with all the possibilities, it might seem overwhelming if you are just getting started. This guide will help you choose the perfect wireless Honeywell door and window contact for your needs.

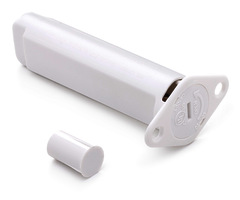
Honeywell 5820l super slim wireless door and window sensorFirst, a user should understand exactly how a door and window contact works. Almost every wireless Honeywell door and window contact functions using the exact same principles. These devices consist of a sensor and magnet. The sensor is the "brains" of the operation, and it is responsible for sending signals to the alarm system. It is typically installed on or inside the door or window frame. The magnet is installed on or inside the door or window itself. The only wireless Honeywell contact that does not use a magnet is the Honeywell 5800RPS. This is a wireless recessed sensor for doors only that operates using a plunger switch.

For proper operation, the device's magnet should be installed very close to the sensor. We usually recommend placing it within a half-inch of the sensor. However, some 5800 Series contacts, like the 5816OD, can function properly with a slightly larger spacing gap. When the door or window is opened, the magnet will separate from the sensor. This will cause a reed switch inside the sensor to activate. When this happens, the sensor will send a signal to the alarm system so that the programmed Response Type can be performed.

It's also important to know the system compatibilities for the different Honeywell wireless contacts. Their wireless contacts come from two different sensor lineups. These are the 5800 Series and the SiX Series. The 5800 Series contacts are unidirectional devices that operate at 345 MHz. This makes them compatible with any Honeywell System or 2GIG System. But the SiX Series contacts are bi-directional, fully encrypted sensors that communicate using 2.4 GHz WIFI. These sensors only work with Honeywell Lyric Systems.

Honeywell lyric controller encrypted wireless security system

If you have a Honeywell Lyric Controller, then you can choose between any Honeywell wireless contact on the market. But if you have a LYNX Touch or a VISTA System with an added wireless receiver, then you are restricted to the 5800 Series contacts. Additionally, if you are using a 2GIG GC3 or a 2GIG GC2, then you can use either 2GIG Contacts or Honeywell 5800 Series contacts. Any alarm systems that do not accept the 345 MHz frequency are unable to use Honeywell contacts.

The only two contacts in the Honeywell SiX Series Lineup are the Honeywell SiXCT and the Honeywell SiXMINICT. These are both wireless, surface-mount sensors that work exclusively with Honeywell Lyric Systems. What makes these sensors special is that they feature 128-bit AES encryption. Whenever the sensor sends a command to the Lyric System, the system must then send a secure response back to the sensor. The command will only go through if this secure response is received. Many security experts refer to this as a "digital handshake", and it is excellent for preventing any hacking attempts or wireless attacks.

The SiXCT and the SiXMINICT do have a few slight differences. Most notably, the SiXMINICT is smaller and more compact than the SiXCT. The SiXCT measures at 3.13”L x 1.61”W x 1"D, while the SiXMINICT measures at 2.44”L x 1.25”W x .45”D. So users who want a smaller sensors should go with the SiXMINICT. But the benefit of the SiXCT is that it features a larger wireless range (~300 feet) than the SiXMINICT (~200 feet). However, only users with particularly large properties should have to worry about signal range. One thing that these sensors do share in common is that they can both be batch-enrolled with the Lyric Controller.

  • Honeywell SiXCT - The standard SiX Series contact. Features a 300 foot range and encryption. Will only work with Lyric Systems.
  • Honeywell SiXMINICT - The more compact SiX Series contact. Provides a 200 foot range and encryption. For Lyric Systems only.

Honeywell sixct wireless door slash window contact for lyric conHoneywell sixminict wireless door slash window contact for lyric

But the SiX Series contacts aren't for everyone. For one, they will only work with the Lyric Systems. There are also no recessed contacts in the SiX Series lineup. Users who don't have a Lyric Controller or want a recessed sensor should look to the Honeywell 5800 Series instead. This is an incredibly diverse sensor lineup that has an appropriate contact option for virtually any situation. Any Honeywell or 2GIG System will work with these sensors. This includes any Lyric Controller, L7000, L5210, VISTA P-Series, 2GIG GC3, 2GIG GC2 and more. Most 5800 Series contacts feature a 150-200 foot wireless range that can be effectively doubled with the use of a 5800RP Wireless Repeater.

Honeywell l7000 wireless home security system with 7 inch screenHoneywell 5800rp wireless repeater

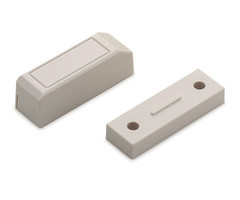
When selecting a 5800 Series Sensor, a user will choose between a surface-mount contact and a recessed contact. With a surface-mount contact, the sensor and the magnet are mounted on the outer surface of the door or window and its frame. But with a recessed contact, the sensor and magnet are installed inside the door or window and its frame. Surface-mount sensors are very easy to install, since they only require screws or double-sided foam tape. But the sensor will be visible on the outside of the door. Recessed sensors are more difficult to install since holes will need to be drilled. However, some users will appreciate the fact that recessed sensors are hidden.

For users who go with a surface-mount sensor there are certainly some great options in the 5800 Series. One of our favorites is the 5800MINI. This is a reliable sensor that boasts an impressive 200 foot range, despite its small size of just 2.2"H x 1"W x 0.25"D. This is arguably the best surface-mount contact in the Honeywell 5800 Series.

  • Honeywell 5800MINI - A small and discreet surface-mount contact. Offers a 200 foot wireless range. Great for almost any application.

Honeywell 5800mini interior wireless door and window sensor

But there are other surface-mount options than just the 5800MIIN. The 5816 is the most popular sensor that Honeywell has ever offered. It features a larger size and roughly the same range as the 5800MINI. But unlike the 5800MINI, the 5816 can be used as a wireless transmitter for a normally closed hardwired device. Honeywell also offers the 5820L Slim Line for narrow installations and the 5816OD for outdoor use.

  • Honeywell 5816 - Honeywell's most popular sensor. Can also be used as a wireless transmitter for a single NC hardwired device.
  • Honeywell 5820L - A slim line door and window contact that is great for narrow applications. Features a 150-foot range.
  • Honeywell 5816OD - A surface-mount contact for outdoor installations. Excellent for monitoring fences, sheds and detached garages.

Honeywell 5816 wireless door window sensorHoneywell 5816od wireless outdoor door and window sensor top


Honeywell also offers some less popular 5800 Series contacts. These include the 5811 (discontinued), the 5814, the 5815 and the 5816MN (discontinued). While these sensors will work just fine, there isn't really any reason to choose them over another 5800 Series contact.

  • Honeywell 5811 - A small and discreet sensor that has since been discontinued. Replaced by the Honeywell 5800MINI.
  • Honeywell 5814 - Another compact sensor option. It is not as robust as the 5800MINI. Its wireless range is only about 100 feet.
  • Honeywell 5815 - An aesthetically pleasing surface-mount contact that has roughly the same functionality as the 5816.
  • Honeywell 5816MN - A discreet surface mount sensor that has been discontinued. Replaced by the Honeywell 5816MN.

Honeywell 5814 wireless small door sensor and window sensorHoneywell 5815 white wireless aesthetic door sensor and window s

There are also several great recessed contacts in the 5800 Series. The Honeywell 5818MNL is a relatively standard recessed contact that can be used with almost any door or window. It features a 200-foot range, and the installation only requires minor drilling. The Honeywell 5800Micra is a recessed contact for windows only. It is a very small sensor with an attached antenna for sending wireless signals. Finally there's the 5800RPS, which uses a plunger switch instead of a sensor and magnet. This sensor can only be used with doors. When the door is closed, the plunger switch will be pressed in. Once the door is opened, the plunger switch will come out and activate the sensor.

  • Honeywell 5818MNL - A standard recessed contact for doors and windows. It is easy to install, and it has a 200 foot range.
  • Honeywell 5800Micra - A small recessed contact for windows only. Its antenna must be adjusted carefully when installing.
  • Honeywell 5800RPS - A recessed sensor that uses a plunger switch instead of a magnet. For use with doors only.

Honeywell 5818mnl wireless recessed door sensor and window sensoHoneywell 5800micra wireless recessed window contact

Alarm Grid has previously discussed the batteries used with door sensors. We recommend checking out that blog post for more information on which batteries to use with a door and window sensor. If you ever need any additional help choosing a Honeywell door and window contact for your DIY wireless alarm system, please feel free to send an email to support@alarmgrid.com. You can also contact one of our technical specialists by calling 888-818-7728 from 9am to 8pm EST M-F.

Tags: , , , , , , , , , , , , , , , , , , , , , , , , , ,

Comments


Posted By

Door alarm sensors, or contacts, are some of the most important devices used with security systems. These devices alert a user whenever their door is opened. They can be used on virtually any type of door. These might include a front door, a back door, screen doors, a patio door, a shed, cabinets and any door inside the building. We typically find that door alarm sensors are some of the easiest to use devices with an alarm system. But still, it can be helpful to read through a comprehensive guide explaining the full ins and outs of these devices. So it here is - everything you've ever to know about door alarm sensors.

Qolsys iq dw mini s encrypted wireless sensors for iq panel 2 qsThe Basics of Door Alarm Sensors

Most traditional door sensors feature a relatively simple design and premise. These devices usually consist of a sensor and a magnet. The sensor is placed on or inside the door frame, and the magnet is placed on or inside the door itself, within a half inch of the sensor. Opening the door will cause the magnet to pull away and separate from the sensor. When this happens, a reed switch inside the sensor will activate. This will cause the sensor to send a signal to the security system, letting it know that the door was opened. The system will then perform the appropriate response based on how the sensor's Response Type was programmed. At the surface, it's all very simple. Some examples of these traditional sensors include the Honeywell 5800MINI, the Honeywell SiXMINICT and the VERSA-2GIG Sensor. Traditional door sensors can be either surface-mounted or recessed.

Honeywell 5800mini interior wireless door and window sensor

There's also a second variation of door sensors, known as mechanical door sensors. This type of sensor features a physical switch that is pressed down when the door is closed. When the door is opened, the switch will pop up, causing the sensor to activate. From there, the system will perform the Response Type assigned to the zone for that sensor. This type of door alarm sensor is far less common than the other type of sensor. However, the end result is still the same - the system will still perform the programmed Response Type when the sensor is activated. An example of this type of sensor is the Honeywell 5800RPS. While you are less likely to come across this type of door sensor, it's still worth mentioning just in case. Mechanical door sensors are only available in the recessed variety.

Honeywell 5800rps wireless recessed door and window plunger sensTypes of Door Sensors - The Two Distinctions

Now that you know the very basics of door sensors, you can start thinking about the different types. While almost every door sensors operates using one of the two mechanisms mentioned above, there are two other distinctions that are commonly made between door sensors. These are whether the door sensor is wireless or wired and whether the door sensor is surface-mounted or recessed. These considerations will play a big role in determining which door sensor you choose to purchase for your alarm system.

A wireless door sensor will communicate with an alarm system wirelessly. This will prevent the need for running a wire from the system to the door sensor. This can make wireless door sensors significantly easier to install. Another great aspect of wireless door sensors is that they can usually be auto-enrolled with the security system. That said, a wireless sensor will need to have its battery replaced every three to five years. On the other hand, a wired door sensor will need to be physically connected with the alarm system. This can make the installation considerably more difficult in certain cases. However, a wired sensor will never require any battery replacements.

If you are using a wireless door sensor with a wired alarm system, such as a Honeywell VISTA Panel, then you will need to use a wireless receiver. This will allow the wireless signal to be received by the system. When choosing a wireless door sensor, make sure that the wireless frequencies it uses are compatible with your alarm system. For example, Honeywell Panels look for wireless signals that operate at a frequency of 345 MHz, while Qolsys Panels use signals that operate at a frequency of 319.5 MHz. If you try to use a wireless door sensor that does not communicate at the correct wireless frequency, then it will not function with the alarm system.

Honeywell 5800rp wireless repeaterThe other major distinction between door sensors is surface-mount sensors versus recessed sensors. Simply put, surface-mount sensors are installed on the outside of the door and its frame, while recessed sensors are installed in the inside. Surface-mount sensors require no drilling. In the easiest scenario, it is possible to mount them using a double-sided adhesive (foam tape). They can also be mounted using screws. With their easier installation, this is generally the preferred type of door sensor. Most users do not mind the fact that a small sensor will be visible on the outside of the door.

Honeywell 5820l super slim wireless door and window sensorHowever, for users who do want a more discrete installation, there are recessed door sensors. These sensors and their magnets need to be inserted into holes that are drilled into both the door and the frame. The exact size of the holes will depend on the specific model of the recessed door sensor that is being installed. Once the sensor and magnet have been installed, they will not be visible from the outside. That said, most users opt for surface-mount door sensors due to the easier installation.

Honeywell 5818mnl wireless recessed door sensor and window senso

Some Notes on Response Types

The primary function of any security sensor is determined by its Response Type. This refers to what action the system will take when the zone is faulted (e.g. the door is opened). Below are the Response Types that are most commonly used with door sensors:

  • Entry / Exit: If the door is opened while the system is armed stay or armed away, then the system will need to be disarmed within its entry delay period. If the system is not disarmed within this time period, then an alarm event will occur. Most alarms will feature two different Entry / Exit settings. This allows two different entry delay periods to be used on the same system for different zones.
  • Perimeter: If the door is opened while the system is armed stay or armed away, then an alarm event will occur immediately.
  • Interior Follower: If the system is set to armed away, an alarm event will immediately occur if the door is opened, assuming that an entry / exit zone is not faulted first. If an entry / exit zone is faulted first, then the system must be disarmed within its entry delay period, otherwise an alarm event will occur.
  • Interior With Delay: If the system is set to armed away and the door is opened, then the system must be disarmed within its entry delay period. If the system is not disarmed within this time period, then an alarm event will occur.
  • Day / Night: If the system is disarmed and the door is opened, a trouble event will occur on the system. If the system is armed away or armed stay and the door is opened, an alarm event will immediately occur on the system.
  • 24 Hour Audible: Opening the door will immediately cause a full system siren and an alarm to be set off, regardless of what state the system is currently in. This Response Type should not be used unless the door should never be opened for any reason.
  • 24 Hour Auxiliary: Same as 24 Hour Audible, but only the panel itself will produce a siren. Any external sirens or noisemakers will not activate. This zone type is ideal for emergency medical cabinets that would only be opened in a serious medical emergency.
  • 24 Hour Silent: Same as 24 Hour Audible, but no siren or sound will be produced.
  • Fire No Verification: Opening the door will immediately cause a fire alarm to be set off, regardless of what state the system is currently in. This is the ideal Response Type for fire doors.

Certain Response Types are only available for certain Device Types. Depending upon the panel you are using, not all of these Response Types will be made available for the Device Type of "Door". A way to work around this is to set the Device Type to "Other". This will allow you to set any possible Response Type for the door sensor.

2gig dw10 wireless slim door slash window contactOther Programming Settings

Programming a door sensor has to do with more than just the Response Type and the Device Type. Below are some of the other programming settings available for a door sensor. Please note that these settings are specific for a Honeywell Lyric Controller, and different settings may be available on another type of panel.

  • Serial Number: This is how the system will specifically identify the exact door sensor that is being used.
  • Loop Number: This tells the door sensor what function it should perform. Each door sensor usually has a specific loop number that should be set for the device to function as a door sensor. Some door sensors have multiple possible functions that can be used with the device. One example is the Honeywell 5816, which can be used as both a door sensor and as a wireless transmitter depending upon the loop number that is set.
  • Zone Descriptors: These serve as the name of the door sensor. The panel will announce the zone descriptors whenever the zone for that sensor is affected.
  • Alarm Report: This tells the system whether or not it should send an outbound signal to the central monitoring station. If you turn this off, then all the sounds and sirens will still be made, but a distress signal will never be sent to the central station. An example for turning this off might be if you are monitoring a liquor cabinet to make sure your teenage doesn't get into it. You might want a very loud siren to go off so that you know if this happens. However, you obviously wouldn't want the police to show up at your house in this situation!
  • Chime: This will have the panel produce a simple chime whenever the door is opened. Many panels will allow you to toggle between different chime options for the panel. Remember, you will still need to have the local chime for the system enabled from the main settings menu.
  • Supervision: This will have the system monitor the door sensor for low battery or loss of signal. Keep this enabled to make sure that the door sensor is always in proper working order. This setting is only used with wireless door sensors.

For any programming questions related to a specific panel, please consult the programming guide for that panel. This information is readily available on the Alarm Grid website in the form of FAQs.

Honeywell 5816 wireless door window sensor

Common Door Sensor Questions

Below are some questions that are commonly asked about door sensors:

1. How do I program my door sensor?

If it is a wireless door sensor, it can most likely be auto-enrolled.This is accomplished by accessing zone programming on the system and then faulting and restoring the door sensor three times to learn it in. You can fault and restore the door sensor by separating the sensor and the magnet and then clicking them back together. From there, make any necessary programming configurations on the panel. See the above information on Response Types and other programming settings.

If it is a wired door sensor with a hardwired VISTA Panel, then we recommend consulting this FAQ. You may also need to consult the VISTA 15P and 20P Programming Guide.

Honeywell vista 15p alarm control panel

2. How long do door sensor batteries last?

A wireless door sensor will typically require a battery replacement every three to five years. Wired door sensors do not use batteries, and they will never require a battery replacement.

Panasonic cr123a 3v battery

3. How close should the door sensor be to its magnet?

We usually recommend placing the door sensor magnet within a half inch of the sensor. Some sensors may allow for a greater separation distance than others before a faulted zone will occur. The closer the magnet is to the sensor, the less likely an unwanted fault or a false alarm is to occur.

Honeywell 5899 magnet for 5816 wireless door sensor and window s

4. Are there any encrypted wireless door sensors?

Yes, there are encrypted wireless door sensors. The Honeywell SiXCT, the Honeywell SiXMINICT, the Qolsys IQ DW MINI-S and the Qolsys IQ Recessed Door-S are all encrypted wireless door sensors.

Honeywell sixct wireless door slash window contact for lyric con

5. What is the best door sensor?

Please see the following FAQs:

Tags: , , , , , , , , , , , , , , , , , , , , , , , , ,

Comments


Posted By

One of the most versatile security key fobs on the market today is the Honeywell 5834-4. This is a wireless four button key fob with up to eight different programmable functions. The device will function from up to 50 feet away from the system. This makes the 5834-4 a convenient tool for quickly arming and disarming your system and performing other useful functions. This helpful guide will tell you everything you need to know about the 5834-4 key fob so that you can fully integrate it into your security setup.


Overview of the 5834-4 and Other 5800 Series Key Fobs

The Honeywell 5834-4 is actually the same security key fob that ADT provides for their monitored customers. This means that an ADT Key Fob can generally be used in the exact same manner as a 5834-4. If an ADT customer decides to leave ADT, they will most likely be able to use their old ADT Key Fob with their new monitoring company. A user can program their old ADT Key Fob with any compatible alarm system, even if the device has not been deleted from the old system. That said, we do recommend deleting the device from the old system if possible.

The 5834-4 is recognized as a wireless sensor from the Honeywell 5800 Series. Just like the other devices in this lineup, the 5834-4 Key Fob operates at a wireless frequency of 345 MHz. It will interface with any control panel that utilizes this wireless frequency. This includes the Honeywell Lyric Controller, Honeywell LYNX Touch Panels, Honeywell VISTA Panels (with an added wireless receiver), the 2GIG GC3 and the 2GIG GC2. In order to achieve the maximum functionality of the device, the 5834-4 will require eight separate wireless zones on the system.

The 5834-4 can perform system commands at a maximum distance of up to 50 feet away from the alarm system, though a Honeywell 5800RP Wireless Repeater can be used to extend this range. Also, any button press that is made using the 5834-4 must be held down for half a second before the programmed action will go into effect. This helps to prevent potential false alarms caused by the key fob.

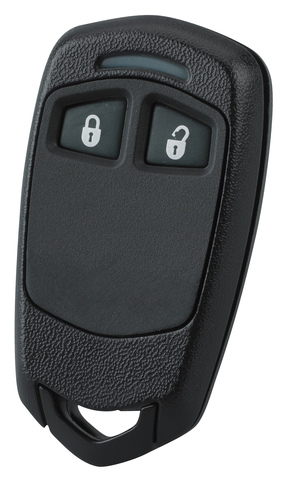
In addition to the 5834-4, Honeywell produces two other key fob devices that are very similar in terms of use. The 5834-2 features two buttons and up to three programmable functions. This two-button key fob is a good option for users who do not require a device with as many functions as the 5834-4. Honeywell also offers the 5834-4EN. This is literally the exact same device as the 5834-4. The only difference is that the 5834-4en features a design with a pleasant silver finish.

Enrolling the 5834-4

Each function on a 5834-4 Key Fob is assigned its own wireless zone on a security system. This means that if every possible button entry is set up, the device will take up eight wireless zones. Each button entry can be learned-in with the security system, much in the same way as any other wireless security sensor. With the panel in its learn mode, press and hold the button entry you want to program. The panel will beep to let you know that it has recognized the key fob. Do this three times to auto-enroll that button press with the system.

Please note that some alarm panels will require you to use the panel's designated "key fob zones" to auto-enroll the 5834-4 with the system. For these panels, attempting to assign the 5834-4 with a non-key fob zone will require that the serial number be entered in manually rather than being learned-in automatically. While the 5834-4 can technically be used with any wireless zone, we always recommend assigning the device to a key fob zone if possible. The exact zone numbers for the key fob zones vary between different alarm panels.

Also note that most panels will have a specific sub-menu within programming for setting up key fobs. By setting up a 5834-4 through this sub-menu, the device inputs will automatically be assigned to a designated key fob zone on the system. Again, we strongly recommend setting up a 5834-4 key fob through the key fob sub-menu for the panel.

The table below outlines the key fob zone numbers for various types of alarm systems:

Panel Type
Key Fob Zones
Honeywell VISTA-15P 49-56
Honeywell VISTA-20P & VISTA-21iP 49-64
Honeywell LYNX Touch 140-147
Honeywell Lyric Controller 131-162
2GIG GC2 51-58
2GIG GC3 32 Key Fob Zones*
*Note: The 32 key fob zones on a 2GIG GC3 are considered separate from other wireless zones.

The 5834-4 uses two different 7-digit Serial Numbers. The second Serial Number is one digit higher than the first Serial Number. So for example, if the first Serial Number is 123-4567, then the second Serial Number would be 123-4568. The first Serial Number is used with all single-button presses, while the second Serial Number is used with multi-button presses. Each unique input is assigned a Loop Number 1-4. This means that each of the eight possible inputs will have a Serial Number and Loop Number combination that is unique from all the others. This is shown in the following diagram:

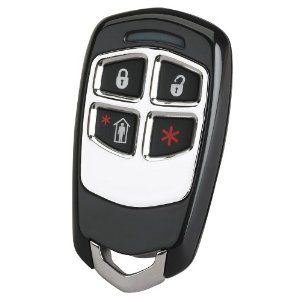
Note that each button is identified by a different letter. The button in the upper-left corner with the closed lock is Button A. The button in the upper-right corner with the open lock is Button B. The button in the lower-left corner with the person standing inside the house is Button C. The button in the lower-right corner with the asterisk (*) is Button D.

Please note that the button combinations of A+D and B+C are not used with the system. But all other two-button combinations are fair game. Serial Number 2 will be one digit higher than Serial Number 1. The following table outlines every Serial Number and Loop Number combination used with the 5834-4 Key Fob:

Input Serial Number Loop Number
A 1 3
B 1 2
C 1 4
D 1 1
A+B 2 1
A+C 2 3
B+D 2 4
C+D 2 2

Configuring the 5834-4

Once an input has been enrolled with the panel, you must then configure the settings for that input. The exact options for for this will vary depending on the type of panel that is being used. Most options are fairly self-explanatory and can be configured with relative ease. For example, below are the menu options displayed for a Honeywell LYNX Touch L7000, assuming that the device is being programmed through the key fob menu. Please note that these are essentially the same menu options that will also be displayed on any other Honeywell LYNX Touch Panel, as well as the Honeywell Lyric Controller. Make sure to save your changes when you have finished configuring the key fob settings.

  • Key Type: This tells the panel how many different inputs are used on the key fob device. Since a 5834-4 Key Fob with eight different possible inputs is being used, the option "8 button" is chosen.
  • User: This will show in the event log which user interacted with the panel. This is great for assigning different system users their own personal key fob.
  • Serial Number: This is the Serial Number for the key fob. If the Serial Number is entered incorrectly, the key fob will not work with the system. For that reason, we strongly recommend auto-enrolling the 5834-4 with the system.
  • Zone: This is the first zone on the system that the key fob will be assigned to. That zone, and the following seven zones will be used with that key fob.
  • Button Key 1: Button A on the 5834-4. This is the picture of the closed lock. This lets you choose the action that will be taken for that input.
  • Button Key 2: Button B on the 5834-4. This is the picture of the opened lock. This lets you choose the action that will be taken for that input.
  • Button Key 3: Button C on the 5834-4. This is the picture of the person standing in the house. This lets you choose the action that will be taken for that input.
  • Button Key 4: Button D on the 5834-4. This is the picture of the asterisk (*). This lets you choose the action that will be taken for that input.
  • Button Key 5: Button combination A+C on the 5834-4. This lets you choose the action that will be taken for that input.
  • Button Key 6: Button combination C+D on the 5834-4. This lets you choose the action that will be taken for that input.
  • Button Key 7: Button combination B+D on the 5834-4. This lets you choose the action that will be taken for that input.
  • Button Key 8: Button combination A+B on the 5834-4. This lets you choose the action that will be taken for that input.

Also take note of the different possible actions that can be used with each possible input:

  • Disarm: This will disarm the system if the system is set to armed stay or armed away.
  • Arm Away: This will set the system to armed away.
  • Arm Stay: This will set the system to armed stay.
  • No Response: The input will not be used with the system.
  • 24 Hour Silent: This will produce a silent alarm on the system. This essentially allows the 5834-4 to be used as a silent panic switch.
  • 24 Hour Audible: This will produce an alarm event on the system. Any sirens and sounders set up with the system will activate.
  • 24 Hour Auxiliary: This will produce an alarm event on the system. The system sounder will activate, but any sirens will not. This is typically used for medical emergencies.
  • Silent Burglary: This will produce a silent alarm on the system. However, this command will only work if the system is armed.
  • Fire No Verification: This will produce a fire alarm on the system.

Standard Mode vs. High-Security Mode

the 5834-4 Key Fob features two different transmitting modes. These are standard mode and high-security mode. Simply put, standard mode has the 5834-4 function as an unencrypted device, while high-security mode has it function as an encrypted device. Putting the 5834-4 into high-security mode will make it nearly impossible for others to hack or compromise the device. However, high-security mode is only compatible with alarm panels that support this feature. For panels that do not support this feature, the 5834-4 Key Fob must be placed in standard mode before it can be used with the system. Some panels that do not support high-security mode include the 2GIG GC3 and the 2GIG GC2.

To activate high-security mode on the 5834-4 Key Fob, press and hold the A+C+D buttons on the device simultaneously for five seconds. The LED light on the device will flash red to indicate that the device has been placed into high-security mode. Once in this mode, any input made using the 5834-4 Key Fob will cause the LED light on the device to flash red.

To activate standard mode on the 5834-4 KeyFob, press and hold the B+C+D buttons on the device simultaneously for five seconds. The LED light on the device will flash green to indicate that the device has been placed into standard mode. Once in this mode, any input made using the 5834-4 Key Fob will cause the LED light on the device to flash green.

The 5834-4 Battery

The Honeywell 5834-4 Key Fob uses a 3-volt CR2032 lithium battery. Every new 5834-4 comes included with a fresh battery that is already installed. The battery should last for about three to five years before requiring a replacement. As the key fob is used, the power that is supplied by the battery will being to slowly drop. Once the power drops below 2.3 volts, a low battery message will be displayed on the alarm system. Please note that this message will only appear if a button is pressed on the key fob. If the key fob is not used, then the panel will not recognize that the battery is low. Additionally, once the battery is low, the LED light on the key fob will no longer flash when an input is made. If the power drops below 2.0 volts, then the device will stop working entirely.

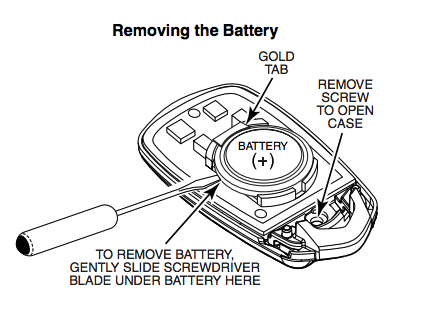
To replace the battery, use a small Phillips head screwdriver to remove the screw on the back of the device. Then slide a flathead screwdriver underneath the battery on the side with the gold tab to pop the battery out. With the old battery removed, slide the new battery into place, making sure that the positive (+) side is facing upwards. Firmly press down on the opposite side to click the battery into place. Finally, reapply the back cover, and screw it into place. Make sure to test the 5834-4 Key Fob after replacing the battery to ensure that it has been installed properly.


If You Need Further Help

The Alarm Grid support team is happy to help any monitored customer with using their 5834-4 Key Fob. Please contact us via email at support@alarmgrid.com or over the phone at 888-818-7728 from 9am-8pm ET M-F if you require further assistance.

Tags: , , , , , , ,

Comments


Posted By

If you've ever wanted a glimpse into the world of Alarm Grid training, we have it! Alarm Grid's team occasionally takes an hour or two off and learns a little bit about the products that we recommend to you. These trainings are in-depth explanations of the functions of items attached to your system. If you wonder how it is that our wonderful staff know so much, well, I think you're going to be astounded by the quality of training they receive.

Below, Julia, an industry veteran and our most senior tech, steps the rest of the staff through a great tutorial on glass breaks and motions.


Tags: , , , , , , ,

Comments