Technology Posts

Posted By

Last week, we took a look at three of the best alarm panels in the industry. These were the Honeywell Lyric, the Qolsys IQ Panel 2 Plus, and the 2GIG GC3e. Today, we are checking out the sensors that you can add to support these systems. Here is our 2020 Security Sensor Buying Guide!

Sensors are accessories that are added to alarm systems to report specific activity. Each sensor has its own job of looking for a certain type of activity in its designated location. All of the sensors on a system communicate with a single centralized panel or hub. This panel is actively listening for any sensor that is triggered due to a potentially important system event. Adding new sensors is perhaps the best way to expand upon an existing system, and they make awesome gifts and stocking stuffers for the security enthusiast in your life.

Broadly speaking, sensors can be split into two main categories, which are security and life safety/environmental. Security sensors look for activity that suggests potentially unauthorized entry into a monitored and protected location, such as a door being opened, movement in a room where nobody is supposed to be present, or a window being broken. Life safety/environmental sensors look for activity associated with unwanted or potentially harmful conditions that affect the well-being of those in the area, such as a flood, an extreme temperature, a fire, or the presence of CO gas. We'll be taking a look at life safety/environmental sensors another time. Today, our focus is on security sensors.

Wireless Sensor Basics


Before we dive into specific security sensors for our top panel picks, we're going to start by giving you some general, generic information that can be applied to any sensor out there. First, understand that this post is focusing only on wireless sensors. These are almost always the sensors chosen for use with wireless alarm systems. Wired sensors can also technically be used with wireless panels but a converter module is almost always needed. Not to mention the fact that wireless sensors are significantly easier to install, especially for DIY users. The only time you will realistically see wired sensors used with a wireless panel is if a user is upgrading from an older wired system and bringing over their old wired sensors, or in new construction where a user wants to integrate the sensors in with the building. But if you're expanding upon a wireless system by getting new sensors, then the new sensors will almost certainly be wireless.

The important thing to remember when choosing wireless sensors for a wireless alarm panel is making sure the sensor is compatible with the system. It doesn't matter if a sensor has all the specs and features if it doesn't work with your panel! The way to determine compatibility is to look at the lineup that the sensor is from. Petty much every wireless sensor out there is part of a larger grouping of sensors that will all have the same compatibility.

To make it easier for you, we have the three panels we mentioned before (well, make that five, as the Qolsys IQ Panel 2 Plus actually comes in three versions), and all their compatible sensor lineups conveniently listed. We hope that this sheds some light on your options. The only caveat is that for any panel listed here that supports the Honeywell 5800 Sensors, we must be clear that this is only for the uni-directional sensors with one-way communication in the lineup. Any bi-directional Honeywell 5800 Sensors with two-way communication will not work with any of the aforementioned systems. The bi-directional Honeywell 5800 Sensors are only compatible with the Honeywell LYNX Touch and VISTA Systems, which were not included in our buying guides.

With that out of the way, here are compatible sensor lineups by system:

You will notice that some of the sensor groups listed above are italicized and underlined. That is done to identify the lineups of encrypted sensors. These encrypted sensors have special protection measures put in place to make them more secure and less prone to being hacked or defeated by malicious attacks. Encrypted sensors tend to have more restricted compatibility. They may follow a special enrollment process. Encrypted sensors often use bi-directional communication so that the sensor knows that it is actively paired with the system. Many encrypted sensors may only be paired with a single system at any given time, and the sensor will need to be deleted from its existing system before it will work with a new one.

It's okay to use non-encrypted sensors with your system, especially in zones that are less likely to trigger an alarm, like a second story window. Many users will opt to use a mixture of both encrypted and non-encrypted sensors. Other users feel comfortable using entirely non-encrypted sensors. It really comes down to your level of comfort. Non-encrypted sensors are secure in most situations, and they are still tricky to defeat. But going fully encrypted is recommended for anyone seeking maximum security. One tip if you do decide to go with some non-encrypted sensors is to avoid letting others know what wireless frequency your sensors use or what type of system you have installed. Knowing the frequency and the system being used makes it much easier for a savvy intruder to defeat a sensor.

Door & Window Alarm Sensors


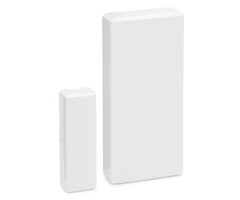
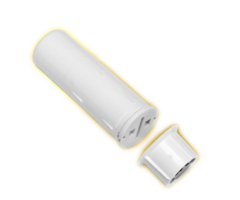
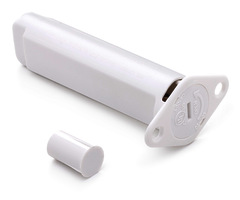
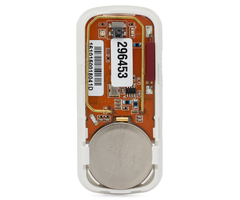
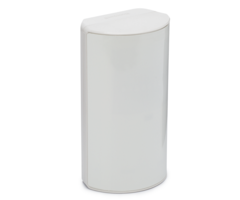
Now that you know some basics that apply to almost all wireless sensors, let's start talking about specific types and models. Door and window sensors will let a system know when a door or window has been opened or closed. These are some of the most basic and easy to use sensors on a security system. These devices work by using a larger sensor portion and a smaller magnet portion. The sensor is placed on or inside the door or window frame, and the magnet is placed on or inside the moving portion of the door or window. When the door or window is opened, the magnet will move away from the sensor. This will trip a metal reed switch inside the sensor, which will tell the sensor to alert the system to the opened door or window. All of the sensors we've listed here follow that same method of operation.

Door and window sensors can be split into two (2) main categories. Surface-mount door and window sensors are mounted outside the door or window and its accompanying frame on the surface. The advantage to surface-mount door and window sensors is that they are very easy to install, and they can usually be mounted using double sided foam tape. But some users may not like how they are visible on the outside of the door or window. If you don't like the appearance of visible surface-mount door and window sensors, then you might instead consider recessed door and window sensors. A recessed door or window sensor is installed inside a door or window and its frame, so that it is hidden and cannot be seen from the outside. Recessed door and window sensors are more difficult and time-consuming to install, because you must drill holes in both the door or window and its accompanying frame. Whether you decide to use surface-mount door and window sensors, or recessed door and window sensors is up to you. Most DIY users and Alarm Grid customers in general will use surface-mount door and window sensors.

Now let's look at some door and window sensors.:

Sensor Name
Product Lineup
Compatibility Range
Encryption Installation
Notes
Honeywell SiXMINICT

Honeywell SiX Series Lyric 200 Nominal Feet 128-bit AES Surface-Mount Premier mini encrypted door/window Sensor for Lyric.
DSC PG9303

PowerG All IQ Panel 2 Plus 2,000 Feet Open Air 128-bit AES Surface-Mount PowerG encrypted surface mount door/window sensor.
DSC PG9307

PowerG All IQ Panel 2 Plus
2,000 Feet Open Air 128-bit AES Recessed PowerG encrypted recessed door/window sensor.
2GIG DW10e

2GIG eSeries 2GIG GC3e 350 Nominal Feet 2GIG eSeries Encryption Surface-Mount Encrypted surface-mount sensor for 2GIG
2GIG DW20e

2GIG eSeries
2GIG GC3e
350 Nominal Feet 2GIG eSeries Encryption
Recessed Encrypted recessed sensor for 2GIG
Qolsys IQ DW Mini-S

Qolsys S-Line 319.5 MHz IQ2+ 600 Feet Open Air Qolsys S-Line Encryption Surface-Mount Encrypted surface-mount sensor for 319.5 MHz systems.
Qolsys IQ Recessed Door-S

Qolsys S-Line 319.5 MHz IQ 2+ 600 Feet Open Air Qolsys S-Line Encryption Recessed Encrypted recessed sensor for 319.5 MHz systems.
Honeywell 5818MNL

Honeywell
5800 Series
Lyric, GC3e, 345 MHz IQ2+ 200 Nominal Feet None Recessed Non-Encrypted recessed door/window sensor for 345 MHz systems.
VERSA-2GIG

2GIG 345 MHz Lyric, GC3e, 345 MHz IQ2+ 200 Nominal Feet None Surface-Mount Non-encrypted surface-mount sensor for 345 MHz systems.
VERSA-GE

Legacy GE 319.5 MHz IQ2+ 200 Nominal Feet None Surface-Mount Non-encrypted surface-mount sensor for 319.5 MHz systems.
VERSA-DSC

Legacy DSC 433 MHz IQ2+ 200 Nominal Feet None Surface-Mount Non-encrypted surface-mount sensor for 433 MHz systems.

We also want to share a selection of outdoor door and window sensors with you. These surface-mount contact sensors are specifically designed to withstand the conditions of an outdoor environment, including intense rain, wind, dust, and sunlight. You can see them listed below.

Sensor Name
Product Lineup
Compatibility
Range
Encryption
Installation Notes
Honeywell 5816OD

Honeywell 5800 Series Lyric, GC3e, 345 MHz IQ2+ 200 Nominal Feet None Surface-Mount Outdoor contact sensor from 5800 Series.
DSC PG9312

PowerG All IQ Panel 2 Plus 2,000 Feet Open Air 128-bit AES Surface-Mount PowerG Outdoor Contact Sensor.
2GIG DW30-345

2GIG 345 MHz Lyric, GC3e, 345 MHz IQ2+ 350 Nominal Feet None Surface-Mount Outdoor contact sensor from 2GIG 345 MHz series.

Motion Sensors


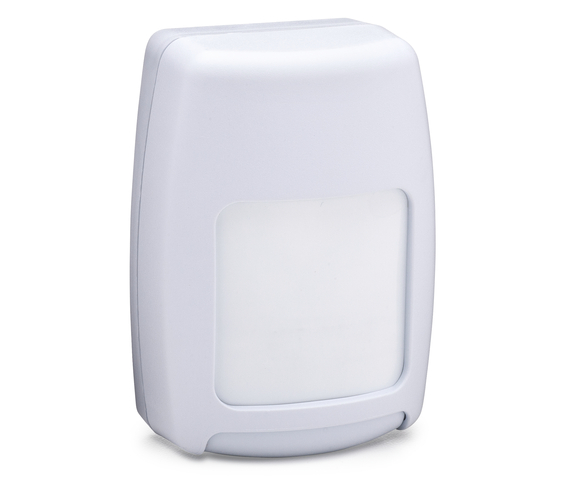
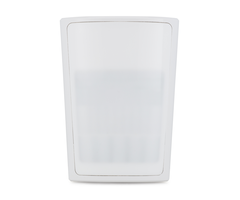
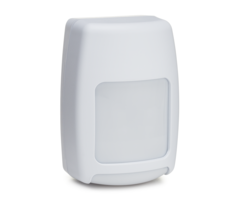
Motion sensors use passive infrared (PIR) technology to detect movement within the sensor's coverage area. This is done by looking for the changes in infrared (IR) energy that occur when a person, animal, or object comes within the sensor's field of view. Standard motion sensors are typically PIR only. These are appropriately called PIR motion sensors.

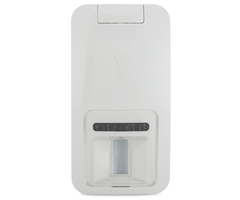
Some motion sensors will also use microwave technology in addition to PIR technology. This involves having the sensor send out microwave signals and seeing how the signals bounce off of objects in the area. Movement will change the pattern of these microwave signals, and the sensor will be able to detect this. These motion sensors that use both microwave and PIR are called Dual-Tech motion sensors. The purpose of using both PIR and microwave together is to prevent false alarms. A Dual-Tech motion sensor will only activate and alert the system if both its PIR sensor and its microwave sensor are triggered. A microwave sensor is not vulnerable to the same environmental issues that may cause a false activation on a PIR. You will not find a motion sensor that uses microwave technology without PIR detection, as microwave alone would result in too many false alarms without having PIR to confirm movement.

One feature that you will often see listed on a motion sensor is pet-immunity. A motion sensor that has been set up for pet immunity can be configured to not "look" in the areas close to the ground where pets and small animals walk. Instead, the motion sensor only looks in the areas higher up, where humans move while walking upright. A pet immune motion sensor is not impervious to small animals, and you must position it carefully so that it works as intended. Pet immune motion sensors normally have a weight limit, where animals under that weight limit should avoid triggering the sensor, assuming that the sensor is installed properly. Please note that most pet friendly motion sensors will require you to set the sensitivity for the sensor to the lowest possible setting.

When it comes to motion sensors, mounting them carefully is very important. A motion sensor may cause false alarms on the system if it is not installed properly. These sensors should not be facing any vents, air ducts, ceiling fans, or curtains that may cause the sensor to activate without any movement. If you are using the motion sensor for pet immunity, then it should also not be facing any furniture or stairwells that your pet could use to get within the sensor's field of view. You will likely want to perform a Walk Test of your motion sensor to make sure that it responds properly when movement is present, and does not respond due to other external factors when there is no movement. You should also have any pets participate in the Walk Test to ensure that pet immunity is working properly.

We recommend reading the following FAQs to learn more about motion sensors:

Below are some of the most popular motion sensors for our recommended systems:

Sensor Name Product Lineup
Compatibility Range
Encryption Coverage Area
Detection Type
Pet Immunity Notes
Honeywell SiXPIR

Honeywell SiX Series Lyric 300 Nominal Feet 128-bit AES 40 by 56 Feet
PIR Up to 80 lbs Encrypted PIR Motion for Lyric.
DSC PG9914

PowerG All IQ Panel 2 Plus 2,000 Feet Open Air 128-bit AES Up to 39 Feet PIR Up to 85 lbs PowerG Encrypted PIR Motion.
DSC PG9984P

PowerG All IQ Panel 2 Plus 2,000 Feet Open Air 128-bit AES Up to 50 Feet Dual-Tech Up to 40 lbs PowerG Encrypted Dual-Tech Motion.
2GIG PIR1e

2GIG eSeries 2GIG GC3e 350 Nominal Feet 2GIG eSeries Encryption
30 by 50 Feet PIR Up to 55 lbs Encrypted PIR Motion for 2GIG.
Honeywell 5800PIR-RES

Honeywell 5800 Series Lyric, GC3e, 345 MHz IQ2+ 200 Nominal Feet None 35 by 40 Feet PIR Up to 80 lbs Non-encrypted residential PIR motion for 345 MHz systems.
Honeywell 5800PIR-COM

Honeywell 5800 Series Lyric, GC3e, 345 MHz, IQ2+ 200 Nominal Feet None 60 by 80 Feet PIR None Non-encrypted commercial PIR motion for 345 MHz systems.
Honeywell 5898

Honeywell 5800 Series Lyric, GC3e, 345 MHz IQ2+ 200 Nominal Feet None 35 by 40 Feet for Pet Immunity Dual-Tech Up to 100 lbs Non-encrypted Dual-Tech motion for 345 MHz systems.
Qolsys IQ Motion-S

Qolsys S-Line 319.5 MHz IQ2+ 600 Feet Open Air Qolsys S-Line Encryption 30 by 40 Feet PIR Up to 40 lbs Non-encrypted PIR motion for 319.5 MHz systems.

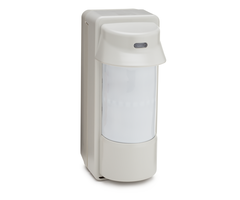
There are also certain outdoor motion detection sensors that are better-suited for use in an outdoor environment. These outdoor motion sensor models are typically more expensive than indoor variants. You can see some of our most popular ones listed below:

Sensor Name
Product Lineup
Compatibility Range
Encryption Coverage Area
Detection Type
Pet Immunity Notes
DSC PG9994

PowerG All IQ Panel 2 Plus 2,000 Feet Open Air 128-bit AES Up to 30 Feet PIR Up to 40 lbs PowerG Outdoor PIR Motion Sensor
Honeywell 5800PIR-OD

Honeywell 5800 Series Lyric, GC3e, 345 MHz IQ2+ 200 Nominal Feet None 40 by 30 Feet PIR None Honeywell 5800 Series Outdoor Motion, 1st ed.
Honeywell 5800PIR-OD2

Honeywell 5800 Series Lyric, GC3e, 345 MHz IQ2+ 200 Nominal Feet None 40 by 30 Feet PIR None Honeywell 5800 Series Outdoor Motion, 2nd ed.
Optex FTN-RRIX

Legacy Interlogix 319.5 MHz IQ2+ 200 Nominal Feet None Up to 16.5 Feet PIR None Optex Fitlink Outdoor Motion Sensor for 319.5 MHz Systems
Optex FTN-RR2G

2GIG 345 MHz Lyric, GC3e, 345 MHz IQ2+ 200 Nominal Feet None Up to 16.5 Feet PIR None Optex Fitlink Outdoor Motion Sensor for 345 MHz Systems.
Optex FTN-RRDS

Legacy DSC 433 MHz IQ2+ 200 Nominal Feet None Up to 16.5 Feet PIR None Optex Fitlink Outdoor Motion Sensor for 433 MHz Systems.

Glass Break Sensors

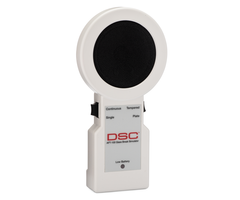
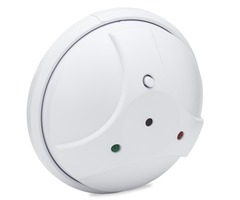
The last type of security sensors we will be discussing are glass break sensors. These sensors include built-in microphones, and they actively listen for the unique sound of glass breaking. Most of these sensors will need to hear both the high-pitched shattering sound of the glass breaking, as well as the low-pitched sound of an object striking against the glass in order to activate. This design choice is to prevent false alarms caused by similar sounds. Most users will use glass break sensors to monitor windows, but they have also been known to work effectively on protective glass display cases that store valuables, such as what you might find in jewelry stores or gun shops. Most types of glass will work with glass break sensors, though there are some exceptions. For example double and triple pane glass windows won't work reliably. The same is true for coated or "safety" glass. Refer to the manual for the exact glass break detector you are using to determine compatibility.

A single glass break detector can monitor multiple windows or display cases, as long as the glass it is monitoring is within its detection range, which is typically 15 to 25 feet. Any glass that is being monitored must have a direct line of sight with the sensor, with no obstacles blocking the path that sound will travel through. When testing your glass break sensors, it is strongly recommended that you us a glass break simulator. These devices will mimic the sound of the glass breaking and activate your glass break sensors without actually breaking any glass. Remember to refer the instructions of your glass break simulator for more information. When choosing a glass break simulator, it is best to use a simulator from the same manufacturer, if possible. We have a Honeywell Glass Break Simulator and a DSC Glass Break Simulator available on our website. If you get one of the 2GIG Glass Break Sensors mentioned in this buying guide, then the Honeywell Glass Break Simulator is best for testing. Otherwise, just match the manufacturer.

Below are some of our most popular glass break sensors:

Sensor Name
Product Lineup
Compatibility
Range
Encryption
Notes
Honeywell SiXGB

Honeywell SiX Series Lyric 300 Nominal Feet 128-bit AES SiX Series Glass Break Sensor for Lyric
DSC PG922

PowerG All IQ Panel 2 Plus 2,000 Feet Open Air 128-bit AES PowerG Glass Break Sensor
2GIG GB1e

2GIG eSeries 2GIG GC3e 350 Nominal Feet 2GIG eSeries Encryption Encrypted glass break sensor for 2GIG.
Honeywell 5853

Honeywell 5800 Series Lyric, GC3e, 345 MHz IQ2+ 200 Nominal Feet None Non-encrypted glass break sensor for 345 MHz systems.
Qolsys IQ Glass-S

Qolsys S-Line 319.5 MHz IQ2+ 600 Feet Open Air Qolsys S-Line Encryption Encrypted glass break sensor for 319.5 MHz systems.

Reach Out to Us!


Remember that you can reach out to us with any questions you might have about planning your system and determining sensor compatibility. The best way to contact us is to email support@alarmgrid.com. This is also a good email to use if you are interested in starting new alarm monitoring service with Alarm Grid. Our team checks for new email from 9am to 8pm ET M-F. We look forward to hearing from you!

Tags: , , , , , , , , , , , , , , , , , , , , , , , , , , , , , , , , , , , , , , , , , , , , , , , , , , , , , , , , , , , , , , , , , , , , , , ,

Comments


Posted By

It's that time of the week for a video recap! We have been busy getting started with our holiday buying guides, so we haven't had quite as much time for new videos. But we still managed to put up a few new ones for you to check out. Let's take a quick look at the newest Alarm Grid videos!

Time Needed to Activate My Alarm Grid System

I provide you with an estimate for the amount of time it will take to activate your new security system for alarm monitoring service. Our activation slots are scheduled for one hour in length, and the typical activation is completed in around 30 minutes. You can help us make your activation go smoothly by having your system installed with sensors programmed, being on-site and ready to work with your system, knowing the important system codes beforehand, and listening carefully to your activator.

Number of Zones On a Wireless System Cannot be Increased

I explain how the number of available zones on a wireless alarm panel cannot be increased. A wireless system has built-in logic, and the number of zones it can support is based on its internal firmware. There is no way to increase this limit, and once you run out of zones, you would need to get an entirely new system to add more. The good news with wireless systems is that all system zones are usually readily accessible right out of the box, with no extra hardware being needed. You just need to get compatible wireless sensors.

Honeywell Lyric System & Garage Door Control

Jarrett explains how the Honeywell Lyric can be set up for garage door control. To do this, you must get a Honeywell 5877 Relay. This unit will wire into your compatible garage door controller. Remember that MyQ Garage Door Controllers are not compatible. You can enroll the 5877 with your Lyric, and then the Lyric will communicate with the 5877 to control the garage door. You must also get a Honeywell 5822T to monitor the Open/Close status of the garage door. This setup will also allow for garage door control through Total Connect 2.0.

Activating a System for Monitoring with Alarm Grid

Jarrett discusses the importance of activating a security system for alarm monitoring service. The user will need to choose an alarm monitoring plan for their system. This will determine how the system communicates (IP, cellular, or both), whether the user has coverage from a central station, and what remote functions will be available for the user through an interactive platform like Total Connect 2.0 or Alarm.com. Activating a system for central station service is the only way to get a certificate of alarm (CoA) for an insurance discount.

Tags: , , , ,

Comments


Posted By

If you're planning to give the gift of security this holiday season, then we're here to help! Today, we're looking at the best alarm panels available for the 2020 holiday season. Finding the right panel is the first step to building the perfect security system for your home or office.


The panel serves as the central hub for an alarm system. All sensors programmed with the system will communicate with the panel. The panel is also the piece of equipment that communicates with the outside world, namely a central station and/or a monitoring platform. To do this, the panel must have a communicator that is installed and activated. Some alarm panels come with a communicator already built-in, while others will require you to purchase one separately.

Today, most alarm panels are wireless, all-in-one devices, where the panel itself serves as the keypad for controlling the system. There are still hardwired panels available, but these are less common due to the sheer convenience and ease of wireless all-in-one panels. For the purpose of this buying guide, we will only be focusing on wireless panels, as most new users today opt to go the wireless route. We especially recommend wireless panels for anyone looking to save money by installing their own system without hiring a professional installer. It's easier than you might think, as many installations are done using a screwdriver as the only tool!

The panel you choose will affect virtually every other aspect of your security system. Your panel selection determines sensor compatibility, available communication paths, the user interface (UI) for the system, what accessories you can use with the system, and even the interactive platform you use when controlling your system through your phone. In a way, the panel itself IS the system. It's such an important decision, so you really want to get it right.

Today, we're going to be presenting you with our three (3) most favorite alarm systems available for the 2020 holiday season. What's great about all these systems is that they are all extremely DIY-friendly, and they can be taken to virtually any monitoring company, whether that is Alarm Grid, or someone else entirely. With all of that out of the way, let's get started!

Honeywell Lyric Controller

The Honeywell Lyric Alarm System still represents our favorite alarm panel from Resideo, and it is the most popular system for use with Alarm Grid monitoring services. It is the oldest panel on this list, and it doesn't support some of the more high-tech features offered by the other panels presented here. But when it comes down to choosing an all-around great system for alarm monitoring, the Lyric is hard to beat.

There are three (3) things that the Lyric can do that are impossible for the other panels on this list. If you choose the Lyric, it's usually because of one or more of these aspects. The Lyric is the only panel here that can be set up with an IP-only communication path, without cellular. While cellular is always recommended, some users opt to go internet only for alarm monitoring. The advantage of doing this is that the user can obtain monitoring service at a lower monthly rate. A Lyric System user can sign-up for an Alarm Grid Bronze Plan with central station service for just $15 per month. But a user with a system that requires cellular monitoring will need to pay a minimum of $25 per month for the Alarm Grid Cellular Alarm Monitoring Plan. That $10 monthly saving equates to $120 annually. The user should understand that an internet outage will take their system offline and leave their home or business vulnerable in that situation. But if a user is confident enough in their internet service, then they can certainly take that chance. Of course, the Lyric can be upgraded to use cellular at any time, but if you are trying to save money by setting up IP-only monitoring, then the Lyric offers you that option.

Second, the Lyric is one of the very few alarm systems that is able to interface with Apple HomeKit. This is the premier automation platform used with iOS devices, and many users have existing HomeKit networks that they build around. If you already have HomeKit devices in your home, then it is natural that you would want a security system that can also integrate with that network. It's important to note that the HomeKit integration isn't perfect, as Apple HomeKit can only provide specific alerts for a limited selection of system activity. But the integration makes it possible to perform some basic commands through HomeKit. The integration also allows you to set up automations so that your HomeKit devices activate automatically with activity on your security system. Overall, it's a great feature, and we often recommend the Lyric over other systems just for this feature.

Third, the Lyric is the only system on this list that uses Total Connect 2.0 as its interactive monitoring platform. This is the service that you will use to control your Lyric System remotely through a web browser or an app on your smartphone. The platform allows you to arm and disarm, check the current status of your system, and control automation devices. Remember that you will need to upgrade to a Silver level plan to take advantage of these great features. We think Total Connect 2.0 works just as well as any other monitoring and automation platform, but we have heard of users specifically choosing the Lyric to use this platform over the other ones out there.

You have no shortage of sensor options for the Lyric, as the system has its own lineup of encrypted wireless sensors in the Honeywell SiX Series Sensors. It is also backwards compatible with the widely popular Honeywell 5800 Sensors. As we mentioned earlier, the system is a bit on the older side, and it lacks some of the more advanced features like partitioning and automatic Bluetooth disarming. The panel does technically support camera streaming, but that's only for older legacy cameras that are no longer being manufactured. Also, the system only offers classic Z-Wave functionality, so you won't be able to take advantage of the the extended wireless range and longer battery life of Z-Wave Plus. If you want Z-Wave Plus, and you have the Lyric, then you will need to replace the panel entirely. There is no way to upgrade the existing classic Z-Wave firmware for the Lyric and make it Z-Wave Plus. But if you need HomeKit compatibility, or if you are trying to keep your monthly monitoring costs as low as possible, then the Lyric is almost certainly your best option. With its support of local end user programming, the Lyric is the best system from Honeywell and Resideo as of late 2020. There is a good reason why it remains the most popular Alarm Grid security system.

One last note is that while a plug-in transformer comes included with the Lyric, no power cable for connecting the system to the transformer is included. We recommend purchasing a Honeywell LT-Cable for this purpose.

The Lyric is for you if:

  • You want to save money by going IP only.
  • You want compatibility with Apple HomeKit.
  • You want to use Total Connect 2.0 as your interactive platform.
  • You don't need automatic Bluetooth disarming, partitioning, or Z-Wave Plus functionality.
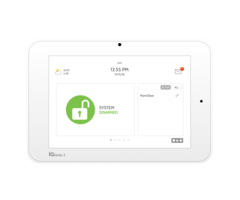
Qolsys IQ Panel 2 Plus

The Qolsys IQ Panel 2 Plus is without a doubt the most feature-packed system we offer at this time. It has totally changed the game with its advanced features like automatic Bluetooth disarming, camera streaming from the panel, partitioning, facial recognition, and a super innovative wellness platform. The IQ2+ offers a seamless integration with Alarm.com, which serves as the interactive monitoring and automation platform used with the system. It is also currently the only system where you can perform Alarm.com Smart Scenes directly from the main panel. We also love the system's UI, as automation devices like lights, door locks, and smart thermostats can all be accessed from the main panel screen. It is easy to navigate, and we find that it is arguably the most intuitive panel for users who have never used a security system before. Really, the Qolsys IQ Panel 2 Plus is the system we almost always recommend for any user not needing HomeKit functionality or low-cost IP-only monitoring.

Since this system, communicates through Alarm.com, you must have a cellular connection set up with the system. The good news is that you won't have to buy a communicator, as the IQ2+ already has one built-in (AT&T LTE or Verizon LTE). The bad news is that monitoring for this system starts at $25 per month, assuming you get service with Alarm Grid. And if you want central station service and the ability to do cool things through Alarm.com, such as arming and disarming remotely and setting up automated smart scenes, then the minimum cost jumps up to $35 per month for our Gold Plan. You may want to review this post that explains our monitoring plans in more depth.

One other awesome aspect of the IQ2+ is that it supports DSC PowerG Sensors. These wireless sensors are some of the best in the industry. They can be used from up to 2,000 feet away from the IQ Panel 2 Plus in an open air environment, and they utilize 128-bit AES encryption for advanced protection and security. You also get the choice of one of three (3) legacy sensor frequencies (319.5 MHz, 345 MHz, or 433 MHz). If you are upgrading from an older system, this is fantastic, as there is almost certainly a version of the IQ2+ that will let you bring over your old wireless sensors.

But even with all its bells and whistles, the IQ Panel 2 Plus is still not a perfect alarm system. We aren't blown away with its build quality, as some users have reported struggles in properly closing the panel after opening it up. And having an integrated communicator might seem like a good thing, but it also means that the entire panel must be replaced if the one inside fails for any reason. The same will hold true when the inevitable LTE Sunset occurs, though that should be years into the future. All that being said, if you are looking for the most feature-rich alarm system on the market today, you would be hard pressed to find a better option.

And unlike the other systems listed here, the Qolsys IQ Panel 2 Plus comes complete with BOTH a plug-in transformer AND a power cable for connecting. It is ready to be set up and powered on using nothing more than a screwdriver! Also included is a small table stand for keeping the system upright if wall-mounting is not desired.

The IQ Panel 2 Plus is for you if:

  • You want a system with the most advanced features.
  • You want easy access to smart home automation.
  • You want to use PowerG Wireless Sensors.
  • You can accept a system without replaceable components.
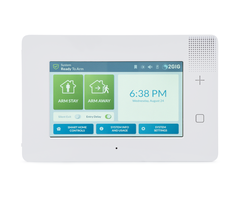
2GIG GC3e

The 2GIG GC3e is the current flagship system from 2GIG, though that might soon change with the 2GIG Edge on the horizon. This panel was introduced in 2019, as 2GIG was a fairly late arriver to the encryption game. But it's here now, and it's ready to support 2GIG eSeries Encrypted Sensors, while still being backwards compatible with older 2GIG 345 MHz Sensors and Honeywell 5800 Sensors.

If we're being completely honest, we rarely recommend the 2GIG GC3e over the Lyric or the IQ2+. The Lyric offers some unique features (HomeKit support and IP-only monitoring) that make it the best option in many cases, while the IQ2+ is the most feature-rich system we offer. The GC3e just doesn't have any one particular feature that helps it stand-out from the other two. We usually only steer people toward the GC3e if they want an Alarm.com System, but don't want the Qolsys IQ Panel 2 Plus for whatever reason. We must also admit that the GC3e local end user programming is a bit more cumbersome than the Lyric or the IQ2+. People who choose the GC3e are usually those who are accustomed to the 2GIG panel, and are upgrading from an older 2GIG GC2 or 2GIG GC3.

That doesn't mean the GC3e is a bad system. The truth is that it actually has the best build-quality out of any system listed here. The panel just feels well-made and durable, especially when compared with the Qolsys IQ Panel 2 Plus. And while you don't get fancy features like panel camera streaming, Bluetooth disarming, or Apple HomeKit support, you do get a nice partitioning suite, and Z-Wave Plus functionality with the ability to create localized smart scenes. Also, unlike the Qolsys IQ Panel 2 Plus, you can actually swap out the cellular communicator in the GC3e. It is rather inconvenient that you have to buy a communication module add-on to get the system monitored, but this is a good thing if you ever need to replace your system's communicator for whatever reason.

This is matter of subjective personal opinion, but I can say one very nice thing about the GC3e. Out of every panel we offer, the 2GIG GC3e looks the nicest on the wall, and has the most fluid and satisfying touchscreen controls out of any panel I have personally ever used. And sometimes, that alone is the selling factor. There are users out there who don't care about fancy technical features or easily accessible automation menus, and they just want a high-quality system that looks good and does what they need it to do. If that is you, then maybe you should consider the GC3e.

Remember that while the 2GIG GC3e includes a plug-in transformer for providing power, it does not include a power cable for connecting the transformer to the panel. Just like with the Lyric, the Honeywell LT-Cable makes a fantastic power cable for this purpose.

The GC3e is for you if:

  • You want the panel with the best build-quality.
  • You don't care about fancy extra features.
  • You want an Alarm.com System with a replaceable communicator.
  • You can deal with programming that is a bit more cumbersome.

We hope that this post has given you some insight into choosing a new system for alarm monitoring. Stay tuned to our blog, as we will soon present a buying guide for the various security sensors you can choose from. Remember to email us at support@alarmgrid.com if you have any questions. We are available to respond to emails from 9am to 8pm ET M-F. We look forward to hearing from you!

Tags: , , , , , , , , , , , , , ,

Comments


Posted By

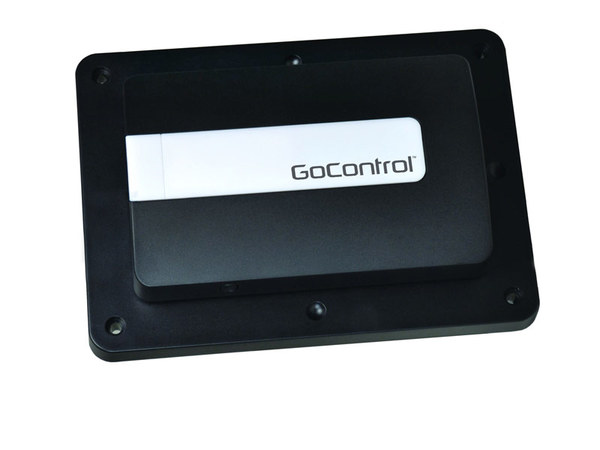
Just last month, we announced that we were offering the Linear GD00Z-7 Z-Wave Plus Garage Door Controller. Well that product was short-lived, as it has already been discontinued and replaced by the GoControl GD00Z-8-GC Z-Wave Plus Garage Door Controller, which is now available on our site.

The GoControl and Linear brands are often used interchangeably. They are both used to identify automation offerings from Nortek Control, which is also the parent company of 2GIG. Whether the company decides to brand a product as GoControl or Linear usually isn't very important, as they basically represent the same product lineups from Nortek Control.

As you may recall, the various smart garage door controllers offered from Nortek through the years have usually been sold under the Linear banner. Some of these products include the Linear GD00Z-4, the Linear GD00Z-5 and, of course, the Linear GD00Z-7 that we mentioned earlier. From what we can tell, the introduction of the GoControl GD00Z-8-GC was only done to rebrand the product as GoControl instead of Linear. We say that because, from what we can tell, the Linear GD00Z-7 and GoControl GD00Z-8-GC are virtually identical, other than the name written across the front.

This isn't a bad thing though, as the Linear GD00Z-7 was an excellent product. All of the same great features return for the GoControl GD00Z-8-GC. It is a Z-Wave Plus garage door controller that is wired to your garage door motor. By pairing the device with your Z-Wave hub, you can open and close your garage door and check its current status remotely. This is done by using a compatible interactive automation platform for the Z-Wave controller, such as Alarm.com. You can also include it with smart scenes for automatic operation.

Just like its predecessors, the GoControl GD00Z-8-GC cannot check the open/close status of the garage door on its own. Instead, it interfaces with a tilt sensor that is installed on top of the garage door. This tilt sensor will relay status to the GD00Z-8-GC so that it knows whether the garage door is opened or closed. This tilt sensor comes included with the product, so you do not need to purchase one separately.

An exception to the above rule is if you wish to have the garage door monitored by your burglar alarm system. The tilt sensor that comes included only conveys the garage door status to the GD00Z-8-GC, not to the alarm panel being used. So, if you want to monitor the state of the garage door as a part of your alarm system, then you will need to purchase a separate, compatible garage door sensor.

Also returning to the GoControl GD00Z-8-GC is the ability to utilize the S2 Security Protocol with Z-Wave Plus controllers that support S2. This security suite offers advanced levels of protection to keep your automation equipment safe. We recently did a great post on the S2 Security Protocol, which you can check out here. Keep in mind that the same compatibility restrictions of the older Linear and GoControl Garage Door Controllers also apply to the GD00Z-8-GC. This means that you cannot interface the unit with the Honeywell Lyric or the Honeywell LYNX Touch Panels. Make sure to check compatibility before purchasing.

If you want to check compatibility, or if you have any other questions about the GoControl GD00Z-8-GC2 or monitoring service in general, please email us at support@alarmgrid.com. We will check your email at our earliest convenience and reply back as soon as possible. Remember that our business hours for checking email run from 9am to 8pm ET M-F. We look forward to hearing from you!
Tags: , , , , , , ,

Comments


Posted By

Our video team had a decent time last week, as five (5) new videos were released. This time, the videos feature myself and Jarrett. As always, we hope that you find them to be helpful, informative, and interesting. Remember, we make these videos to help you! Let's check out the videos.

Finding the Date Code On the FF345

I show you how to find the date code on the Encore FF345. The FF345 is a listening module for smoke detectors and CO detectors that alerts the system upon hearing the unique sound of an activated smoke detector or carbon monoxide sensor. The device is designed to be used with 2GIG Panels and Honeywell Panels. However, FF345 units from a certain batch had an error that prevented them from working with Honeywell Systems. Checking the date code is useful for determining if your unit is affected.


Cameras that Work w/ the Lyric and Total Connect

Jarrett explains which security cameras are compatible with the Honeywell Lyric and the Total Connect 2.0 platform. The only cameras that can work with TC2 are Honeywell IP Cameras. Of these cameras, only the legacy models that are no longer sold are able to interface with the Lyric for live-streaming on the panel. None of the current Honeywell HD Cameras can be streamed on the Lyric. One important note about the legacy IP cameras from Honeywell is that they had to be online to receive a critical firmware update to continue being used to this day.


The Lyric Built-In Camera Disarm Pictures Cannot be Used With HomeKit

Jarrett explains how the disarm photos that are taken using the front camera on the Honeywell Lyric will not appear on the Apple HomeKit platform. While there is a nice integration between the Lyric and HomeKit, it is only used for automation purposes and a very limited selection of security functions. Disarm photos are considered to be a security function, and they will not appear in HomeKit. The only platform that allows you to view disarm photos taken by the Lyric is Total Connect 2.0.


Night Stay On Qolsys IQ Panel 2 Plus

I explain how there is no Night Stay option for a Qolsys IQ Panel 2 Plus. Night Stay is a special type of Arm Stay. Normally, when you Arm Stay, interior zones are automatically bypassed. But when you Night Stay, motion sensors that are designated for Arm Night will remain active, instead of being bypassed. The feature is available on most Honeywell Panels, but it is not supported on the IQ2+. But there is an okay workaround for the IQ2+ that involves using specific Sensor Groups for programmed motion sensors that you want to remain active when Arming Stay.


Number of Zones On a Hardwired System Cannot be Increased

I explain why the number of zones on a hardwired alarm panel cannot be increased. The maximum number of zones that a system can support is built into its logic, and it cannot be increased. For a wired panel, only the on-board zones are initially accessible. You will need to add one or more wired expansion modules and/or a wireless receiver to open up the other zones. This will allow sensors to connect with the zones and interface with the system.

Tags: , , , , , , , , , , , , , ,

Comments


Posted By

If you are a Honeywell VISTA System user, then you have likely heard about the Honeywell Home Tuxedo Keypad. The Tuxedo serves as a touchscreen keypad controller, and also as a Z-Wave Plus hub. But one limitation for the unit is that it cannot be configured as a secondary Z-Wave controller.


Setting up a hub as a secondary Z-Wave controller involves pairing it with a separate Z-Wave hub, which will serve as the primary. When you do this, all Z-Wave devices paired with the primary controller will be automatically pushed over to the secondary, as long as they are compatible. These devices will also remain on the primary controller, meaning that you can operate them from both hubs.

If you decide to use this type of setup, it is advised that you clear all Z-Wave devices enrolled with the secondary controller, and instead enroll them with the primary controller beforehand. Then perform the process of setting up the secondary controller to the primary. This will ensure that all of the Z-Wave devices you want to use are available on both controllers.

Remember, Z-Wave devices paired with the secondary controller will not be pushed over to the primary. When you get a new Z-Wave device, you must enroll it at the primary Z-Wave controller, not the secondary. In most cases, Honeywell Z-Wave Hubs are used as secondary controllers, and Z-Wave devices paired directly with the primary controller are then shared with the Honeywell Z-Wave Controller. One of the most common primary Z-Wave hubs to use for this type of setup is Samsung SmartThings. Other popular third party Z-Wave hubs should work just as well.

Being able to set up a Z-Wave hub as a secondary controller, is technically one of the more advanced Z-Wave functions that you would ever try to perform on a smart home automation network. But while it is quite advanced, it is also very standard. It is somewhat unusual to encounter a Z-Wave automation controller with no primary and secondary configuration options. But that's exactly the case with the Honeywell Home Tuxedo. You can't set it as a secondary Z-Wave controller, which is a big letdown for anyone who wants to use the device in conjunction with a different Z-Wave hub, such as Samsung SmartThings.

According to Resideo, the ability to set the Tuxedo as a secondary Z-Wave controller will come from a future firmware update. At this time, we do not have any estimate for when such a firmware update would be made available. If you want to learn more about firmware updates for a Tuxedo Keypad, please refer to this FAQ.

However, we can speculate that once the feature is available, you will be able to configure Tuxedo primary/secondary options by starting from the main keypad screen, and choosing the Devices option, followed by the Z-Wave Setup button at the bottom of the screen, and then selecting More in the lower-right corner. If you do that now, you will notice that the "Learn Mode" option currently does not exist.


Remember to stay tuned to our blog for future updates on the Honeywell Home Tuxedo. We will be sure to let you know about any new features made available for the keypad. If you have any questions about the Tuxedo or Z-Wave home automation, please feel free to email us at support@alarmgrid.com. We check our email from 9am to 8pm ET M-F. We look forward to hearing from you!

Tags: , , , , , , ,

Comments


Posted By

Network security is more important than ever, as hackers constantly strive to expose vulnerabilities and steal personal information. If your alarm system is associated with an interactive platform, then a flaw in network security could give an intruder easy access to your home or business.


The key to protecting your network and your personal information is to have multiple layers of security in place. You shouldn't just rely on one single security method, even if that one method is known for being very secure. If a vulnerability or an opening is ever exposed within that method's framework, then you could be left vulnerable.

An example of this can be seen in a vulnerability that was discovered in SonicWall Network Security Appliance (NSA) devices last month. This left more than 800,000 VPN appliances vulnerable. A patch has since been applied to these affected SonicWall devices, but that doesn't change the fact that many users were running unsecured VPNs for quite some time. Another example occurred last September, when it was found that FortiGate VPNs are vulnerable to Man-In-The-Middle (MITM) attacks when used in their default configuration.

This doesn't mean that using a VPN is a bad idea. Having a VPN in place is a great way to protect your network and your personal information. But it's important to understand that a VPN should be one of multiple protection layers keeping you safe. That way, even if your VPN fails, you will still have other mechanisms providing protection.

Network vulnerabilities can have severe consequences. Hackers can use vulnerabilities to access your personal information, including your passwords, credit card info, browsing history, and virtually all other data that you have shared with your network. In the context of a monitored security system, this can include information associated with an interactive service platform, such as Total Connect 2.0 or Alarm.com. Keep in mind that if an intruder accesses your TC2 or ADC account, they can disarm your system at-will and freely access your home or business. Having access to TC2 or ADC is basically the same as having a system code!

Fortunately, there are multiple security provisions you can set up to protect yourself. A strong VPN is a nice start. You should also set up firewalls as an added layer of security. And of course, always use secure, difficult-to-guess passwords, and never share them across different websites. You may also want to consider using two-factor authentication when available. Just yesterday, we made a post about two-factor authentication on Alarm.com. That is also an excellent way to keep your account protected.

Remember, protecting your network is your responsibility. Nobody else will do it for you. But we're here to help you. If you're monitored with Alarm Grid, feel free to reach out to us for more tips on keeping your private data safe. You may also contact us if you are interested in starting new monitoring service. Emailing our team at support@alarmgrid.com is the best way to get a prompt response. Keep in mind that we check our email from 9am to 8pm M-F. We look forward to hearing from you!
Tags: , ,

Comments


Posted By

We have learned that Alarm.com now allows users to receive two-factor authentication (2FA) links via email when logging into the Alarm.com website. This is in addition to the two-factor authentication via text message when accessing the Alarm.com platform. You can set up the feature in ADC.


When two-factor authentication is enabled for your Alarm.com account, your login process will have an added layer of security. Upon logging into your Alarm.com account via the website or mobile app on a device that you haven't saved, you will need to verify yourself by providing a secret access code. You will get this code via text message or email, depending upon how you have set up the 2FA feature. In other words, accessing your Alarm.com account on a new device will require your username, password, and access to either your phone or email. This is great for keeping your Alarm.com account as secure as possible.

Remember, 2FA will only be required when you access Alarm.com from a new device. For example, if you frequently access Alarm.com using the same web browser on your computer, and you tell Alarm.com that the device can be safely trusted, then you will only need to perform 2FA the first time you login, as well as anytime you login after clearing your cookies. Some users are hesitant to enable 2FA, because they don't want to have to go through the inconvenience of entering a secret code every time. Fortunately, that isn't a concern, as Alarm.com can remember your usual devices and skip the process for these trusted devices. You can also tell Alarm.com to trust your phone so that you will only need to perform 2FA if you get a new phone or if you are using a different mobile device than usual to access your account. Whenever you access Alarm.com through a new device, after completing the 2FA process, Alarm.com will ask you if you want to save that device so that you do not have to complete 2FA every time. This protects your account, while still maximizing convenience.

If you want to enable two-factor authentication for your Alarm.com account, start by logging into the Alarm.com website. Choose Settings on the left-hand side of the screen, then choose Login Information, and then Two-Factor Authentication. Then set up the feature through email address or text message by following the on-screen prompts. If you have questions, email us at support@alarmgrid.com. This email is also great if you are interested in starting new monitoring service for access to Alarm.com. We look forward to hearing from you!
Tags: , ,

Comments


Posted By

Security, Sales, & Integration recently published an article outlining the 3G Sunset and the importance of upgrading to LTE. One question we are often asked is how long LTE networks will be kept in-service. Thanks to this informative article from SSI, we now have a pretty good estimate.


According to the information presented in the article, LTE networks are expected to have a lifespan that extends through at least the mid-2030s, if not longer. We have said many times before that LTE networks should be kept in service well into the very distant future, and now we have somewhat of a more precise timeline. It is also important to note that we understand this "mid-2030s" estimate to be on the conservative side. There is a good chance that the LTE networks might be supported even beyond that point in time. But given that we are in the year 2020, and have a "mid-2030s" estimate for the LTE lifespan, we can say that anyone who purchases an LTE communicator for their security system at this point in time should expect it to work for at least the next 15 years.

We need to stress here that this is nothing official. This is just information being published in an SSI article. This is not an official statement from a cellular service provider, and we advise taking it with a grain of salt. But given our understanding on the subject, this mid-2030s estimate strikes us as legitimate. The article also states that all 3G cellular networks will be shut down no later than December 31, 2022. This also lines up with what we have been hearing. At the time of this writing in late October 2020, we are slightly more than two (2) years away from the final end of 3G. We have said it many times before, and we will say it again. You need to upgrade to LTE as soon as possible to avoid a loss of monitoring service.

On that note, it's also fair for us to begin thinking about what lies beyond LTE. It's no secret that 5G networks are being rolled out across the country, and they will soon become the norm for cellular communication. At this time, we have not heard of any alarm manufacturer offering a 5G communicator, though we wouldn't be surprised for it to happen soon. But it's not a sure thing that a 5G communicator would be available before the end of 3G. That is why we are pushing so hard for users to make the upgrade to LTE. We don't want any of our monitored customers to be left behind in the transition. While the eventual promise of 5G might seem exciting and flashy, the important thing here is keeping your security system working and having your home or business stay protected. And from what we can tell, LTE will provide exactly that until at least the mid-2030s, possibly even beyond that.

If you are interested in getting starte with alarm monitoring service, or if you are needing to upgrade your existing system to LTE, please email us at support@alarmgrid.com. Our team is here to check email from 9am to 8pm ET M-F. We look forward to hearing from you!

Tags: , , , , , , , , , , , , ,

Comments


Posted By

We actually missed this about a month ago, but it appears Alarm.com has updated their website camera video feed viewer to use native browser streaming. This replaces the old Adobe Flash video viewer. This change does not come as a surprise, as Adobe Flash will soon reach its end of life.


Being able to live-stream the video feed for Alarm.com Security Cameras is one of the most important features of these devices. This can be done using the Alarm.com website or the mobile app. The change being discussed here affects streaming through a web browser and the Alarm.com website. Before, it was only possible to stream Alarm.com Cameras on the website by using the Adobe Flash video viewer. The update provides support for native browser streaming. This will make it easier for most viewers to access their camera feeds.

With Adobe Flash reaching its end of life by the end of the year, this update was basically a no-brainer for Alarm.com. Users will still have the ability to view their cameras using Adobe Flash until the end of the year. At that point, only native browser streaming will be supported for camera streaming through the Alarm.com website. Native browser streaming is easier to maintain, and it does not require users to install and update a Flash plug-in. Native browser streaming support was actually made available towards the end of September, but we never covered the news in our blog prior to now.

When you access your Alarm.com account through the website, the Video section will appear on the left if Video Surveillance has been added to your account. By clicking on this section then Live Video, you will be able to choose a camera for streaming. In the upper-right corner there will be a toggle bar for you to enable or disable the "New Viewer. When the bar is blue, the New Viewer is enabled, and native browser streaming will be used. This is the default option. You can click the toggle bar to turn off the New Viewer and use Adobe Flash streaming. This will only be available until the end of the year. After that, no Flash streaming will be available.


Please note that the New Viewer and native browser streaming only allows the live video stream to be maintained for a few minutes at a time. After that, you will get a message that the stream has "timed out". You will need to refresh the stream to resume viewing. This is normal, and it's just a limitation that comes with Alarm.com Camera streaming. Simply click the "Play" button that appears on the screen to refresh the stream and continue watching.

Also note that while the camera viewer now has native browser streaming available, the streaming video recorder (SVR) timeline page still uses Adobe Flash. Native browser streaming is not yet available for SVR functions on the Alarm.com website. We expect that to change in the near future, as Alarm.com continues to make their transition away from Flash. We do not have an ETA on when that will become available, but we will be sure to provide an update once we learn more.

If you have any questions about Alarm.com Camera streaming, or if you are interested in monitoring service to gain access to Alarm.com, please email us at support@alarmgrid.com. Remember that Alarm Grid customers need either a Platinum Level Plan or a Video-Only Plan to gain access to Alarm.com for camera streaming. Our team is happy to address any questions or concerns you may have via email. We check our email during our usual business hours of 9am to 8pm ET M-F. We look forward to hearing from you!

Tags: , , , , , , , , , , , , , ,

Comments