Technology Posts

Posted By

If you're in the market for a new home security system, you are likely faced with the decision to go hardwired or wireless. Both options have their merits, but it really comes down to the needs of the user. But we will say that in most cases, a homeowner will want to go the wireless route.

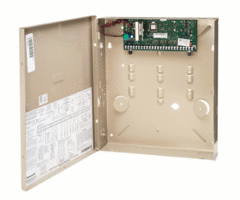
Honeywell vista 21ip internet alarm control panel open

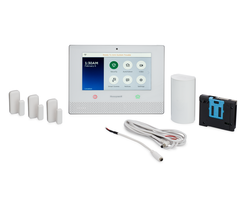
Honeywell lyric controller encrypted wireless security system

That's not to say that hardwired home security systems aren't right in certain situations. It's just that they offer greater challenges than wireless systems. Most users will want the convenience and ease-of-use that hardwired systems simply cannot offer. Perhaps the most obvious factor is that wireless systems are much easier to install and get started with than hardwired systems. This can be very important for DIY users who don't want to hire a professional installer.

Many wireless alarm systems can be installed without even drilling any holes. Although they can certainly be mounted, most wireless systems support desk stands that allow them to be conveniently rested on any desk or table. Wireless systems can also be readily used with wireless sensors. These sensors can often be mounted using double-sided foam tape, thereby eliminating the need to drill holes.

On the other hand, a hardwired system will almost certainly need to be mounted. These systems provide ready support for hardwired sensors. Any hardwired sensor will need to have a wire that is connected directly with the system. This can mean running wires across the entire premises for a complete hardwired setup. Although most wired systems can be configured to use wireless sensors, they will usually require a separately purchased wireless receiver to make this possible.

Honeywell 5881enh unlimited zone wireless receiverThe next consideration that a user should make is the ease of use for the system. Most users find that wireless panels are much easier to use and program. These systems often feature built-in touchscreen controls and menus that are easy to navigate. With some minor instructions, an end user will be able to set up their wireless system in its entirety. Additionally, the touchscreen navigation will make it easier for the user to perform basic system functions like arming and disarming. This can be very important for users who aren't always the most tech-savvy.

Hardwired systems function differently. These panels typically use external hardwired keypads that are wired-in directly to the panel. Although there are some wired touchscreen keypads, most wired keypads are of the push-button variety. This means that a user will have to enter-in various codes to perform basic system functions. The menus will not be as easy to navigate, and deep-level programming will often require the use of an intricate and sophisticated programming guide. In fact, many users of hardwired systems do not even attempt programming, and they leave the task to a professional installer.


Another advantage that wireless systems offer is that they usually come more "ready" than hardwired systems. That is, wireless systems typically require fewer add-ons than hardwired systems. Many wireless systems come ready-to-go right out of the box. As mentioned earlier, these systems come with integrated touchscreen controls so that no external keypad is needed. Wireless panels also come with built-in wireless receivers so that they can support wireless sensors. If a user wants to use wireless sensors with a hardwired system, they will almost certainly need to add a wireless receiver. Modern wireless panels will also usually come with some type of communicator so that they can readily connect with a central monitoring station. But please note that many wireless systems will still need to have a cellular communicator added for cellular monitoring services.

Hardwired systems don't come nearly as ready. Virtually every system function for a hardwired panel will require some type of add-on. Even basic functionality will require an external keypad. And hardwired systems almost never come with a built-in communicator. Instead, a separate communicator will need to be added and installed if a user wants reliable connectivity with a central station or an interactive service platform like Total Connect 2.0 or Alarm.com.

Honeywell lte xv alarmnet verizon lte cellular communicator

One area where wired systems do reign supreme is adding value to the property. A hardwired system with wired sensors will essentially integrate in with the building itself. This is something you can actually list when selling the building, and it can certainly increase the property's resell value. But a wireless system is not necessarily considered a fixture in the home, and it will not add to the home's value.

However, the upside is that wireless systems can be taken to a new property much more easily than wired systems. The user will just need to unplug the panel, dismount their sensors, put them in a box, and bring them to their new house. But for hardwired systems that have wires running throughout the building, the process is much more challenging. Many wires and sensors may be inaccessible, and a professional might need to remove them. For that reason, it's not much of a surprise that a user will often leave their hardwired system behind when moving to a new property. As mentioned earlier, this can provide the added benefit of increasing the home's resell value.

One final consideration is that wired systems usually require less maintenance than wireless systems. Wired sensors use power provided from the panel, and they will almost never require any type of maintenance. In other words, once a hardwired system has been installed and programmed, a user will almost never need to make any adjustments. The only thing they will need to worry about is replacing the panel's backup battery every few years.

But the wireless sensors that are used with wireless systems cannot receive power directly from the panel. Instead, these sensors rely on internal batteries that must be replaced every few years. If a user has many wireless sensors, they can expect that they will need to replace many sensor batteries at some point in the years to come. Fortunately, the wireless panel will let the user know when the sensor batteries are low and in need of replacing. It's also important to remember that most wireless sensors offer fairly impressive battery lifespans, and batteries will not need to be replaced very often. But this is still more maintenance than what is required with wired systems.

Consideration
Winner
Ease of Installation Wireless Systems
Ease of Use
Wireless Systems
Readiness Wireless Systems
Adding Property Value Wired Systems
Bringing to New Location Wireless Systems
Required Maintenance Wired Systems

In conclusion, most users find that wireless alarm systems are the superior option for home security. They are easier to set up and use, require fewer add-ons and are easier to bring to a new location. But a user might prefer a wired system in situations where they want to add to the property's value or if they want a system that requires as little maintenance as possible.

If you still can't decide between a wired or wireless system, feel free to reach out to us for help! You may email us at any time at support@alarmgrid.com. Or if you prefer to call us, you can reach us at 888-818-7728 from 9am to 8pm Monday thru Friday. We look forward to hearing from you!

Tags: , , ,

Comments


Posted By

Hi DIYers! There's an unfortunate misconception in the security industry that wireless systems aren't as reliable as hardwired systems. A person may look down on wireless systems due to the the potential for hacking, wireless signal ranges and the limited battery life of wireless sensors.

Honeywell lyric controller encrypted wireless security systemThe reality though is that wireless systems are just as reliable, if not more reliable, than their hardwired counterparts. Wireless systems also offer greater convenience and more flexibility both when setting up a system and when moving it to a new location. As a result, it's not much of a surprise that most new alarm systems are of the wireless variety. With a wireless system, a user will not need to run wires across the building, and installing equipment will be made much easier. Wireless systems also have the added benefit of requiring fewer add-ons than wired systems. But even with these positives, some people may still not be convinced that wireless systems are often the superior options. Today, we're going to break-down some of the biggest misconceptions against wireless systems and prove that they are truly a viable option for home and business security.

A major concern we often hear about with wireless systems is that they could be wirelessly hacked. The fear is that a potential intruder could use specialized equipment to takeover the sensors or the control panel that is used with the system. From there, the intruder could control or disable the system and enter the property uninterrupted. While this is extremely uncommon, it is a legitimate concern for those who require the highest level of security for their home or business. However, wireless hacking is really only possible with older, unencrypted sensors. Many newer alarm systems will support encrypted wireless sensors that are virtually impossible for outsiders to takeover or hack into, even with the most advanced equipment available. The way that encryption works is by having both the panel and the sensors know a unique encryption key. Any information that is sent out is encrypted for maximum security. Once the information is received, it is decrypted using the encryption key. This process is often referred to as a "digital handshake", and it allows for wireless sensors to be some of the most secure in the industry. Some wireless sensors that utilize encryption include the Honeywell SiX Series Sensors for the Honeywell Lyric Controller, the Qolsys S-Line 319.5 MHz Sensors for the Qolsys IQ Panel 2 and IQ Panel 2 Plus Systems, and the DSC PowerG Sensors.


The next misconception we hear with wireless systems is that the wireless signals are too weak to work reliably. Some users are afraid that even once the sensor has been paired with the system, its signal could weaken over time, and it might not work reliably. This could not be further from the truth. Once a sensor is paired with a system and permanently mounted within in range, it will always work with the system. The key is to not move the system or the sensors around, as it could disrupt the signals. But there's really no reason to do this.

Users should also remember that each sensor has a certain wireless signal range that should be kept in mind when planning the system. For example, Honeywell 5800 Series Sensors have a signal range of about 200 feet away from the system. On the other hand, a DSC 915 MHz PowerG Sensor will have a wireless range of roughly 2,000 feet in open air when used with an IQ Panel 2 Plus! Remember that walls and obstacles can reduce these ranges, as the wireless signal will have a more difficult time reaching the panel. Just make sure that the sensors work reliably from their final locations before you mount them permanently. If wireless range is an issue, then you may be able to overcome the problem by using a compatible wireless repeater. Some examples of wireless repeaters include the Honeywell 5800RP and the DSC PG9920.

A third concern we come across with wireless systems is that wireless sensors offer a limited battery life. Some users ask us what happens if the battery for a wireless sensor suddenly dies. They believe that their security system could randomly stop working all because a battery died. While it's true that not having to rely on batteries is an advantage of hardwired sensors, this does not make wireless systems any less reliable. A wireless sensor that uses batteries would not just suddenly stop working in most cases. Instead, there are multiple preventive measures put in place to keep the user safe.

Whenever a sensor battery is low, it will transmit a warning to the security system. The user will receive this alert on the panel and know to change the battery as soon as possible. In most cases, the user will have a week or longer before the sensor will die. This will give them plenty of time to replace the battery. And if a sensor does ever go offline entirely, the panel will alert the user to the loss of RF supervision. This way, they will know if a sensor is ever not being detected by the panel before it becomes any type of security concern.

Qolsys iq panel 2 at and t wireless security system with at and In addition to being more convenient and easier to install, there is one other major advantage that wireless systems offer over wired systems. That is, wireless systems cannot be as easily tampered with. A hardwired sensor can have its line to the panel cut by a potential intruder so that it no longer functions properly. Of course, when this happens, the hardwired system will recognize this and trigger an immediate trouble situation. This makes this a relatively minor security concern. But it would still be very inconvenient to have to rewire the sensor and make sure that its working order has been restored.

A user might even bypass the zone for the time being and leave the system vulnerable until they can properly address the issue. With wireless systems, there are no direct physical connections, and this is much less of an issue. In that sense, because there are no physical connections to cut, an encrypted wireless system might be considered more reliable than a wired system in many cases.

Modern wireless alarm systems offer excellent reliability for homes and businesses. Virtually all of the concerns or doubts regarding wireless setups are unwarranted and not of real concern. Therefore, wireless systems offer excellent reliability and protection for virtually any home or business. They make for a great option for anyone looking get into alarm monitoring. And once you have a wireless system, make sure to sign-up for an alarm monitoring plan from Alarm Grid. We offer varying plans based on the needs of the customer. If you have any questions, do not hesitate to reach out to us at anytime through email at support@alarmgrid.com. You may also call us from 9am to 8pm EST M-F at 888-818-7728.

Tags: , , , , , , , , , , ,

Comments


Posted By

We have recently been made aware that the maximum range for the DSC 915 MHz PowerG Sensors is only 2,000 feet in open air when used with the IQ Panel 2 Plus. This is quite shorter than the 2 kilometer maximum range when these same sensors are used with DSC PowerSeries Neo Alarm Systems.

Qolsys iq panel 2 at and t wireless security system with at and Through testing, we have determined that the range of PowerG Sensors is noticeably shorter when they are used with a Qolsys IQ Panel 2 Plus instead of with a DSC PowerSeries Neo. This is likely due to the smaller antenna that is featured on the IQ Panel 2 Plus System. On a DSC PowerSeries Neo System, the sensors can achieve their advertised wireless range of up to 2km in open air. But the IQ2+ offers a considerably smaller wireless range, even with clear line of sight. The maximum range for a PowerG Sensor used with an IQ Panel 2 Plus is no more than 2,000 feet. This is much less than 2km. We also do not recommended trying to use the Power Sensors with an IQ2+ beyond 500 feet away in practice. This is especially true if many obstacles and walls are present.

Previously, we produced content that led some customers to believe that the maximum range of these sensors was 2km when used with the IQ2+. We have since learned that this is not the case, and we have adjusted our old content accordingly. These changes apply to all versions of the IQ Panel 2 Plus, regardless of which legacy daughtercard or cellular communicator is used. We apologize for any inconvenience that this may have caused for our customers.

The only way these sensors can support a 2km signal range is when they are used with a DSC PowerSeries Neo System. These systems feature more powerful antennas that can allow these sensors to achieve their maximum possible distance. Alarm Grid does not sell any PowerSeries Neo Systems at this time, but we do offer compatible Alarm.com cellular communicators that allow us to takeover these systems.

That being said, 2,000 feet of open air range is still extremely impressive for any alarm system. Even customers with the largest of homes and should be able to utilize these sensors as they see fit. And if the range still isn't enough, a PowerG wireless repeater can be used to effectively double the range. This will boost it to more than 1,000 feet when used in most homes and up to 4,000 feet when used with an IQ Panel 2 Plus in open air!

Additionally, we've found that these sensors cannot auto-enroll with an IQ Panel 2 Plus like most other compatible sensors. Instead, the Serial Number for the sensor must be manually entered. For the PowerG Sensors, this is called the "DL ID", and it can be found on the sensor's box. The user must also set the Source Signal to reflect that of PowerG. Please keep this in mind when enrolling a PowerG Sensor with an IQ Panel 2 Plus Alarm System.

UPDATE: We have since learned that you can auto-enroll PowerG Sensors with the IQ Panel 2 Plus. This post explains the process.


If you have any questions about the IQ Panel 2 Plus or DSC PowerG Sensors, please do not hesitate to reach out to us. You may email us at any time at support@alarmgrid.com, or you can call us from 9am to 8pm EST M-F at 888-818-7728. We look forward to helping you with your security needs!

Tags: , , , , , ,

Comments


Posted By

Hi DIYers! We have great news for 2GIG GC3 owners. Nortek, the owners of 2GIG, has officially announced that the 2GIG GC3 now has partitioning support available. The update comes via the Firmware Version 3.2 release. This release makes the GC3 our first wireless panel with partitioning.

2gig gc3 diy wireless security system w slash 7 screenIf you aren't familiar with partitioning, it refers to the practice of sectioning off an alarm system into different groups that are called partitions. This allows zones within the designated partition to be armed or disarmed while the system zones outside that partition remain unaffected. For example, if a specific system partition is disarmed, then all of the zones within that partition will become disarmed. But the rest of the system will remain armed. Partitioning features are somewhat similar to bypassing zones, but it does not require each zone to be individually bypassed.

In the case of the 2GIG GC3, the partitions are referred to as "Smart Areas". Every Smart Area can be individually and set up for its own alerts and notifications. Any zone within a Smart Area be individually bypassed if needed. The system will support a maximum number of four different Smart Areas. Each Smart Area can be assigned its own set of access codes. This is excellent for restricting access to certain Smart Areas. The Smart Areas option for controlling this feature is easily accessible from the main screen of the 2GIG GC3 System.


Other features for 2GIG GC3 Firmware Version 3.2.0 include the support for up to eight wireless keypads (SP1, SP2 and PAD1-345), better support for Z-Wave smart home devices, fixes with the French and Spanish language options, updates to broadband network programming (Q33, Q34 and Q35) and general networking improvements.

To apply the update, download the current firmware file on this page. Extract the downloaded file, and save the firmware file to the root directory of a USB drive. Then plug the USB drive into the top of the 2GIG GC3. The system will ask you to confirm the update and provide either the Master Code or the Installer Code (default 1561). The system will then reboot and perform the update.

Additionally, Firmware Version 3.2.0 has received approval from Alarm.com, and the update can pushed down over-the-air (OTA) by an Alarm.com dealer. Please note that performing an OTA update will include added fees that may be passed on to the user. However, updating through a USB drive will not feature any added costs.

Update: This feature is also built-in standard on the newer 2GIG GC3e System.

Tags: , , , ,

Comments


Posted By

Hi DIYers! Last week, we took a look at some takeover modules that allow existing life-safety sensors to be used with wireless systems. Specifically, we examined the Encore FF345 for 345 MHz systems and the SLX-AD-T3 for 319.5 MHz systems. Now, we offer a module for 433 MHz systems as well!

Despite its name, the DSC WST-600 actually operates at 433 MHz. This is the frequency commonly used with DSC Panels, including the wireless all-in-one DSC Impassa. It works in essentially the same manner as the other takeover modules. This involves continuously listening for the unique temporal sound of an activated smoke detector or carbon monoxide detector. As long as the sensor has the appropriate sounder, it can be used in this way. And if the sensors are interconnected, a single DSC WST-600 module can monitor the entire building!

The DSC WST-600 is programmed with a DSC System as though it were a regular 433 MHz wireless smoke or CO detector. Most users will program this type of device so that it has the system send out an emergency alert as soon as it is activated. This way, the user can receive automatic emergency dispatch from a central monitoring station. For best results, the DSC WST-600 should be placed within six inches of the life-safety sensor that it is monitoring. This way, the sensor will be able to actively detect the sound of the activated sensor. Overall, this sensor is a great way to monitor existing smokes and CO sensor so that the end user can save money.

The DSC WST-600 is available for purchase now on the Alarm Grid site. It is perfect for anyone with a DSC Impassa who wants to integrate hardwired life-safety sensors or conventional battery-powered life-safety sensors with their system. Get a DSC WST-600 takeover module to protect your home or business.

Tags: , , ,

Comments


Posted By

UPDATE: The information presented below is outdated. The L5200 can now be updated using the LYNXTOUCH-MSD Firmware Updater Tool. Please read this blog for more information.

Alarm Grid has recently learned that the Honeywell 3GL, the longtime cellular communicator for the LYNX Touch Panels, has officially been discontinued. This leaves the Honeywell L5200 with no available cellular communicator. However, the newer LYNX Touch Systems still have cellular options.

Honeywell 3gl alarmnet cellular communicator for the l5200 and l

The Honeywell 3GL was a cellular communicator that connected with the AT&T 3G Network. It was previously sold as the Honeywell 4GL. But Honeywell smartly changed the name, as it misled many people into believing it was a 4G communicator. The 3GL was compatible with the L5200, L5210 and L7000 Alarm Systems.

As for the L5210 and L7000, there are still cellular communicators available, specifically the LTE-L57A and LTE-L57V. Please note that the L5210 and L7000 must be running Firmware Version 9.00.209 or higher to support LTE-L57A, and Firmware Version 9.00.201 to support the LTE-L57V. More information on this is available here.

With the discontinuation of this module, the Honeywell L5200 now has no available cellular communicator option. Users of the L5200 who want to receive cellular monitoring should strongly consider upgrading to a newer system, such as a Honeywell Lyric Controller. This is Honeywell's newest wireless security system, and it has multiple cellular options available.

Please note that this news does not affect L5200 Systems that are already using an active 3GL Communicator. Any communicator that has already been activated will continue to function as normal. Additionally, if a user is able to find an existing 3GL or GSMVLP5-4G from somewhere else, then we can still activate it for cellular monitoring service with their L5200 System.

One alternative option for L5200 users without a cellular communicator is to go the WIFI-route instead. The system will support the L5100-WIFI module, which will allow the system to connect with a local WIFI network. Although WIFI is not as reliable as cellular service, it can be a good option if a user simply does not want to upgrade their panel. This is also a great option for Honeywell L5100 users, as that system also has no cellular radio in current production.

Finally, the ILP5 is still available for purchase, and it provides hardwired ethernet capabilities for any LYNX Touch Panel. But please note that a LYNX Touch cannot support both the ILP5 and a cellular communicator since they use the same port. Once a Honeywell LYNX Touch System is using IP or cellular communication, it will be capable of being used with the Total Connect 2.0 service.

The following table outlines all of the communicators available for the Honeywell LYNX Touch Systems and their compatibilities with each of these panels:


GSMVLP5

3GL

GSMVLP5-4G

LTE-L57A

LTE-L57V

ILP5

L5100-WIFI

Network AT&T 2G AT&T 3G AT&T 4G AT&T LTE Verizon LTE Wired Ethernet WIFI
Available Discontinued Discontinued Discontinued Yes Yes Yes Yes

L5000

Yes

No

No

No

No

Yes

No

L5100

No

No

Yes

No

No

Yes

Yes

L5200

No

Yes

Yes

No

No

Yes

Yes

L5210

No

Yes

Yes

Yes

Yes

Yes

Yes

L7000

No

Yes

Yes

Yes

Yes

Yes

Yes

If you have any question about this news, please do not hesitate to reach out to us for further assistance. You may email us at support@alarmgrid.com, or you may call us at 888-818-7728 from 9am to 8pm EST M-F. We look forward to hearing from you.

Tags: , , , , , , , , , , , , , , , , ,

Comments


Posted By

Hi DIYers! A couple of weeks ago, we took an initial look at Alarm.com Siri Shortcuts. This function allows ADC users to control their security system and smart home automation devices through Siri voice commands. Today, we're taking a closer look at this new feature and what it provides.


Alarm.com Siri Shortcuts are available for any iOS device that is running Apple iOS Version 12. This includes iPhones, iPads, HomePods, the Apple Watch and even Apple CarPlay. They allow you to use voice commands through Siri to control basic system functions and to run any smart scene that has been set up with Alarm.com. If you haven't already created smart scenes, we recommend doing that before attempting to set up any Siri Shortcuts. This is because any created smart scenes will conveniently appear in the "Suggested Shortcuts" list for easy creation.

To get started, you will need to have the Alarm.com Mobile App downloaded for the device you want to use with Alarm.com Siri Shortcuts. If you do not have the app, it can be downloaded for free from the Apple App Store. From there, you will need to enable Siri Shortcuts. To do this, click on the settings icon (the gears), then "Siri Shortcuts", then "Edit" in the upper-right corner, and finally the button below the Edit button to share activity with Siri.


From there, you will be able to create your own Siri Shortcuts for use with Alarm.com. While this can be done from the settings menu on your iOS device, we have found that it is easiest to do this right from the Alarm.com App. If you scroll down, you will see all of the current Alarm.com Siri Shortcuts that have been set up. Please note that any Alarm.com Siri Shortcut will need to be custom-recorded before they can be used. This includes any basic system functions that are automatically suggested by Alarm.com. Some of the suggested actions for Alarm.com Siri Shortcuts include:

  • Disarm
  • Arm Away
  • Arm Stay
  • Home
  • Away
  • Sleep
  • Wake Up
  • Any Custom Scenes

Below the existing shortcuts are suggested actions can be set to trigger with a voice-activated Siri Shortcut. This includes basic system functions, such as arming and disarming, and any custom smart scenes that you have previously created. Remember, you may need to press the "Edit" button in the upper-right corner before you can begin creating Siri Shortcuts. Simply choose the action you want to use. For this example, we created a "CUSTOM SCENE" that disarms the system and unlocks a Z-Wave door lock. You will then be taken to a screen where you can record the Siri Shortcut. Press the Red Circle to record the command. You can say anything you want to trigger the shortcut. Finally, press "Done" in the upper-right corner to save the recording. Then press "Done" in the upper-right corner of the Alarm.com screen to save your new shortcut.


Once you have created your Siri Shortcut, simply activate Siri, and state the command you recorded earlier. Alarm.com will then perform the programmed action as through it had been activated through the ADC Mobile App. You can even perform these actions remotely so that you can use Siri and your own voice to control your alarm system and run smart scenes from virtually anywhere in the world. Overall, this is a super easy and user-friendly way to perform everyday actions right from your iOS device!

We're huge fans of this new feature, and we can't wait for you to get started so that you can get the most out of your Alarm.com system. If you have any questions about Siri Shortcuts, please do not hesitate to contact us at support@alarmgrid.com, or call us from 9am to 8pm EST M-F at 888-818-7728. We look forward to hearing from you!

Tags: , , ,

Comments


Posted By

Hi DIYers! Today, we are reviewing the Encore FireFighter FF345 and the Interlogix SLX-AD-T3 takeover listening modules. These are both listening devices that are used with life-safety sensors. They allow end users to easily integrate existing life-safety sensors with their alarm systems.


Obviously, a sensor can only work with a system if the system is able to detect signals that are sent out from the sensor. For many existing smoke detectors and carbon monoxide detectors, they may not be able to communicate successfully with a panel. This is often because they are hardwired building smoke detectors that aren't designed to integrate with a newly installed system. Or they could be standalone, battery-powered devices that do not send out wireless communication signals for communicating with a wireless receiver. In any case, these devices are unable to integrate with an alarm system through a conventional method.

However, a takeover module like the FF345 or the SLX-AD-T3 will allow these devices to be used as a part of a complete alarm system. The user will not need to change their existing smoke detectors or carbon monoxide detectors in any way. Instead, they can simply install an FF345 or an SLX-AD-T3 next to an existing life-safety sensor. They can then program the FF345 or the SLX-AD-T3 as though it were a regular life-safety sensor that is compatible with their system.

When their smoke detector or their carbon monoxide sensor is activated, it will still produce a sound to alert anyone in the building. The way that the FF345 and SLX-AD-T3 work is that they actively listen for this specific type of sound. Once the FF345 or SLX-AD-T3 hears the sound and realizes that the life-safety sensor has been activated, it will send an immediate alert to the panel. The system will then respond in the same way as if a programmed life-safety sensor were activated. If the user is monitored with a central station, this will usually mean automatic emergency dispatch.

Please note that only smoke detectors that produce a Temporal 3 sound and carbon monoxide sensors that product a Temporal 4 sound can be used with life-safety detector listening modules. Additionally, the Interlogix SLX-AD-T3 (FF319) can only listen for smoke detector modules that produce the Temporal 3 sound. You cannot use the SLX-AD-T3 with carbon monoxide sensors. However, the latest version of the FF345 will listen for both the Temporal 3 and the Temporal 4 sound. As such, the FF345 can be used with both smoke detectors and CO detectors.

Whether a user gets the FF345 or the SLX-AD-T3 will depend on what type of system they have. If their system supports 345 MHz sensors (e.g. Honeywell, 2GIG), they will get the FF345. If their system supports 319.5 MHz sensors (e.g. Interlogix/GE, Qolsys), they will get the SLX-AD-T3. But both sensors will provide the same great type of functionality and reliability.

Both the FF345 and the SLX-AD-T3 can be purchased from the Alarm Grid website. Get one to provide top-quality fire and carbon monoxide protection for your home or business.

Tags: , , , ,

Comments


Posted By

Hi DIYers! Did you know that many of our monitored customers come to us with their own existing equipment? There are many cases where a user will inherit an old alarm system or bring sensors from a different monitoring company to use with Alarm Grid. This is often called a "system takeover".

Alarm grid inside security stickers

At Alarm Grid, we are firm believers in the principle of "if you have it, then use it". When a customer is interested in our monitoring services, and they already have a system from a different monitoring company, we will do everything possible to use that existing equipment. This can include the panel, their sensors and various system add-ons. We can often take over the system entirely once its communicator been released from their previous monitoring company. Other times, simply replacing the old communicator with a new one, while still keeping the rest of the system, can do the trick. This can save the user hundreds or even thousands of dollars in equipment costs!

When you are monitored with Alarm Grid, you own all of your equipment. Whether you obtained it from us or somewhere else does not matter to us. We are happy to provide you and those around you with top-quality protection regardless of where you bought your equipment. And if you ever do decide to terminate your service with us, we will release your communicator so that you can easily take it somewhere else.

Of course, taking over an old alarm system isn't always possible. Many other alarm monitoring companies use proprietary equipment and communicators that will only work with their monitoring services. Monitoring companies may also lock out users of programming by using a secret Installer Code that prevents us from taking over the system. Yet another possibility is that the security panel is very old, and we may recommend making an upgrade to get additional functions and features. These are some of the problems that our technicians encounter almost everyday. Sometimes we can overcome these issues, but other times we cannot. Our experts can make that determination.

So while we will certainly do everything possible to make your existing panel and sensors work to save you money, please understand that it may still be necessary to replace some or all of your old equipment. However, it never hurts to at least ask us about using your old equipment before going out and buying new stuff, whether that is from us or from somewhere else. It never costs anything to speak to our planning team to start designing a security system. And if you do decide you need new equipment, remember that our website is an outstanding resource for competitively priced and non-proprietary equipment. In the event that you do ever find the same equipment at a less expensive price, by all means, buy it there, and bring it here.

Remember, our security technicians are experts. We are familiar with older alarm systems, and we can generally provide you with a fairly concise answer of whether or not your old equipment is usable. If you have an old system that you want to get monitored, please reach out to us! Often, a simple picture or a description is all we need to determine whether or not we can take it over. You can get started by giving us a call between 9am and 8pm EST M-F or by sending an email to support@alarmgrid.com. Our team is always happy to help, and, quite frankly, we love the challenge of making old equipment viable. So if you have an old security system or sensors that you think could still serve you and your family well, check with us to see if we can get it monitored!

Tags: , , ,

Comments


Posted By

Hi DIYers! Our YouTube Channel uploaded a sound clip that mimics the sound of breaking glass. This sound clip can be used to test various glass break detectors for proper function. This includes both external glass break sensors and the internal glass break sensor for the Qolsys IQ Panel 2.


Although this might just sound like a generic glass break effect, it was actually specifically designed for testing glass break sensors. It includes both the low-pitched "thud" of an object striking against the glass, as well as the high-pitched "shattering" sound that is most commonly associated with breaking glass.

In order to test one of your glass break sensors, start by putting your system on test mode with the central station. Next, pull up the YouTube clip on your phone, and set your phone's volume to its highest setting. Then play the clip in its entirety while you are within the detection range of your glass break sensor. If successful, the sensor will send an alert to the control panel to let it know that it has been activated. You might want to test the sensor from multiple locations to make sure that it will properly respond to glass breaking from different directions.

Keep in mind that if the glass break sensor does not activate during testing, it does not necessarily mean that your glass break sensor isn't working properly. It may just need to have its settings adjusted, or you may need to change its location. Also, it's very important to mention that we recommend using a conventional glass break simulator, such as a Honeywell FG701 or an Interlogix 5709C-W if possible. This sound clip is only alternative option if a user has no other way of testing their sensor. Although the clip should work well, it will not work as effectively as a legitimate testing device.

We hope this clip will be helpful for users who need to test their glass break sensors. If you need any help, please contact us at 888-818-7728 M-F from 9am to 8pm EST or email us any time at support@alarmgrid.com.

Tags: , , , , ,

Comments