Training Posts

Posted By

Hi DIYers! We're here for our video recap. We only have three (3) new videos this week, but they all follow a theme. They all feature Joe discussing the PowerG Smoke Detectors. You can use them with any PowerG compatible panel, and they offer one-go-all-go technology! They are nice devices!

Dsc pg9916 powerg 915mhz wireless smoke and heat detector

Additionally, if you haven't seen our blog about the new DSC PG9936 Smoke and Heat Detector, make sure you take a look. Now, onto the videos!

Properly Testing a PowerG Smoke Detector

Joe shows you how to test a PowerG Smoke Detector. This is something you should do regularly, and you may have to perform this test to get a certificate of alarm (CoA). The PowerG Smoke Detectors have a test button so you can easily test transmissions with the panel. If you want to test the device for smoke detection, then you will need canned smoke. Make sure to put your system on test mode before testing!


Enrolling a PowerG Smoke Detector In a Qolsys IQ Panel 2 Plus

Joe shows you how to enroll a PowerG Smoke Detector with a Qolsys IQ Panel 2 Plus System. All versions of the Qolsys IQ Panel 2 Plus include a PowerG daughtercard for supporting PowerG Sensors. PowerG Smoke Detectors can be auto-enrolled with an IQ Panel 2 Plus System by putting the panel into its auto-enrollment mode and then holding down the device's enrollment button until the LED light remains steady. However, the new PG9936 can be auto-enrolled by powering the device on while the panel is in enrollment mode.


Factory Defaulting a PowerG Sensor

Joe shows you how to factory default a PowerG Smoke Detector. These same steps apply to almost any PowerG Sensor. The PowerG devices use 128-bit AES encryption in all their wireless communication. This requires linking the PowerG Sensor with a compatible panel. When you delete the sensor from the panel, the sensor will still think that it is enrolled with the panel. You need to perform a factory default on the PowerG Sensor so that it knows that it is no longer enrolled.

Tags: , , , , , , ,

Comments


Posted By

We recently discussed the end of Interlogix and how the company will soon be ceasing business in North America. We know that many users will be looking for a replacement for Interlogix Panels. Today, we will discuss how you can easily replace an Interlogix Panel with a Qolsys IQ Panel 2 Plus.

Qolsys iq panel 2 plus verizon lte with powerg s line and legacy

Interlogix Systems have been widely used in the security industry for many years. We want to start by saying that existing Interlogix Panels will continue to be supported by Alarm.com. As long as your Interlogix System has a compatible LTE cellular communicator, you can continue using the system well into the very distant future. And that is a perfectly acceptable option if you are looking for a cheap and effective solution for alarm monitoring.

But if you want to take home or business security to the next level, then now is a great time to upgrade to a Qolsys IQ Panel 2 Plus. This state-of-the-art security system offers fantastic features like automatic Bluetooth disarming, partitioning, live-streaming for compatible Alarm.com Cameras, built-in Z-Wave Plus functionality, support for up to 128 wireless zones, and so much more. And it is all controlled using a beautiful 7" touchscreen display.

Qolsys offers three (3) versions of the IQ Panel 2 Plus. If you are replacing an Interlogix Panel, then you will want to get the 319.5 MHz version. This is the version with the gold and white box shown above. The 319.5 MHz will be able to support all of your existing Interlogix 319.5 MHz Sensors. This means that you can upgrade to a brand-new high-tech security system, while still being able to maintain your existing sensors that work perfectly well. How cool is that?

If you do want to upgrade to newer wireless sensors, then you can also use PowerG Sensors with the system. PowerG Sensors offer an incredible wireless range of up to 2,000 feet away from the IQ Panel 2 Plus in an open air environment. They also utilize military-grade 128-bit AES encryption to prevent any wireless hacking or takeover attempts. This also protects the sensors from any RF jamming techniques that could disable legacy sensors.

Qolsys also offers their own 319.5 MHz sensors if you need to get some new wireless devices for the system. These sensors can be easily enrolled with the panel just any existing Interlogix Wireless Sensor. Qolsys even offers their own "S-Line" Encrypted Sensors for added wireless protection. These sensors use a rolling code encryption for added protection. These devices will make for a great addition to any 319.5 MHz IQ Panel 2 Plus!

We also understand that some users may be upgrading from hardwired Interlogix Panels, such as an Interlogix Concord 4 or an Interlogix NetworX Series Panel. Qolsys considered this, and they have a solution. The Qolsys IQ Hardwire 16-F is a wired to wireless converter that will allow you to use existing wired sensors with your new IQ Panel 2 Plus System. Just mount the IQ Hardwire 16-F in-place of the old panel, and enroll your existing sensors!

Whether you have a wireless Interlogix Panel like an Interlogix Simon XT, an Interlogix Simon XTi, or an Interlogix Simon XTi-5, or you have a hardwired Interlogix Panel like a Concord 4 or NetworX Series System, Qolsys has the solution for you. And if you choose to keep your existing Interlogix Panel, that's fine too. We have compatible communicators available on our website, and we can help you get the system running with our monitoring services.

If you would like to learn more about your options, or if you would like to discuss our monitoring plans, we invite you to email us at support@alarmgrid.com. Just tell us what you have (or what you would like to have!), and we will be happy to help you as soon as possible. Remember that our support hours are 9am to 8pm ET M-F, so keep that in mind when you email us. We look forward to hearing from you and helping you find the perfect security solution!

In the video below, Qolsys shows us how quickly and easily an Interlogix Simon XT panel can be replaced by a Qolsys IQ Panel 2 Plus 319.5 MHz version:


Tags: , , , , , , ,

Comments


Posted By

Hi DIYers! It's time for our video recap again, this time covering September 9th thru 13th. We have five (5) new videos this time featuring Jarrett, Jorge, and myself. We have been getting some positive feedback regarding our videos lately, thank you so much! Let's check out the new ones!

Enrolling the 2GIG PAD1-345 Wireless Keypad to the 2GIG GC2

I show you how to enroll a 2GIG PAD1-345 with a 2GIG GC2 Security System. The 2GIG PAD1-345 is a relatively simple push-button keypad that is great for basic arming and disarming. You can keep it by a second entrance in your home or business so that you can arm and disarm as you come and go. It is also compatible with other 2GIG Systems. These include the 2GIG GC2e, the 2GIG GC3, and the 2GIG GC3e.


Using a WIFI Communicator with a Honeywell Alarm System

Jorge from Alarm Grid talks about using a WIFI communicator with a Honeywell System. This can be a great way to monitor your system if you have WIFI in your home or business. IP communication is known for being fast and relatively reliable for the most part. You just need to be wary of internet outages, as they will leave your system unmonitored. For that reason, you might want to get cellular backup for your system as well.


Using L7000 Alarm Panels Together

Team MVP Jorge explains how you cannot use two Honeywell L7000 Systems together. As a general rule, it is not possible to use multiple security systems together. You cannot pair one alarm control panel with another alarm control panel. This is true even if they are the same exact system. If you want a second controller for operating your alarm system, then you should get a keypad instead. A good keypad for the L7000 is the Honeywell 5828.


Self-Monitoring an Alarm.com Security System

Super Alarm Grid Hero Jarrett explains how you can self-monitor an Alarm.com Security System. The Alarm.com service is used with many security systems. This service will send you text and/or email notifications regarding any system activity. As a result, it is possible to use an Alarm.com System without it being connected with a central monitoring station. This practice is known as self-monitoring. Just remember, it will be up to you to contact the authorities if needed!


Defaulting a Resideo Lyric Controller

Wonder Boy Jarrett shows you how to default a Resideo Lyric Alarm System. Performing a factory default on a Lyric is normally only done if you are planning to get rid of the system, or as a last resort troubleshooting step. Doing this will reset the Installer Code back to 4112 if it was changed. All zones from the system will be cleared. It will reset the panel time. And all general system settings will be reset back to their default values.

Tags: , , , , , ,

Comments


Posted By

Hi DIYers! It's time for another video recap. Our video team managed to put up five (5) new videos this time. We're sure they will help many people get the most out of their alarm systems. Hopefully you enjoy watching them as much as we enjoyed making them. Let's check out the newest videos!

Using a DSC PowerG Keypad With the Qolsys IQ Panel 2 Plus

Joe explains how you can use a DSC PowerG Wireless Keypad with a Qolsys IQ Panel 2 Plus System. The IQ2+ works with a PowerG Keypad because it accepts the necessary 915 MHz frequency. The compatible PowerG Keypad is a push-button device that makes for a good secondary keypad for an IQ Panel 2 Plus. The keypad can be used in a second location in the building, such as by a back door. If you want a touchscreen keypad for the IQ2+, then the IQ Remote is a great option.


Using the 5800COMBO With the Lyric Alarm System

Jorge teaches users how they can use a Honeywell 5800COMBO with a Honeywell Lyric Alarm System. The 5800COMBO offers smoke, heat, freeze and carbon monoxide detection all in one convenient device. The sensor can use up to five (5) zones on the Lyric System. Each zone will have a different Loop Number according to function. These functions include smoke & heat detection, freeze detection, CO detection, RF supervision, and end of product life. If there is a function you do not want to use with the sensor, then you can skip programming for that zone.


Getting Remote Access to a Qolsys IQ Panel 2 Plus

Jorge tells users how they can get remote access to a Qolsys IQ Panel 2 Plus Alarm System. This is done by getting the system monitored with service that includes access to Alarm.com. This is an interactive monitoring and automation platform that allows you to control your system remotely. By accessing Alarm.com through the mobile app on an Android or iOS device, you can arm and disarm the system, check its current status, control programmed Z-Wave devices, view the live feed for Alarm.com Cameras, and more.


5800C2W Support With the Lyric Alarm System

Jarrett explains how you can use a Honeywell 5800C2W with a Lyric System. This is a wired to wireless converter that lets you use hardwired sensors with the system. This is great if you are upgrading to the Lyric from a hardwired system. You can save a lot of money by not having to buy completely new sensors when your existing ones work just fine. You will typically want to have the 5800C2W in the same location as the old hardwired panel. This will make wiring as easy as possible. Mark the wires before switching them over!


Door Contacts - Overview

Jorge covers the basics for door contacts. These sensors let the system know when a door is opened. Most work in the exact same manner. There is a sensor, along with a smaller accompanying magnet. The sensor is placed of the door frame, while the magnet is placed on the moving part of the door. The sensor and magnet should be as close as possible when the door is closed. Alignment is also important. Opening the door will cause the magnet to separate from the sensor. This will let the sensor know to alert the system.

Tags: , , ,

Comments


Posted By

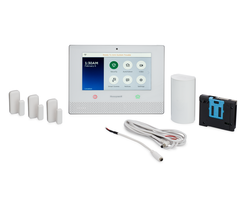
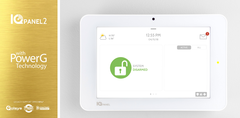
Hi DIYers! We have a simple tip today that will be helpful for anyone looking to buy a new home security system. That tip is that the cellular communicator used with your panel is different than the one used with your phone. This is very important to keep in mind when buying a system.
Honeywell lyricpk lte a wireless security system w slash at and

As you probably know, cellular communication is not the only communication path available for security systems. There are also internet (IP) communicators and even traditional telephone dialers. But cellular communication is by far the most reliable. Unlike other communication paths, cellular service almost never goes down or becomes unavailable. Modern cellular communication has also improved tremendously through the years, and it is now nearly as fast as IP communication. For that reason, we recommend that everyone uses cellular communication with their alarm systems.

You may be surprised to learn that many people think they have to get a cellular communicator for their alarm system that uses the same service provider as their cell phone. That is false. You can certainly use a different service provider with your security system than what you use with your phone. There is nothing wrong with using the same service provider, but this is by no means required.

Your phone and your alarm system are completely separate devices. They are not related in any way. They have separate billing cycles, and the service for one will not affect the other. Of course, you may receive text alerts regarding system activity. And if you have a system like the Qolsys IQ Panel 2 Plus, you may use Bluetooth disarming with your phone. But the fact remains that your system and your smartphone are totally separate.
Qolsys iq panel 2 plus at and t lte with powerg s line and legac

The reason we bring this up is because we have customers all the time who think that they must have the same service provider for their phone as they do their alarm system. They don't. This is a complete fallacy. Your service provider for your phone should have very little impact on which service provider you choose for your system. For example, if you have an AT&T Phone, then there's nothing wrong with choosing a Verizon Communicator for your system, or vice-versa.

Now, there's nothing wrong with considering how the service for your smartphone fares in your home when you are choosing service for your alarm system. For instance, if you think, "Gee, I have an AT&T Phone, and my service works excellent while I am at home!", then by all means, go with an AT&T Communicator for your system. It's just important to understand that this isn't mandatory.

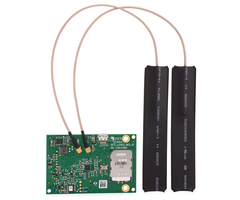
You should also understand that a cell phone and an alarm panel using cellular communication operate in a very similar manner. Both will send out signals across a cellular network. Both have a SIM Card. The only difference is that one communicator is inside a phone, while the other is inside an alarm panel. If you have a phone with a service provider that provides strong service in your home, then it's fair to expect that the same cellular network can also provide strong service for your alarm system.

But if you find that your phone does not receive strong cellular signal strength while you are at home, then please, choose a different service provider for your alarm system! With your phone, you might sacrifice signal strength at home because the network provides better signal strength while you are at work or while you are in town. But your alarm system isn't going anywhere. You should choose your alarm system's cellular service provider based solely on how it performs at the location where it is used.

You should also realize that the costs for cellular alarm monitoring will remain the same, regardless of which service provider you choose. This is different for your phone, where you may shop around for different rates. For an alarm system it's a little bit different. You do not pay the cellular service provider directly. Instead, you pay your alarm monitoring company all the fees for your monitoring service. Your monitoring company will then handle any of the fees for cellular service. No matter which cellular provider you go with, your monthly cost will remain the same. It is the same cost for AT&T, Verizon, or any other cellular service provider you might use.

Cost and the service provider for your phone should not be factors when choosing a cellular service provider for your alarm system. The only factor you should consider is how well that service provider fares in the location of the system. You should check coverage maps and select the service provider that works best in that area. Whether that service provider is the same as the one you use for your phone should not make any difference.
2gig ltev1 a gc2 alarm dot com verizon lte cellular communicator

Remember, to use any cellular communicator, you will need a monitoring plan that includes cellular service. We recommend choosing one of our Gold or Platinum Level Plans so that you can take full advantage of the great features that Alarm.com and Total Connect 2.0 have to offer. More information about these plans is available on our alarm monitoring page. If you don't need the convenience of interactive monitoring and smart home automation, we also offer a Cellular-Only Plan that is less expensive and doesn't include access to Alarm.com or Total Connect 2. This plan is perfect for users who want reliable central station monitoring service, and nothing more.

If you have any questions about cellular communicators or alarm monitoring in general, we encourage you to reach out to us. Our planning department is here to help any potential customer make the best decisions for their needs. The best way to reach us is to email support@alarmgrid.com. We will check your email at our earliest convenience and respond back as soon as possible. You may also call us at (888) 818-7728 during our regular business hours of 9am to 8pm EST M-F. We look forward to hearing from you and helping you with all your home security needs.

Tags: , , , , , , ,

Comments


Posted By

Hi DIYers! It's time for another Alarm Grid video recap! We have videos from all the usual team members. Those team members are Jarrett, Joe, and Jorge, and they're all here to help you learn how to use your security system. Let's check out the latest videos from the Alarm Grid video team!

Troubleshooting 2-Wire Smokes on the Qolsys Hardwire 16-F

Joe explains the best practices for troubleshooting 2-wire smoke detectors when they are used with a Qolsys Hardwire 16-F Wired to Wireless Converter. The Qolsys Hardwire 16-F supports 2-wire smoke detectors when they are wired at Zone 16. This wired to wireless converter can work with any 319.5 MHz wireless alarm system, including the 319.5 MHz version of the Qolsys IQ Panel 2 Plus. Remember that you will need to wire the 2-wire smoke detectors to Zone 16 before enrolling the Hardwire 16-F with the system. You must also use a 4.7k end of line resistor.


Testing the Honeywell 5808W3 Smoke Detector on the Qolsys IQ Panel 2 Plus

Jarrett rocks some protective ear gear while he explains how to test the Honeywell 5808W3 Smoke and Heat Detector on the 345 MHz version of the Qolsys IQ Panel 2 Plus. The Honeywell 5808W3 Smoke and Heat Detector has a recessed test button that you can test using a thin object like a screwdriver. If you want to test the actual functionality of the sensor, you can use a hair dryer for the heat detection function and canned smoke for the smoke detection function. Always remember to put your system on test mode before testing this sensor!


Using Power over Ethernet (PoE) on Alarm.com Cameras

Joe discusses how you can use Power over Ethernet (PoE) with certain Alarm.com Cameras. Power over Ethernet means that the camera will receive both power and data from the same ethernet cable. This means that you will not need to connect a power adapter to the camera. You can just use the ethernet cable. This can help reduce installation time and allow you to utilize a more flexible wiring configuration. In order to complete a PoE setup, you may need a PoE injector like the Alarm.com ADC-POE-INJ. This will depend on the network switch or router being used.


Using the Qolsys IQ Siren with a Honeywell LYNX Touch Panel

Jorge explains how to use the Qolsys IQ Siren with a LYNX Touch System. The Qolsys IQ Siren is a Z-Wave Siren that communicates with a system wirelessly. To pair this siren with a LYNX Touch System, the panel must have an L5100-ZWAVE Module installed. Since these panels will see the IQ Siren as a light switch, you must create special scenes for it to work properly. You need a scene to activate the siren during intrusion alarms, a scene to activate the siren during fire alarms, and a scene to stop the siren when an alarm is cleared.


Zone Status Indications on the Qolsys IQ Panel 2 Plus

Jarrett discusses the various zone status symbols that will appear next to zones on the main screen of the Qolsys IQ Panel 2 Plus. The different statuses that can be displayed include Open, Closed, Active, Idle, Unreachable, and Tampered. The Open and Closed statuses are for door and window contact sensors. The Active and Idle statuses are for motion sensors, glass break sensors, environmental sensors, and life-safety sensors. The Unreachable status refers to a sensor experiencing loss of RF supervision. The Tampered status means that someone has activated the tamper cover for the sensor.

Tags: , , , , , , ,

Comments


Posted By

Hi DIYers! We have a simple, yet effective tip for you today. The tip is to keep a second key fob device by your bed for easy access. This can be a great way to trigger a panic and scare off an intruder if you hear a break-in. You can also use this key fob as a backup for your main one.

Dsc pg9929 powerg 915mhz slimline 4 button key

Being woken up in the middle of the night due to a break-in can be a very scary feeling. Most users will arm their systems to stay mode at night so that an alarm will occur if someone tries to break-in. But maybe you forgot to arm your system, or maybe you want to activate a siren to try and scare off the intruder. In that case, having a key fob next to your bed can be very helpful.

Most key fobs have a designated panic button that you can use to activate an immediate intrusion alarm. By pressing and holding this button, you are telling your system that you are in danger and that help is needed immediately. It's a great resource to have in these rare, but extremely scary, situations. Just be aware that some panels may require you to specially enroll the panic zone. Additionally, some key fobs may require dual-button presses to activate panics.

Once you activate the panic button, your system will immediately go into alarm. This can involve triggering a siren to scare off any intruders. Alternatively, you could set up a silent alarm so that the police show up without the intruder knowing. However, a loud, audible alarm will be much more effective in scaring away an intruder. You might even set up on input for an audible alarm and another for a silent alarm. It's up to you.

But keeping a key fob next to your bed is more for than just having an option for triggering a panic in the middle of the night. It's also good to have a second key fob as a backup option in case you lose or misplace your first one. You can always grab the other key fob by your bed if you need to quickly grab a fob. You can also use it to set your system to arm stay from your bed if you forgot to do so while you were by your panel or keypad earlier.

Remember, a key fob isn't the only way to access your system remotely. You can always access your system from your Android or iOS device through Total Connect 2.0 or Alarm.com. Both of these platforms offer mobile apps allow you to arm and disarm your system from anywhere. Just keep in mind that you will need a monitoring plan to use TC2 or ADC. And of course, you can always dial 911 if you believe you are in a dangerous situation. But a key fob panic can still be useful in certain situations.

And if you just want a simple device for triggering panic alarms without having arming and disarming functions, we offer standalone panic buttons as well. These are convenient devices that you can activate if you hear something suspicious to trigger an immediate system alarm. You might also consider getting outdoor sirens that you can activate to try and scare away anyone lurking outside your home. And remember that if you have monitoring service, you can set up how your system responds during alarm events. This includes what action(s) the central station will take and when you receive text, email, and/or push notifications regarding any triggered panics.

If you do decide to get additional key fob devices or a panic button for your system, you will need to make sure they are compatible. Our team can help you with that. Remember that we offer free support for all our monitored customers. We can help you determine the perfect key fob option for your needs so that you can your family can feel safe at home. The best way to contact us is to email support@alarmgrid.com. We will check your email at our earliest convenience and reply back as soon as possible. We look forward to hearing from you!

Tags: , , , , , , , , , , , , , , , ,

Comments


Posted By

Hi DIYers! We promised last week that new videos would be coming. Well we have four (4) new videos for you to enjoy. Jorge was the big winner this week with three (3) videos. And I actually contributed a rare video of my own. Let's take a look at the newest videos from our video team.


Pairing the Honeywell T6 Pro Thermostat with a Residio Lyric Controller

I show you how to pair a Honeywell T6 Pro Z-Wave Plus Thermostat with a Resideo Lyric Controller. By pairing the T6 Pro with your Lyric System, you will be able to adjust the temperature right from the Lyric Panel. You will also be able to control the T6 Pro from Total Connect 2.0 if you have a Silver Level monitoring plan or higher. TC2 will also allow you to create smart scenes to have the T6 Pro activate automatically with certain system events or on a predetermined schedule.


Turning Off the Siren on a Qolsys IQ Panel 2 Plus

Jorge explains how to disable a siren on a Qolsys IQ Panel 2 Plus System so that it does not sound when an intrusion alarm occurs. This is great for testing the system so that you do not activate a loud siren when you need to test various sensors. You might also do this if you want all burglary alarms to be silent. In order to disable the siren, you will need to enter system programming. Please note that alarms for life-safety events will still activate a siren.


Enrolling a VERSA-GE Sensor into a Qolsys IQ Panel 2 Plus

Jorge teaches users how to enroll a VERSA-GE Sensor with a Qolsys IQ Panel 2 Plus System. The VERSA-GE is a wireless door and window contact sensor that operates at 319.5 MHz. As a result, the sensor will only work with the 319.5 MHz version of the IQ2+. This is the version that comes in a white and gold box. If you have a 345 MHz IQ2+ (silver and white box), you can use the VERSA-2GIG Sensor. If you have a 433 MHz IQ2+ (red and white box), you can use the VERSA-DSC Sensor.


Siren Timeout on the Qolsys IQ Panel 2 Plus

Jorge discusses the siren timeout feature on the Qolsys IQ Panel 2 Plus. This feature will have any siren programmed with the IQ Panel 2 Plus automatically stop sounding after a set period of time, even if the alarm is not properly cleared. This will prevent the siren from sounding indefinitely and annoying everyone in the area. This feature may also be referred to as a "bell timeout" period. The standard set siren timeout period is usually around four (4) minutes.

Tags: , , , , ,

Comments


Posted By

Hi DIYers and future DIYers! If you've spent any time on our site, you have likely come across Total Connect 2.0 (TC2). Maybe you know all about it. Maybe you know nothing about it. But did you know that you can "Test Drive" TC2 to check out the platform? Today, we're gonna show you how.


For the uninitiated, Total Connect 2.0 is an interactive service platform designed exclusively for use with Resideo Alarm Systems. You can access this platform using a web browser or by using the Total Connect 2.0 Mobile App on an Android or iOS device. From there, you must login to your TC2 account using your username and password. Make sure to keep this information a secret. After logging in, you can control your system in a number of different ways.

TC2 allows users to do all sorts of different actions. You can access TC2 to arm and disarm your system, bypass sensors, view the live feed for Total Connect 2.0 IP Cameras, control Z-Wave smart home devices, and more. What's great about this service is that you can quickly and conveniently access the platform from almost anywhere. As long as you have your smartphone, you can get on TC2 and control your system from across the street or across the world.

But maybe you want to see how great TC2 is for yourself? With the Total Connect 2.0 Test Drive feature, you certainly can. You don't need to sign-up for anything, and the feature is completely free to use. All you have to do, is go to the Total Connect 2.0 website or mobile app, and click the Test Drive button. Please note that the button will appear slightly different depending on whether you are using the website or mobile app.


After clicking the Test Drive button, you will be taken to an identical representation of the TC2 platform. You can then check out all of its features and see exactly how the platform looks and responds. This will show you first-hand exactly what the platform can do you for you. This way, you can make an informed decision as to whether or not TC2 is right for you.

If you decide that TC2 is for you, then getting started with the service is easy. You will need to obtain a Resideo Alarm System with an AlarmNet Communicator. You will then need to get an alarm monitoring plan from Alarm Grid. You will choose a time slot to activate your system. Make sure to follow these tips to make your activation as easy as possible. One of our trained activators will call you at the scheduled time to activate your system. After that, you will receive an email to set up a Total Connect 2.0 account.

If you want to learn more about Total Connect 2.0 or our monitoring service, please reach out to us! The best way to contact us is to email support@alarmgrid.com. We will check your email as soon as possible and reply back at our earliest convenience. We look forward to hearing from you!

Tags: , , , ,

Comments


Posted By

Hi DIYers! We have a quick tip today to help you save time. If you ever email us to make changes to your central station document, then you will need to provide your false alarm passcode or the last four (4) digits of your credit card on file. This is necessary for verifying your identity.

Alarm grid inside security stickers

This information is applicable for any Alarm Grid customer with monitoring service that includes central station service from Criticom Monitoring Services (CMS). Any customer with central station service will have a document on file with Alarm Grid that includes important instructions and information. For example, this document will include the phone numbers to call during an alarm, the order that these numbers should be called, your false alarm passcode and more.

The easiest way to make simple changes to your CMS document is to email us at support@alarmgrid.com with the changes. For example, you might want to add a new phone number to your account. Or maybe you want to have the central station call your spouse before they call your neighbor. Perhaps you want to change your false alarm passcode to something you can more easily remember. Emailing support@alarmgrid.com in these situations is a great way to get the change made as quickly as possible.

However, it isn't enough to just send us an email from your email address you have on file. We need verification to prove that it's you. At Alarm Grid, we take protecting your account information very seriously. If we get an email telling us to make changes to your account, we want to be certain it's you. For all we know, someone may have hacked your email and is trying to gain unlawful access to your account. That is why we strongly encourage all customers to keep their email passwords safe and protected.

Now you may be wondering, how can we prove that you are really who you say you are when you send us an email. The easiest way is to include your false alarm passcode or the last four (4) digits of the credit card that you have on file with Alarm Grid. This is classified information that only you and people you absolutely trust should know. On that note, we must also remind customers to never share this secure information with anyone who should not have access to their accounts. This is important.

Just to be clear, your false alarm passcode is not the same as your verbal duress code. Your false alarm passcode is what you say if the central station calls you and wants to know that everything is okay. The dispatcher will ask you for your secret false alarm passcode so that they know it's you on the line and not an intruder who made an unlawful entry.

Your verbal duress code is something completely different. This is also a secret code that you say to a central station dispatcher, but this code is used in an emergency hostage situation. As soon as the dispatcher hears this code, they will hang up and immediately call the police. This code is useful if an intruder is holding you hostage and you want to request emergency dispatch without actually calling for help.

Always make sure that you know the difference between your false alarm passcode and your verbal duress code. Never mix them up, as doing so can certainly lead to a false alarm. Remember, you can always contact us or CMS to change your false alarm passcode or your duress code. Our team is happy to help you with these issues whenever needed.

Keep this tip in mind the next time you email us to make account changes. Remember to include the last four (4) digits of your credit card or your false alarm passcode so that we can verify your identity and quickly make the changes. We look forward to hearing from you!

Tags: , , ,

Comments